Limit the Number of Failed Login Attempts in Windows 10: If you have set a password on the lock screen of Windows 10 to prevent unauthorized users from accessing your system then chances are your PC still might be vulnerable to attackers as they can use brute force to crack your password. To prevent this from happening, Windows 10 provides a way to limit the number of failed login attempts to your PC and you could also set Account Locket Duration.
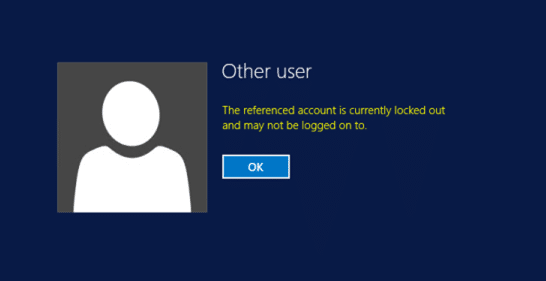
The referenced account is currently locked out and may not be logged on to:
Now there are two ways via which you could customize the above settings via Local Security Policy or Command Prompt. Sadly, Windows 10 Home users can only use the Command Prompt as they don’t have Group Policy Editor. So without wasting any time let’s see How to Limit the Number of Failed Login Attempts in Windows 10 with the help of the below-listed guide.
Limit the Number of Failed Login Attempts in Windows 10
Qiniseka ukuthi udala iphoyinti lokubuyisela uma nje kukhona okungahambanga kahle.
Method 1: Limit the Number of Failed Login Attempts via Local Security Policy
Qaphela: This method won’t work for Windows 10 Home Edition users, please continue to method 2.
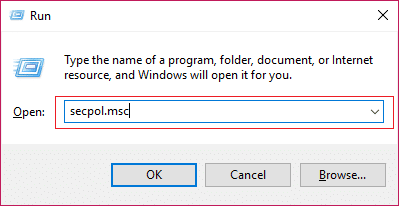
1.Cindezela i-Windows Key + R bese uthayipha secpol.msc and hit Enter to open Local Security Policy.
2.Navigate to the following path:
Security Settings > Account Policies > Account Lockout Policy
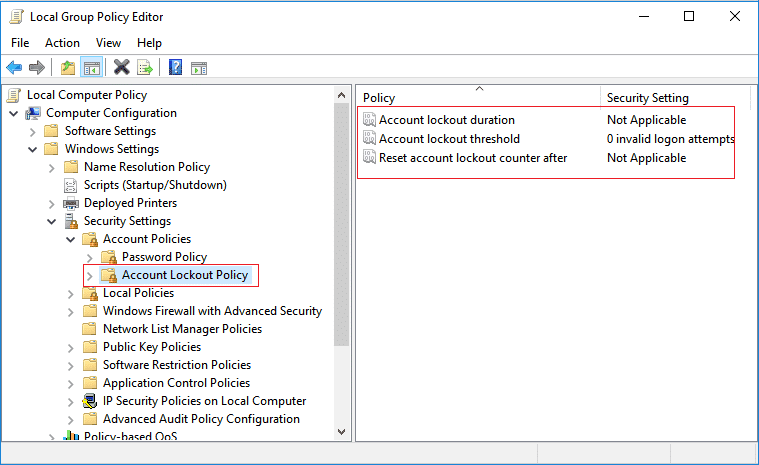
3.Qinisekisa ukuthi uyakhetha Inqubomgomo yokukhiya i-akhawunti then in the right window pane you would see the following three policy settings:
Account lockout duration
Umkhawulo wokuvala i-akhawunti
Reset account lockout counter after
4.Let’s first understand all the three policy settings before moving forward:
Account lockout duration: The Account lockout duration policy setting determines the number of minutes that a locked-out account remains locked out before automatically becoming unlocked. The available range is from 1 through 99,999 minutes. A value of 0 specifies that the account will be locked out until an administrator explicitly unlocks it. If Account lockout threshold is set to a number greater than zero, Account lockout duration must be greater than or equal to the value of Reset account lockout counter after.
Account lockout threshold: The Account lockout threshold policy setting determines the number of failed login in attempts that will cause a user account to be locked. A locked account cannot be used until you reset it or until the number of minutes specified by the Account lockout duration policy setting expires. You can set a value from 1 through 999 failed sign-in attempts, or you can specify that the account will never be locked by setting the value to 0. If Account lockout threshold is set to a number greater than zero, Account lockout duration must be greater than or equal to the value of Reset account lockout counter after.
Reset account lockout counter after: The Reset account lockout counter after policy setting determines the number of minutes that must elapse from the time a user fails to log on before the failed logon attempt counter is reset to 0. If Account lockout threshold is set to a number greater than zero, this reset time must be less than or equal to the value of Account lockout duration.
5.Now double-click on Account lockout threshold policy and change the value of “Account will not lock out”Ukuze a value between 0 to 999 and click OK. For example, in this case, we will set this setting to 3.
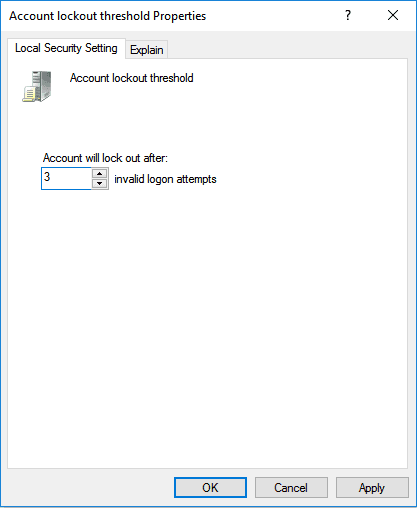
Qaphela: Default value is 0 which means the account will not lock out no matter how many failed login attempts.
6.Next, you will see a prompt saying “Because the value of Account lockout threshold is now 3 invalid logon attempts, the settings for the following items will be changed to the suggested values: Account lockout duration (30 minutes) and Reset account lockout counter after (30 minutes)”.
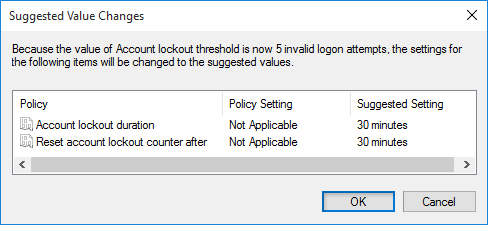
Qaphela: Isethingi ezenzakalelayo imizuzu engu-30.
7.Click Ok on the prompt, but if you still want to change these settings then individually double-click on “Account lockout duration or Reset account lockout counter after” settings. Then change the value accordingly, but do keep in mind the desired number which must be greater or less than the above-specified value.
8.Close everything then reboot your PC to save changes.
Nakhu wena Limit the Number of Failed Login Attempts in Windows 10 using Group Policy Editor but if you are using Windows 10 Home Edition then follow the method.
Method 2: Limit the Number of Failed Login Attempts via Command Prompt
1.Cindezela i-Windows Key + X bese ukhetha I-Command Prompt (Admin).

2.Thayipha umyalo olandelayo ku-cmd bese ushaya u-Enter:
net accounts /lockoutthreshold:Value
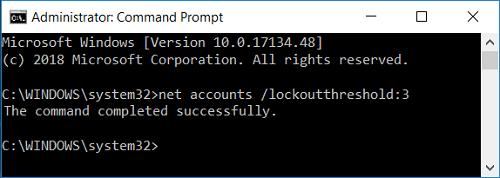
Qaphela: Replace Value with a number between 0 and 999 for how many failed login attempts before the accounts is locked. The default value is 0 which means the account will not lock out no matter how many failed login attempts.
net accounts /lockoutwindow:Value

Qaphela: Replace Value with a number between 1 and 99999 for the number of minutes that must elapse from the time a user fails to log on before the failed logon attempt counter is reset to 0. Account lockout duration must be greater than or equal to the value of Reset account lockout counter after. The default value is 30 minutes.
net accounts /lockoutduration:Value
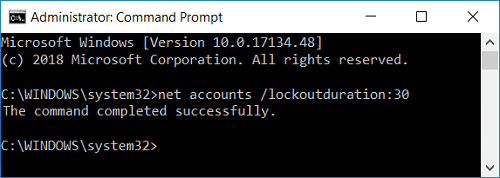
Qaphela: Replace Value with a number between 0 (none) and 99999 for how many minutes you want for a locked-out local account to remain locked out before automatically becoming unlocked. Account lockout duration must be greater than or equal to the value of Reset account lockout counter after. The default setting is 30 minutes. Setting it to 0 minutes will specify that the account will be locked out until an administrator explicitly unlocks it.
3.Close the command prompt and reboot your PC to save changes.
Kunconywe:
Yilokho onakho ngempumelelo Limit the Number of Failed Login Attempts in Windows 10 kodwa uma usenemibuzo mayelana nalesi sifundo zizwe ukhululekile ukuyibuza esigabeni sokuphawula.

