Hoe om grafiese hulpmiddel in Windows 11 te installeer

DirectX Graphics Tools is not installed by default in Windows 11. But, it can be added via operating system Optional features. Today, we bring to you a helpful guide that will teach you how to install or uninstall Graphics Tool in Windows 11, as need be. A few noteworthy features of this tool include:
- It is essential for performing graphics diagnostics and other related functions.
- Dit kan ook gebruik word om create Direct3D debug devices.
- Moreover, it can be used to develop DirectX games & applications.
- In addition to 3D-related functions, this technology also allows you to track real-time GPU consumption and when & which apps or games employ Direct3D technology.
How to Install In-built DirectX Graphics Tool in Windows 11
Follow the given steps to install Graphics Tool on Windows 11 PC:
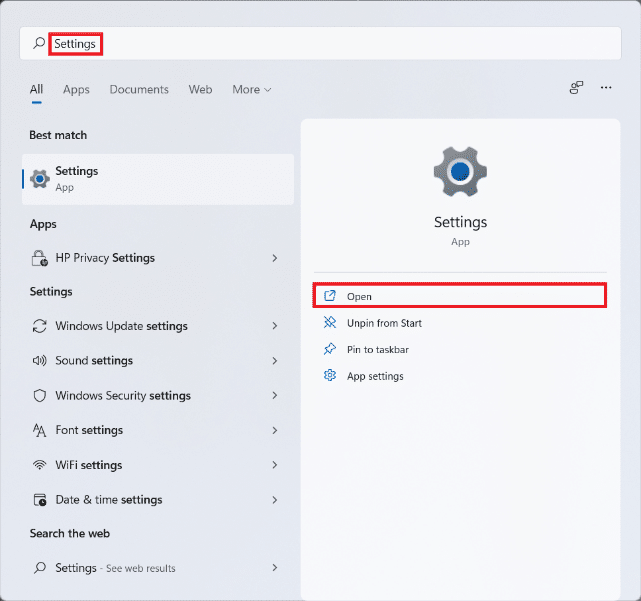
1. Klik op die Soek ikoon en tik Stellings, en klik dan op Opening, soos aangedui.
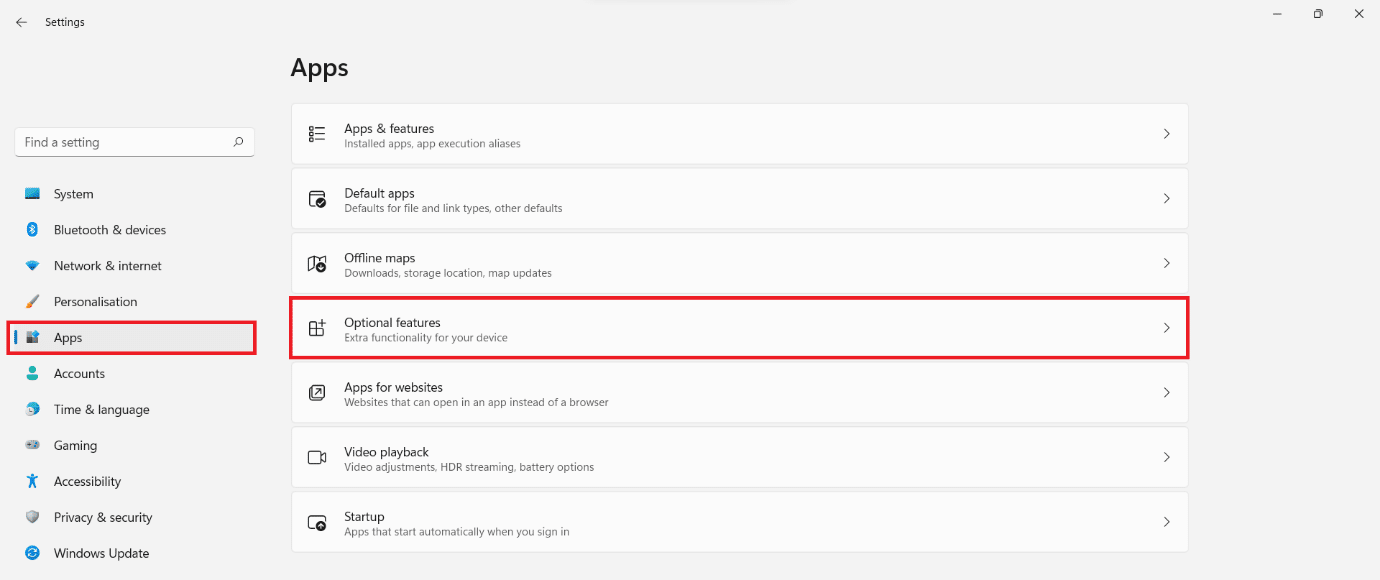
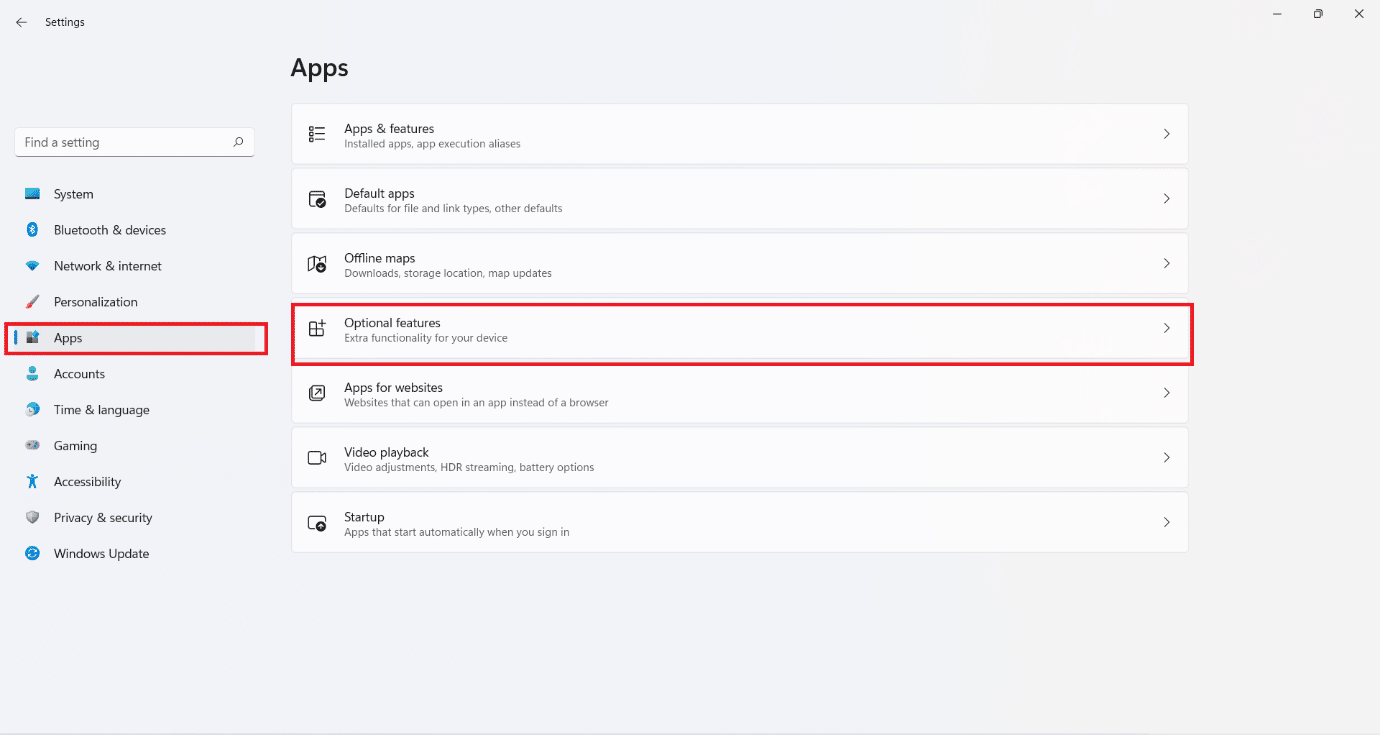
2. Kliek op Apps in die linkerkant.
3. Klik dan op opsioneel kenmerke, soos hieronder uitgebeeld.
4. Klik dan op Besigtig kenmerke.

5. tipe graphics tools in the search bar provided in the Voeg 'n opsionele kenmerk by venster.
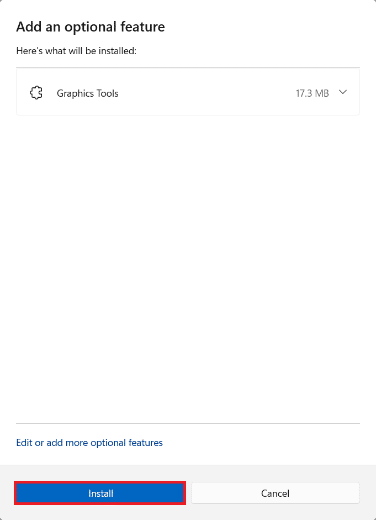
6. Merk die blokkie gemerk Graphics Tools en klik op volgende, soos hieronder geïllustreer.

7. Klik nou op die installeer knoppie.
8. Laat die Graphics Tools be Geïnstalleer. You can see the progress under Onlangse aksies afdeling.

Lees ook: How to Install XPS Viewer in Windows 11
How to Use DirectX Graphics Tools on Windows 11
Microsoft hosts a dedicated page on DirectX Programming. Here are the steps to use Windows 11 Graphics Diagnostic Tools:
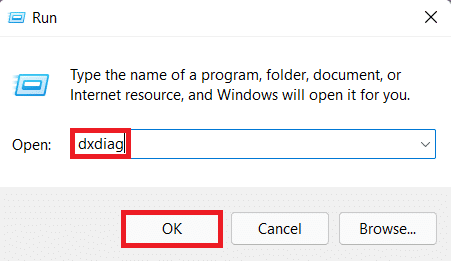
1. Press Windows + R-sleutels gelyktydig oop te maak Run dialoog boks.
2. tipe dxdiag en klik op OK om te begin Diagnose-instrument vir DirectX venster.
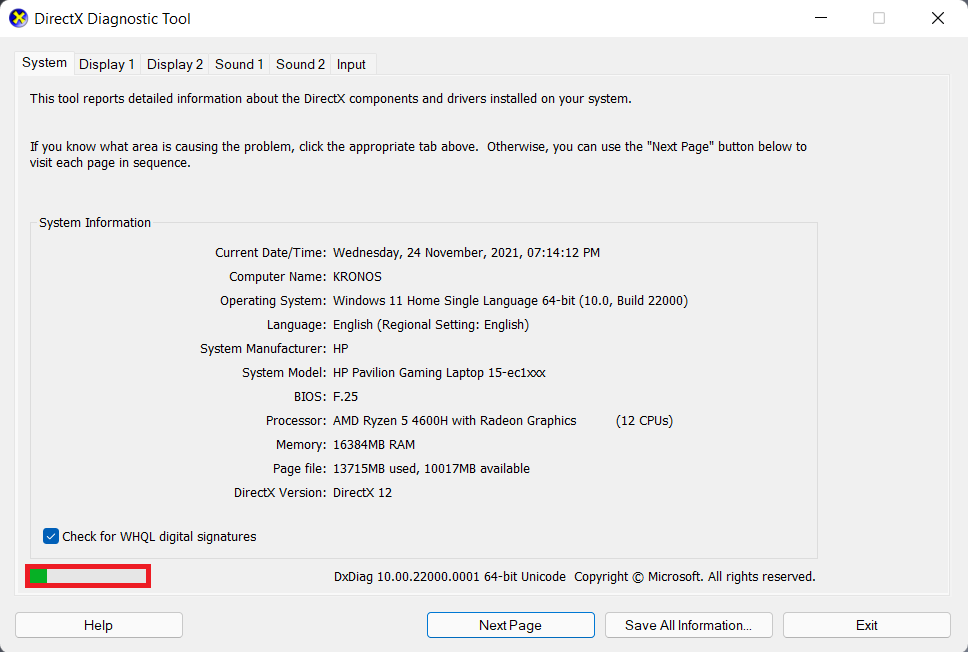
3. You may notice a green progress bar at the bottom left corner, shown highlighted. This means that the diagnostic process is active. Wait for the process to be completed.
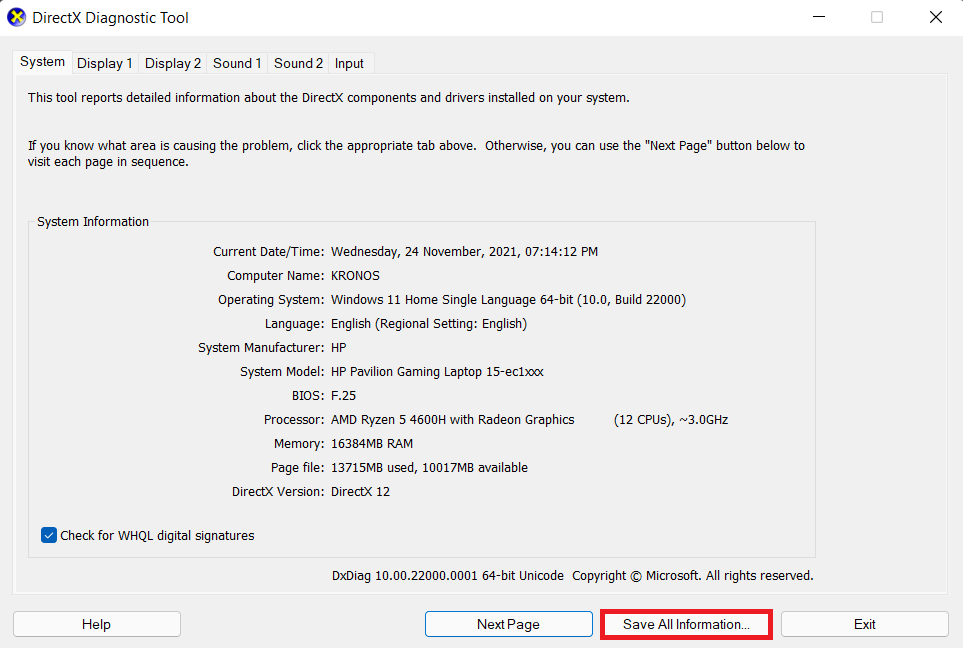
4. When the diagnosis is complete, the green progress bar will disappear. Click on Save All Information… knoppie soos hieronder uitgebeeld.
Lees ook: Hoe om PowerToys op Windows 11 te gebruik
How to Uninstall DirectX Graphics Tools
To uninstall Windows 11 Graphics Tools, follow the steps mentioned below:
1. Begin Stellings soos aangedui.
2. Gaan na Apps > Optionele funksies, soos uitgebeeld.
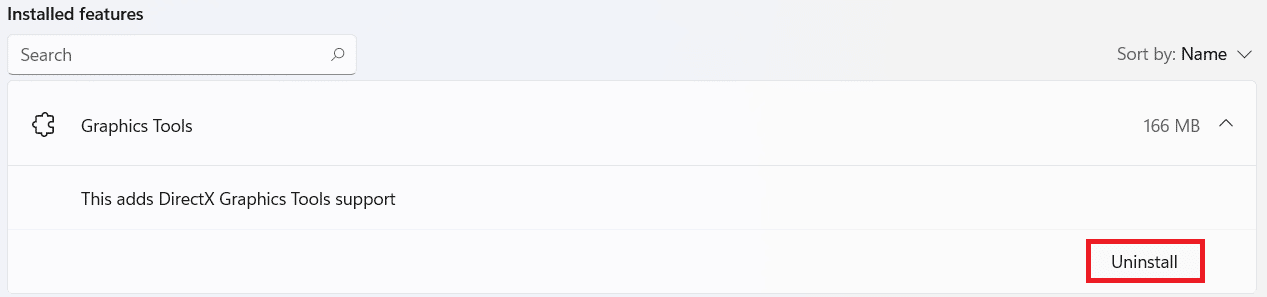
3. Scroll down the list of Geïnstalleerde funksies of soek vir Graphics Tools in the search bar provided to locate it.
4. Kliek die downward-pointing arrow in die Graphics Tools tile and click on Verwyder, soos aangedui.
5. Once the uninstallation process is finished, you will see Gedeïnstalleer tag under Onlangse aksies afdeling.

Aanbeveel:
We hope you found this article helpful about how to install, use or uninstall DirectX Graphics Tool in Windows 11. Drop your suggestions and queries in the comment section below. We would love to hear from you. Stay tuned for more such info!