قم بتعطيل لوحة اللمس تلقائيًا عند توصيل الماوس

If you use a traditional mouse over Touchpad, you could automatically disable touchpad when you plug in the USB Mouse. This can be easily done via Mouse Properties in Control Panel where you have a label called “Leave touchpad on when a mouse is connected”, so you need to uncheck this option and you’re good to go. If you have Windows 8.1 with the latest update, you could easily configure this option right from PC settings.
This option makes it easier for users to navigate and you don’t need to worry about accidental touch or click over touchpad when using a USB Mouse. So without wasting any time let’s see How to Automatically disable Touchpad when Mouse is Connected in Windows 10 with the help of the below-listed guide.
قم بتعطيل لوحة اللمس تلقائيًا عند توصيل الماوس
تأكد من إنشاء نقطة استعادة في حالة حدوث خطأ ما.
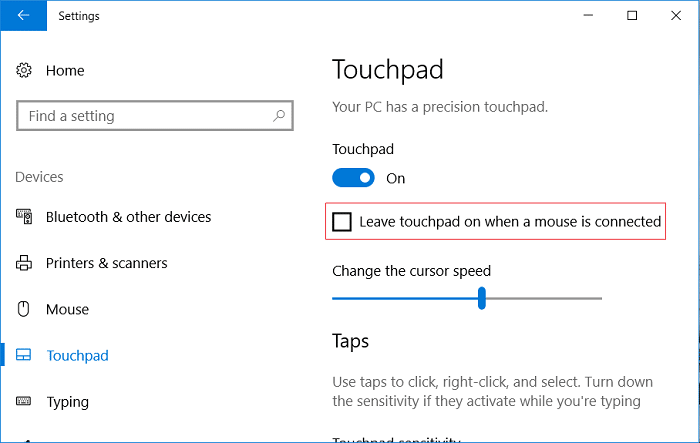
Method 1: Disable Touchpad when Mouse is connected via Settings
1. اضغط على مفتاح Windows + I لفتحه الإعدادات ثم انقر فوق الأجهزة.

2. من القائمة اليمنى ، حدد لوحة اللمس.
3. Under Touchpad ازل "اترك لوحة اللمس قيد التشغيل عند توصيل الماوس".
4. أعد تشغيل الكمبيوتر لحفظ التغييرات.
Method 2: Disable Touchpad when Mouse is connected via Mouse Properties
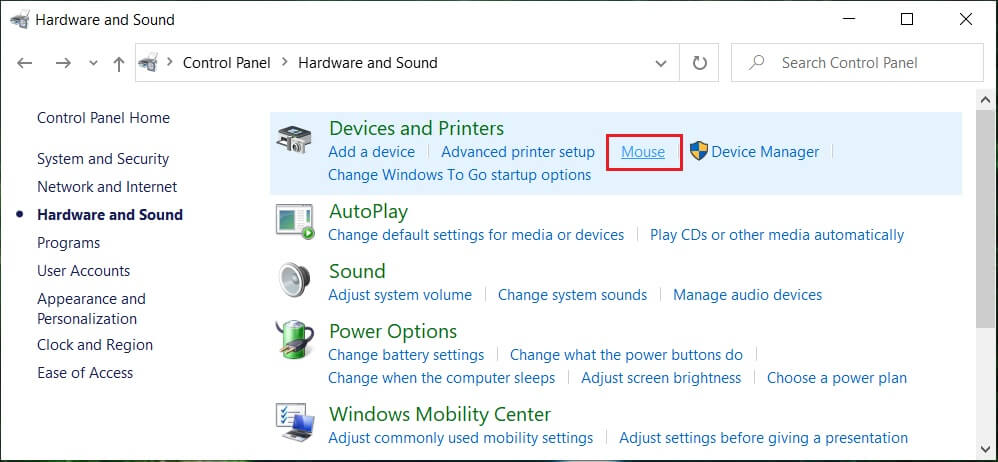
1. اضغط على مفتاح Windows + Q لإظهار البحث، اكتب مراقبة، وانقر على لوحة التحكم من نتائج البحث.

2. المقبل ، انقر فوق الأجهزة والصوت.

3. Under Devices and Printers click on الفأر.
4. التبديل إلى ELAN or Device Settings علامة التبويب ثم ازل "Disable internal pointing device when the external USB pointing device is attached" اختيار.
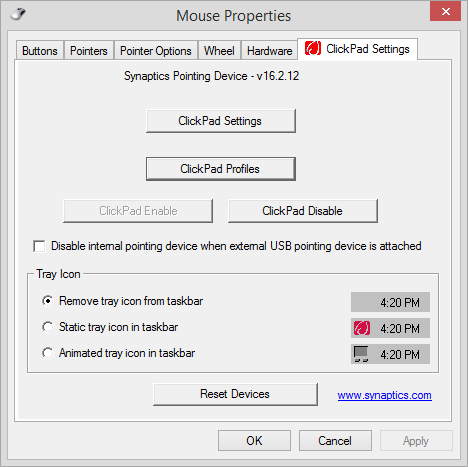
5. انقر فوق "تطبيق"، متبوعًا بـ حسنا.
Method 3: Disable Dell Touchpad when Mouse is connected
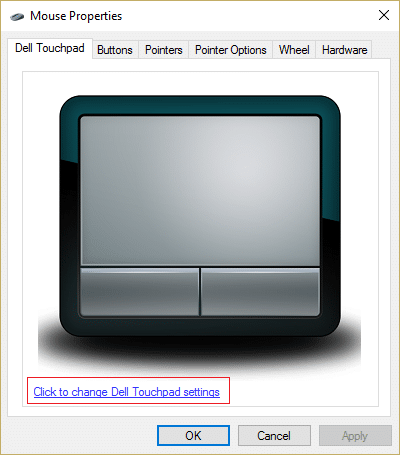
1. اضغط على مفتاح Windows + R ثم اكتب main.cpl واضغط على Enter للفتح خصائص الماوس.
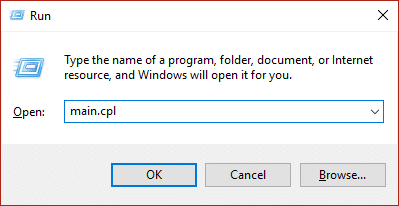
2. Under Dell Touchpad tab, click on “Click to change Dell Touchpad settings".
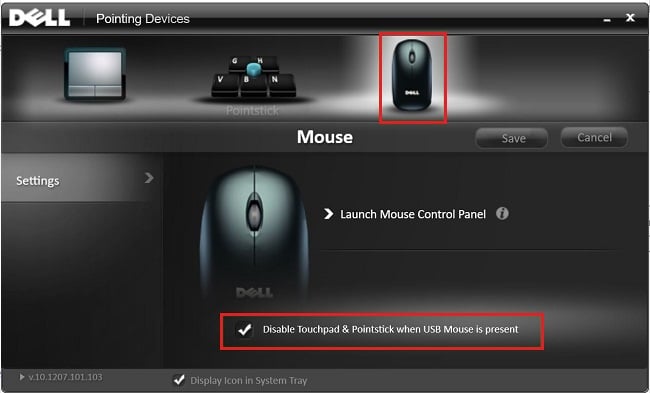
3. From Pointing Devices, select the Mouse picture from the top.
4. علامة اختيار "Disable Touchpad when USB mouse is present".
5. أعد تشغيل الكمبيوتر لحفظ التغييرات.
Method 4: Disable Touchpad when Mouse is connected via Registry
1. اضغط على مفتاح Windows + R ثم اكتب رجديت واضغط على Enter لفتح محرر التسجيل.

2. انتقل إلى مفتاح التسجيل التالي:
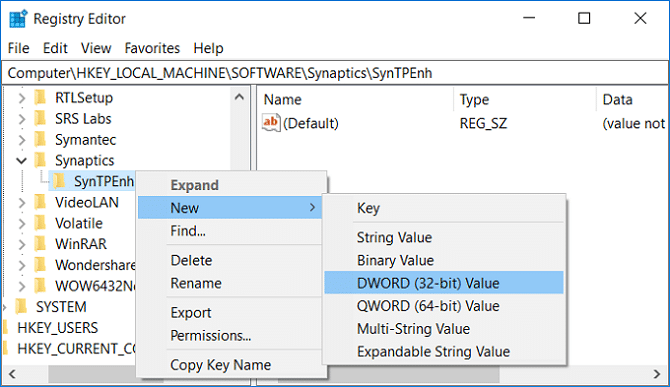
HKEY_LOCAL_MACHINESOFTWARES SynapticsSynTPEnh
3. انقر بزر الماوس الأيمن SynTPEnh ثم حدد قيمة جديدة> DWORD (32 بت).
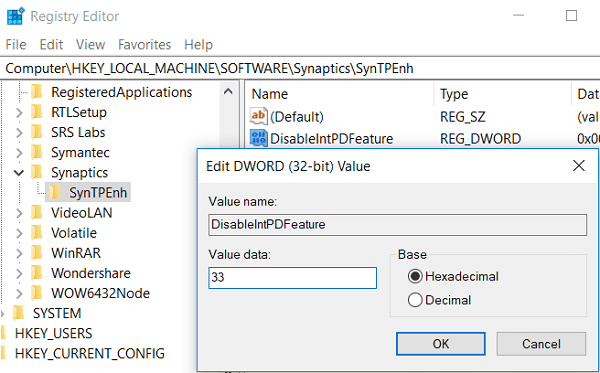
4. Name this DWORD as DisableIntPDFeature and then double click on it to change its value.
5. تأكد من ذلك Hexadecimal is selected under Base then قم بتغيير قيمته إلى 33 وانقر فوق موافق.
6. أعد تشغيل الكمبيوتر لحفظ التغييرات.
Method 5: Disable Touchpad when Mouse is Connected in Windows 8.1
1. Press Windows Key + C key to open الإعدادات سحر.
2. حدد تغيير إعدادات جهاز الكمبيوتر than from the left-hand menu click on PC and Devices.
3. ثم انقر فوق الفأرة ولوحة اللمس, then from the right window look for an option labelled as “اترك لوحة اللمس قيد التشغيل عند توصيل الماوس".
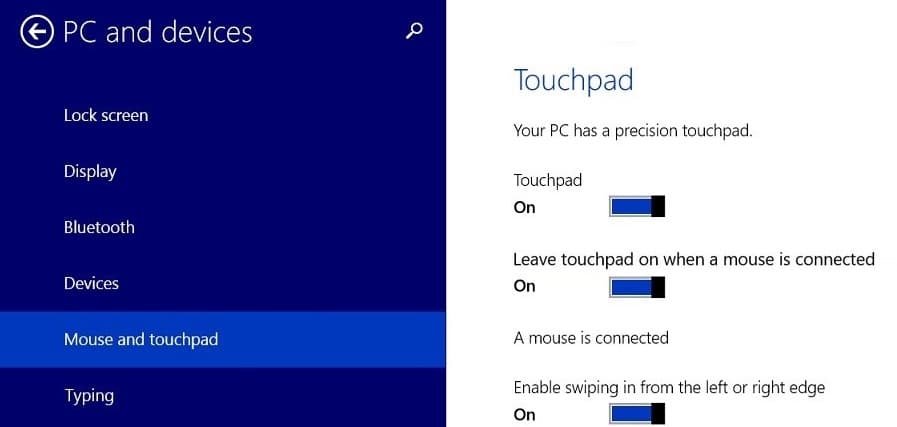
4. تاكد من disable or turn off the toggle for this option.
5. أعد تشغيل جهاز الكمبيوتر الخاص بك لحفظ التغييرات، وسيتم ذلك automatically disable Touchpad when Mouse is connected.
أوصى:
هذا كل ما لديك بنجاح Disable Touchpad when Mouse is Connected in Windows 10 ولكن إذا كان لا يزال لديك أي استفسارات بخصوص هذا الدليل ، فلا تتردد في طرحها في قسم التعليقات.