Fix MultiVersus Not Launching in Windows 10

MultiVersus is a famous online multiplayer fighting game that is rocking today’s gaming world. Yet, few users complain about the MultiVersus not launching issue when the game is launched on their Windows 10 PC. If you are in the same boat, the troubleshooting hacks discussed in this article will help you sail the problem.
How to Fix MultiVersus Not Launching in Windows 10
If you are vexed by MultiVersus won’t launch issue in your Windows 10 computer, here are a few possible reasons why you must analyze them carefully to sort out the problem.
- جهاز الكمبيوتر لا يلبي المتطلبات الأساسية للعبة.
- بعض برامج الخلفية الأخرى تتداخل مع اللعبة.
- أنت تستخدم إصدارًا لم يتم التحقق منه من برامج التشغيل.
- The graphics settings of the game are misconfigured.
- وجود البرامج الضارة والفيروسات.
- لم يتم تحديث إطار عمل .NET ونظام التشغيل إلى الإصدار الأحدث.
- DirectX version is not up-to-date.
- رفع تردد التشغيل.
- تتسبب أي ملفات تثبيت للعبة تم تكوينها بشكل خاطئ أو تالفة في حدوث المشكلة أيضًا.
- ملفات Microsoft C++ القابلة لإعادة التوزيع غير متوافقة مع اللعبة والكمبيوتر الشخصي.
Here are a few possible troubleshooting methods that will help you fix the discussed issue.
الطريقة الأولى: طرق استكشاف الأخطاء وإصلاحها الأساسية
اتبع هذه الطرق الأساسية لاستكشاف الأخطاء وإصلاحها لإصلاح المشكلة المذكورة.
1 أ. تحقق من متطلبات النظام
متعدد مقابل متطلبات النظام الحد الأدنى
- وحدة المعالجة المركزية:: Intel Core i5-2300 أو AMD FX-8350
- رامات: 4 GB
- بطاقة فيديو: Nvidia GeForce GTX 550 Ti or AMD Radeon HD 5850 | Intel UHD 750
- بكسل تظليل: 5.0
- شادر فيرتيكس: 5.0
- مساحة حرة: 6 GB
- فيديو ذاكرة الوصول العشوائي مخصص: 1024 MB
متعدد مقابل متطلبات الموصى بها
- وحدة المعالجة المركزية:: Intel Core i5-3470 أو AMD Ryzen 3 1200
- رامات: 8 GB
- بطاقة فيديو: Nvidia GeForce GTX 660 or AMD Radeon R9 270
- بكسل تظليل: 5.0
- شادر فيرتيكس: 5.0
- مساحة حرة: 6 GB
- فيديو ذاكرة الوصول العشوائي مخصص: 2048 MB
1B. Check your internet connection
Unstable internet connection leads to MultiVersus is not working issue, also if there are any obstacles between your router and your computer, they may interfere with the wireless signal and will cause intermittent connection problems.
يمكنك تشغيل ملف اختبار السرعة لمعرفة المستوى الأمثل لسرعة الشبكة المطلوبة للاتصال المناسب.
تأكد من أن جهازك يلبي المعايير التالية.
- ابحث عن قوة إشارة شبكتك، وإذا كانت منخفضة جدًا، قم بإزالة جميع العوائق الموجودة بين الطريق.
- تجنب وجود عدد كبير جدًا من الأجهزة المتصلة بنفس الشبكة.
- قم دائمًا بشراء مودم/جهاز توجيه تم التحقق منه بواسطة مزود خدمة الإنترنت (ISP) الخاص بك وهو خالي من التعارضات.
- لا تستخدم الكابلات القديمة أو المكسورة أو التالفة. استبدل الكابلات إذا لزم الأمر.
- تأكد من أن الأسلاك من المودم إلى جهاز التوجيه والمودم إلى الحائط مستقرة وبعيدة عن الإزعاج.
إذا كانت هناك أية مشكلات في الاتصال بالإنترنت، فراجع دليلنا كيفية استكشاف مشكلات الاتصال بالشبكة وإصلاحها على نظام التشغيل Windows 10 لاستكشاف هذه المشكلات وإصلاحها.
1C. توقف عن رفع تردد التشغيل
- Every high-end computer is built with the option of Overclocking which helps in outputting more juice than your specifications that you already have. Running the graphics card or processor faster than the default speed refers to overclocking.
- عندما يحدث هذا، سيصل جهاز الكمبيوتر الخاص بك إلى الحد الأقصى لدرجة الحرارة بعد وقت معين. يكتشف الكمبيوتر ذلك ويقوم بضبط سرعة الساعة على السرعة العادية حتى يتم تبريدها. تتم زيادة سرعة الساعة مرة أخرى بعد أن تبرد.
- يؤدي ذلك إلى زيادة أداء جهاز الكمبيوتر الخاص بك ويعتبر بمثابة مساعدة كبيرة إذا لم يكن لديك جهاز كمبيوتر قوي.
- It must be noted that all the games do not support overclocking. The same applies to MultiVersus. So, you must try disabling all overclocking on your computer and try launching the game. If it launches well, the issue is fixed.
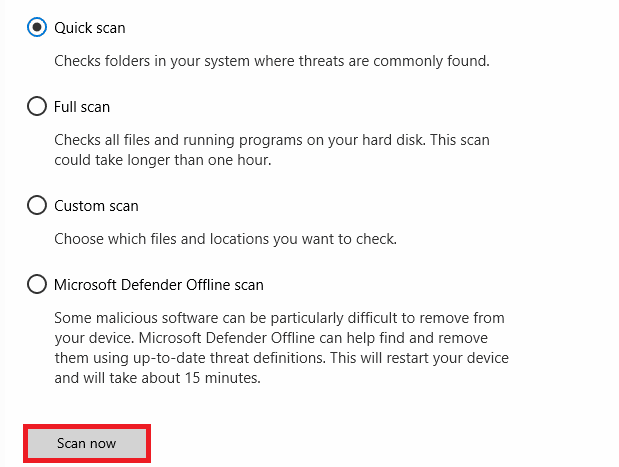
1D. قم بتشغيل فحص البرامج الضارة
The presence of a virus or malware attack will result in gaming problems on your computer. If in case, the virus attack is very severe, you cannot connect to any online game continuously at all. To resolve the problem, you have to remove the virus or malware completely from your Windows 10 computer.
يُنصح بفحص جهاز الكمبيوتر الخاص بك وفقًا للتعليمات الواردة في دليلنا كيف أقوم بإجراء فحص الفيروسات على جهاز الكمبيوتر الخاص بي؟
أيضًا، إذا كنت تريد إزالة البرامج الضارة من جهاز الكمبيوتر الخاص بك، فراجع دليلنا كيفية إزالة البرامج الضارة من جهاز الكمبيوتر الخاص بك الذي يعمل بنظام التشغيل Windows 10.
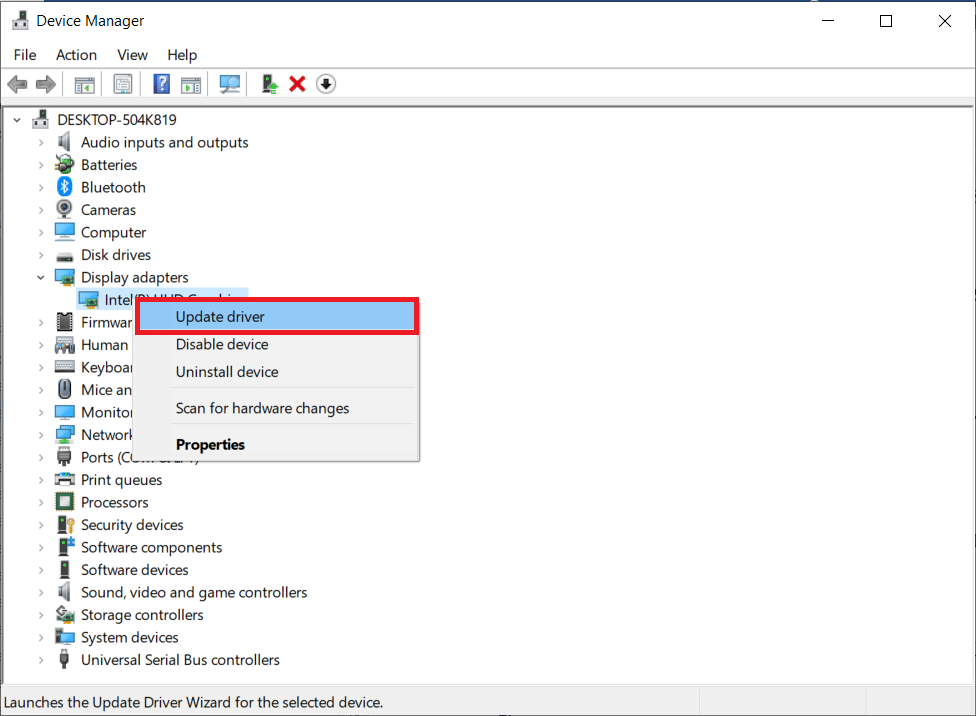
1E. Update GPU Drivers
Graphical drivers are responsible for heavy graphical images and video processing games. If you face any launching conflicts in the MultiVersus game, make sure you use an updated version of device drivers, as they serve as a link between the hardware and Operating System of your PC. Many users have suggested that updating drivers have fixed MultiVersus not working issue. Read and implement the steps instructed in our guide 4 Ways to Update Graphics Drivers in Windows 10 to do so.
اقرأ أيضا: أصلح نظام التشغيل Windows الذي عثر على برامج تشغيل لجهازك ولكن واجه خطأً
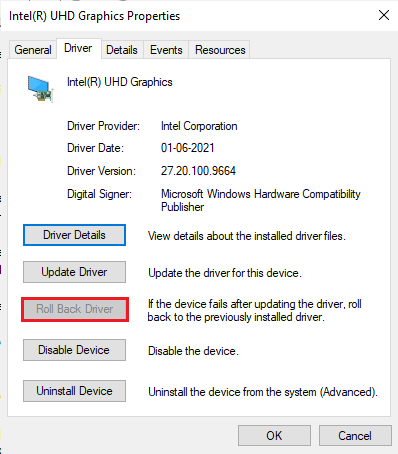
1F. Roll Back GPU Drivers
Sometimes, the current version of GPU drivers may cause the discussed launching issue in MultiVersus, and in this case, you have to restore previous versions of installed drivers. This process is called التراجع عن السائقين ويمكنك بسهولة استعادة برامج تشغيل الكمبيوتر لديك إلى حالتها السابقة باتباع دليلنا حول كيفية استعادة برامج التشغيل على نظام التشغيل Windows 10.
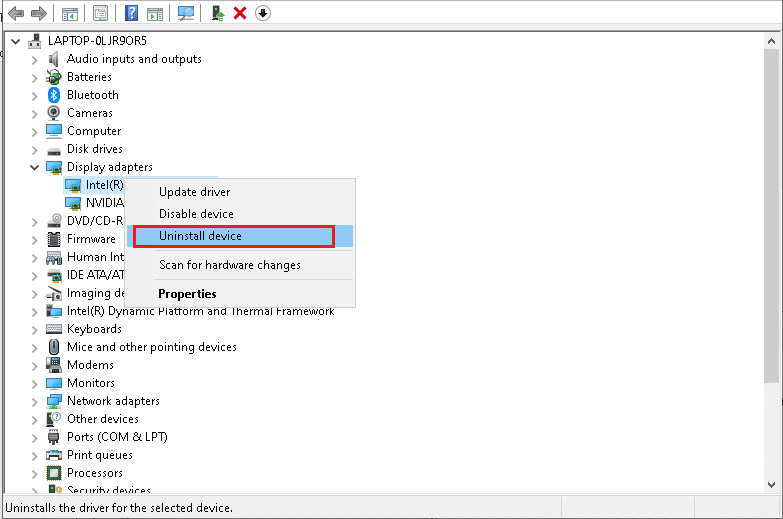
1G. Reinstall GPU Driver
If you still face MultiVersus not starting issue after updating your GPU drivers, then reinstall device drivers to fix any incompatibility issues. There are several ways to reinstall drivers on your computer. Yet, you can easily reinstall Graphical drivers as instructed in our guide How to Uninstall and Reinstall Drivers on Windows 10.
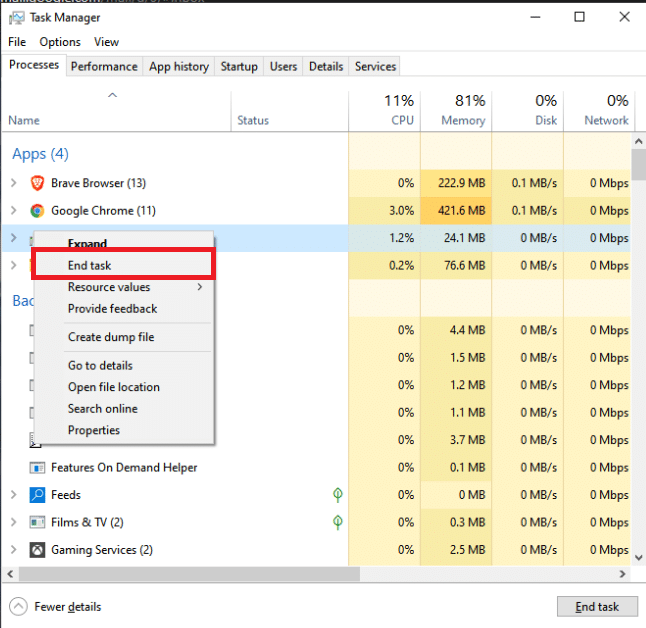
1H. End Background Processes
Several users have confirmed that MultiVersus not starting on PC can be resolved by closing all the background tasks running on your PC. To implement the task, follow our guide How to End Task in Windows 10, and proceed as instructed.
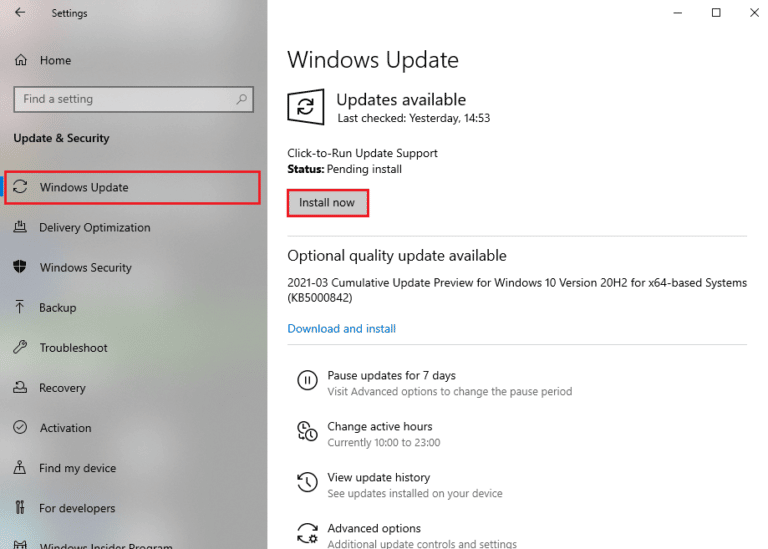
1أنا. تحديث ويندوز
You can also eradicate bugs in your computer and game by updating your Operating System. Always ensure if you have updated your Windows Operating System and if any updates are pending in action, use our guide How to Download and Install Windows 10 Latest Update
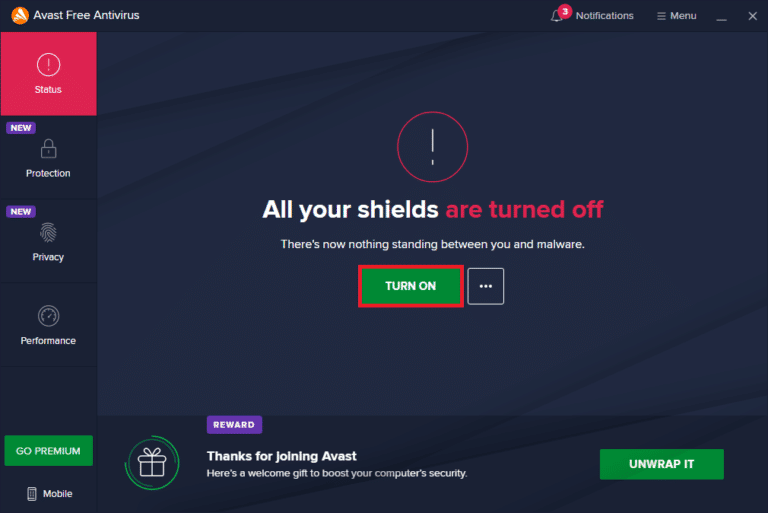
1J. Disable Antivirus Temporarily (If Applicable)
Some incompatible antivirus programs installed on your computer will cause MultiVersus launching problem. To avoid conflicts, you must ensure the security settings of your Windows 10 computer and check if they are stable or not. To find whether the antivirus suite is the reason for the discussed issue, disable it once and try connecting to a network.
اقرأ دليلنا حول كيفية تعطيل برنامج مكافحة الفيروسات مؤقتًا على نظام التشغيل Windows 10 واتبع التعليمات لتعطيل برنامج مكافحة الفيروسات مؤقتًا على جهاز الكمبيوتر الخاص بك.
إذا كان لديك حل لمشكلتك بعد تعطيل برنامج مكافحة الفيروسات على جهاز الكمبيوتر الخاص بك، فننصحك بإلغاء تثبيت البرنامج بالكامل من جهاز الكمبيوتر الخاص بك.
Read our guide Force Uninstall Programs which won’t Uninstall in Windows 10 to uninstall your antivirus program on your computer.
اقرأ أيضا: كيفية إلغاء تثبيت McAfee LiveSafe في نظام التشغيل Windows 10
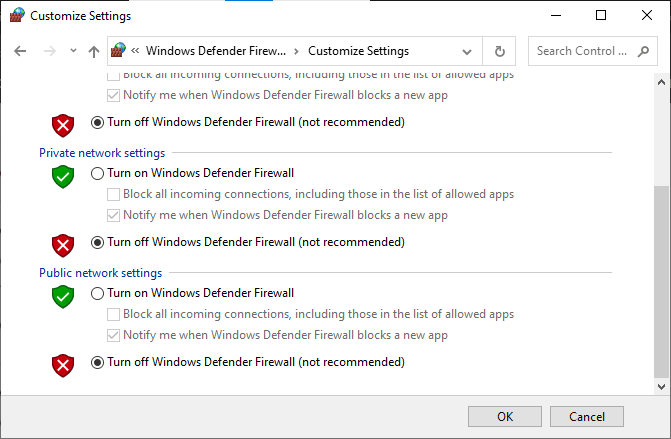
1K. Turn Off Windows Defender Firewall (Not Recommended)
Your computer will face MultiVersus is not working issue, due to an over-protective firewall suite in the Windows 10 PC. To resolve the problem, you can either add a new rule for your game, whitelist the game or as the last fix, disable the firewall temporarily.
Our guide on How to Disable Windows 10 Firewall will help you.
1L. Repair System Files
If there are any missing or damaged files on your Windows 10 PC, you will face MultiVersus takes forever to launch issue. Yet, you are repairing these corrupt files by using inbuilt utilities namely, مدقق ملفات النظام و إدارة صورة النشر والإدارة.
اقرأ دليلنا حول كيفية إصلاح ملفات النظام على نظام التشغيل Windows 10 واتبع الخطوات وفقًا للتعليمات لإصلاح جميع ملفاتك الفاسدة.
Method 2: Run MultiVersus Game as Administrator
If MultiVersus does not have required administrative privileges, a few essential features of the game will be limited causing you MultiVersus not launching issue whenever you open the game or install any updates. Follow the below-mentioned instructions to run the game as an administrator.
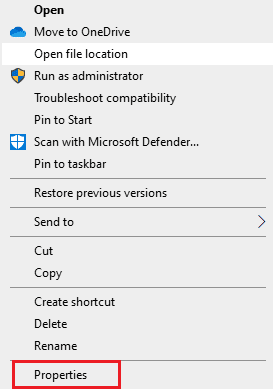
1. انقر بزر الماوس الأيمن على MultiVersus shortcut على سطح المكتب.
ملحوظة: يمكنك أيضا الذهاب إلى دليل التثبيت وانقر بزر الماوس الأيمن عليها.
2. ثم حدد ملف عقارات الخيار.
3. الآن، انتقل إلى التوافق علامة التبويب وانقر على تشغيل هذا البرنامج كمسؤول.
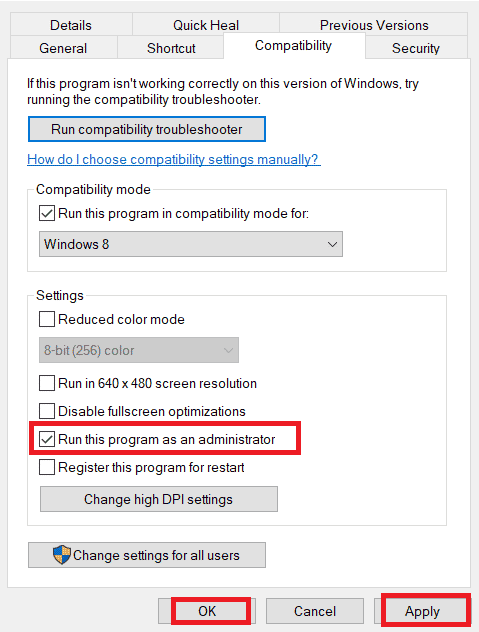
4. أخيرًا ، انقر فوق تطبيق> موافق لحفظ التغييرات.
Check if you have fixed MultiVersus launching issues.
اقرأ أيضا: إصلاح WoW يستغرق وقتًا طويلاً ليتم تشغيله في نظام التشغيل Windows 10
الطريقة الثالثة: تغيير أولوية عملية اللعبة
The preference of an application or process tells the computer the importance and if it should be given preference over the others while allocating the resources. The priority of every application is normal except the system processes, by default. MultiVersus might crash if it didn’t get enough resources.
1. اضغط على مفاتيح Ctrl + Shift + Esc معا لفتح شريط المهام.
2. الآن، ابحث عن MultiVersus process.
3. ثم قم بتغيير الأولوية إلى ذا أهيمة عليا وتحقق مما إذا كان هذا يعمل.
ملحوظة: قم بتغيير الأولوية بحذر شديد لأن تغيير أولوية العملية بلا مبالاة قد يجعل نظامك بطيئًا للغاية أو غير مستقر.
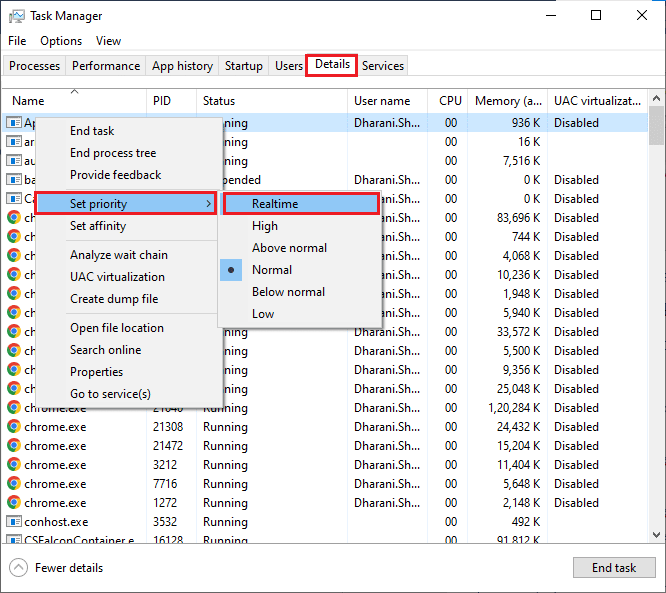
4. أقفل ال مهمة مدير و إعادة تشغيل حاسوبك.
الطريقة الرابعة: تعيين الأداء العالي
يمكنك أيضًا تحسين لعبتك عند ضبط إعدادات خطة الطاقة عالية الأداء. تم تطوير خطط الطاقة هذه لإدارة إعدادات الطاقة على الإعدادات المحمولة. اتبع الإرشادات المذكورة أدناه لاستخدام إعدادات خطة الطاقة عالية الأداء في نظامك.
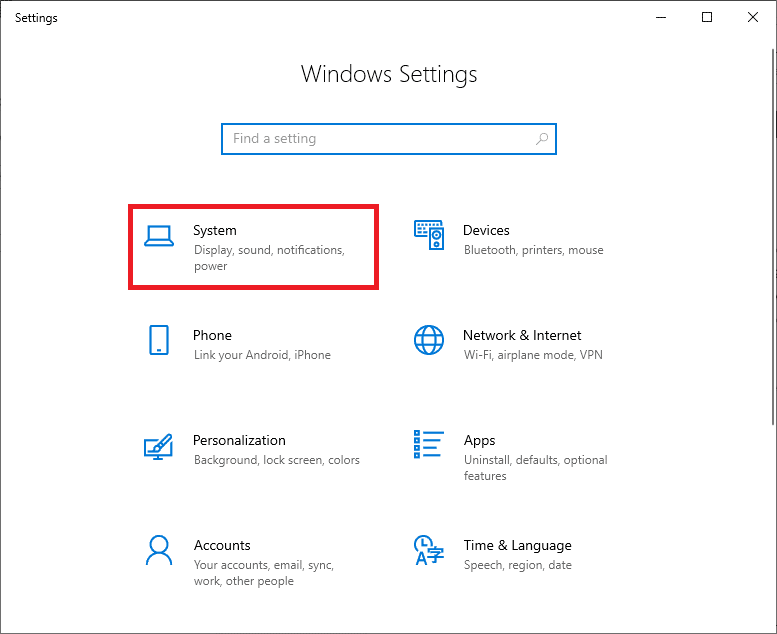
1. اضغط على مفاتيح Windows + I في وقت واحد لفتح إعدادات Windows.
2. الآن ، انقر فوق System الإعداد.
3. الآن ، حدد ملف القوة والنوم الخيار وانقر على إعدادات الطاقة إضافية مع الإعدادات ذات الصلة.
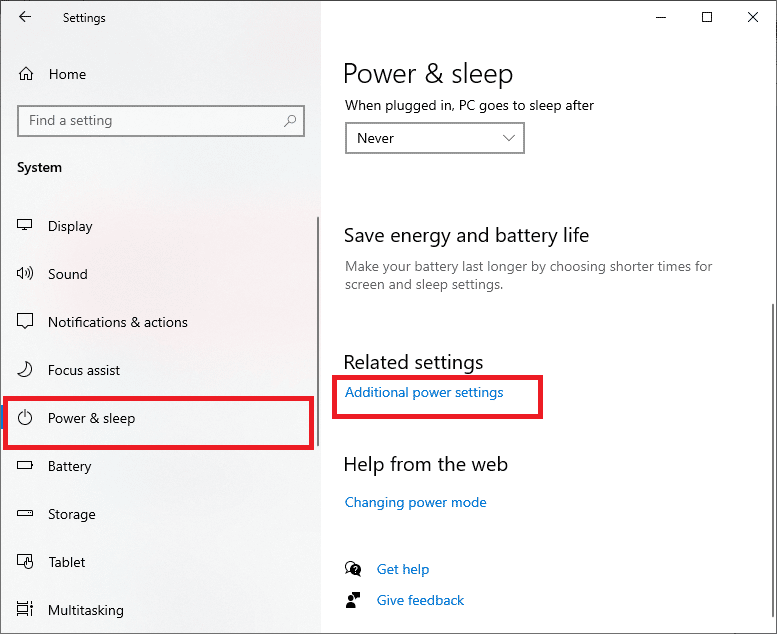
4. الآن، اختر أداء عالي الخيار تحت خطط إضافية عالية كما هو موضح في الصورة أدناه.
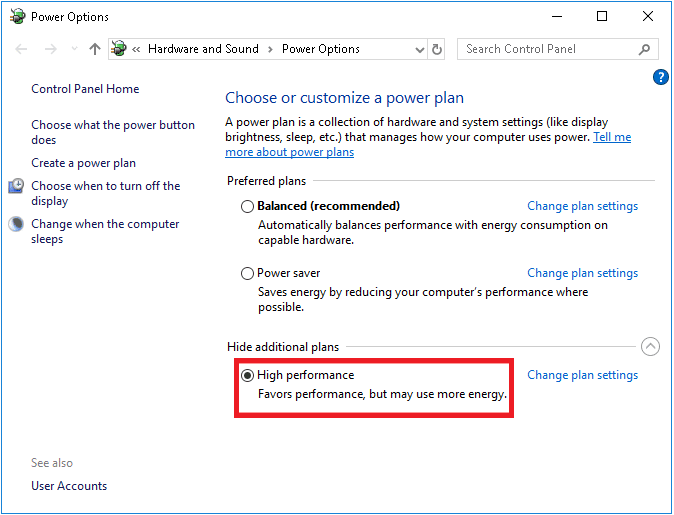
Now you have optimized your system, check if you have fixed MultiVersus won’t launch on startup issue.
اقرأ أيضا: إصلاح خطأ الملفات التي تم تنزيلها المفقودة على Steam
Method 5: Update Steam App & MultiVersus Game
If you use an outdated Steam application, you cannot access any games smoothly. Hence always make sure you use an updated version of Steam and MultiVersus game before launching it.
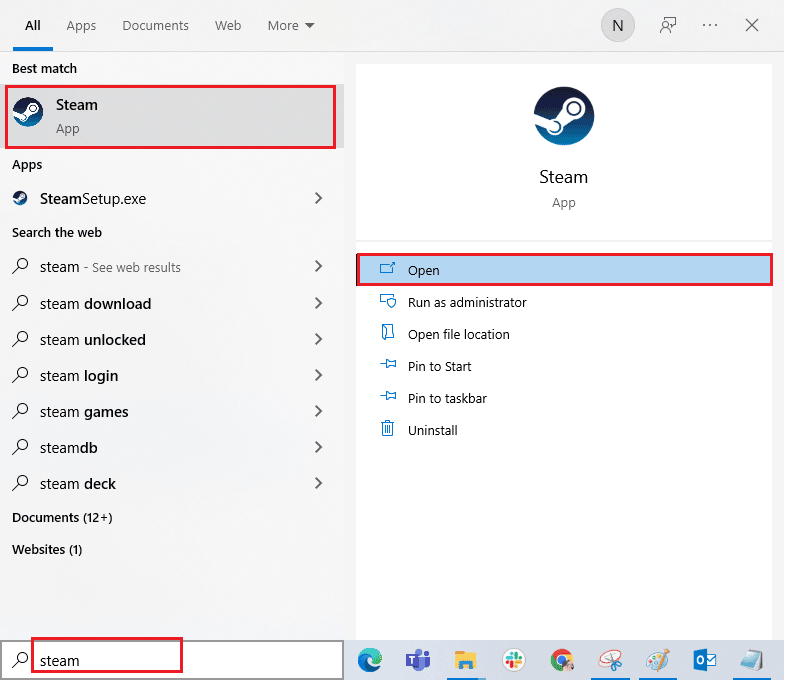
1. نجاح مفتاح ويندوز ونوع بخار، ثم انقر على فتح.
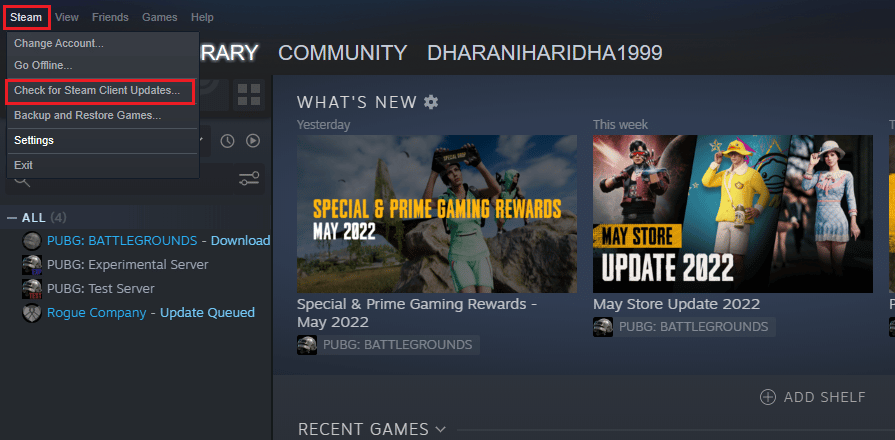
2. الآن ، انقر فوق بخار في الزاوية العلوية اليسرى من الشاشة متبوعًا بـ التحقق من وجود تحديثات عميل Steam... كما هو موضح أدناه.
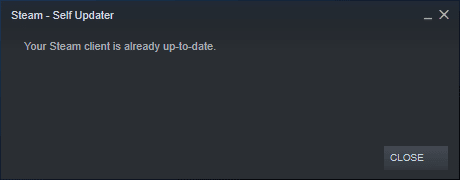
3. إذا كان لديك أي تحديثات جديدة تريد تنزيلها، فقم بتثبيتها والتأكد من ذلك عميل Steam الخاص بك محدث.
4. الآن ، أعد تشغيل Steam وتحقق مما إذا تم حل المشكلة الآن.
Likewise, it is always essential that your game run at its latest version to avoid any conflicts. Until your game is updated, you cannot log in to MultiVersus servers successfully.
إلى قم بتحديث لعبتك، اتبع الخطوات المذكورة أدناه.
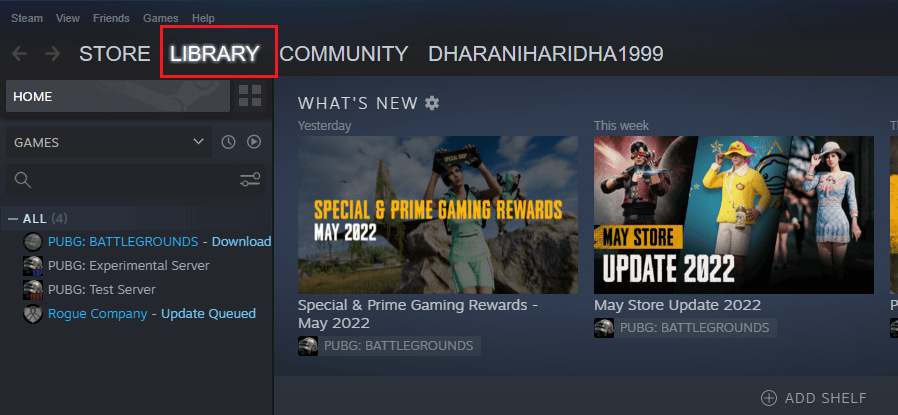
1. إطلاق بخار وانتقل إلى مكتبة.
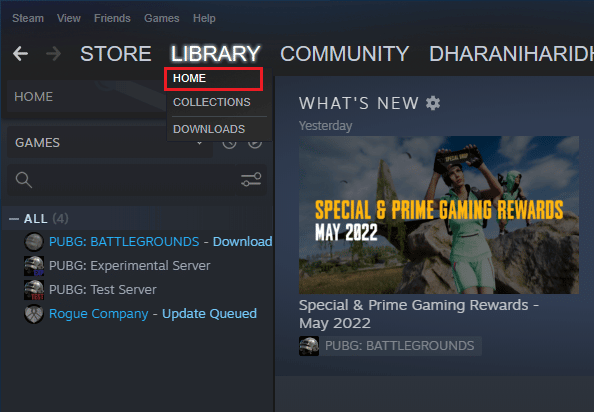
2. الآن ، انقر فوق الصفحة الرئيسية and search for MultiVersus.
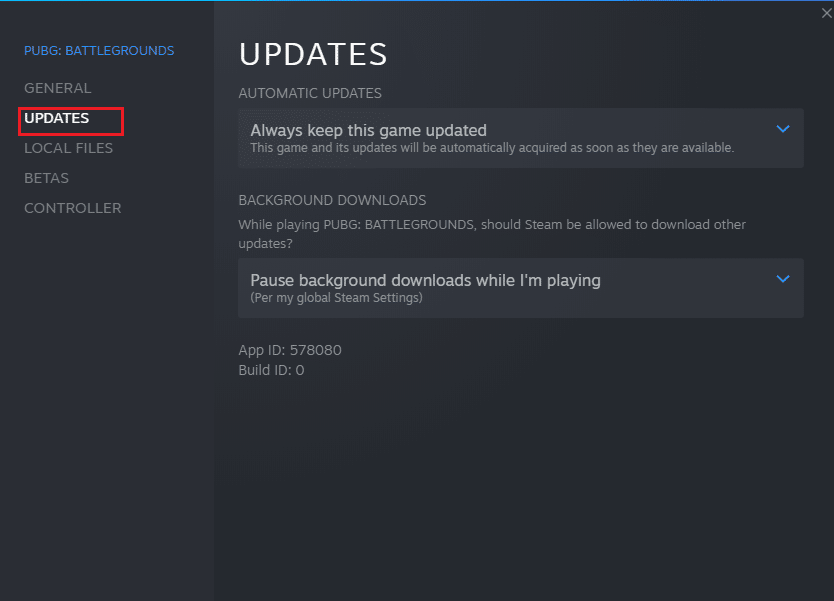
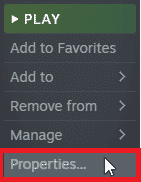
3. ثم، انقر بزر الماوس الأيمن على اللعبة وحدد ملكيات… الخيار.

4. الآن، قم بالتبديل إلى تحديثات علامة التبويب وتحقق مما إذا كانت هناك أية تحديثات معلقة قيد التنفيذ. إذا كان الأمر كذلك، فاتبع الإرشادات التي تظهر على الشاشة لتنزيل آخر التحديثات.
After an update, check if MultiVersus not launching issue is fixed.
الطريقة السادسة: تعطيل تحسينات ملء الشاشة
Few users have suggested that disabling full-screen optimizations on PC has helped them fix MultiVersus is not launching issue. Follow as instructed.
1. Navigate to the Steam مكتبة القائمة.
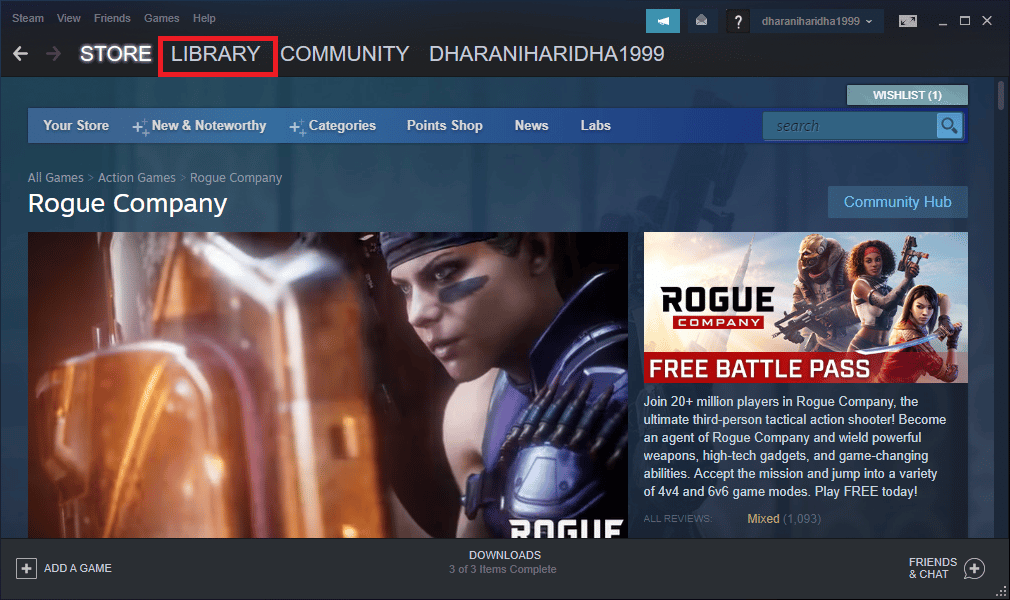
2. Now, right-click on the MultiVersus game and click on ملكيات…
3. الآن، قم بالتبديل إلى يمكنك تحويل أي لحظة سعيدة إلى ذكرى ثمينة وخالدة – احتفظ بها على شكل صورة أو مقطع فيديو باستخدام الكاميرا الخلفية المضمنة. ومن خلال اتصال Bluetooth، يمكنك مشاركة الملفات ذات المحتوى العزيز على قلبك مع أجهزة المقربين منك. علامة التبويب وانقر على تعيين خيارات إطلاق… كما هو مبين.
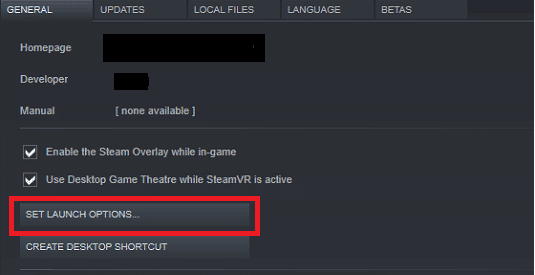
4. الآن، سيتم فتح نافذة جديدة مع تحذير متقدم للمستخدم. لفتح اللعبة في وضع الإطارات، اكتب - نافذة المعلمة.
5. الآن، احفظ التغييرات بالنقر فوق OK والخروج من نافذة الخصائص.
6. الآن ، استئناف لعبة and ensure that it runs in windowed mode.
ملحوظة: يمكنك أيضًا الانتقال إلى تعيين خيارات إطلاق… مرة أخرى واكتب المعلمات التالية بدلاً من المعلمة الأخيرة.
-نافذة -ث 1024
7. Now, save the changes by clicking on OK.
ستقوم هذه المعلمة بتعيين اللعبة ليتم تشغيلها في وضع الإطارات.
اقرأ أيضا: إصلاح عدم توفر تكوين تطبيق Steam في نظام التشغيل Windows 10
الطريقة السابعة: تعطيل التراكب داخل اللعبة
The Steam Overlay is a piece of Steam that allows the users to access friends list, and web browser and allows in-game purchasing. It is a significant tool, yet it sometimes triggers MultiVersus not launching on startup issue. If you want to solve this problem, then turn off the Steam game overlay.
1. افتح ال بخار التطبيق وانقر على مكتبة.
2. الآن، انقر بزر الماوس الأيمن على متعدد مقابل وانقر على ملكيات…

3. الآن، قم بالتبديل إلى يمكنك تحويل أي لحظة سعيدة إلى ذكرى ثمينة وخالدة – احتفظ بها على شكل صورة أو مقطع فيديو باستخدام الكاميرا الخلفية المضمنة. ومن خلال اتصال Bluetooth، يمكنك مشاركة الملفات ذات المحتوى العزيز على قلبك مع أجهزة المقربين منك. علامة التبويب وإلغاء تحديد المربع الذي يحتوي على قم بتمكين Steam Overlay أثناء وجودك في اللعبة.
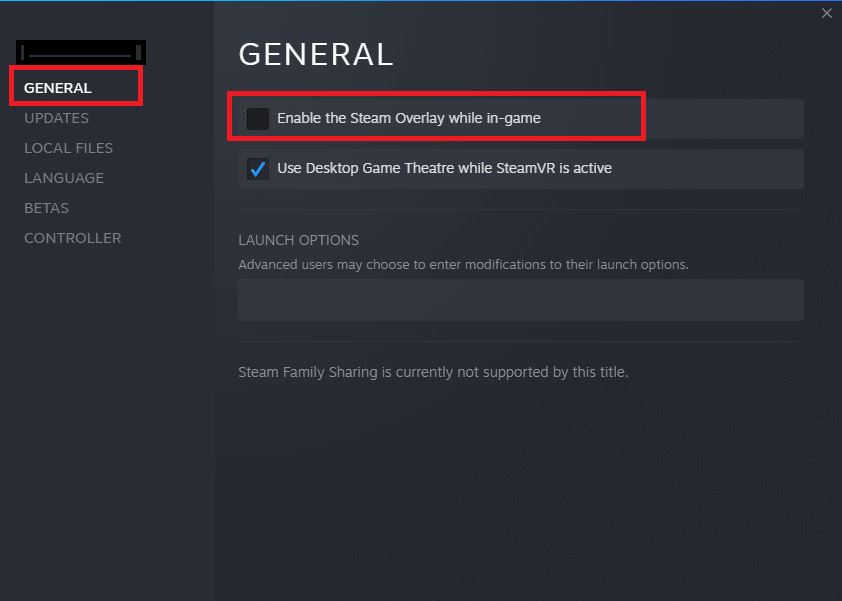
4. أخيرا، أعد تشغيل اللعبة and check if the MultiVersus launching issue is solved.
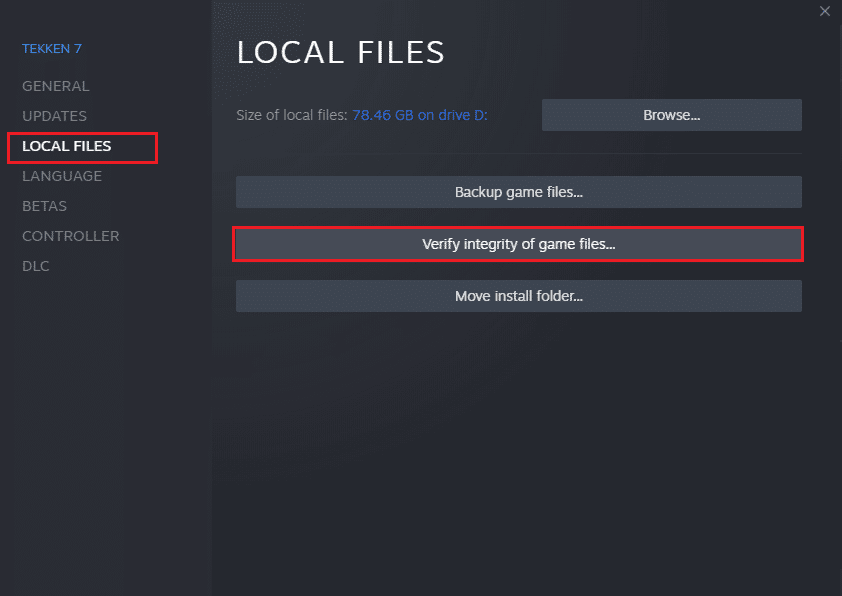
الطريقة الثالثة: التحقق من سلامة ملفات اللعبة
We have seen many cases in which the game files are either missing or corrupt or it had incomplete installations. Users could also experience MultiVersus not starting on PC issue if they are interrupted by the update process or if the game files are being moved. In this method, you will be opening Steam and using the built-in function for verifying the integrity of the game. It will be replaced if the application finds something. Read our guide on how to verify integrity of game files on Steam.
اقرأ أيضا: إصلاح مشكلة عدم استجابة Steam Client Bootstrapper في نظام التشغيل Windows 10
الطريقة الثالثة: تحديث .NET Framework
.NET framework in Windows 10 computer is essential for uninterrupted service of modern apps and games. Many games have an auto-update feature for the .NET framework, and thus it will be updated automatically whenever an update is available. In another case, if an update prompts in your PC, you can manually install the latest version of the .NET framework, as discussed below, to fix MultiVersus not launching issue.
1. تحقق من تحديثات جديدة ل الإطار. NET من موقع مايكروسوفت الرسمي.
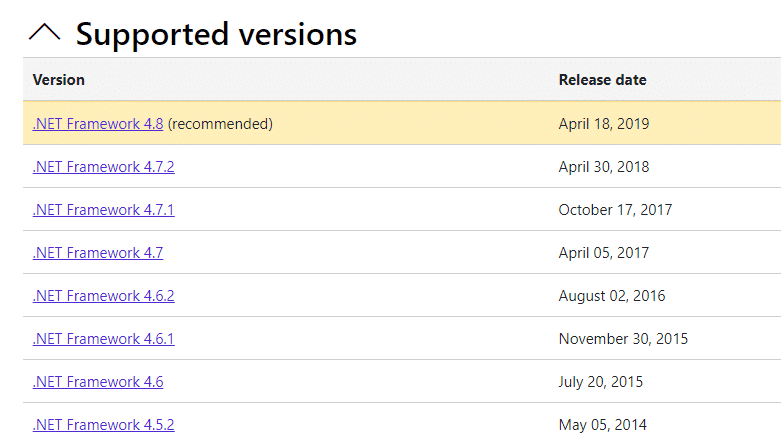
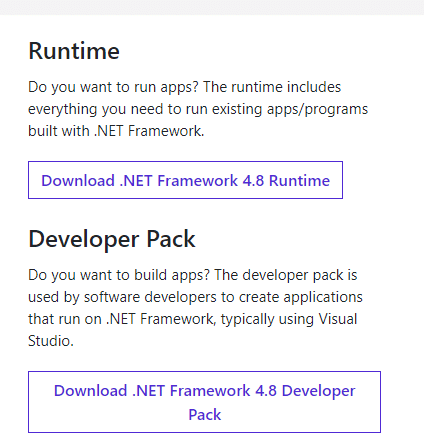
2. إذا كان هناك أي تحديثات، انقر فوق / المقابلةموصى به الارتباط والنقر قم بتنزيل .NET Framework 4.8 وقت التشغيل الخيار.
ملحوظة: لا تنقر على قم بتنزيل حزمة المطورين .NET Framework 4.8 كما يتم استخدامه من قبل مطوري البرمجيات.
3. اذهب إلى التنزيلات الخاصة بي، انقر نقرًا مزدوجًا فوق ملف الإعداد لتشغيل الملف الذي تم تنزيله واتبع التعليمات التعليمات التي تظهر على الشاشة لتثبيت إطار عمل .NET بنجاح على جهاز الكمبيوتر الذي يعمل بنظام Windows. بمجرد الانتهاء، تحقق مما إذا كنت قد أصلحت المشكلة التي تمت مناقشتها أم لا.
الطريقة الثانية: تحديث DirectX
To enjoy a seamless multimedia experience on MultiVersus, you have to make sure whether DirectX is installed, and it is updated to its latest version. DirectX helps you improve the visual media experience for graphical games and applications especially. It is worth updating DirectX needed for this game.
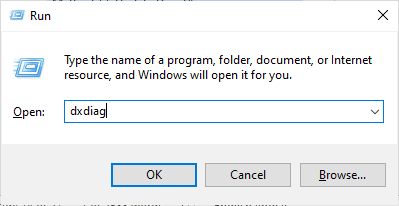
1. ضرب مفاتيح Windows + R. في وقت واحد لإطلاق يجري صندوق المحادثة.
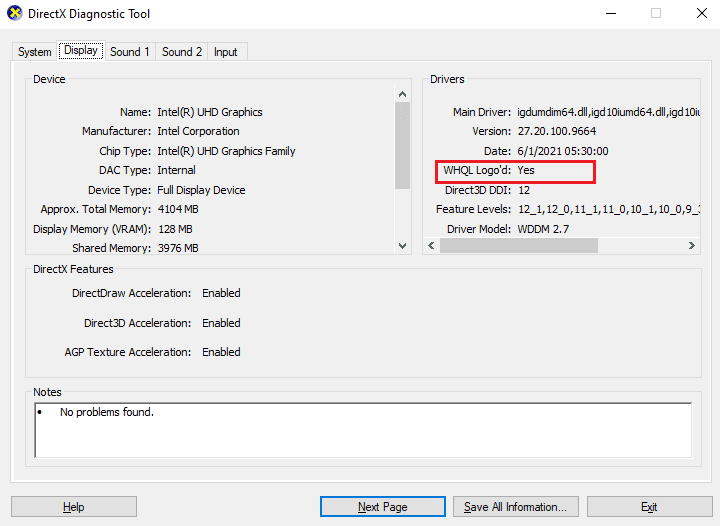
2. اكتب DXDIAG واضغط على مفتاح الادخال لفتح أداة تشخيص DirectX.
3. افحص ال إصدار DirectX, if it contains دايركت 12 أم لا.
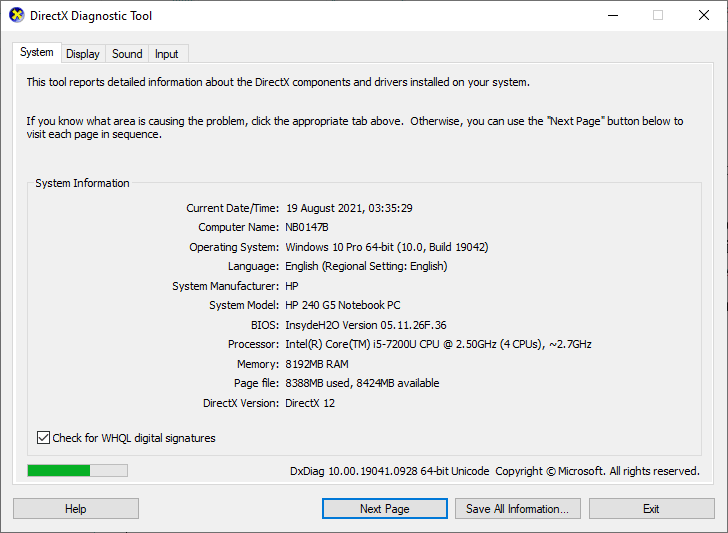
4. إذا لم يكن لديك DirectX 12 في نظامك، فقم بتنزيله وتثبيته من صفحة تنزيل DirectX باتباع التعليمات التي تظهر على الشاشة.
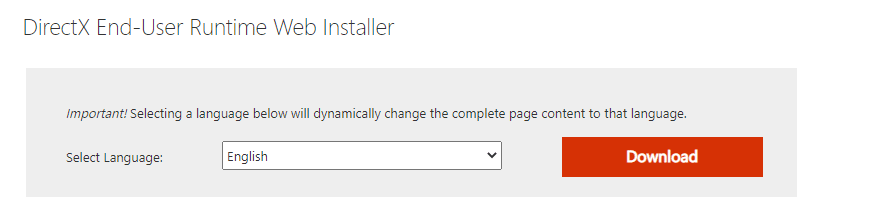
بعد تثبيت DirectX، تحقق من حدوث المشكلة مرة أخرى.
ملحوظة: ضمان التحقق من التوقيعات الرقمية WHQL تم وضع علامة في المربع System علامة التبويب وفي كافة علامات التبويب، تحقق مما إذا كان WHQL Logo'd يتم ضبطها على نعم.
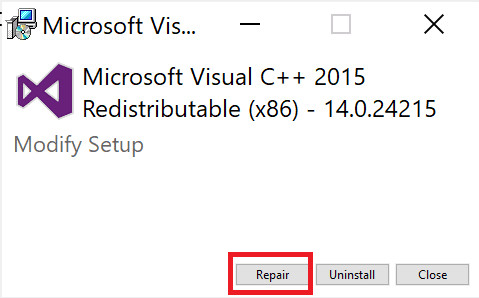
الطريقة الثامنة: إصلاح Microsoft Visual C++ القابل لإعادة التوزيع
Alternately, you can try to repair the Microsoft Visual C++ Redistributable packages to fix MultiVersus not launching issue as follows:
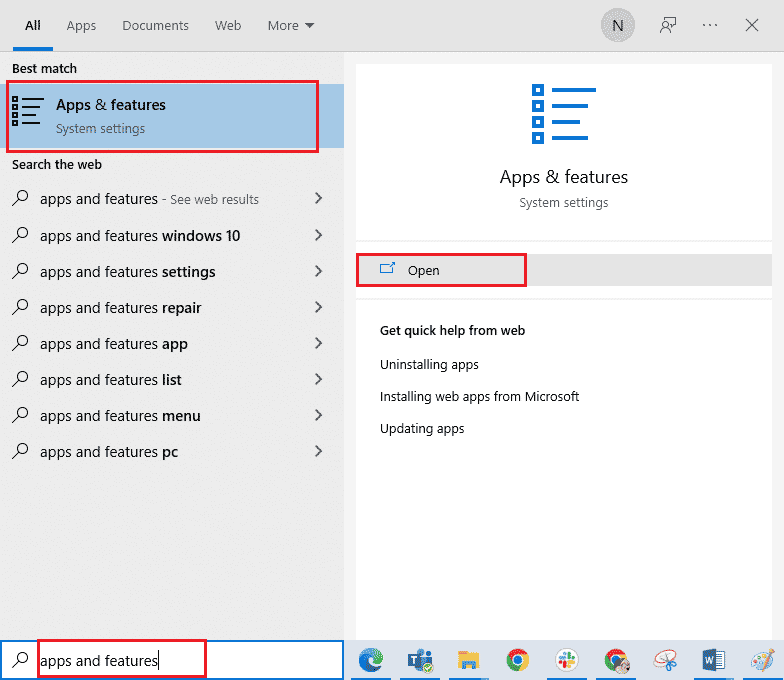
1. ضرب مفتاح ويندوز، نوع التطبيقات والميزات، ثم انقر على ساعات العمل.
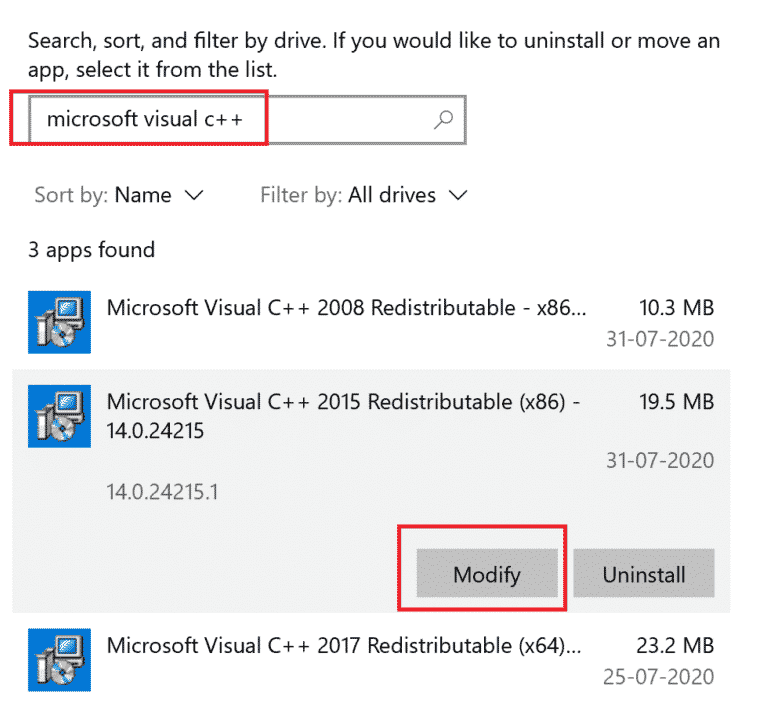
2. ابحث عن مايكروسوفت Visual C ++ القابلة لإعادة التوزيع صفقة.
3. Then, select the package, and click on عدل الخيار.
4. ثم انقر فوق نعم على التحكم في حساب المستخدم صندوق المحادثة.
5. في النافذة المنبثقة التي تظهر، انقر فوق إصلاح. انتظر حتى تنتهي العملية.
6. Repeat the above steps to modify all the Microsoft Visual C++ Redistributable packages.
7. أخيرا، أعد تشغيل الكمبيوتر.
افتح التطبيق الذي لم تتمكن من فتحه سابقًا. إذا لم ينجح ذلك، فحاول إعادة تثبيت الإصدار C++ القابل لإعادة التوزيع بدلاً من ذلك.
اقرأ أيضا: إصلاح فشل إعداد Microsoft Visual C++ 2015 القابل لإعادة التوزيع خطأ 0x80240017
الطريقة الثالثة: إعادة تثبيت Microsoft Visual C++ القابل لإعادة التوزيع
If the previous method of repairing the Microsoft C++ Visual Redistributable did not fix MultiVersus won’t launch issue, then you will have to reinstall the redistributable. Follow the given steps to uninstall & then install these again.
1. افتح ال التطبيقات والميزات اعدادات النظام.
2. حدد مايكروسوفت Visual C ++ القابلة لإعادة التوزيع package, then click on إلغاء الخيار.
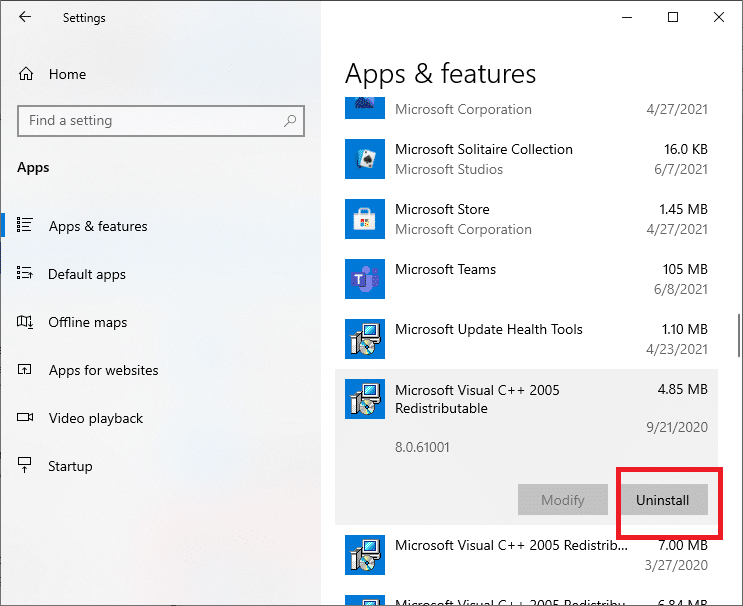
3. انقر على إلغاء option again to confirm and remove the package.
ملحوظة: Make sure to uninstall all the Microsoft Visual C++ Redistributable packages.
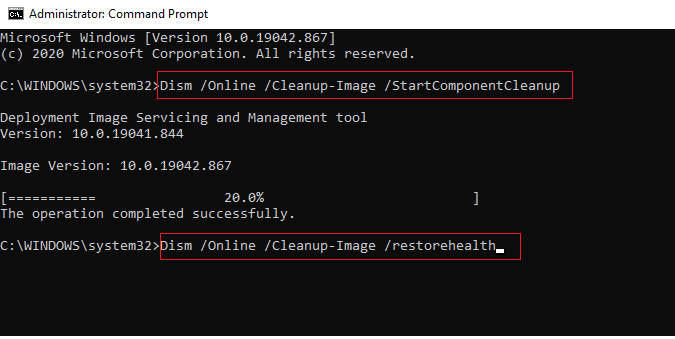
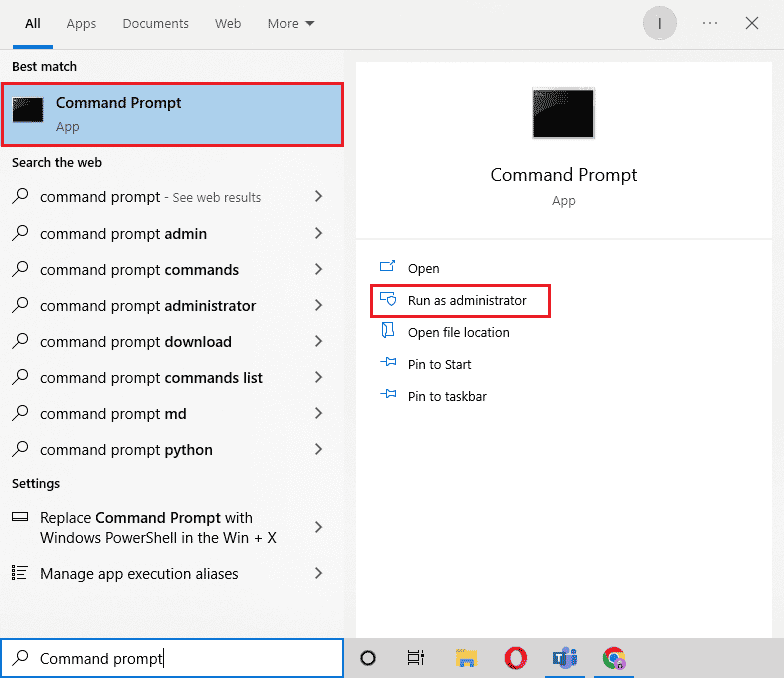
4. ضرب مفتاح ويندوز، نوع موجه الأوامر، ثم انقر على تشغيل كمسؤول.
5. اكتب ما يلي الأوامر والصحافة أدخل مفتاح بعد كل:
DISM /online /Cleanup-Image /StartComponentCleanup
DISM /online /Cleanup-Image /RestoreHealth
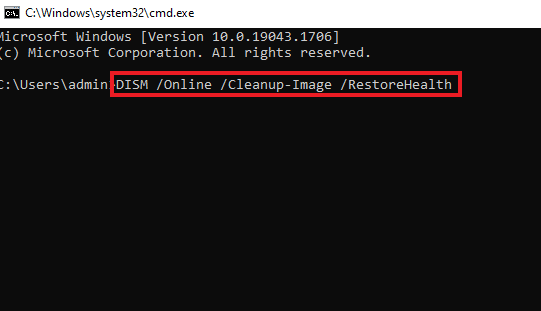
6. بمجرد اكتمال العملية، إعادة تشغيل جهاز الكمبيوتر.
7. بعد ذلك ، قم بزيارة Microsoft Visual C++ Redistributable webpage لتنزيل أحدث حزمة C++ كما هو موضح هنا.
8. بمجرد التنزيل، افتح الملف الملف الذي تم تنزيله عن طريق النقر المزدوج عليه بلدي التنزيلات. تثبيت الحزمة باتباع التعليمات التي تظهر على الشاشة.
9. Once the installation is complete, finally أعد تشغيل الكمبيوتر.
أوصى:
نأمل أن يكون هذا الدليل مفيدًا ويمكنك إصلاحه MultiVersus not launching issue on your Windows 10 PC. Let us know which method worked for you the best. Feel free to reach out to us with your queries and suggestions via the comments section below.