Fix Computer does not start until restarted multiple times

Fix Computer does not start until restarted multiple times: There seems to be a new issue with PC users, which is when they first turn ON their PC the power comes ON, fans start to spin but everything suddenly stops and PC never gets a display, in short, PC automatically turned OFF without any warning. Now if the user, powers off the PC and then turned it back ON, the computer boots normally without any additional issues. Basically, Computer does not start until restarted multiple times which is very annoying for basic Windows users.
Sometimes you need to boot up to 4-5 time before you could see the display or even boot your PC, but there is no guarantee that it will boot. Now living in this uncertainty, that you may or may not be able to use your PC next day is not such a good thing, so you need to address this problem immediately.
Now there are only a few issues which can cause this problem, so you can definitely troubleshoot this issue easily. The problem sometimes can be related to software like the main culprit seems to be Fast Startup in many cases and disabling it seems to fix the issue. But if this doesn’t fix the issue then you can be sure that the issue is related to hardware. In hardware, this can be a memory issue, faulty power supply, BIOS Settings or CMOS battery dried up, etc. So without wasting any time let’s see how to Fix Computer does not start until restarted multiple times with the help of the below-listed guide.
Fix Computer does not start until restarted multiple times
Bir şey səhv olarsa, bərpa nöqtəsi yaratdığınızdan əmin olun.
Qeyd: Some of the methods require expert supervision as you can seriously damage your PC while performing the steps, so if you don’t know what you’re doing then take your laptop/PC to a service repair center. If your PC is under warranty then opening the case can temper/void the warranty.
Metod 1: Sürətli başlanğıcı söndürün
1.Windows Key + R düymələrini basın, sonra nəzarət yazın və açmaq üçün Enter düyməsini basın İdarə paneli.

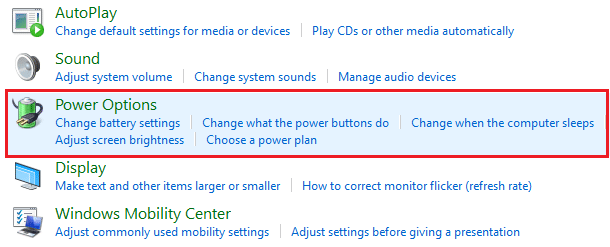
2 basın Hardware və Sound sonra vurun Güc Seçimləri.
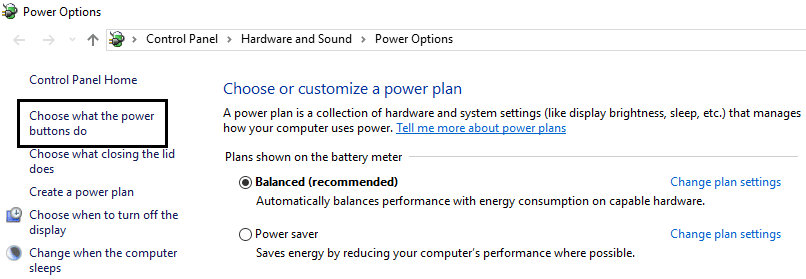
3.Sonra sol pəncərə panelindən “Güc düymələrinin nə etdiyini seçin."
4. İndi " üzərinə klikləyinHal-hazırda mövcud olmayan ayarları dəyişdirin."

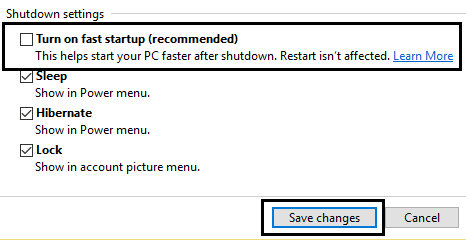
5. " işarəsini çıxarınSürətli başlanğıcı aktivləşdirin” və Dəyişiklikləri yadda saxla üzərinə klikləyin.
Metod 2: Avtomatik Təmiri işə salın
1.Windows 10 yüklənə bilən quraşdırma DVD-sini daxil edin və PC'nizi yenidən başladın.
2.When prompted to İstənilən düyməni basın CD və ya DVD-dən yükləmək üçün davam etmək üçün istənilən düyməni basın.

3.Dil seçimlərinizi seçin və Next düyməsini basın. Təmir et klikləyin kompüterinizin sol alt hissəsində.

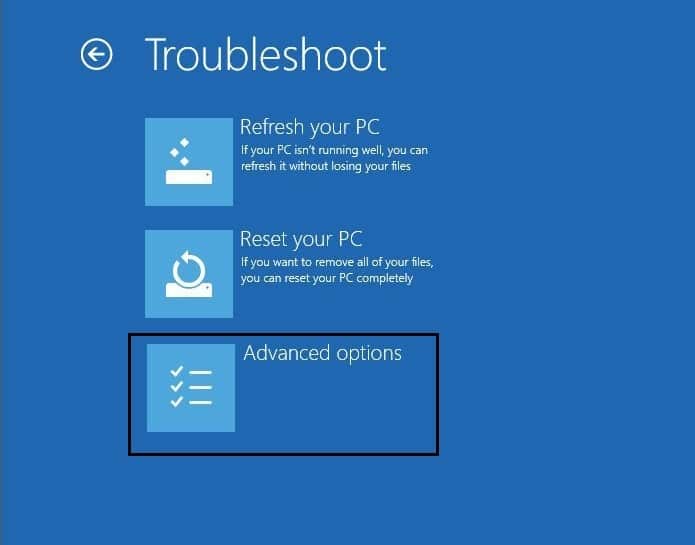
4. Seçim ekranını seçin, üzərinə klikləyin Troubleshoot.

5. Problemin həlli ekranında üzərinə klikləyin Qabaqcıl seçim.
6. Qabaqcıl seçimlər ekranında üzərinə klikləyin Avtomatik Təmir və ya Başlanğıc Təmiri.
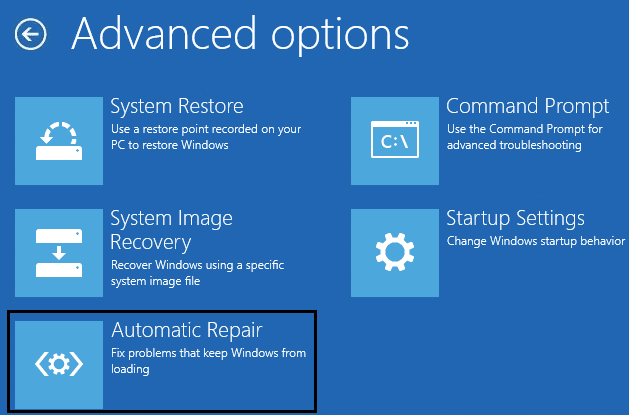
7. Gözləyin Windows Avtomatik/Startup Təmirləri tamamlandı.
8.Yenidən başladın və müvəffəqiyyətlə əldə etdiniz Fix Computer does not start until restarted multiple times issue, deyilsə, davam edin.
Həm də oxuyun Avtomatik Təmir kompüterinizi təmir edə bilmədiyi necə düzəltmək olar.
Metod 3: BIOS'u standart parametrlərə sıfırlayın
1.Laptopu söndürün, sonra onu və eyni vaxtda yandırın F2, DEL və ya F12 düyməsini basın (istehsalçınızdan asılı olaraq) daxil etmək BIOS quraşdırma.

2. İndi sıfırlama seçimini tapmalısınız standart konfiqurasiyanı yükləyin və o, Defoltlara Sıfırla, Zavod parametrlərini yüklə, BIOS parametrlərini sil, Quraşdırma defoltlarını yüklə və ya oxşar bir şey kimi adlandırıla bilər.

3.Ox düymələri ilə onu seçin, Enter düyməsini basın və əməliyyatı təsdiqləyin. Sizin BIOS indi ondan istifadə edəcək standart parametrlər.
4.Once you’re logged into Windows see if you’re able to Fix Computer does not start until restarted multiple times issue.
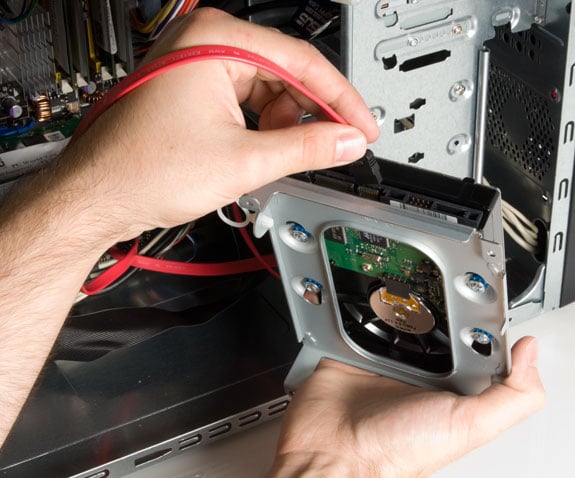
Method 4: Check if hard disk is failing
In many cases, the issue occurs because of the failing hard disk and to check if this is the problem here you need to disconnect the hard disk from your PC and connect it to another PC and try to boot from it. If you can boot from the hard disk without any issue on the other PC then you can be sure that the issue is not related to it.
Another way to test your hard disk is download and burn the SeaTools for DOS on a CD then run the test to check if your hard disk is failing or not. You will need to set the first boot to CD/DVD from BIOS in order for this to work.
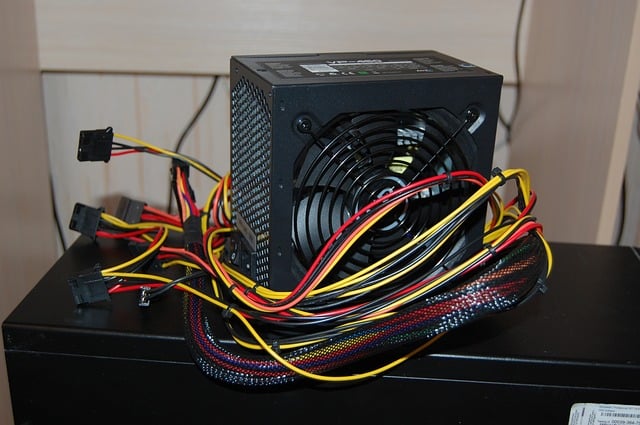
Metod 5: Enerji təchizatını yoxlayın
A faulty or failing Power Supply is generally the cause for PC not starting at the first boot. Because if the power consumption of hard disk is not met, it won’t get enough power to run and subsequently you may need to restart the PC several times before it can take the adequate power from PSU. In this case, you may need to replace the power supply with a new one or you could borrow a spare power supply to test if this is the case here.
If you have recently installed a new hardware such as video card then chances are the PSU is not able to deliver the necessary power needed by the graphic card. Just temporary remove the hardware and see if this fixes the issue. If the issue is resolved then in order to use the graphic card you may need to purchase a higher voltage Power Supply Unit.
Method 6: Replace CMOS battery
If CMOS battery has dried up or no longer deliver powers then your PC won’t start and after few days it will eventually start hanging up. In order to fix the issue, it’s advised to replace your CMOS battery.
Metod 7: ATX sıfırlaması
Qeyd: Bu proses ümumiyyətlə noutbuklara aiddir, ona görə də kompüteriniz varsa, bu üsulu tərk edin.
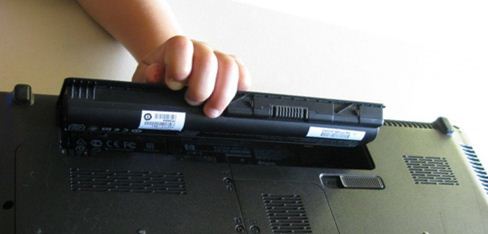
1.Power off your laptop then remove the power cord, leave it for few minutes.
2. İndi batareyanı çıxarın arxadan və güc düyməsini 15-20 saniyə basıb saxlayın.
Qeyd: Elektrik kabelini hələlik qoşmayın, bunu nə vaxt edəcəyinizi sizə xəbər verəcəyik.
3.Now plug in elektrik kabeliniz (batareya daxil edilməməlidir) və laptopunuzu işə salmağa çalışın.
4.If it’s boot properly then again turn off your laptop. Put in the battery and again start your laptop.
If the problem is still there again turn off your laptop, remove power cord & battery. Press & hold the power button for 15-20 seconds and then insert the battery. Power on the laptop and this should fix the issue.
Now if any of the above methods weren’t helpful then it means the problem is with your motherboard and unfortunately, you need to replace it in order to fix the issue.
Tövsiyə edilir:
Uğurla əldə etdiyiniz budur Fix Computer does not start until restarted multiple times issue lakin bu bələdçi ilə bağlı hələ də hər hansı bir sualınız varsa, şərh bölməsində onlardan soruşmaqdan çekinmeyin.