MultiVersus-un Windows 10-da işə salınmamasını düzəldin

MultiVersus is a famous online multiplayer fighting game that is rocking today’s gaming world. Yet, few users complain about the MultiVersus not launching issue when the game is launched on their Windows 10 PC. If you are in the same boat, the troubleshooting hacks discussed in this article will help you sail the problem.
How to Fix MultiVersus Not Launching in Windows 10
If you are vexed by MultiVersus won’t launch issue in your Windows 10 computer, here are a few possible reasons why you must analyze them carefully to sort out the problem.
- PC oyunun əsas tələblərinə cavab vermir.
- Bəzi digər fon proqramı oyuna müdaxilə edir.
- Siz sürücülərin yoxlanılmamış versiyasından istifadə edirsiniz.
- Oyunun qrafik parametrləri səhv konfiqurasiya olunub.
- Zərərli proqramların və virusların olması.
- .NET çərçivəsi və əməliyyat sistemi ən son versiyasına yenilənmir.
- DirectX versiyası yeni deyil.
- Overclock.
- Oyunun səhv konfiqurasiya edilmiş və ya zədələnmiş quraşdırma faylları da problemə səbəb olur.
- Microsoft C++ yenidən paylana bilən faylları oyun və PC ilə uyğun gəlmir.
Müzakirə olunan problemi həll etməyə kömək edəcək bir neçə mümkün problemlərin aradan qaldırılması üsulları bunlardır.
Metod 1: Əsas problemlərin aradan qaldırılması üsulları
Bu problemi həll etmək üçün bu əsas problemlərin aradan qaldırılması üsullarına əməl edin.
1A. Sistem Tələblərini yoxlayın
Multi Versus Minimum sistem tələbləri
- CPU: Intel Core i5-2300 və ya AMD FX-8350
- RAM: 4 GB
- VİDEO KART: Nvidia GeForce GTX 550 Ti və ya AMD Radeon HD 5850 | Intel UHD 750
- PİKSEL ŞEYDER: 5.0
- VERTEX GÖLGƏLƏRİ: 5.0
- PULSUZ DİSK YERİ: 6 GB
- XÜSUSİ VİDEO RAM: 1024 MB
Multi Versus Təklif olunan tələblər
- CPU: Intel Core i5-3470 və ya AMD Ryzen 3 1200
- RAM: 8 GB
- VİDEO KART: Nvidia GeForce GTX 660 və ya AMD Radeon R9 270
- PİKSEL ŞEYDER: 5.0
- VERTEX GÖLGƏLƏRİ: 5.0
- PULSUZ DİSK YERİ: 6 GB
- XÜSUSİ VİDEO RAM: 2048 MB
1B. Check your internet connection
Unstable internet connection leads to MultiVersus is not working issue, also if there are any obstacles between your router and your computer, they may interfere with the wireless signal and will cause intermittent connection problems.
çalıştıra bilərsiniz sürət testi düzgün əlaqə üçün tələb olunan şəbəkə sürətinin optimal səviyyəsini bilmək.
Cihazınızın aşağıdakı meyarlara cavab verdiyinə əmin olun.
- Şəbəkənizin siqnal gücünü tapın və çox aşağıdırsa, yol arasındakı bütün maneələri təmizləyin.
- Eyni şəbəkəyə qoşulmuş çoxlu cihazdan çəkinin.
- Həmişə İnternet Xidmət Provayderiniz (ISP) tərəfindən təsdiqlənmiş modem/marşrutlaşdırıcı alın və onlar münaqişələrdən azaddırlar.
- İstifadə etməyin köhnə, qırıq və ya zədələnmiş kabellər. Lazım gələrsə, kabelləri dəyişdirin.
- Modemdən marşrutlaşdırıcıya və modemdən divara gedən naqillərin sabit və narahat olmadığından əmin olun.
İnternet bağlantısı ilə bağlı hər hansı bir problem varsa, eyni problemləri həll etmək üçün Windows 10-da Şəbəkə Bağlantısı Problemlərini necə həll etmək barədə bələdçimizə baxın.
1C. Overclocku dayandırın
- Hər bir yüksək səviyyəli kompüter, artıq sahib olduğunuz spesifikasiyalarınızdan daha çox şirə çıxarmağa kömək edən Overclock seçimi ilə qurulmuşdur. Qrafik kartı və ya prosessoru standart sürətdən daha sürətli işə salmaq overclocka aiddir.
- Bu baş verdikdə, kompüteriniz müəyyən bir müddətdən sonra maksimum temperatura çatacaq. Kompüter bunu aşkar edir və soyudulana qədər saat sürətini normal sürətə uyğunlaşdırır. Onlar soyuduqdan sonra saat sürəti yenidən artır.
- Bu, kompüterinizin performansını artırır və güclü kompüteriniz yoxdursa, böyük köməkdir.
- Qeyd etmək lazımdır ki, bütün oyunlar overclocku dəstəkləmir. Eyni şey MultiVersus-a da aiddir. Beləliklə, kompüterinizdə bütün overclockları söndürməyə və oyunu işə salmağa cəhd etməlisiniz. Yaxşı işə salınarsa, problem həll olunur.
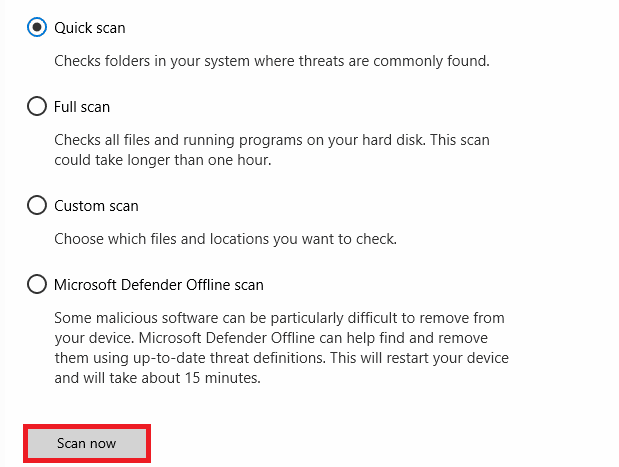
1D. Zərərli proqram taramasını işə salın
Virus və ya zərərli proqram hücumunun olması kompüterinizdə oyun problemləri ilə nəticələnəcək. Əgər virus hücumu çox şiddətlidirsə, siz heç bir onlayn oyuna davamlı olaraq qoşula bilməzsiniz. Problemi həll etmək üçün Windows 10 kompüterinizdən virusu və ya zərərli proqramı tamamilə silməlisiniz.
Sizə bələdçimizdə göstərildiyi kimi kompüterinizi skan etmək tövsiyə olunur. Kompüterimdə Virus Skanını Necə Çalışdıra bilərəm?
Həmçinin, zərərli proqramı kompüterinizdən silmək istəyirsinizsə, Windows 10-da Zərərli proqramı kompüterinizdən necə çıxarmaq olar bələdçimizə baxın.
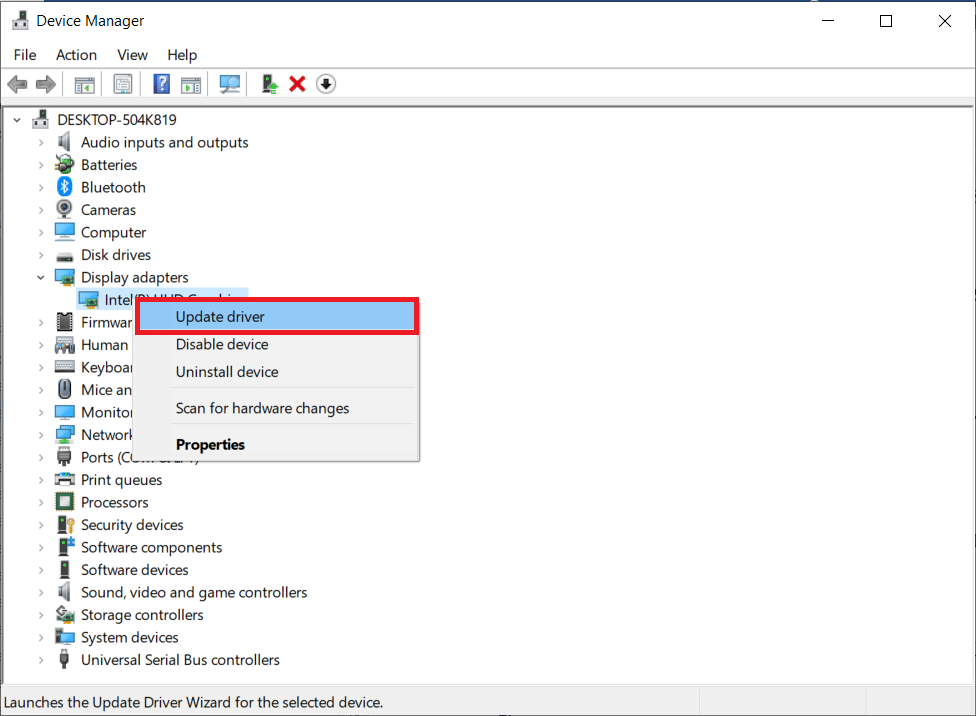
1E. GPU sürücülərini yeniləyin
Graphical drivers are responsible for heavy graphical images and video processing games. If you face any launching conflicts in the MultiVersus game, make sure you use an updated version of device drivers, as they serve as a link between the hardware and Operating System of your PC. Many users have suggested that updating drivers have fixed MultiVersus not working issue. Read and implement the steps instructed in our guide 4 Ways to Update Graphics Drivers in Windows 10 to do so.
Həm də oxuyun: Cihazınız üçün Windows Tapılan Sürücüləri Düzəldin, lakin Xəta ilə Qarşılaşdı
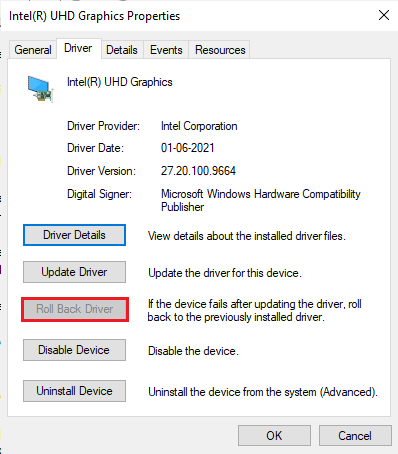
1F. GPU Sürücülərini Geri qaytarın
Sometimes, the current version of GPU drivers may cause the discussed launching issue in MultiVersus, and in this case, you have to restore previous versions of installed drivers. This process is called sürücülərin geri qaytarılması və Windows 10-da Sürücüləri necə geri qaytarmaq olar bələdçimizə əməl etməklə kompüterinizin sürücülərini asanlıqla əvvəlki vəziyyətinə qaytara bilərsiniz.
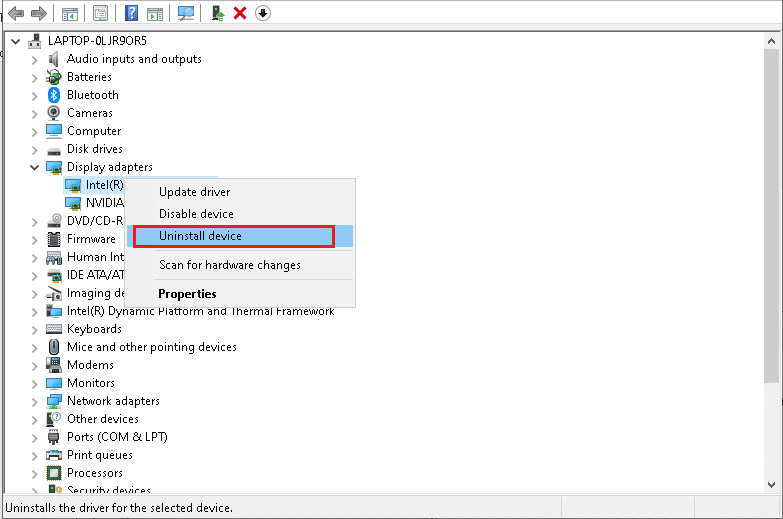
1G. GPU Sürücüsünü yenidən quraşdırın
If you still face MultiVersus not starting issue after updating your GPU drivers, then reinstall device drivers to fix any incompatibility issues. There are several ways to reinstall drivers on your computer. Yet, you can easily reinstall Graphical drivers as instructed in our guide How to Uninstall and Reinstall Drivers on Windows 10.
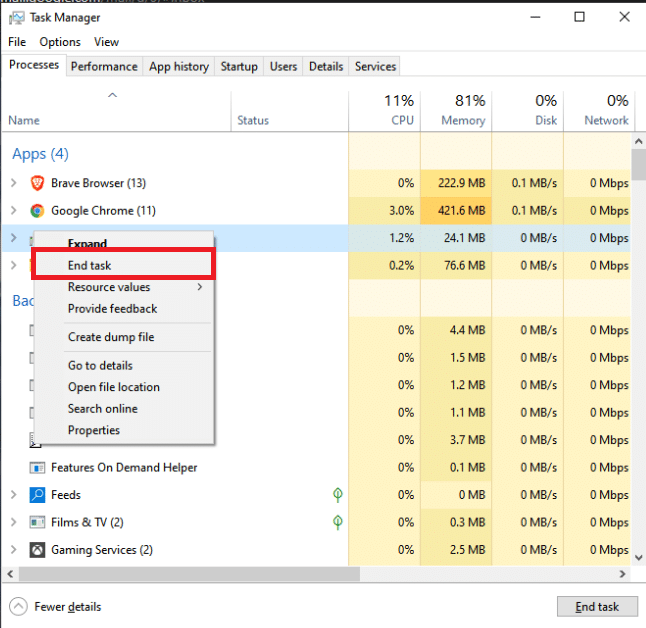
1H. End Background Processes
Several users have confirmed that MultiVersus not starting on PC can be resolved by closing all the background tasks running on your PC. To implement the task, follow our guide How to End Task in Windows 10, and proceed as instructed.
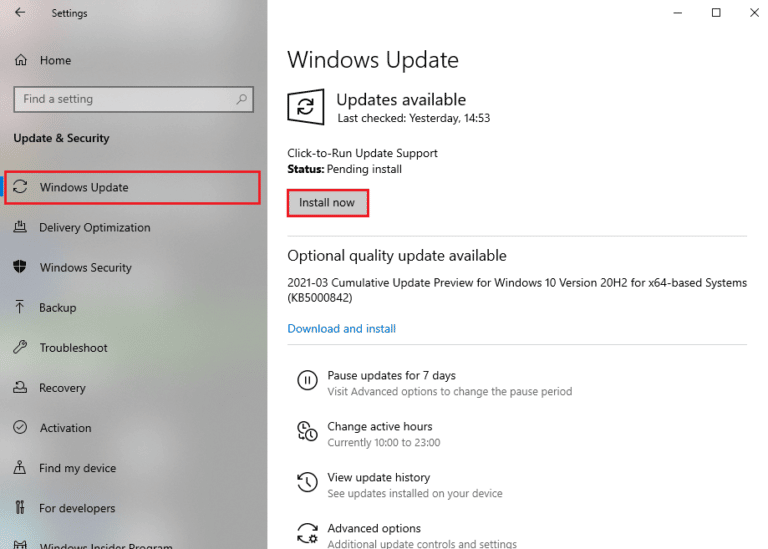
1I. Update Windows
You can also eradicate bugs in your computer and game by updating your Operating System. Always ensure if you have updated your Windows Operating System and if any updates are pending in action, use our guide How to Download and Install Windows 10 Latest Update
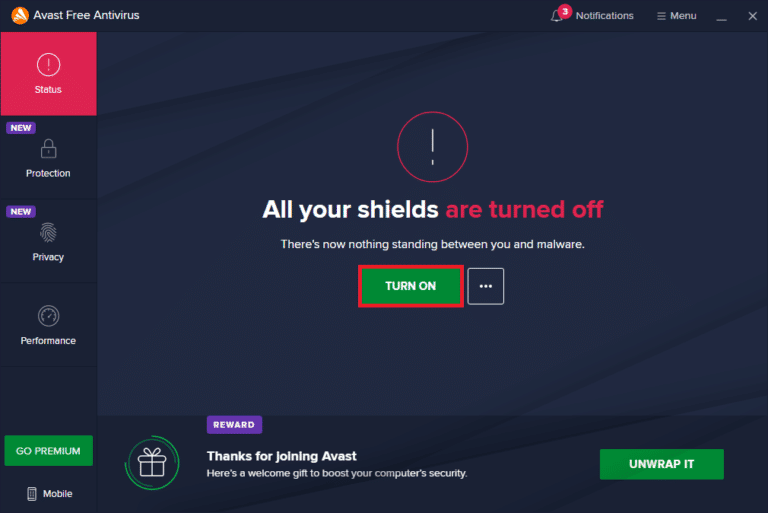
1J. Disable Antivirus Temporarily (If Applicable)
Some incompatible antivirus programs installed on your computer will cause MultiVersus launching problem. To avoid conflicts, you must ensure the security settings of your Windows 10 computer and check if they are stable or not. To find whether the antivirus suite is the reason for the discussed issue, disable it once and try connecting to a network.
Windows 10-da Antivirusu müvəqqəti olaraq necə deaktiv etmək barədə təlimatımızı oxuyun və Antivirus proqramınızı kompüterinizdə müvəqqəti olaraq söndürmək üçün təlimatlara əməl edin.
Kompüterinizdə antivirus proqramını söndürdükdən sonra probleminizi həll etsəniz, proqramı kompüterinizdən tamamilə silməyiniz tövsiyə olunur.
Read our guide Force Uninstall Programs which won’t Uninstall in Windows 10 to uninstall your antivirus program on your computer.
Həm də oxuyun: Windows 10-da McAfee LiveSafe-i necə silmək olar
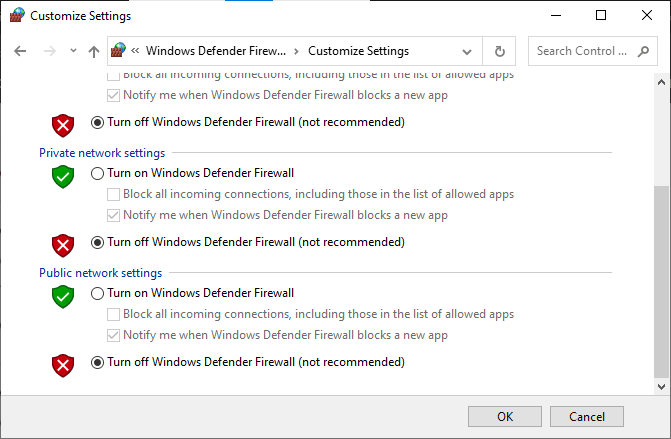
1K. Turn Off Windows Defender Firewall (Not Recommended)
Your computer will face MultiVersus is not working issue, due to an over-protective firewall suite in the Windows 10 PC. To resolve the problem, you can either add a new rule for your game, whitelist the game or as the last fix, disable the firewall temporarily.
Our guide on How to Disable Windows 10 Firewall will help you.
1L. Repair System Files
If there are any missing or damaged files on your Windows 10 PC, you will face MultiVersus takes forever to launch issue. Yet, you are repairing these corrupt files by using inbuilt utilities namely, Sistem Fayl Denetleyicisi və Deployment Image Servicing və İdarəetmə.
Windows 10-da sistem fayllarını necə təmir etmək barədə təlimatımızı oxuyun və bütün zədələnmiş fayllarınızı düzəltmək üçün göstərişlərə uyğun olaraq addımları yerinə yetirin.
Metod 2: MultiVersus oyununu idarəçi olaraq işə salın
If MultiVersus does not have required administrative privileges, a few essential features of the game will be limited causing you MultiVersus not launching issue whenever you open the game or install any updates. Follow the below-mentioned instructions to run the game as an administrator.
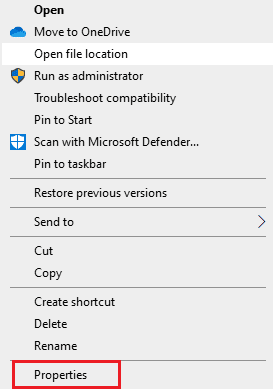
1. düyməsini sağ basın MultiVersus qısayolu İş masasında.
Qeyd: Ayrıca gedə bilərsiniz quraşdırma kataloqu və üzərinə sağ vurun.
2. Sonra, seçin Properties seçin.
3. İndi üzərinə keçin Uyumluluk nişanı basın və vurun Bu proqramı bir idarəçi olaraq işə salın.
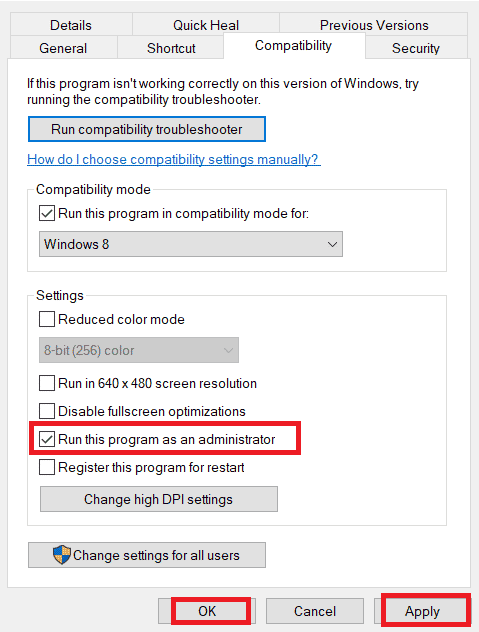
4. Nəhayət, üzərinə klikləyin Tətbiq edin> Tamam dəyişiklikləri saxlamaq üçün.
Check if you have fixed MultiVersus launching issues.
Həm də oxuyun: WoW-un Windows 10-da işə salınması əbədi vaxt aparır
Metod 3: Oyun prosesinin prioritetini dəyişdirin
The preference of an application or process tells the computer the importance and if it should be given preference over the others while allocating the resources. The priority of every application is normal except the system processes, by default. MultiVersus might crash if it didn’t get enough resources.
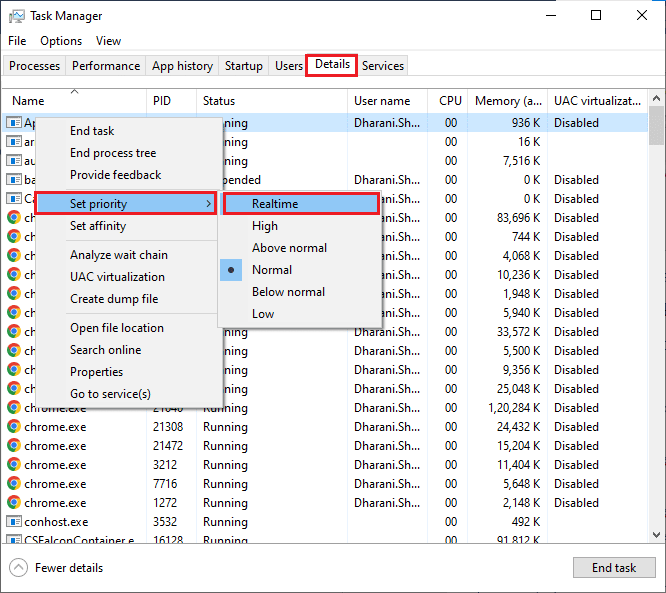
1. Basın Ctrl + Shift + Esc düymələri açmaq üçün birlikdə görev Çubuğu.
2. İndi axtarın MultiVersus prosesi.
3. Sonra prioriteti olaraq dəyişdirin Yüksək prioritet və bunun işlədiyini yoxlayın.
Qeyd: Prioriteti çox ehtiyatla dəyişdirin, çünki prosesin prioritetini ehtiyatsızlıqla dəyişdirmək sisteminizi son dərəcə yavaş və ya qeyri-sabit edə bilər.
4. Bağlayın Task Manager və reboot kompüteriniz.
Metod 4: Yüksək Performans təyin edin
Siz həmçinin yüksək performanslı güc planı parametrlərinizi təyin edərkən oyununuzu optimallaşdıra bilərsiniz. Bu güc planları portativ parametrlərdə güc parametrlərini idarə etmək üçün hazırlanmışdır. Sisteminizdə yüksək performanslı enerji planı parametrlərindən istifadə etmək üçün aşağıda qeyd olunan təlimatlara əməl edin.
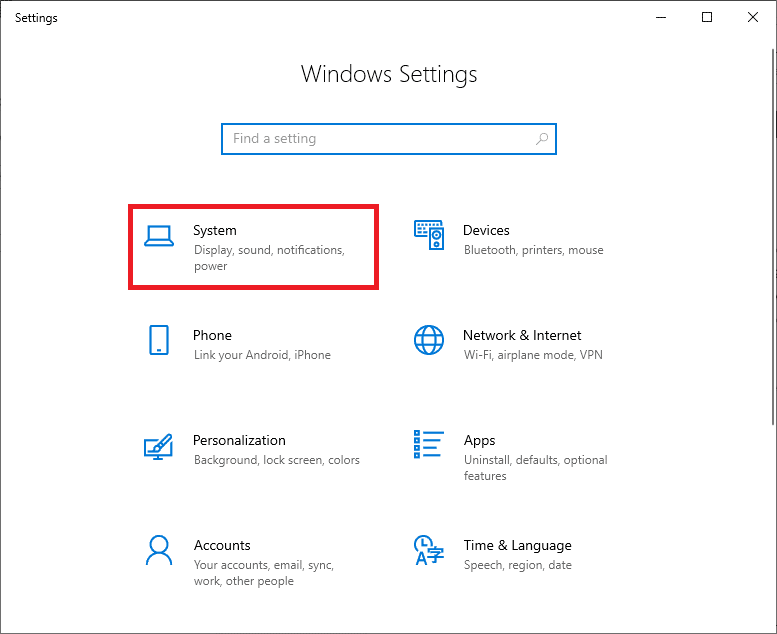
1. Basın Windows + I düymələri eyni zamanda açmaq üçün Windows Ayarları.
2. İndi basın Sistem qəbulu.
3. İndi seçin Güc və yuxu seçimi vurun Əlavə güc parametrləri altında Müvafiq parametrlər.
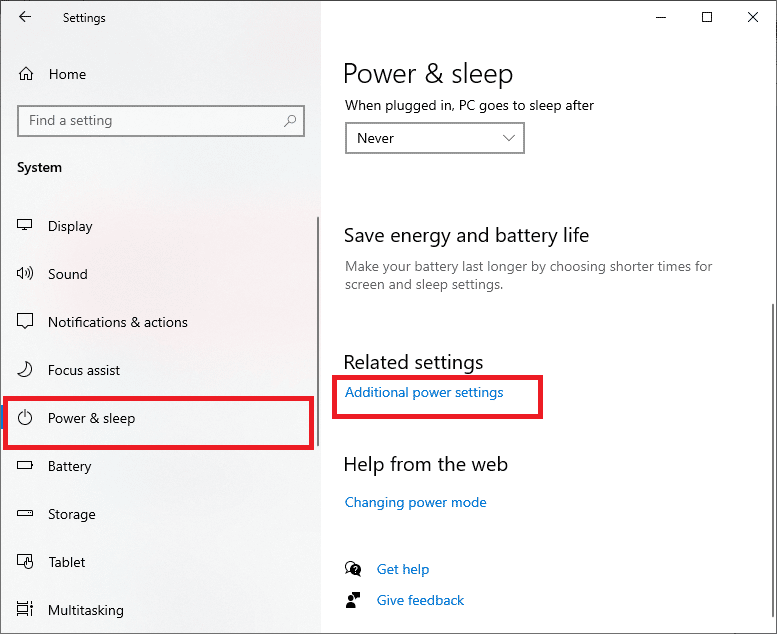
4. İndi seçin Yüksək performans altında seçim Yüksək əlavə planlar aşağıdakı şəkildə göstərildiyi kimi.
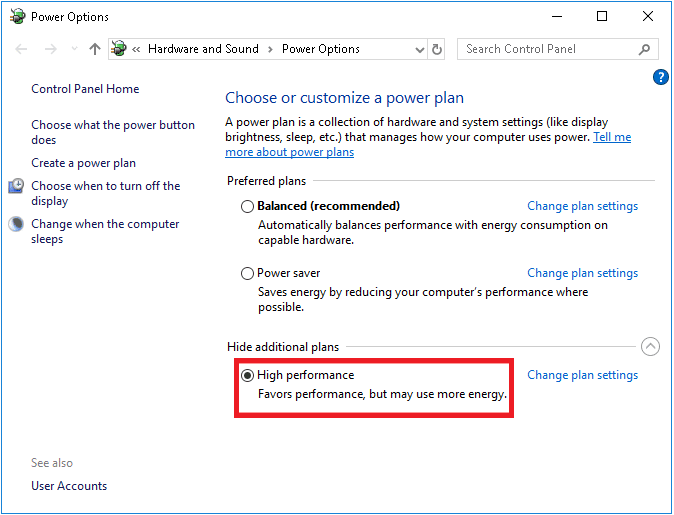
Now you have optimized your system, check if you have fixed MultiVersus won’t launch on startup issue.
Həm də oxuyun: Steam-də Çatışmayan Yüklənmiş Fayllar Xətasını düzəldin
Method 5: Update Steam App & MultiVersus Game
Köhnəlmiş Steam tətbiqindən istifadə edirsinizsə, heç bir oyuna rahat daxil ola bilməzsiniz. Buna görə də, onu işə salmazdan əvvəl həmişə Steam və MultiVersus oyununun yenilənmiş versiyasını istifadə etdiyinizə əmin olun.
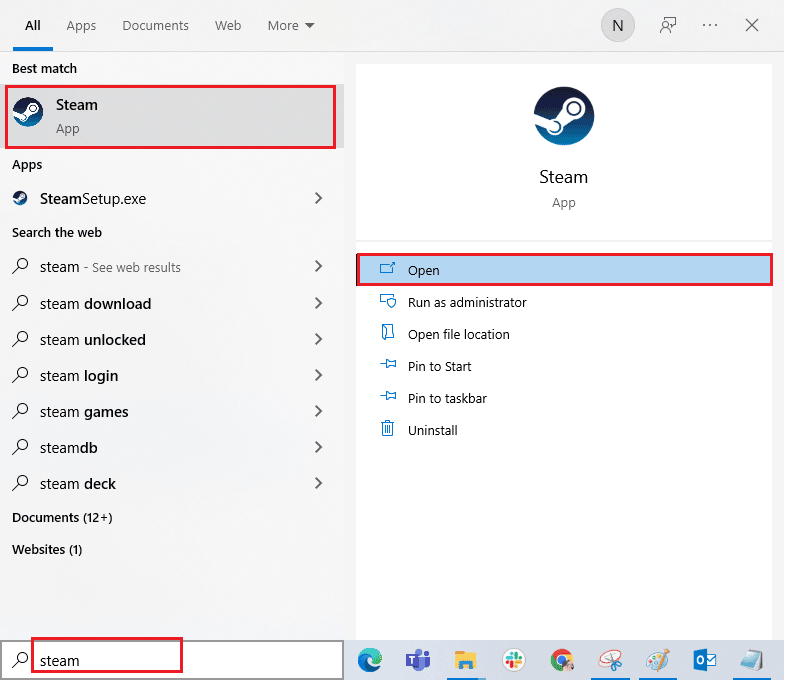
1. Hit Windows açarı və növü Buxarsonra basın Açıq.
2. İndi basın Buxar ekranın yuxarı sol küncündə və ardınca Steam Müştəri Güncəlləmələrini yoxlayın... aşağıda vurğulandığı kimi.
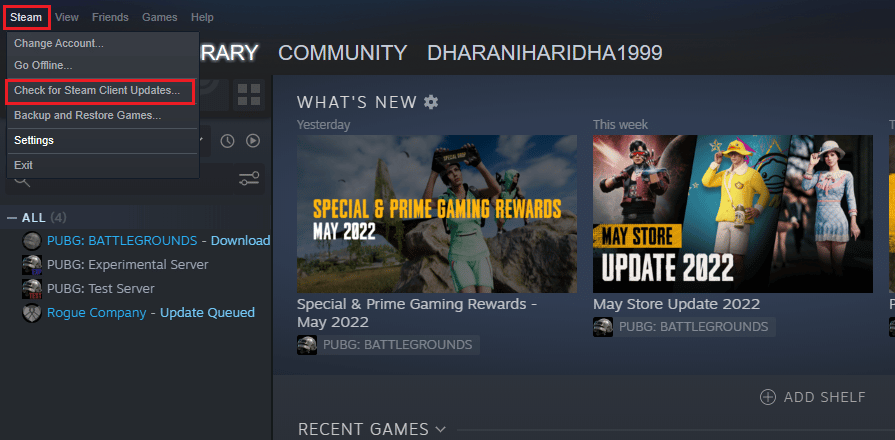
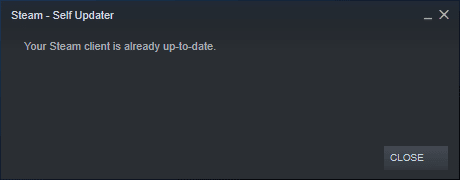
3. Yüklənəcək hər hansı yeni yeniləmələriniz varsa, onları quraşdırın və əmin olun Steam müştəriniz güncəldir.
4. İndi, Steam-i yenidən işə salın və problemin indi həll edilib-edilmədiyini yoxlayın.
Likewise, it is always essential that your game run at its latest version to avoid any conflicts. Until your game is updated, you cannot log in to MultiVersus servers successfully.
Kənar oyununuzu yeniləyin, aşağıda qeyd olunan addımları izləyin.
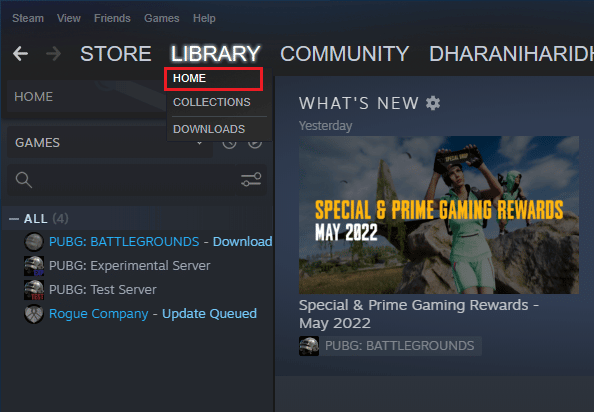
1. Başla Buxar və getmək KİTABXANA.
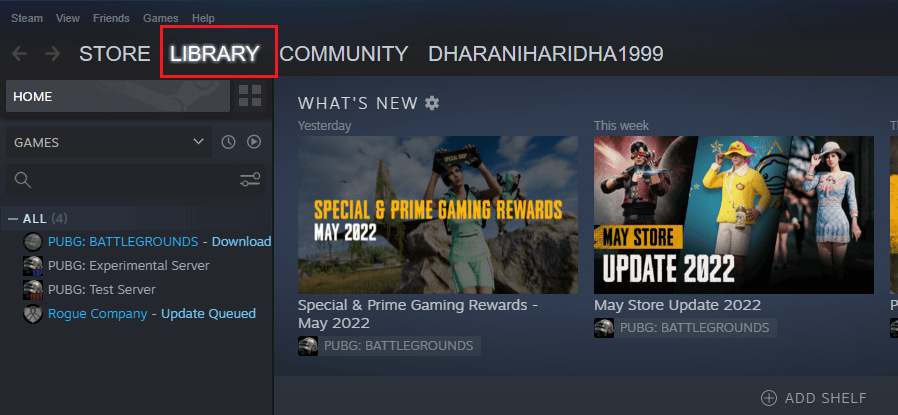
2. İndi basın EV və MultiVersus-u axtarın.
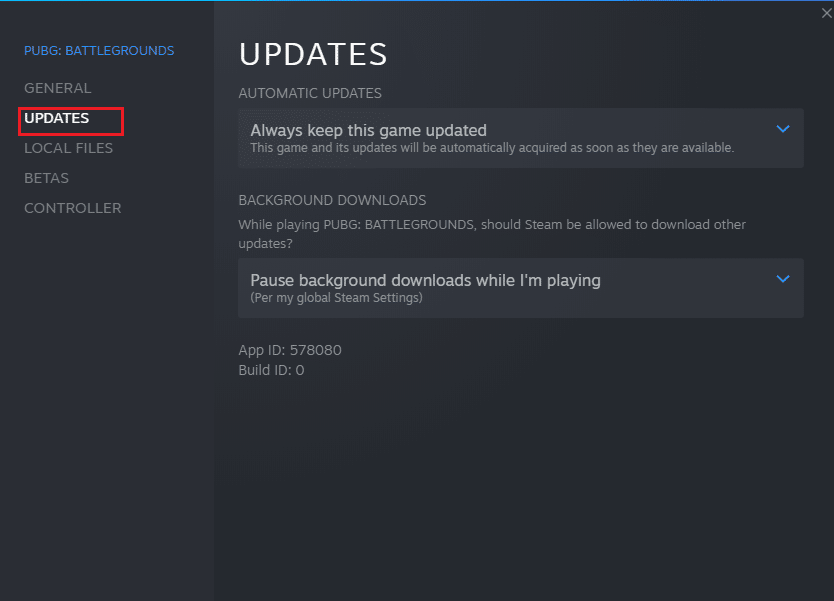
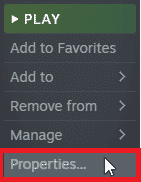
3. Sonra oyunun üzərinə sağ klikləyin və seçin Xüsusiyyətlər… seçin.

4. İndi, keçid GÜNCELLEME tab və hər hansı yeniləmənin fəaliyyətdə olub olmadığını yoxlayın. Əgər belədirsə, ən son yeniləmələri yükləmək üçün ekrandakı təlimatlara əməl edin.
After an update, check if MultiVersus not launching issue is fixed.
Metod 6: Tam Ekran Optimallaşdırmasını deaktiv edin
Few users have suggested that disabling full-screen optimizations on PC has helped them fix MultiVersus is not launching issue. Follow as instructed.
1. Steam-ə keçin KİTABXANA menyu.
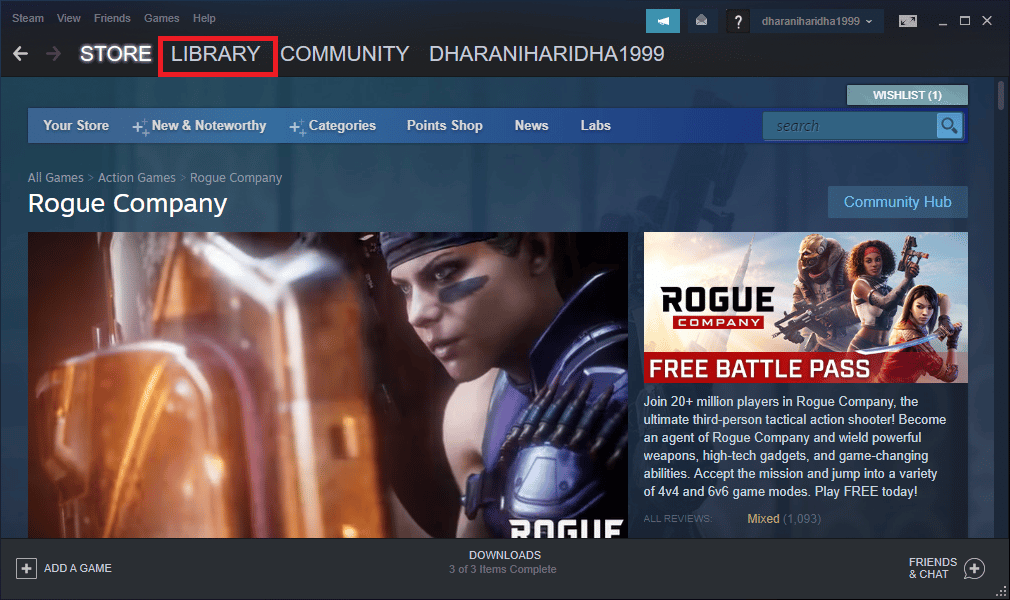
2. Now, right-click on the MultiVersus game and click on Xüsusiyyətlər…
3. İndi, keçid GENERAL nişanı basın və vurun BAŞLATMA SEÇENMƏLƏRİNİ QAYDIRIN... təsvir edildiyi kimi.
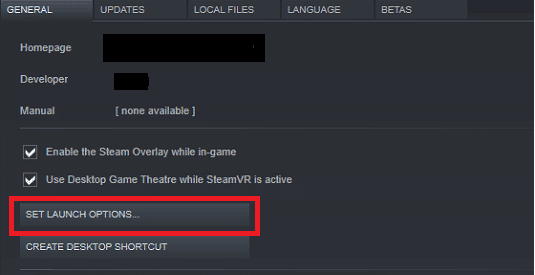
4. İndi qabaqcıl istifadəçi xəbərdarlığı ilə yeni pəncərə açılacaq. Oyunu pəncərə rejimində açmaq üçün yazın -pəncərəli parametr.
5. İndi klikləməklə dəyişiklikləri qeyd edin OK və Xüsusiyyətlər pəncərəsindən çıxın.
6. İndi, yenidən başladın oyun and ensure that it runs in windowed mode.
Qeyd: You can also navigate to BAŞLATMA SEÇENƏRİNİ QURUN… yenidən və sonuncu parametrin yerinə aşağıdakı parametrləri yazın.
-pəncərəli -w 1024
7. İndi üzərinə klikləməklə dəyişiklikləri qeyd edin OK.
Bu parametr oyunu pəncərə rejimində işə salacaq.
Həm də oxuyun: Windows 10-da mövcud olmayan Steam Tətbiq Konfiqurasiyasını düzəldin
Metod 7: Oyundaxili örtüyü söndürün
The Steam Overlay is a piece of Steam that allows the users to access friends list, and web browser and allows in-game purchasing. It is a significant tool, yet it sometimes triggers MultiVersus not launching on startup issue. If you want to solve this problem, then turn off the Steam game overlay.
1. açın Buxar tətbiq et və vurun KİTABXANA.
2. İndi üzərinə sağ klikləyin Multi Versus və basın Xüsusiyyətlər…

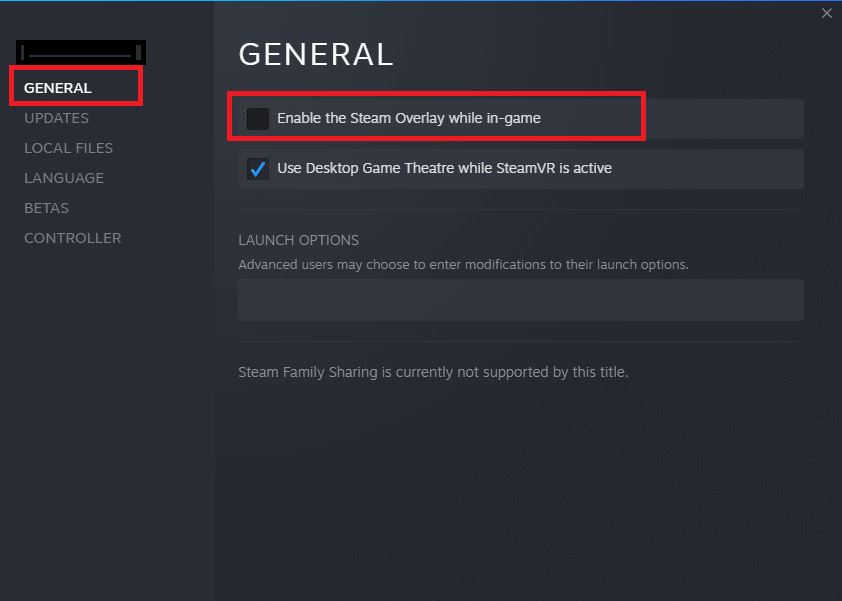
3. İndi, keçid GENERAL tab və ehtiva edən qutunun işarəsini çıxarın Oyunda olarkən Steam Overlay-i aktivləşdirin.
4. Nəhayət, oyunu yenidən başladın and check if the MultiVersus launching issue is solved.
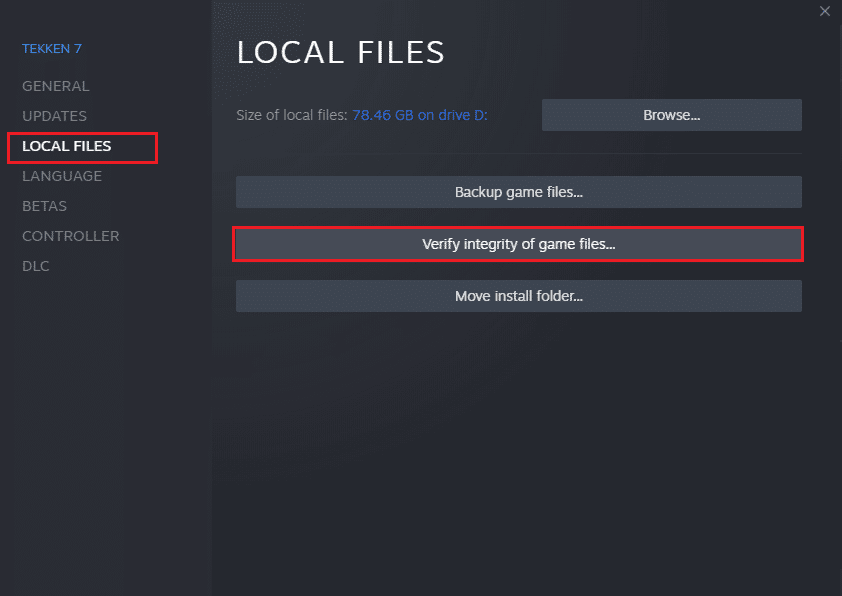
Metod 8: Oyun fayllarının bütövlüyünü yoxlayın
We have seen many cases in which the game files are either missing or corrupt or it had incomplete installations. Users could also experience MultiVersus not starting on PC issue if they are interrupted by the update process or if the game files are being moved. In this method, you will be opening Steam and using the built-in function for verifying the integrity of the game. It will be replaced if the application finds something. Read our guide on how to verify integrity of game files on Steam.
Həm də oxuyun: Fix Steam Client Bootstrapper Not Responding in Windows 10
Metod 9: .NET Framework-ü yeniləyin
.NET framework in Windows 10 computer is essential for uninterrupted service of modern apps and games. Many games have an auto-update feature for the .NET framework, and thus it will be updated automatically whenever an update is available. In another case, if an update prompts in your PC, you can manually install the latest version of the .NET framework, as discussed below, to fix MultiVersus not launching issue.
1. Yoxlayın yeni yeniləmələr üçün .NET çərçivəsi dən rəsmi Microsoft veb saytı.
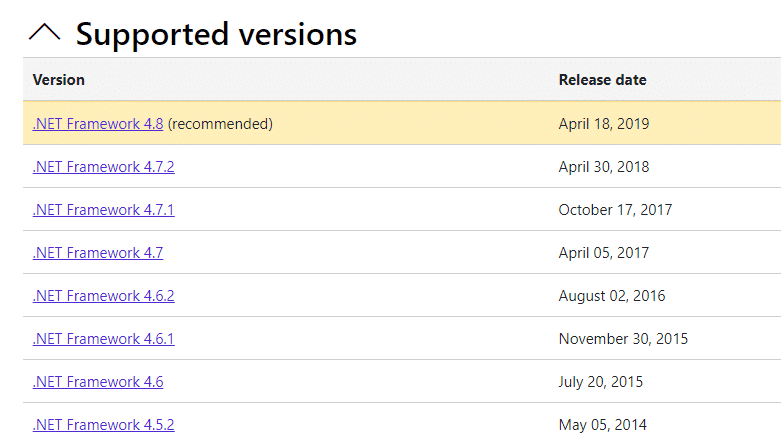
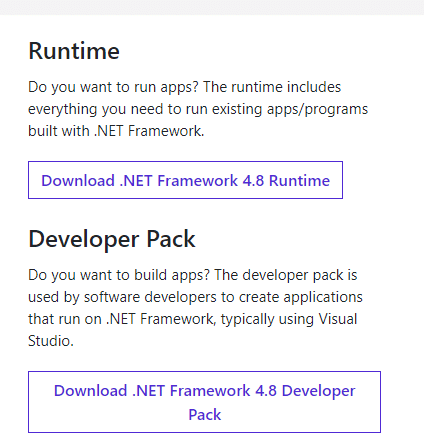
2. Əgər hər hansı yeniləmə varsa, müvafiq/tövsiyə keçid edin və vurun .NET Framework 4.8 Runtime proqramını yükləyin seçin.
Qeyd: klik etməyin .NET Framework 4.8 Developer Paketini endirin proqram tərtibatçıları tərəfindən istifadə edildiyi üçün.
3. Getmək Yükləmələrim, Yüklənmiş faylı işə salmaq üçün quraşdırma faylına iki dəfə klikləyin və izləyin ekrandakı təlimatlar .NET çərçivəsini Windows PC-də uğurla quraşdırmaq üçün. Bitdikdən sonra müzakirə olunan problemi həll edib-etmədiyinizi yoxlayın.
Metod 10: DirectX-i yeniləyin
To enjoy a seamless multimedia experience on MultiVersus, you have to make sure whether DirectX is installed, and it is updated to its latest version. DirectX helps you improve the visual media experience for graphical games and applications especially. It is worth updating DirectX needed for this game.
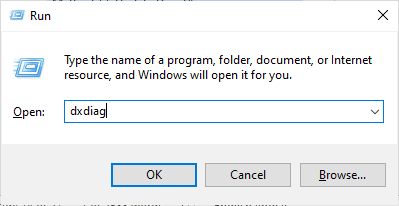
1. vurun Windows + R düymələri eyni vaxtda işə salmaq üçün qaçış dialoq qutusu.
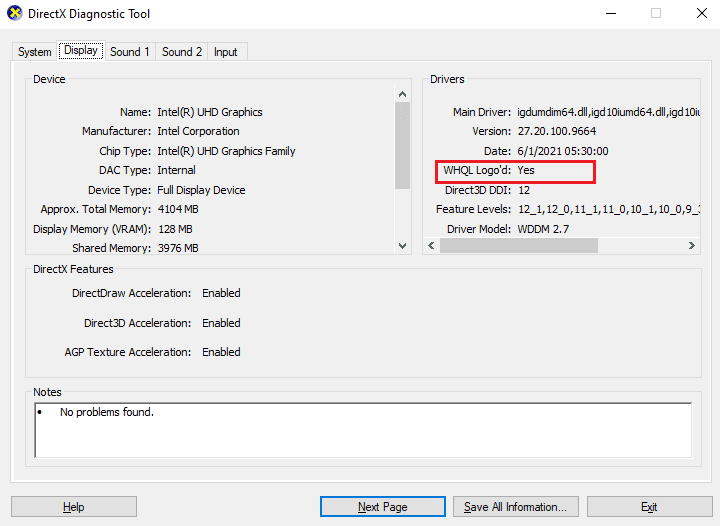
2. Tipi dxdiag və basın Enter düyməsini vurun açmaq DirectX Diaqnostik Alət.
3. yoxlayın DirectX versiyası, if it contains DirectX 12 və ya deyil.
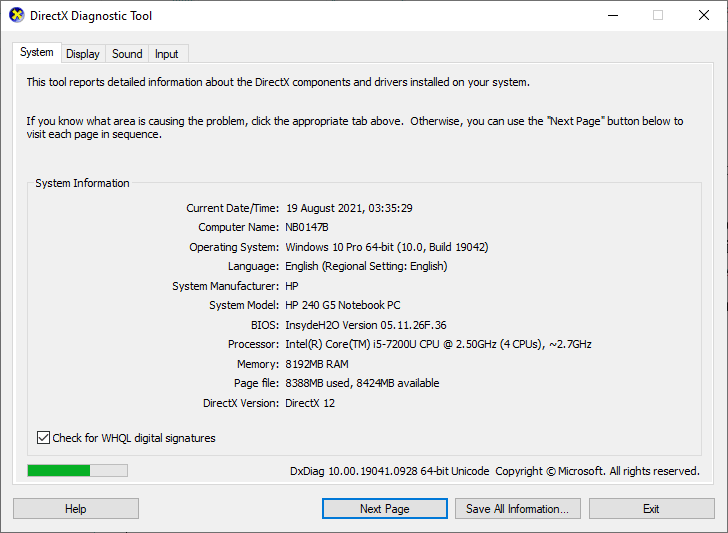
4. Sisteminizdə DirectX 12 yoxdursa, onu buradan endirin və quraşdırın DirectX yükləmə səhifəsi ekrandakı təlimatlara əməl etməklə.
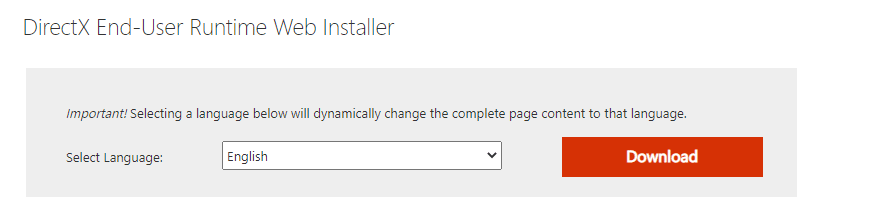
After installing DirectX, check if the issue occurs again.
Qeyd: Təmin etmək WHQL rəqəmsal imzalarını yoxlayın qutusu yoxlanılır Sistem nişanı və bütün tablarda olub olmadığını yoxlayın WHQL Giriş təyin olun bəli.
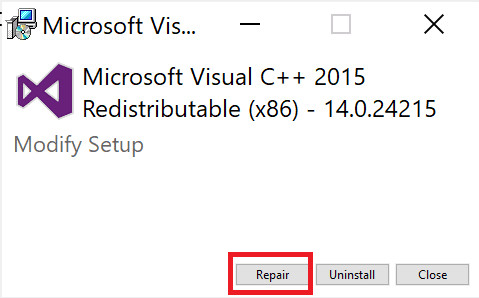
Metod 11: Microsoft Visual C++ Redistributable təmirini bərpa edin
Alternately, you can try to repair the Microsoft Visual C++ Redistributable packages to fix MultiVersus not launching issue as follows:
1. vurun Windows açarı, növü Tətbiqlər və xüsusiyyətlərsonra basın açıq.
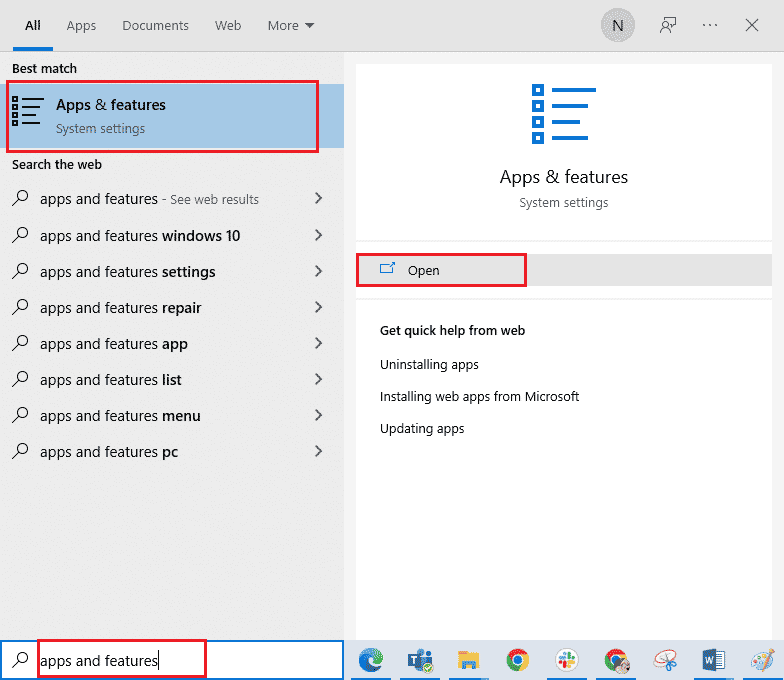
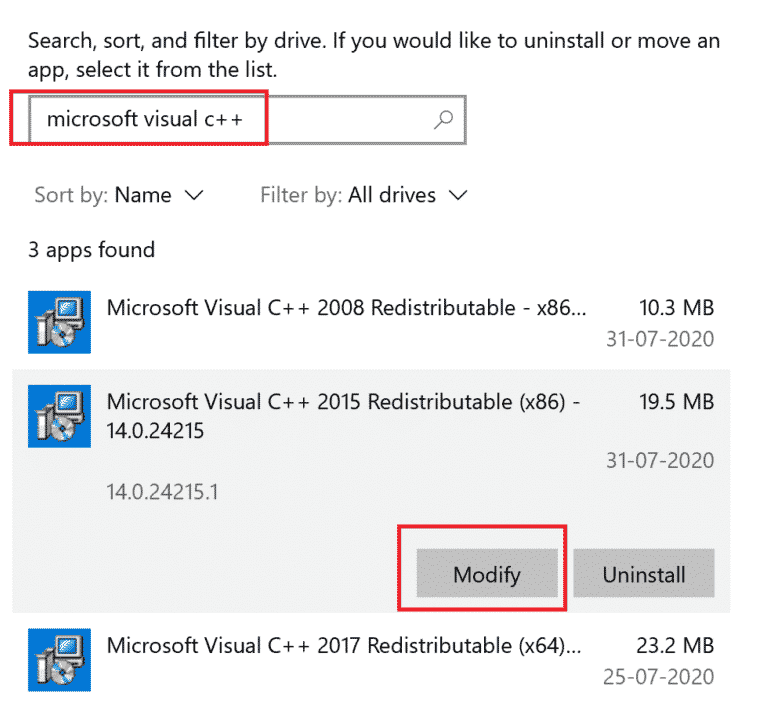
2. Axtarış Microsoft Visual C ++ Yenidən Dağıtılabilir paketi.
3. Then, select the package, and click on Düzelt seçin.
4. Sonra klikləyin bəli üzrə İstifadəçi Hesabının İdarəsi dialoq qutusu.
5. In the pop-up window that appears, click on təmir. Prosesin bitməsini gözləyin.
6. Repeat the above steps to modify all the Microsoft Visual C++ Redistributable packages.
7. Nəhayət, kompüteri yenidən başladın.
Əvvəllər aça bilmədiyiniz proqramı açın. Əgər bu işə yaramadısa, əvəzində yenidən paylana bilən C++ proqramını yenidən quraşdırmağa cəhd edin.
Həm də oxuyun: Microsoft Visual C++ 2015 Yenidən Paylanan Quraşdırma Xətası 0x80240017 Düzelt
Metod 12: Microsoft Visual C++ Redistributable proqramını yenidən quraşdırın
If the previous method of repairing the Microsoft C++ Visual Redistributable did not fix MultiVersus won’t launch issue, then you will have to reinstall the redistributable. Follow the given steps to uninstall & then install these again.
1. açın Tətbiqlər və xüsusiyyətlər sistem parametrləri.
2. Seçin Microsoft Visual C ++ Yenidən Dağıtılabilir package, then click on Uninstall seçin.
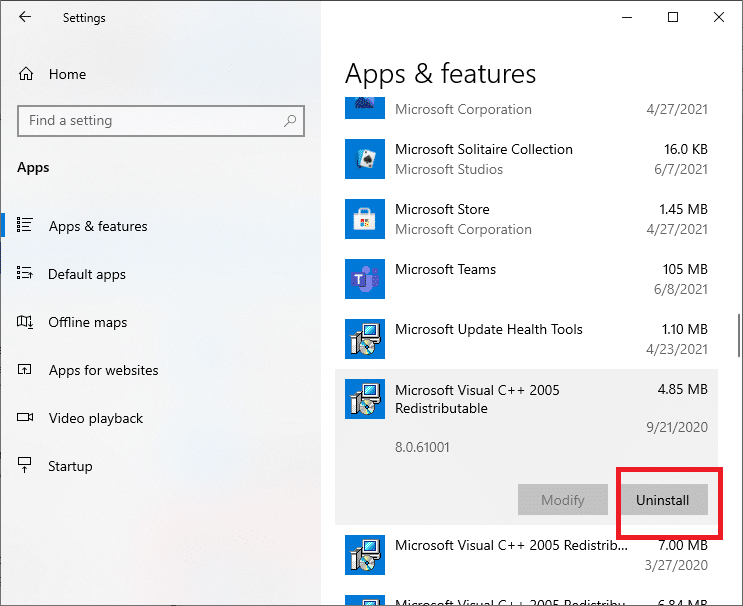
3. Basın Uninstall option again to confirm and remove the package.
Qeyd: Make sure to uninstall all the Microsoft Visual C++ Redistributable packages.
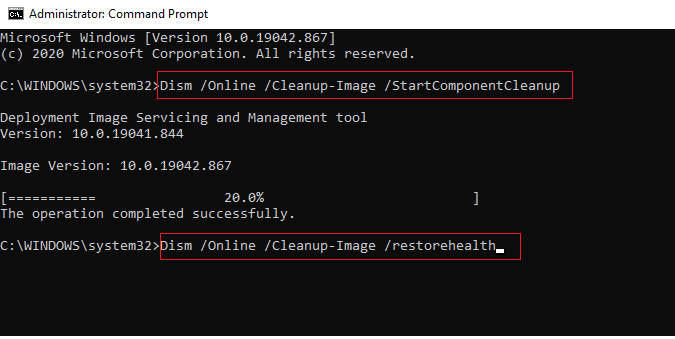
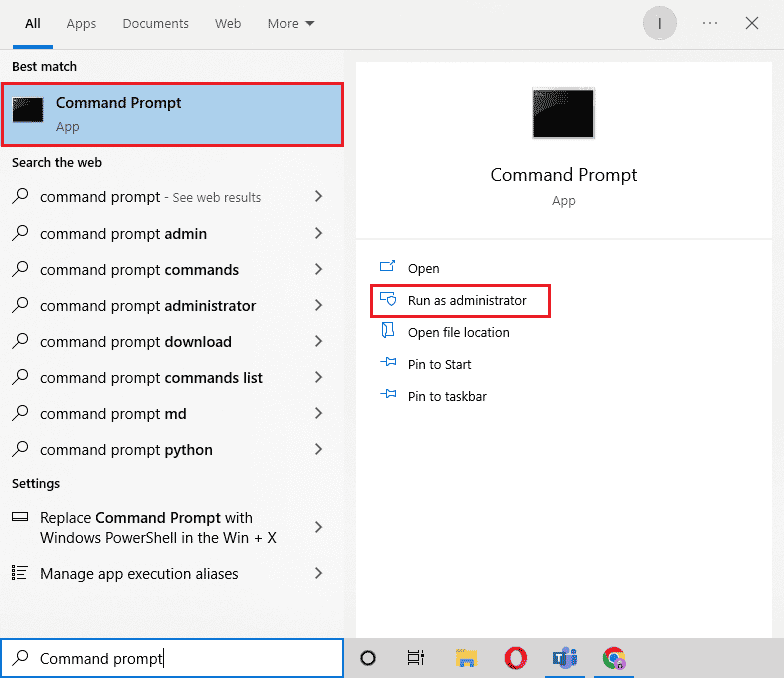
4. vurun Windows açarı, növü Command Promptsonra basın Administrator olaraq işləyin.
5. Aşağıdakıları yazın əmrləri və mətbuat Daxil edin açar hər birindən sonra:
DISM /online /Cleanup-Image /StartComponentCleanup
DISM /online /Cleanup-Image /RestoreHealth
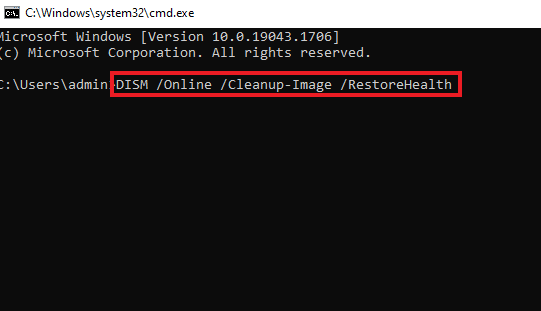
6. Proses başa çatdıqdan sonra, kompüteri yenidən başladın.
7. Sonra, ziyarət edin Microsoft Visual C++ Redistributable webpage to download the latest C++ package as shown here.
8. Once downloaded, open the yüklənmiş fayl by double-clicking on it in Yükləmələrim. Quraşdırın the package by following the on-screen instructions.
9. Once the installation is complete, finally kompüteri yenidən başladın.
Tövsiyə edilir:
Ümid edirik ki, bu bələdçi faydalı oldu və siz düzəldə bilərsiniz MultiVersus not launching issue on your Windows 10 PC. Let us know which method worked for you the best. Feel free to reach out to us with your queries and suggestions via the comments section below.