Fix Computer does not start until restarted multiple times

Fix Computer does not start until restarted multiple times: There seems to be a new issue with PC users, which is when they first turn ON their PC the power comes ON, fans start to spin but everything suddenly stops and PC never gets a display, in short, PC automatically turned OFF without any warning. Now if the user, powers off the PC and then turned it back ON, the computer boots normally without any additional issues. Basically, Computer does not start until restarted multiple times which is very annoying for basic Windows users.
Sometimes you need to boot up to 4-5 time before you could see the display or even boot your PC, but there is no guarantee that it will boot. Now living in this uncertainty, that you may or may not be able to use your PC next day is not such a good thing, so you need to address this problem immediately.
Now there are only a few issues which can cause this problem, so you can definitely troubleshoot this issue easily. The problem sometimes can be related to software like the main culprit seems to be Fast Startup in many cases and disabling it seems to fix the issue. But if this doesn’t fix the issue then you can be sure that the issue is related to hardware. In hardware, this can be a memory issue, faulty power supply, BIOS Settings or CMOS battery dried up, etc. So without wasting any time let’s see how to Fix Computer does not start until restarted multiple times with the help of the below-listed guide.
Fix Computer does not start until restarted multiple times
Не забравяйте да създадете точка за възстановяване, в случай че нещо се обърка.
Забележка: Some of the methods require expert supervision as you can seriously damage your PC while performing the steps, so if you don’t know what you’re doing then take your laptop/PC to a service repair center. If your PC is under warranty then opening the case can temper/void the warranty.
Метод 1: Изключете бързото стартиране
1. Натиснете клавиша Windows + R, след това въведете control и натиснете Enter, за да отворите Control Panel.

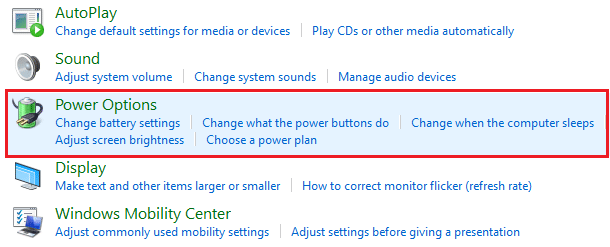
2.Кликнете върху Хардуер и звук след това кликнете върху Опции за енергия.
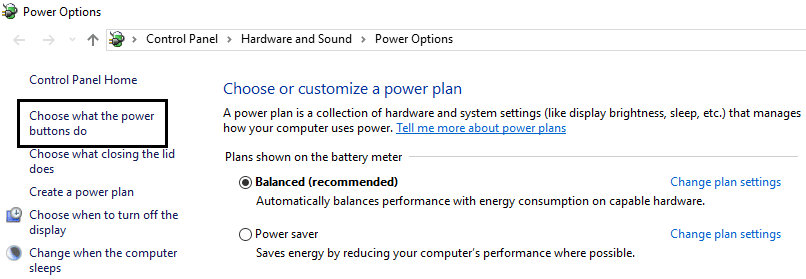
3. След това от левия панел на прозореца изберете „Изберете какво правят бутоните за захранване."
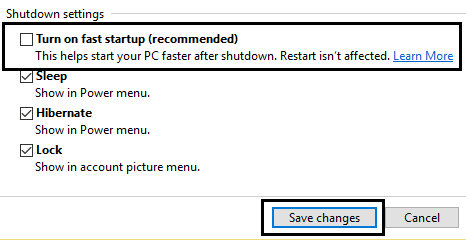
4. Сега щракнете върху „Променете настройките, които понастоящем не са налице."

5. Премахнете отметката от „Включете бързо стартиране” и щракнете върху Запазване на промените.
Метод 2: Стартирайте Automatic Repair
1.Поставете стартиращия инсталационен DVD на Windows 10 и рестартирайте компютъра си.
2.When prompted to Натиснете произволен клавиш за да стартирате от CD или DVD, натиснете произволен клавиш, за да продължите.

3. Изберете езиковите си предпочитания и щракнете върху Напред. Щракнете върху Ремонт вашия компютър в долния ляв ъгъл.

4.На екрана за избор на опция щракнете Отстраняване на неизправности.

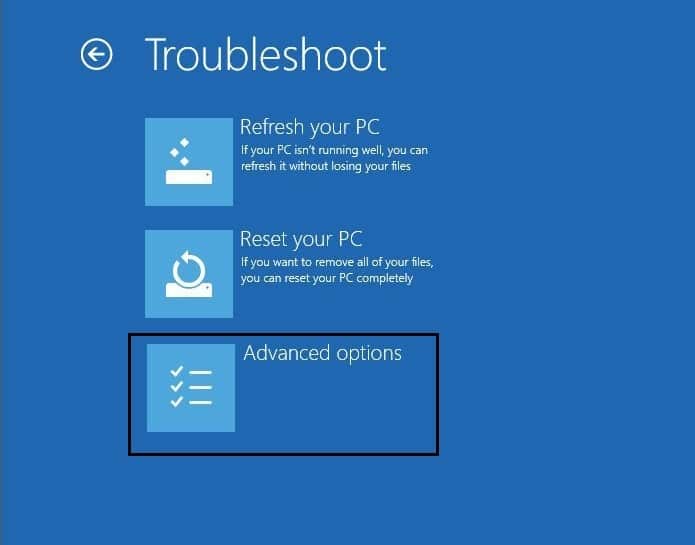
5. На екрана за отстраняване на неизправности щракнете Разширена опция.
6. На екрана с разширени опции щракнете Автоматична поправка или поправка при стартиране.
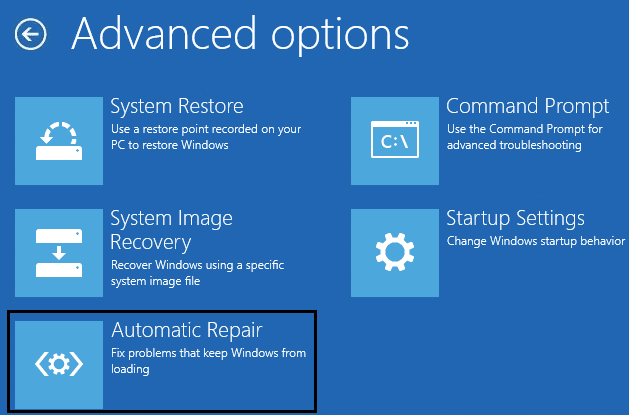
7.Изчакайте до Автоматични/поправки при стартиране на Windows пълна.
8. Рестартирайте и сте успешни Fix Computer does not start until restarted multiple times issue, ако не, продължете.
Също така, прочетете Как да коригирате Автоматичната поправка не можа да поправи вашия компютър.
Метод 3: Нулирайте BIOS до настройките по подразбиране
1. Изключете лаптопа си, след това го включете и едновременно натиснете F2, DEL или F12 (в зависимост от вашия производител), за да влезете в настройка на BIOS.

2. Сега ще трябва да намерите опцията за нулиране заредете конфигурацията по подразбиране и може да се наименува като Нулиране по подразбиране, Зареждане на фабричните настройки по подразбиране, Изчистване на настройките на BIOS, Зареждане на настройките по подразбиране или нещо подобно.

3. Изберете го с клавишите със стрелки, натиснете Enter и потвърдете операцията. Вашият BIOS сега ще използва своя настройките по подразбиране.
4.Once you’re logged into Windows see if you’re able to Fix Computer does not start until restarted multiple times issue.
Method 4: Check if hard disk is failing
In many cases, the issue occurs because of the failing hard disk and to check if this is the problem here you need to disconnect the hard disk from your PC and connect it to another PC and try to boot from it. If you can boot from the hard disk without any issue on the other PC then you can be sure that the issue is not related to it.
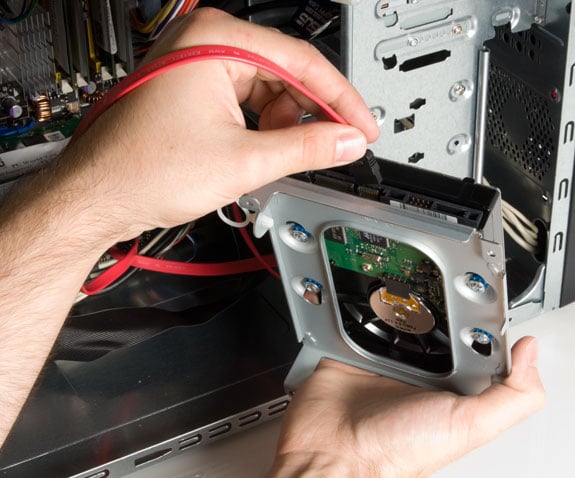
Another way to test your hard disk is download and burn the SeaTools for DOS on a CD then run the test to check if your hard disk is failing or not. You will need to set the first boot to CD/DVD from BIOS in order for this to work.
Метод 5: Проверка на захранването
A faulty or failing Power Supply is generally the cause for PC not starting at the first boot. Because if the power consumption of hard disk is not met, it won’t get enough power to run and subsequently you may need to restart the PC several times before it can take the adequate power from PSU. In this case, you may need to replace the power supply with a new one or you could borrow a spare power supply to test if this is the case here.
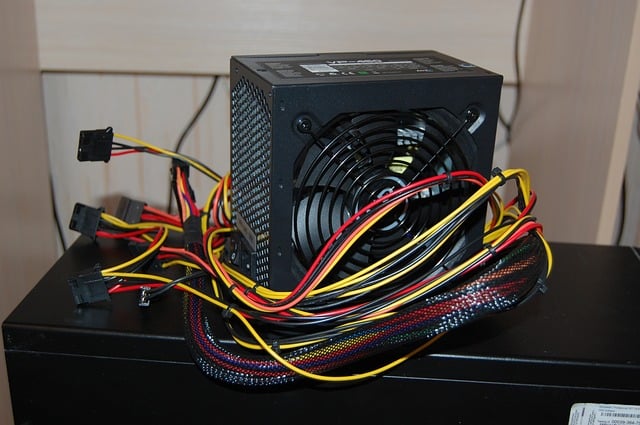
If you have recently installed a new hardware such as video card then chances are the PSU is not able to deliver the necessary power needed by the graphic card. Just temporary remove the hardware and see if this fixes the issue. If the issue is resolved then in order to use the graphic card you may need to purchase a higher voltage Power Supply Unit.
Method 6: Replace CMOS battery
If CMOS battery has dried up or no longer deliver powers then your PC won’t start and after few days it will eventually start hanging up. In order to fix the issue, it’s advised to replace your CMOS battery.
Метод 7: Нулиране на ATX
Забележка: Този процес обикновено се прилага за лаптопи, така че ако имате компютър, оставете този метод.
1.Power off your laptop then remove the power cord, leave it for few minutes.
2.Сега извадете батерията отзад и натиснете и задръжте бутона за захранване за 15-20 секунди.
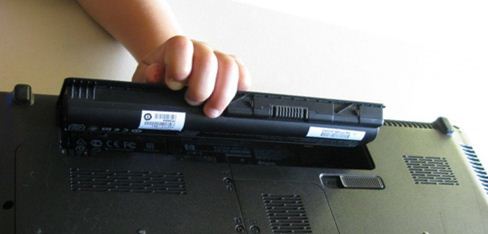
Забележка: Все още не свързвайте захранващия кабел, ние ще ви кажем кога да го направите.
3.Now plug in вашия захранващ кабел (батерията не трябва да се поставя) и се опитвате да стартирате вашия лаптоп.
4.If it’s boot properly then again turn off your laptop. Put in the battery and again start your laptop.
If the problem is still there again turn off your laptop, remove power cord & battery. Press & hold the power button for 15-20 seconds and then insert the battery. Power on the laptop and this should fix the issue.
Now if any of the above methods weren’t helpful then it means the problem is with your motherboard and unfortunately, you need to replace it in order to fix the issue.
Препоръчва се:
Това е, което имате успешно Fix Computer does not start until restarted multiple times issue но ако все още имате някакви въпроси относно това ръководство, не се колебайте да ги зададете в секцията за коментари.