Възстановете кеша на шрифтовете в Windows 10

Font Cache works the same way as Icon Cache, and Windows operating system creates a cache for fonts to load them faster and to display them to the interface of the app, Explorer etc. If for some reason the font cache is corrupted then the fonts may not appear properly, or it starts displaying invalid font characters in Windows 10. To resolve this issue, you need to rebuild the font cache, and in this post, we will see how to do that.
The font cache file is stored in the Windows folders: C:WindowsServiceProfilesLocalServiceAppDataLocalFontCache, If you are trying to access this folder then you won’t be able to do that directly as Windows protect this folder. Font’s are cached in more than one files in the above folder. Anyway, without wasting any time, let’s see How to Rebuild Font Cache in Windows 10 with the help of the below-listed tutorial.
Възстановете кеша на шрифтовете в Windows 10
Не забравяйте да създадете точка за възстановяване, в случай че нещо се обърка.
Метод 1: Ръчно възстановяване на кеша на шрифтове в Windows 10
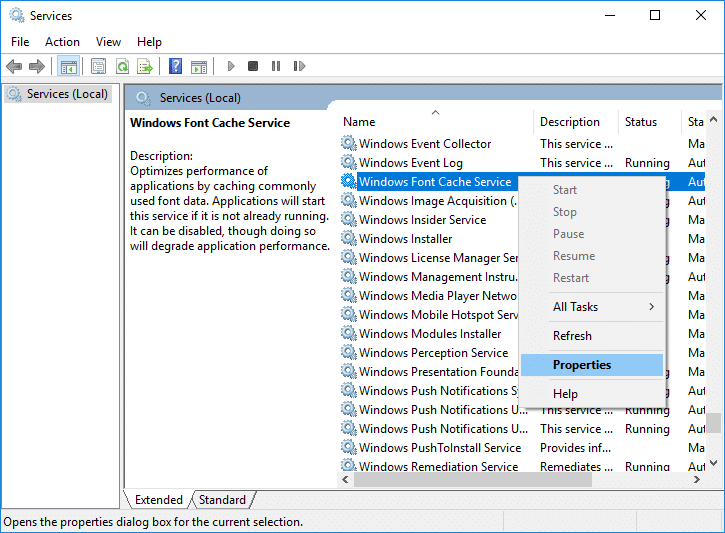
1. Натиснете клавиша Windows + R, след което въведете services.msc и натиснете Enter.

2. Превъртете надолу, докато намерите „Windows Font Cache service” in the services window.
Забележка: Press W key on the keyboard to locate the Windows Font Cache service.
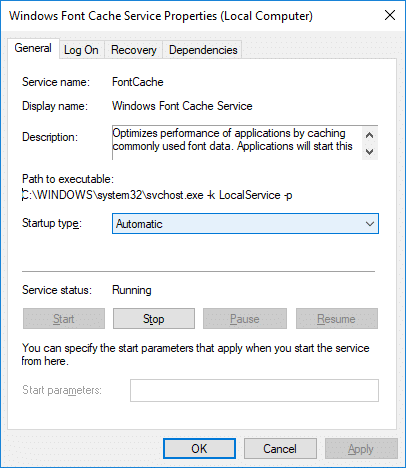
3. Right-click on Window Font Cache Service след това избира Properties.
4. Make sure to click on Спиране след това задайте Startup тип as Хора с увреждания.
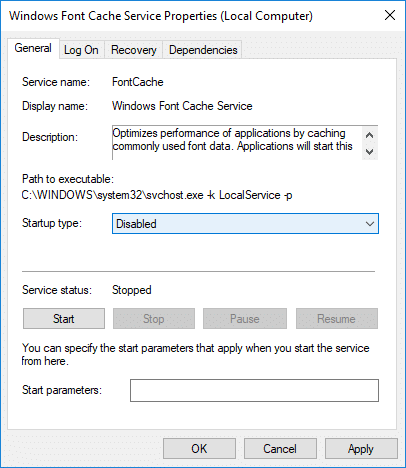
5. Щракнете върху Прилагане, последвано от OK.
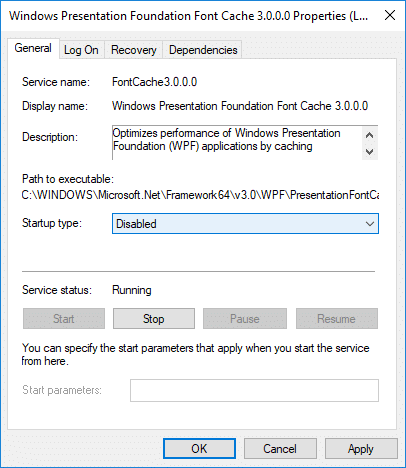
6. Do the same (Follow the steps 3 to 5) for Windows Presentation Foundation Font Cache 3.0.0.0.
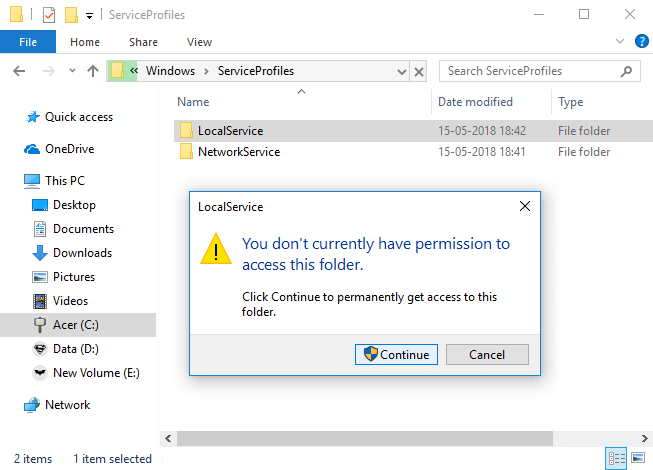
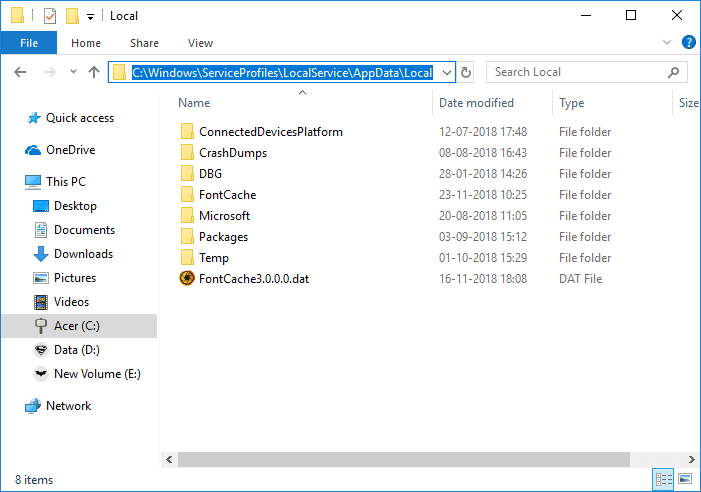
7. Now navigate to the following folder by going to one folder at a time:
C:WindowsServiceProfilesLocalServiceAppDataLocal
Забележка: Do not copy and paste the above path as certain directories are protected by Windows. You need to manually double-click on each of the above folders and click Продължете to access the above folders.
8. Now once inside the Local folder, delete all the files with the name FontCache and .dat as the extension.
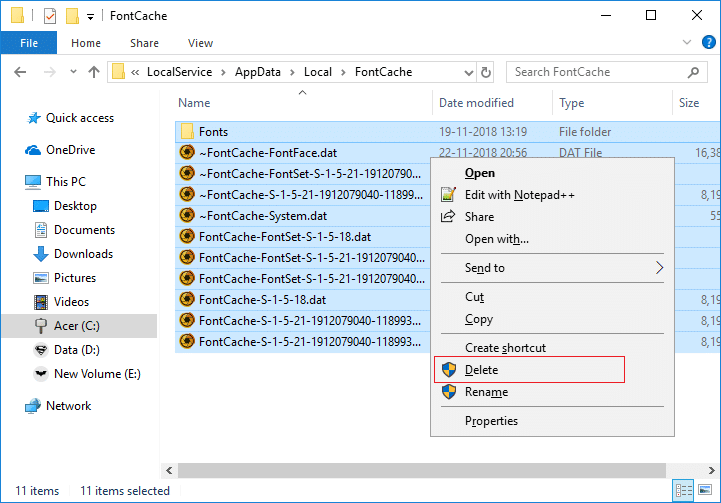
9. След това щракнете двукратно върху FontCache папка и delete all of its content.
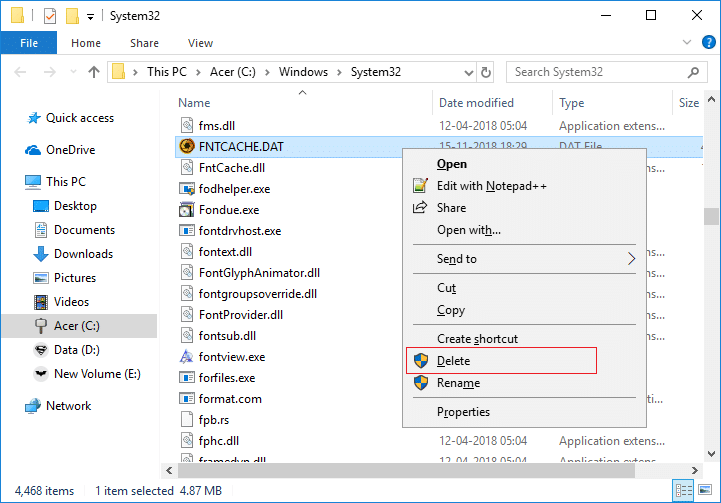
10. You need to also delete the file FNTCACHE.DAT от следната директория:
C: WindowsSystem32
11. Once done, reboot your PC to save changes.
12. After the reboot, make sure to start the following services and set their startup type as Automatic:
Windows Font Cache Service
Кеш за шрифтове на Windows Presentation Foundation 3.0.0.0
13. Това ще бъде успешно Rebuild Font Cache in Windows 10.
If you still see the invalid characters after restarting, you need to repair your Windows 10 using DISM.
Method 2: Rebuild Font Cache in Windows 10 using the BAT file
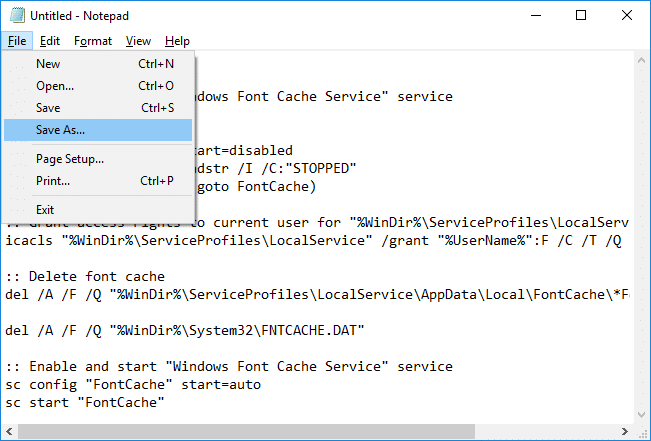
1.Open Notepad then copy & paste the following:
@echo off

:: Stop and disable "Windows Font Cache Service" service
:FontCache
sc stop "FontCache"
sc config "FontCache" start=disabled
sc query FontCache | findstr /I /C:"STOPPED"
if not %errorlevel%==0 (goto FontCache)

:: Grant access rights to current user for "%WinDir%ServiceProfilesLocalService" folder and contents
icacls "%WinDir%ServiceProfilesLocalService" /grant "%UserName%":F /C /T /Q

:: Delete font cache
del /A /F /Q "%WinDir%ServiceProfilesLocalServiceAppDataLocalFontCache*FontCache*"

del /A /F /Q "%WinDir%System32FNTCACHE.DAT"

:: Enable and start "Windows Font Cache Service" service
sc config "FontCache" start=auto
sc start "FontCache"
2.Now from Notepad menu click on досие след това щракнете върху Запази като.
3. From Save as type drop-down select “Всички файлове” then under File name type Rebuild_FontCache.bat (Разширението .bat е много важно).
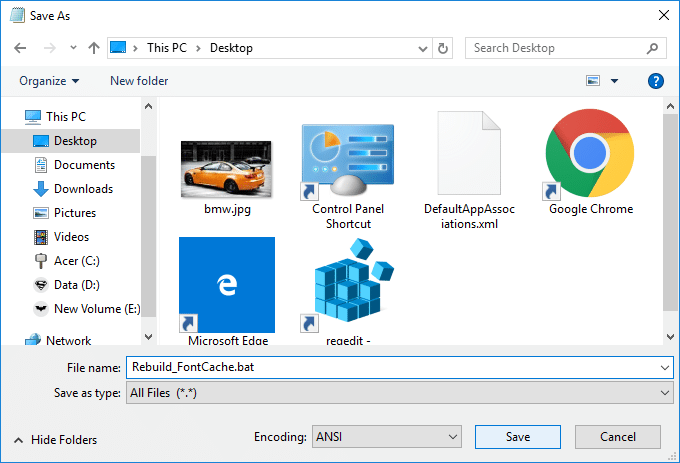
4. Make sure to navigate to desktop then click on Запазване.
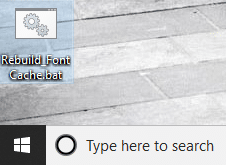
5. Щракнете двукратно върху Rebuild_FontCache.bat to run it and once done reboot your PC to save changes.
Препоръчва се:
Това е, успешно научихте How to Rebuild Font Cache in Windows 10 но ако все още имате въпроси относно този урок, не се колебайте да ги зададете в секцията за коментари.