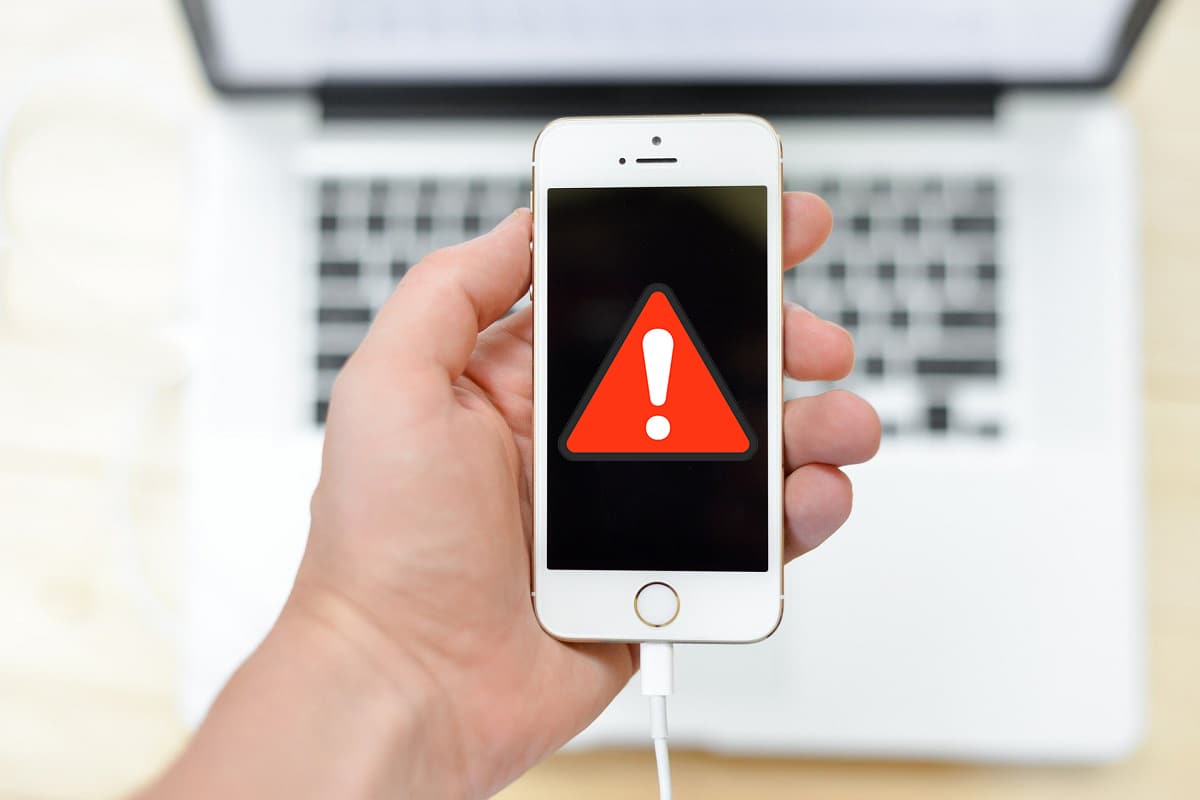
Fix Computer Not Recognizing iPhone

As an iOS user, you must be aware that you can’t download songs or videos on iPhones and iPads, without paying to do so. You need iTunes to transfer your favorite songs or videos to your iPhone and then, play these for free. Often, you connect your iOS device to a PC but, the computer not recognizing iPhone issue occurs. This can be caused either by a hardware defect or a software incompatibility. In this article, we have explained a few simple methods to fix iPhone not showing in my computer issue.
How to Fix iPhone Not Showing in My Computer Problem
Method 1: Perform Basic Checks
Let’s check why this error might occur and rectify hardware issues before moving onto software fixes.
- Examine Lightning cable – to check for damage. If it is damaged, try connecting your iPhone to your computer with a new/different one.
- Examine USB port – If the Lightning cable is in sound condition, link your iPhone to another USB port. Check to see if it’s recognized now.
- Disconnect, then Reconnect – Try to connect your iPhone to your computer after disconnecting it.
- Ponovo pokreni uređajima – If the problem persists, restart your iPhone and reboot your computer to solve minor issues. Then, reconnect your iPhone.
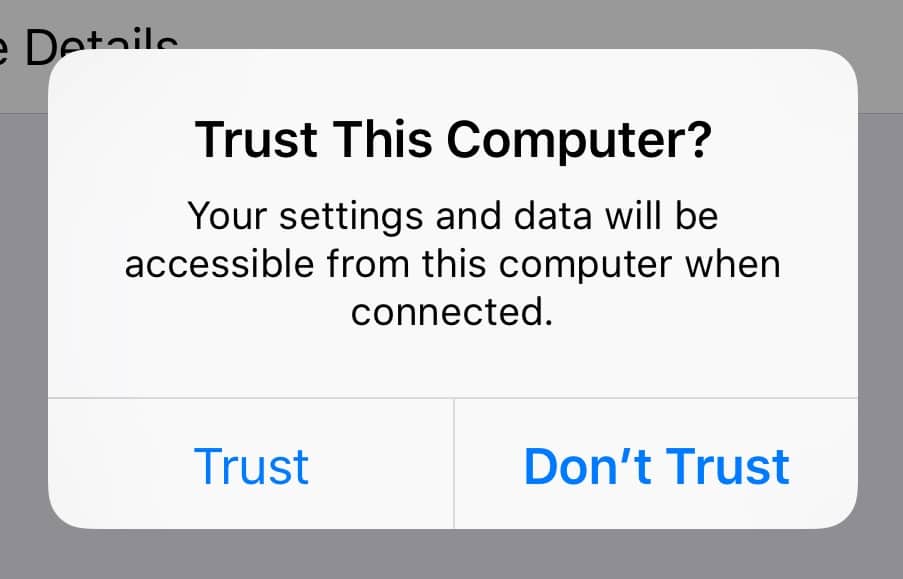
- Unlock your iOS device – Before you attach your iPhone/iPad to your PC, make sure it is unlocked.
- Verujte ovom računaru – When you pair your iPhone to any computer for the first time, you need to tap Verujte ovom računaru kada se zatraži.
Method 2: Update iTunes App and Windows OS
This problem is most likely triggered by an out-of-date iTunes or Windows operating system. To resolve this problem, upgrade iTunes to the most recent version and then, run a Windows update.
- If your desktop is currently operating on Windows 10, iTunes will automatically upgrade itself whenever a new version is available.
- If you have Windows 7 or Windows 8, or Windows 8.1 computer, update iTunes and Windows by following the steps listed below.
1. Preuzmite i instalirajte iTunes for your Windows PC. Then, launch the iTunes app.
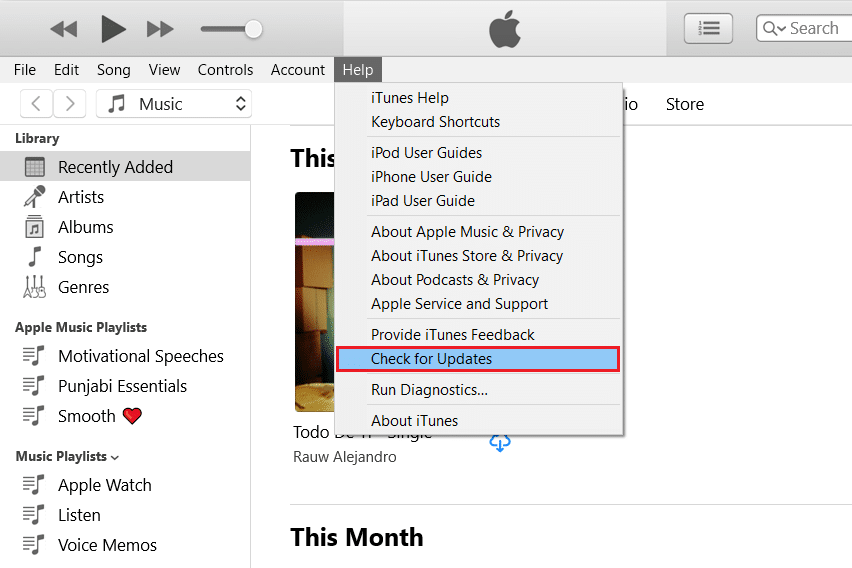
2. klik Proverite ažuriranja iz Meni pomoći, kao što je ilustrovano u nastavku.
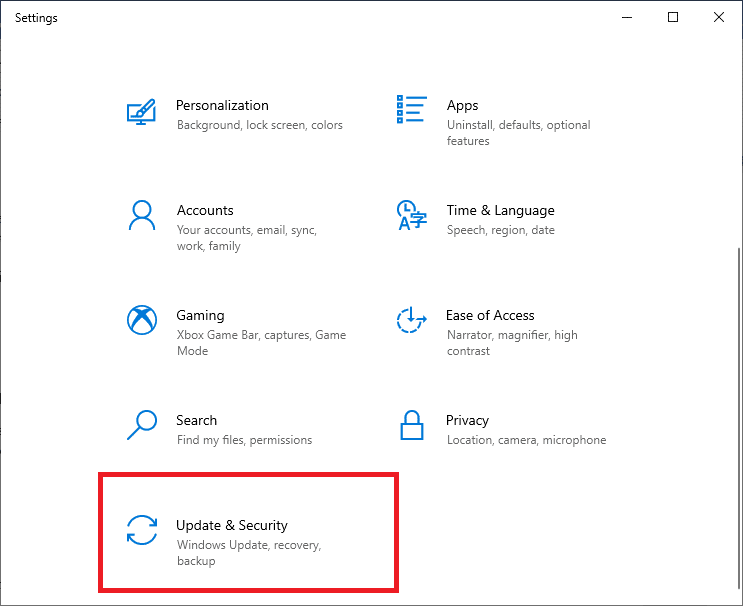
3. After upgrading iTunes to the newest edition, go to Postavke> Ažuriranje i sigurnost, kao što je prikazano.
4. Search for available updates by clicking on Proverite ažuriranja, kao što je prikazano.
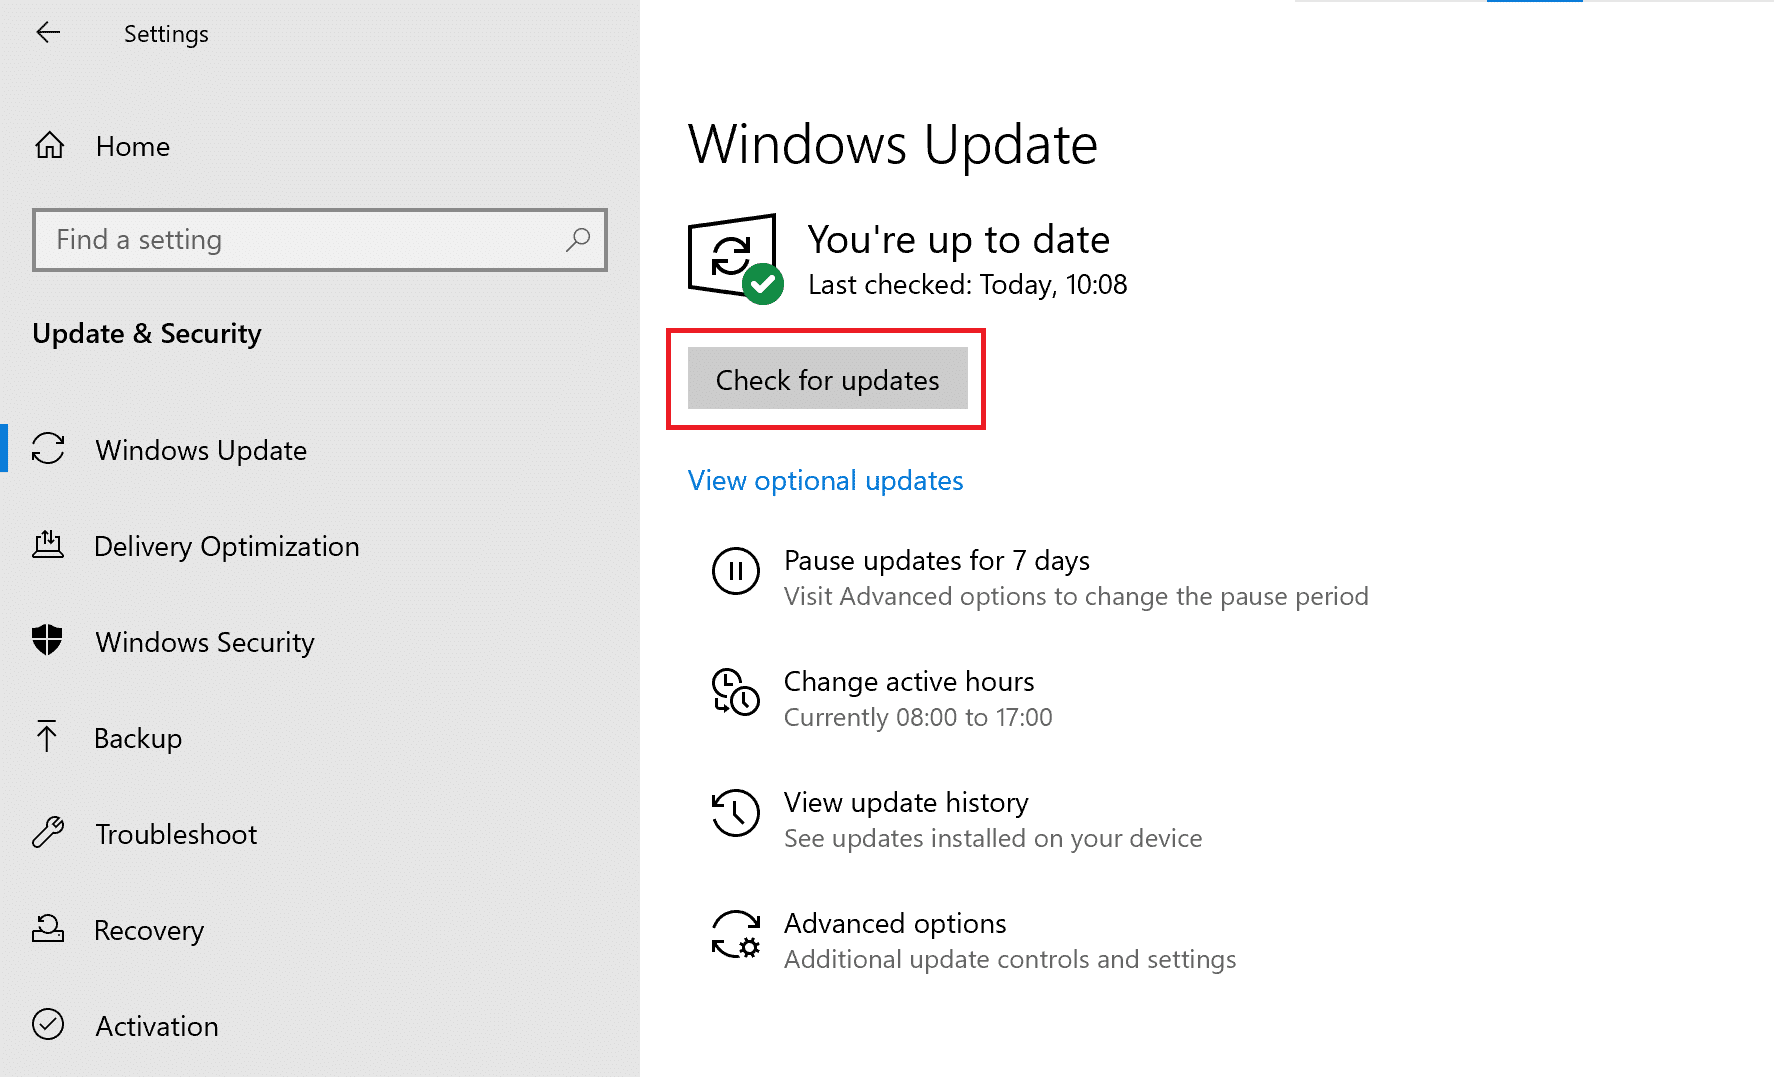
5. If any updates are available, install them and restart your PC.
Then, connect your iPhone to your Windows computer to verify if iPhone not showing in my computer issue is resolved.
Takođe pročitajte: Popravite Windows 10 koji ne prepoznaje iPhone
Method 3: Update Apple iPhone Driver
It is possible that your computer is utilizing an obsolete device driver. Hence, to fix the computer not recognizing iPhone issue, try updating the Apple iPhone driver as:
1. Idite na Početni ekran na vašem iPhone-u.
2. spojiti your iPhone to your Windows PC.
3. Exit iTunes, if it pops up.
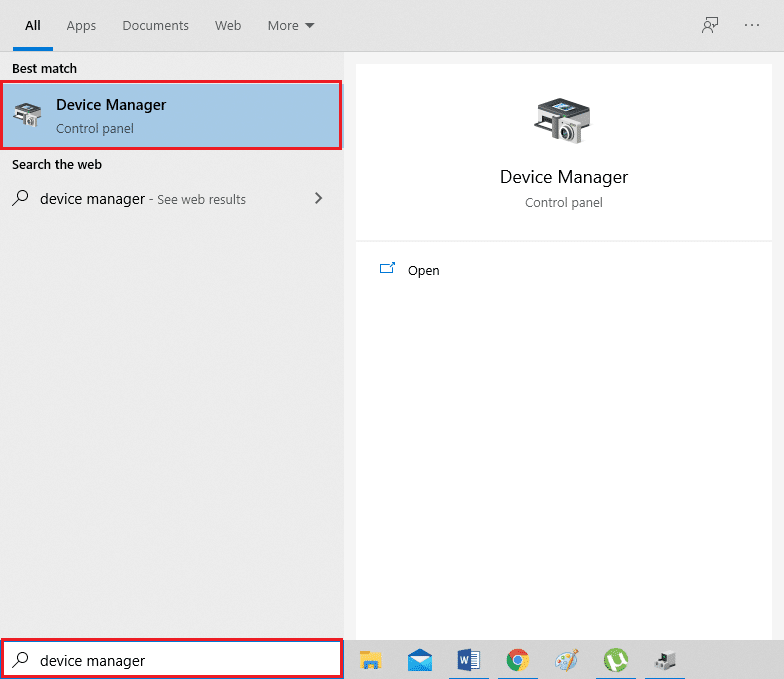
4. Pokretanje Menadžer uređaja tražeći ga u Windows pretraga box.
5. Here, double click on Prijenosni uređaji da ga proširite.
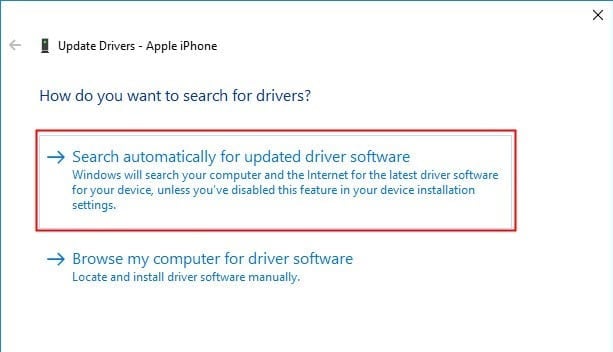
6. klik Update driver i.e. the first option from the menu that appears when you right-click on Apple iPhone.
7. Izaberite Traži automatski ažurirani softver za drajver and then, follow the on-screen instructions.
8. Pokretanje iTunes and link your iPhone to the computer.
If this doesn’t help solve the computer not recognizing iPhone issue, we will reinstall the drivers in the next method.
Method 4: Reinstall Apple Mobile Driver (For iTunes installed from App Store)
When your computer does not recognize/remember your iPhone, you should try reinstalling the Apple Mobile Device USB driver. If you installed iTunes from Apple official website, you could install the Apple Mobile Device USB driver again by following the steps listed below:
1. Idite na Početni ekran na vašem iPhone-u.
2. spojiti your iPhone to your Windows PC.
3. Izađite iz iTunes-a if it is pops-up.
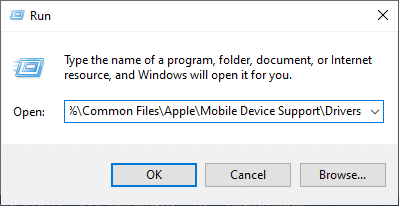
4. Pokrenite trčanje dialogue box by pressing Windows + R tasteri u isto vrijeme.
5. Type the given navigation path and click OK, kao što je prikazano.
% ProgramFiles% Common FilesAppleMobile Device SupportDrivers
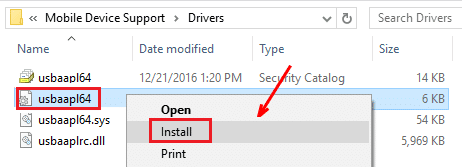
6. Desni klik na usbaapl64.inf or usbaapl.inf file in the pop-up window and click Instaliraj, kao što je prikazano u nastavku.
7. Disconnect your iPhone from your computer and Restart računaru.
8. Konačno, spojiti the iPhone and launch iTunes.
Takođe pročitajte: Popravi Datoteka iTunes Library.itl se ne može pročitati
Method 5: Reinstall Apple Mobile Driver (For iTunes installed from Microsoft Store)
Alternately, you can reinstall drivers to fix computer not recognizing iPhone errors on Windows 10 PC, kao što slijedi:
1. Type, search and open Menadžer uređaja, as instructed in Način 3.
2. Dvaput kliknite na Prijenosni uređaji da ga proširite.
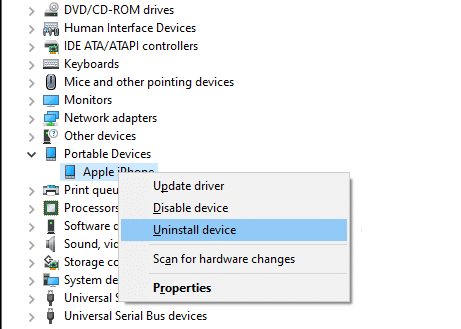
3. Desnom tipkom miša kliknite iOS uređaj i kliknite Uninstall uređaj, kao što je prikazano u nastavku.
4. Reboot the system. Now, reconnect your iPhone and allow Windows to install Apple drivers automatically.
5. If you face difficulties, then use Steps 3-5 of Method 2 to update Windows and consequently, install & update iPhone drivers on your Windows 10 laptop/desktop.
Method 6: Restart Apple Mobile Device Service
If the Apple Mobile Device Service is not installed on your computer, your iPhone will not connect to it. So, ensure that the said service is installed. If your iPhone continues to be unrecognized by your computer, restart Apple Mobile Device Service. If your computer runs on the operating system Windows 7/8/8.1, follow the given steps to restart Apple Mobile Device Service:
1. Close iTunes i isključi your iPhone from the computer.
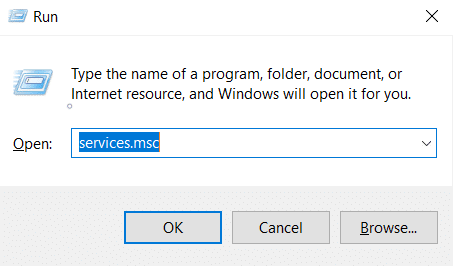
2. To open the Run dialogue box, press the Windows + R tasteri simultaneously from your keyboard.
3. Evo, otkucajte services.msc i pogodi ući.
4. Desni klik na Usluga Apple Mobile Device i izaberite svojstva.
5. Izaberite automatski kao Tip pokretanja.
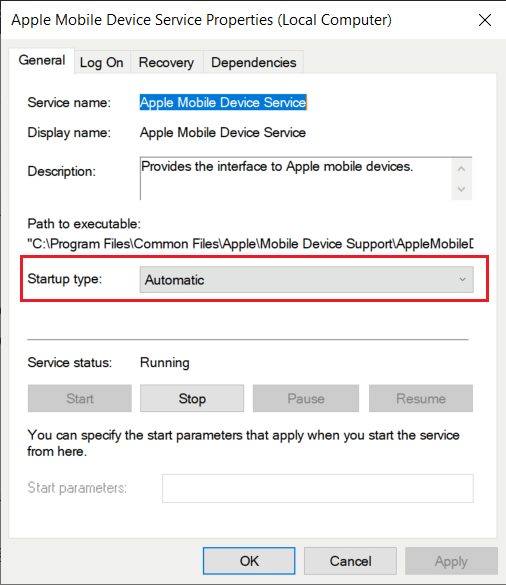
6. klik Stop to terminate the operation.
7. Once the operation has been halted, click start to restart it. Then, click on the OK dugme.
8. Reboot your Windows computer. Link your iPhone to your device using iTunes.
Takođe pročitajte: Popravite Android telefon koji nije prepoznat na Windows 10
How do I avoid iPhone not showing in my computer?
When connecting your iPhone to the Windows system for the first time, you can utilize the AutoPlay feature and easily avoid the computer not recognizing iPhone issue. Here are the steps to do the same:
1. spojiti your iPhone with your Windows 10 computer.
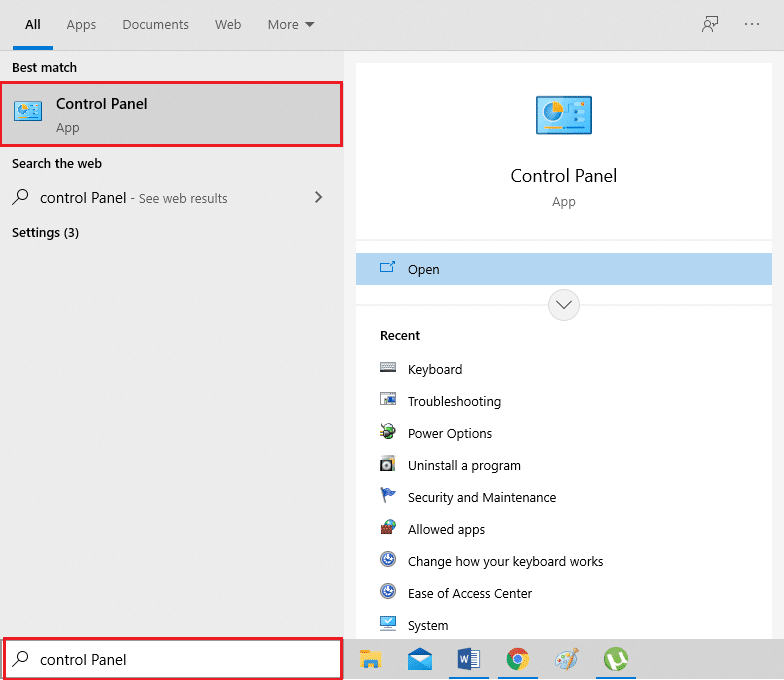
2. Pokretanje Kontrolna tabla by searching for it, as shown.
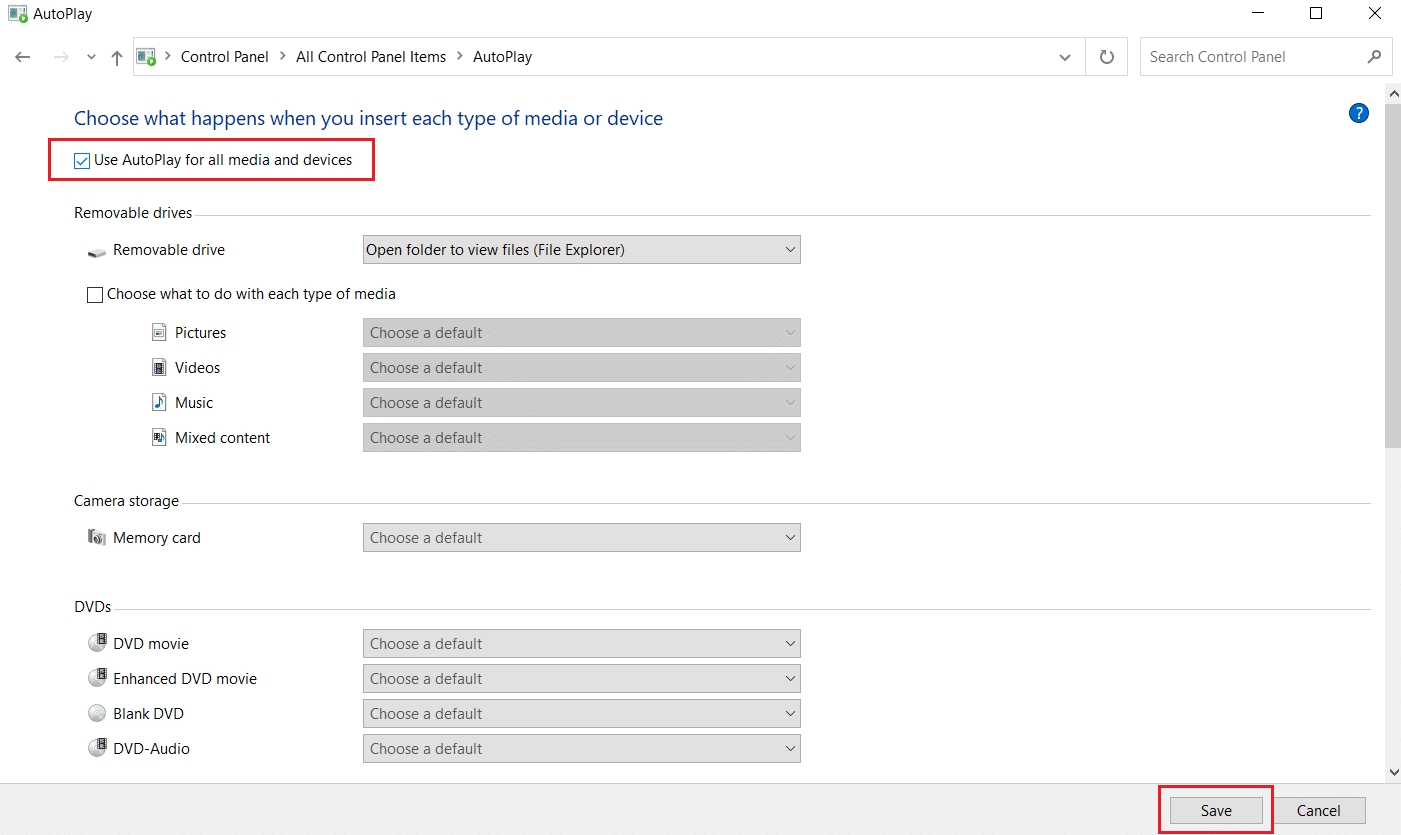
3. Izaberite View by > Small icons. Zatim kliknite na autoplay.
4. Označite polje pored Use Autoplay on both media and devices opcija. Kliknite Spremi. Refer highlighted section of the given pic.
5. Pronađite iPhone device and click on Ask me every time iz datog menija.
Preporučena:
Nadamo se da je ovaj vodič bio od pomoći i da ste bili u mogućnosti fix computer not recognizing iPhone issue using the given easy-to-understand methods. Let us know which method worked for you best. If you have any queries/comments regarding this article, then feel free to drop them in the comments section. For ore iPhone problem fixes, check out our other articles in the iOS category.