Fix MULTIPLE_IRP_COMPLETE_REQUESTS Error – TechCult

Fix MULTIPLE_IRP_COMPLETE_REQUESTS Error: If you are facing Multiple_IRP_Complete_Requests with a bug check value of 0x00000044 and a Blue Screen of Death then this indicates that a driver has tried to request an IRP (I/O request packet) be completed which is already complete, so it creates a conflict and thus the error message. So basically its a driver issue, where a driver attempts to complete its own packet twice.
The main problem is that two separate device drivers believe that they both own the packet and try to complete the package but only of them succeeds while the other one fails, resulting in MULTIPLE_IRP_COMPLETE_REQUESTS BSOD error. So without wasting any time let’s see How to Fix MULTIPLE_IRP_COMPLETE_REQUESTS Error with the help of below-listed troubleshooting guide.
Pro Tip: If you use any Virtual Drive software such as LogMeIn Hamachi, Daemon tools, then uninstall them and completely removing their drivers should help in fixing this issue.
Fix MULTIPLE_IRP_COMPLETE_REQUESTS Error
Obavezno kreirajte tačku vraćanja, za slučaj da nešto krene po zlu.
Method 1: Use Event Viewer
1. Pritisnite tipku Windows + R, a zatim otkucajte eventvwr.msc i pritisnite Enter da otvorite Event Viewer.
2.In the Event Viewer navigate to the following path:
Event Viewer (Local) > Windows Logs > System
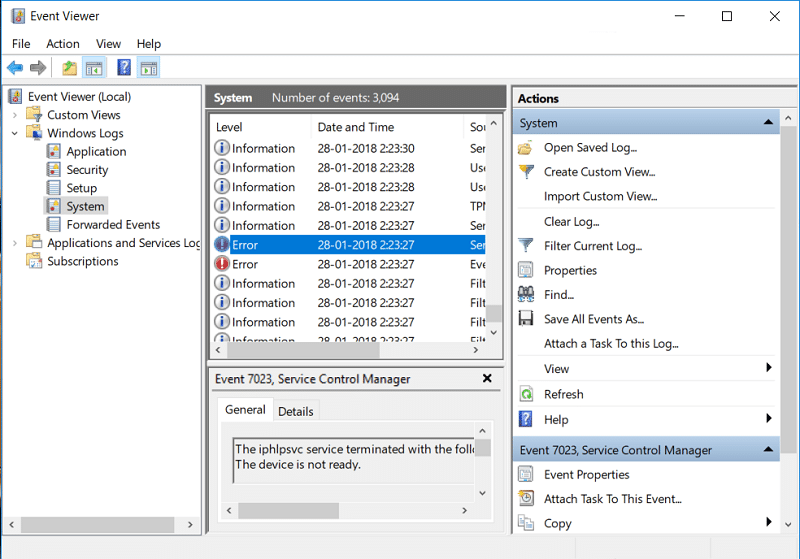
3.Look for Blue Screen of Death entry or MULTIPLE_IRP_COMPLETE_REQUESTS and check which driver has caused the error.
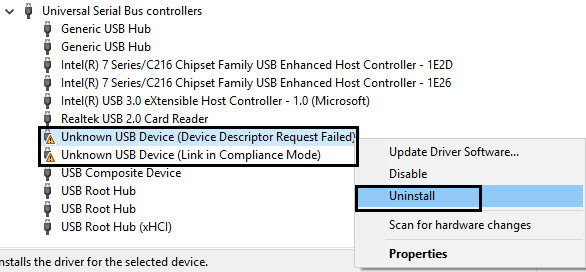
4.If you can find the problematic driver then press Windows Key + R then type devmgmt.msc i pritisnite Enter.

5.Right-click on the problematic device driver and select Deinstalirati.
6. Ponovo pokrenite računar da sačuvate promene i vidite da li ste u mogućnosti Fix MULTIPLE_IRP_COMPLETE_REQUESTS Error.
Takođe pročitajte: Popravite Hamachi VPN grešku u Windows 10
Method 2: Troubleshoot BSOD Error
1.Download BlueScreenView from here.
2.Extract or install the software according to your Windows architecture and double click on it to run the application.
3.Odaberite MULTIPLE_IRP_COMPLETE_REQUESTS (Bug Check String) and look for the “caused by driver".
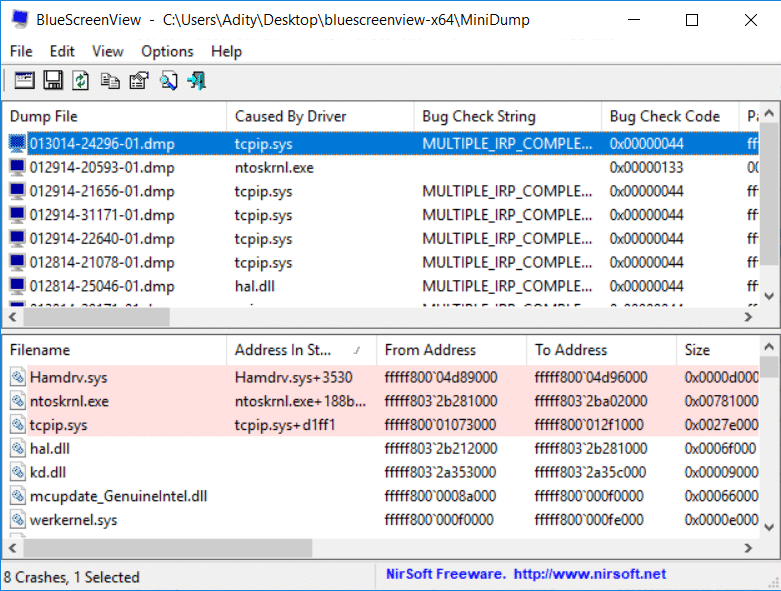
4.Google search the software or driver causing the issue and fix the underlying cause.
5.Download & Install the latest available drivers from the manufacturer’s website.
6.If this doesn’t fix the issue then try uninstalling the device drivers.
Method 3: Run System File Checker and DISM Tool
1. Pritisnite tipku Windows + X, a zatim kliknite na Komandni redak (Admin).

2. Sada upišite sljedeće u cmd i pritisnite enter:
Sfc /scannow sfc /scannow /offbootdir=c: /offwindir=c:windows (Ako gore ne uspije, pokušajte s ovim)

3. Sačekajte da se gornji proces završi i kada završite ponovo pokrenite računar.
4. Ponovo otvorite cmd i upišite sljedeću naredbu i pritisnite enter nakon svake:
a) Dism /Online /Cleanup-Image /CheckHealth b) Dism /Online /Cleanup-Image /ScanHealth c) Dism /Online /Cleanup-Image /RestoreHealth

5. Pustite da se DISM naredba pokrene i pričekajte da se završi.
6. Ako gornja naredba ne radi, pokušajte sa sljedećim:
Dism /Image:C:offline /Cleanup-Image /RestoreHealth /Izvor:c:testmountwindows Dism /Online /Cleanup-Image /RestoreHealth /Izvor:c:testmountwindows /LimitAccess
Bilješka: Zamijenite C:RepairSourceWindows lokacijom vašeg izvora popravke (Windows instalacijski disk ili disk za oporavak).
7. Ponovo pokrenite računar da sačuvate promene i vidite da li ste u mogućnosti Fix MULTIPLE_IRP_COMPLETE_REQUESTS Error.
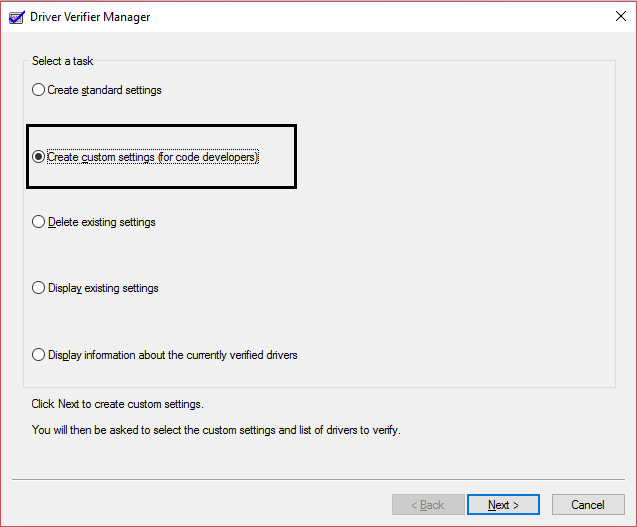
Metoda 4: Pokrenite verifikator drajvera
Ova metoda je korisna samo ako se možete prijaviti na svoj Windows obično ne u sigurnom načinu rada. Zatim obavezno kreirajte tačku za vraćanje sistema.
Metoda 5: Pokrenite Memtest86+
1. Povežite USB fleš disk sa svojim sistemom.
2.Preuzmite i instalirajte Windows Memtest86 Automatska instalacija za USB ključ.
3. Desni klik na datoteku slike koju ste upravo preuzeli i odaberite “Izdvoji ovde" opcija.
4. Nakon što ste raspakovani, otvorite fasciklu i pokrenite Memtest86+ USB Installer.
5.Choose your plugged in USB drive, in order to burn the MemTest86 software (This will format your USB drive).

6.Once the above process is finished, insert the USB to the PC which is showing the error MULTIPLE_IRP_COMPLETE_REQUESTS.
7. Ponovo pokrenite računar i uverite se da je izabrano pokretanje sa USB fleš diska.
8.Memtest86 će započeti testiranje na oštećenje memorije u vašem sistemu.
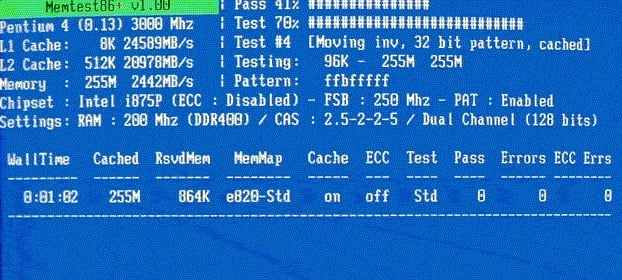
9. Ako ste položili sve testove onda možete biti sigurni da vaša memorija radi ispravno.
10. Ako su neki od koraka tada bili neuspješni Memtest86 will find memory corruption which means MULTIPLE_IRP_COMPLETE_REQUESTS Error is because of bad/corrupt memory.
11.Da bi se Fix MULTIPLE_IRP_COMPLETE_REQUESTS Error, morat ćete zamijeniti RAM ako se pronađu loši memorijski sektori.
Method 6: Update your BIOS
Izvođenje ažuriranja BIOS-a je kritičan zadatak i ako nešto krene naopako može ozbiljno oštetiti vaš sistem, stoga se preporučuje stručni nadzor.
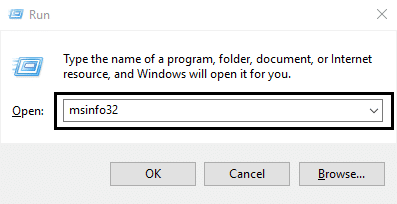
1. Prvi korak je da identifikujete svoju verziju BIOS-a, da biste to uradili pritisnite Windows Key + R zatim upišite “msinfo32” (bez navodnika) i pritisnite enter da otvorite informacije o sistemu.
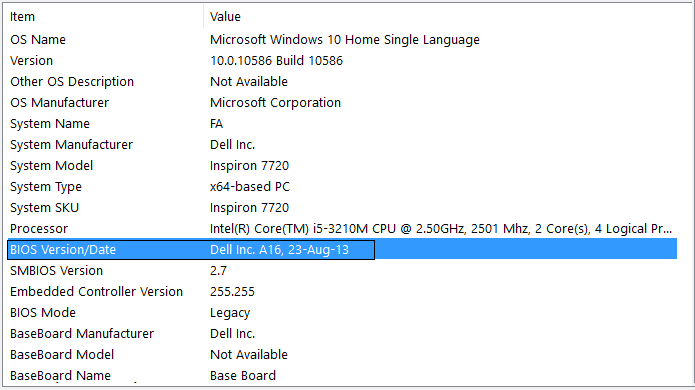
2.Once the Informacije o sustavu Otvara se prozor locirajte verziju/datum BIOS-a, a zatim zabilježite proizvođača i verziju BIOS-a.
3. Zatim idite na web stranicu vašeg proizvođača, npr. u mom slučaju je to Dell pa ću otići na Web lokacija kompanije Dell a zatim ću uneti serijski broj svog računara ili kliknuti na opciju automatskog otkrivanja.
4.Sada ću sa prikazane liste drajvera kliknuti na BIOS i preuzeti preporučeno ažuriranje.
Bilješka: Ne isključujte računar niti ga iskopčajte iz izvora napajanja tokom ažuriranja BIOS-a ili možete oštetiti računar. Tokom ažuriranja, računar će se ponovo pokrenuti i nakratko ćete videti crni ekran.
5. Kada se datoteka preuzme, samo dvaput kliknite na Exe datoteku da biste je pokrenuli.
6.Konačno, ažurirali ste svoj BIOS, a to bi takođe moglo Fix MULTIPLE_IRP_COMPLETE_REQUESTS Error.
Preporučena:
To je to što ste uspjeli Fix MULTIPLE_IRP_COMPLETE_REQUESTS Error ali ako i dalje imate bilo kakvih pitanja u vezi sa ovom objavom, slobodno ih postavite u odjeljku za komentare.