Popravite MultiVersus koji se ne pokreće u Windows 10

MultiVersus is a famous online multiplayer fighting game that is rocking today’s gaming world. Yet, few users complain about the MultiVersus not launching issue when the game is launched on their Windows 10 PC. If you are in the same boat, the troubleshooting hacks discussed in this article will help you sail the problem.
How to Fix MultiVersus Not Launching in Windows 10
If you are vexed by MultiVersus won’t launch issue in your Windows 10 computer, here are a few possible reasons why you must analyze them carefully to sort out the problem.
- PC ne ispunjava osnovne zahtjeve igre.
- Neki drugi programi u pozadini ometaju igru.
- Koristite neprovjerenu verziju drajvera.
- Postavke grafike igre su pogrešno konfigurirane.
- Prisutnost zlonamjernog softvera i virusa.
- .NET framework i operativni sistem nisu ažurirani na najnoviju verziju.
- DirectX verzija nije ažurirana.
- Overclocking.
- Bilo koja pogrešno konfigurirana ili oštećena instalacijska datoteka igre također uzrokuje problem.
- Datoteke za Microsoft C++ za redistribuciju nisu kompatibilne s igrom i PC-om.
Evo nekoliko mogućih metoda za rješavanje problema koje će vam pomoći da riješite problem o kojem se raspravlja.
Metoda 1: Osnovne metode za rješavanje problema
Slijedite ove osnovne metode rješavanja problema kako biste riješili navedeni problem.
1A. Provjerite sistemske zahtjeve
Multi Versus Minimalni sistemski zahtevi
- CPU: Intel Core i5-2300 ili AMD FX-8350
- RAM: 4 GB
- VIDEO KARTICA: Nvidia GeForce GTX 550 Ti ili AMD Radeon HD 5850 | Intel UHD 750
- PIXEL SHADERS: 5.0
- VERTEX SHADES: 5.0
- SLOBODAN PROSTOR NA DISKU: 6 GB
- NAMJENSKI VIDEO RAM: 1024 MB
Multi Versus Preporučeni zahtjevi
- CPU: Intel Core i5-3470 ili AMD Ryzen 3 1200
- RAM: 8 GB
- VIDEO KARTICA: Nvidia GeForce GTX 660 ili AMD Radeon R9 270
- PIXEL SHADERS: 5.0
- VERTEX SHADES: 5.0
- SLOBODAN PROSTOR NA DISKU: 6 GB
- NAMJENSKI VIDEO RAM: 2048 MB
1B. Check your internet connection
Unstable internet connection leads to MultiVersus is not working issue, also if there are any obstacles between your router and your computer, they may interfere with the wireless signal and will cause intermittent connection problems.
Možete pokrenuti a brzinski test da biste znali optimalni nivo brzine mreže potreban za ispravnu vezu.
Uvjerite se da vaš uređaj zadovoljava dolje navedene kriterije.
- Pronađite jačinu signala svoje mreže i ako je jako slaba, uklonite sve prepreke između puta.
- Izbjegavajte previše uređaja povezanih na istu mrežu.
- Uvijek kupujte modem/ruter koji je verificirao vaš Internet provajder (ISP) i oni su bez sukoba.
- Ne koristiti stari, polomljeni ili oštećeni kablovi. Zamijenite kablove ako je potrebno.
- Uvjerite se da su žice od modema do rutera i modema do zida stabilne i da nisu ometane.
Ako postoje problemi s internet konekcijom, pogledajte naš vodič Kako riješiti probleme s mrežnom vezom na Windows 10 da biste ih riješili.
1C. Stop Overclocking
- Svaki vrhunski računar izgrađen je sa opcijom Overclockinga koja pomaže u isporuci više soka od vaših specifikacija koje već imate. Pokretanje grafičke kartice ili procesora brže od zadane brzine odnosi se na overclocking.
- Kada se to dogodi, vaš računar će dostići maksimalnu temperaturu nakon određenog vremena. Računar to detektuje i podešava brzinu sata na normalnu brzinu dok se ne ohladi. Brzina sata se ponovo povećava nakon što se ohlade.
- Ovo povećava performanse vašeg računara i od velike je pomoći ako nemate moćan računar.
- Mora se napomenuti da sve igre ne podržavaju overclocking. Isto važi i za MultiVersus. Dakle, morate pokušati onemogućiti sav overklok na svom računaru i pokušati pokrenuti igru. Ako se dobro pokrene, problem je riješen.
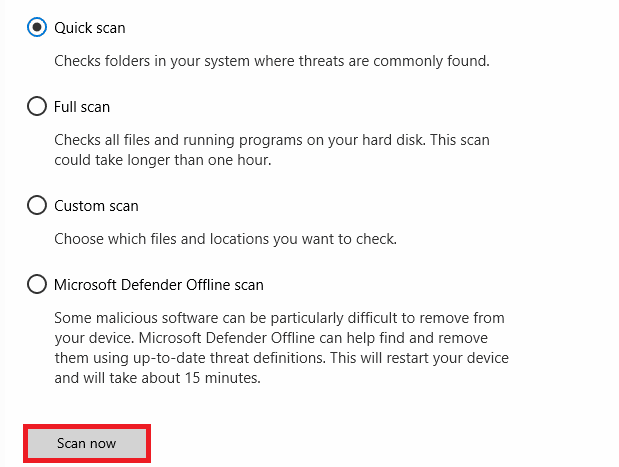
1D. Pokrenite skeniranje zlonamjernog softvera
Prisustvo virusa ili napada zlonamjernog softvera dovest će do problema s igranjem igara na vašem računalu. Ako je napad virusa vrlo ozbiljan, ne možete se kontinualno povezati ni na jednu online igru. Da biste riješili problem, morate potpuno ukloniti virus ili zlonamjerni softver sa svog Windows 10 računara.
Savjetujemo vam da skenirate svoj računar prema uputama u našem vodiču Kako da pokrenem skeniranje virusa na svom računaru?
Takođe, ako želite da uklonite malver sa svog računara, pogledajte naš vodič Kako ukloniti zlonamerni softver sa računara u Windows 10.
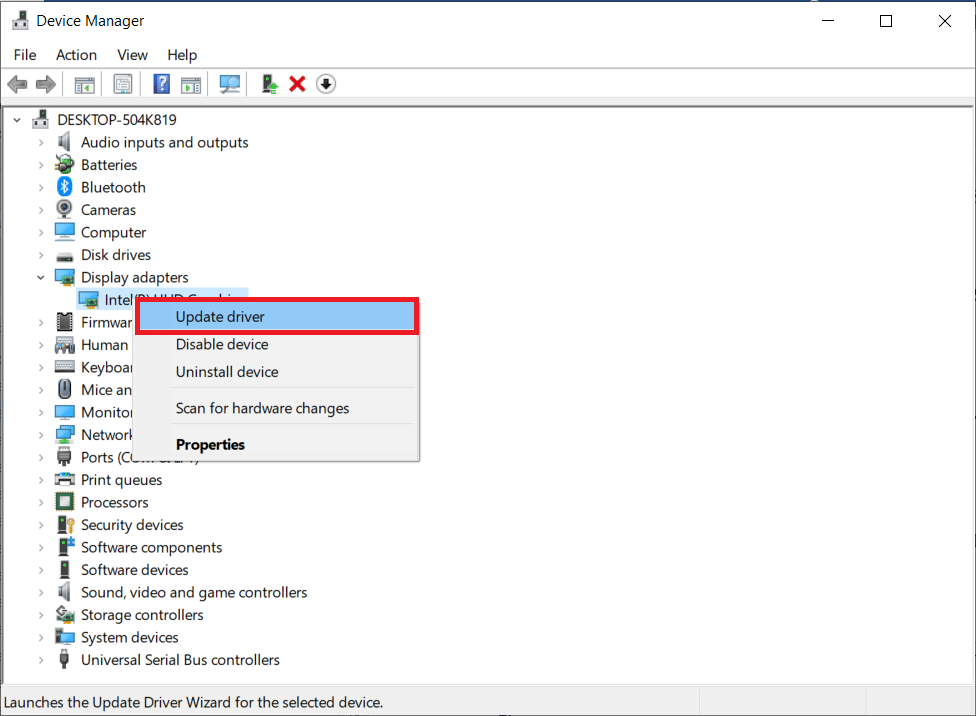
1E. Ažurirajte upravljačke programe za GPU
Graphical drivers are responsible for heavy graphical images and video processing games. If you face any launching conflicts in the MultiVersus game, make sure you use an updated version of device drivers, as they serve as a link between the hardware and Operating System of your PC. Many users have suggested that updating drivers have fixed MultiVersus not working issue. Read and implement the steps instructed in our guide 4 Ways to Update Graphics Drivers in Windows 10 to do so.
Takođe pročitajte: Popravite Windows pronašao drajvere za vaš uređaj, ali je naišao na grešku
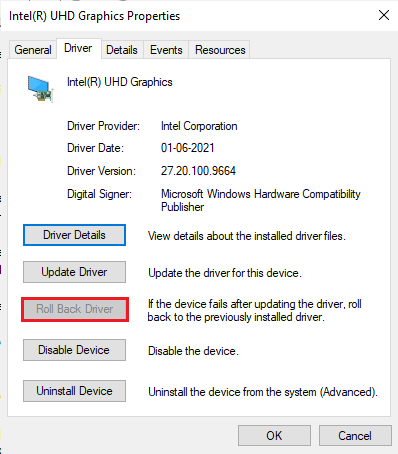
1F. Vratite upravljačke programe za GPU
Sometimes, the current version of GPU drivers may cause the discussed launching issue in MultiVersus, and in this case, you have to restore previous versions of installed drivers. This process is called vraćanje drajvera i lako možete vratiti upravljačke programe vašeg računara u prethodno stanje prateći naš vodič Kako vratiti upravljačke programe na Windows 10.
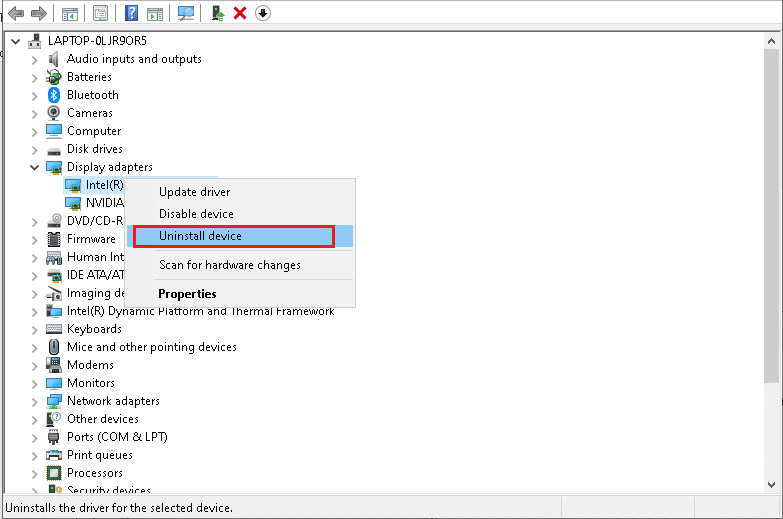
1G. Ponovo instalirajte upravljački program za GPU
If you still face MultiVersus not starting issue after updating your GPU drivers, then reinstall device drivers to fix any incompatibility issues. There are several ways to reinstall drivers on your computer. Yet, you can easily reinstall Graphical drivers as instructed in our guide How to Uninstall and Reinstall Drivers on Windows 10.
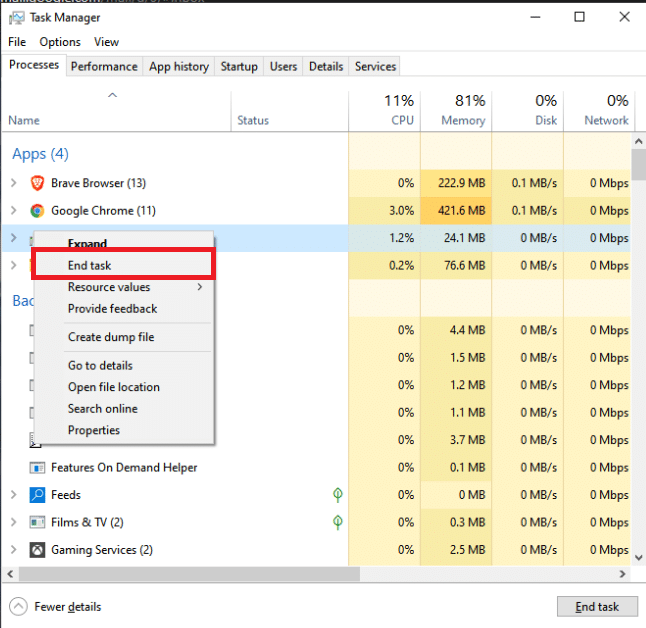
1H. End Background Processes
Several users have confirmed that MultiVersus not starting on PC can be resolved by closing all the background tasks running on your PC. To implement the task, follow our guide How to End Task in Windows 10, and proceed as instructed.
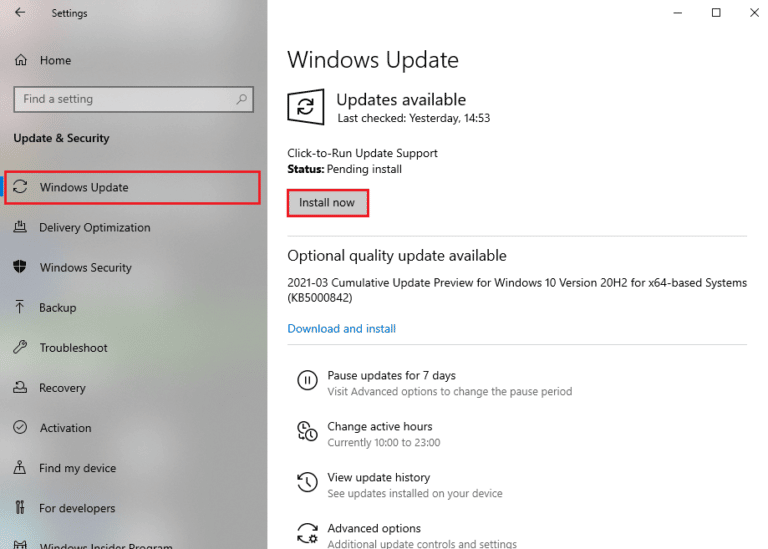
1I. Update Windows
You can also eradicate bugs in your computer and game by updating your Operating System. Always ensure if you have updated your Windows Operating System and if any updates are pending in action, use our guide How to Download and Install Windows 10 Latest Update
1J. Disable Antivirus Temporarily (If Applicable)
Some incompatible antivirus programs installed on your computer will cause MultiVersus launching problem. To avoid conflicts, you must ensure the security settings of your Windows 10 computer and check if they are stable or not. To find whether the antivirus suite is the reason for the discussed issue, disable it once and try connecting to a network.
Pročitajte naš vodič o tome kako privremeno onemogućiti antivirusni program na Windows 10 i slijedite upute da privremeno onemogućite svoj antivirusni program na računaru.
Ako imate ispravku za svoj problem nakon što ste onemogućili antivirusni program na računaru, savetujemo vam da potpuno deinstalirate program sa računara.
Read our guide Force Uninstall Programs which won’t Uninstall in Windows 10 to uninstall your antivirus program on your computer.
Takođe pročitajte: Kako deinstalirati McAfee LiveSafe u Windows 10
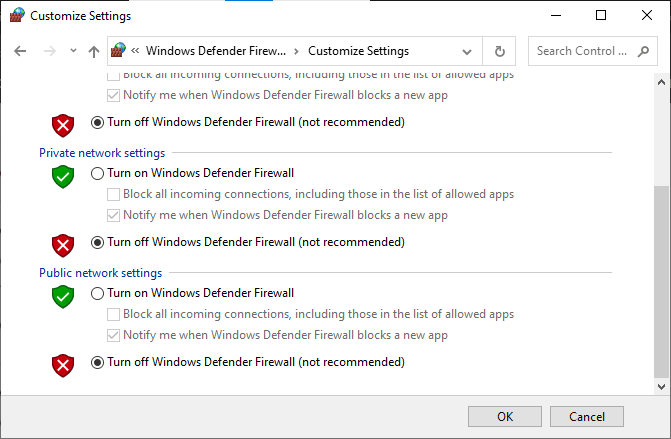
1K. Turn Off Windows Defender Firewall (Not Recommended)
Your computer will face MultiVersus is not working issue, due to an over-protective firewall suite in the Windows 10 PC. To resolve the problem, you can either add a new rule for your game, whitelist the game or as the last fix, disable the firewall temporarily.
Our guide on How to Disable Windows 10 Firewall will help you.
1L. Repair System Files
If there are any missing or damaged files on your Windows 10 PC, you will face MultiVersus takes forever to launch issue. Yet, you are repairing these corrupt files by using inbuilt utilities namely, System File Checker i Servisiranje slika i upravljanje.
Pročitajte naš vodič o tome kako popraviti sistemske datoteke na Windows 10 i slijedite korake prema uputama da popravite sve svoje oštećene datoteke.
Metoda 2: Pokrenite MultiVersus igru kao administrator
If MultiVersus does not have required administrative privileges, a few essential features of the game will be limited causing you MultiVersus not launching issue whenever you open the game or install any updates. Follow the below-mentioned instructions to run the game as an administrator.
1. Desnom tipkom miša kliknite MultiVersus prečica na radnoj površini.
Bilješka: Takođe možete otići na instalacijski direktorij i desnim klikom miša kliknite na nju.
2. Zatim odaberite svojstva opcija.
3. Sada, prijeđite na kompatibilnost karticu i kliknite na Pokrenite ovaj program kao administrator.
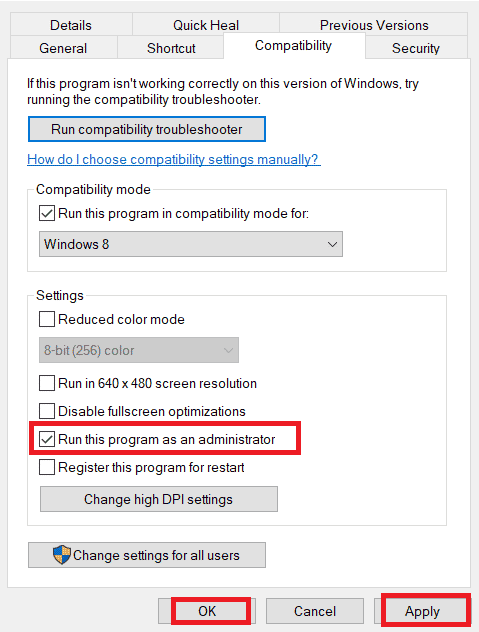
4. Konačno, kliknite na Apply> OK da sačuvate promene.
Check if you have fixed MultiVersus launching issues.
Takođe pročitajte: Popravka WoW traje zauvijek da se pokrene u Windows 10
Metoda 3: Promjena prioriteta procesa igre
The preference of an application or process tells the computer the importance and if it should be given preference over the others while allocating the resources. The priority of every application is normal except the system processes, by default. MultiVersus might crash if it didn’t get enough resources.
1. Pritisnite taster Tasteri Ctrl + Shift + Esc zajedno da otvorimo Taskbar.
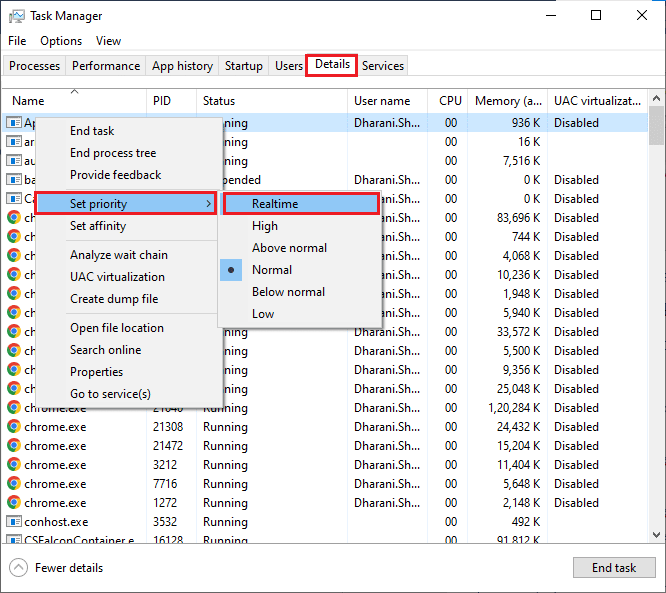
2. Sada potražite MultiVersus proces.
3. Zatim promijenite prioritet u Visok prioritet i provjeri da li ovo radi.
Bilješka: Promenite prioritet sa velikim oprezom jer nepažljivo menjanje prioriteta procesa može učiniti vaš sistem izuzetno sporim ili nestabilnim.
4. Zatvorite Task Manager i reboot računaru.
Metod 4: Postavite visoke performanse
Također možete optimizirati svoju igru kada postavljate postavke plana napajanja visokih performansi. Ovi planovi napajanja su razvijeni za upravljanje postavkama napajanja na prijenosnim postavkama. Slijedite dolje navedena uputstva za korištenje postavki plana napajanja visokih performansi u vašem sistemu.
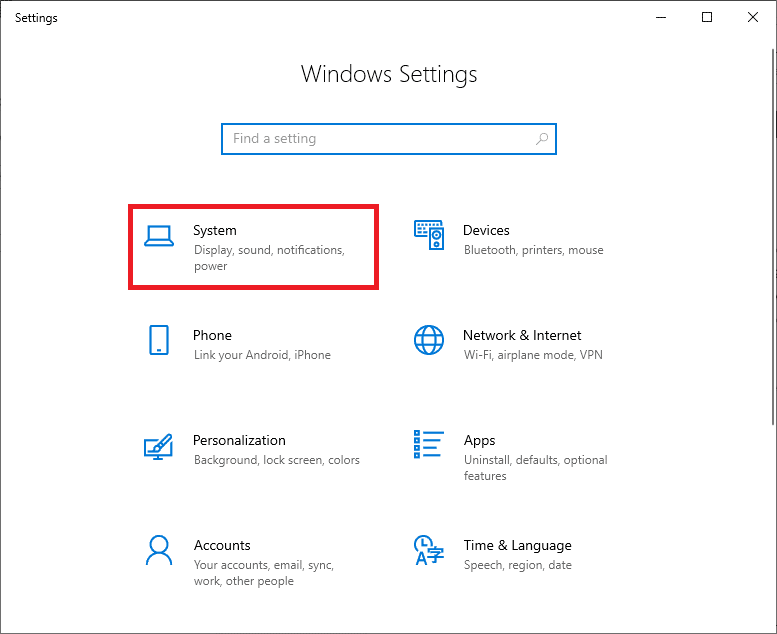
1. Pritisnite taster Windows + I tasteri istovremeno otvoriti Windows postavke.
2. Sada kliknite na sistem podešavanje.
3. Sada odaberite Snaga i spavanje opciju i kliknite na Dodatne postavke napajanja pod Povezana podešavanja.
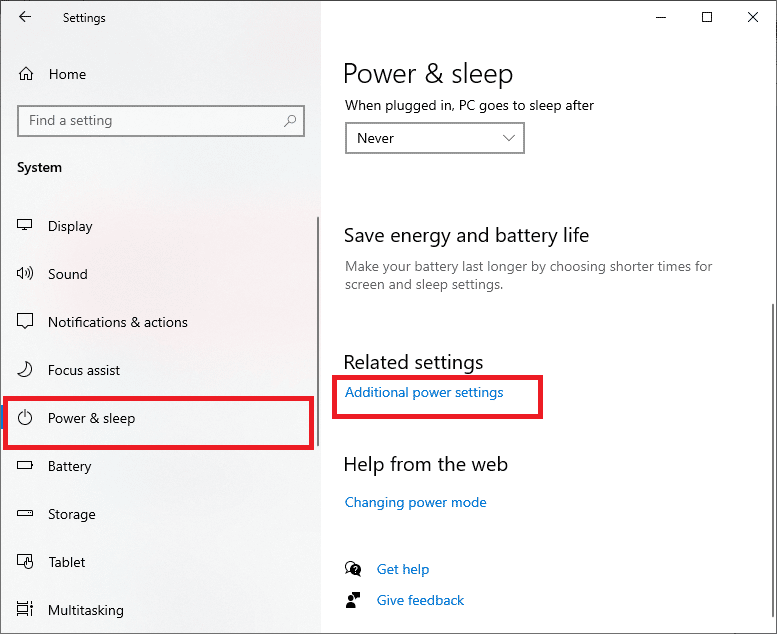
4. Sada odaberite Visoke performanse opcija ispod Visoki dodatni planovi kao što je prikazano na donjoj slici.
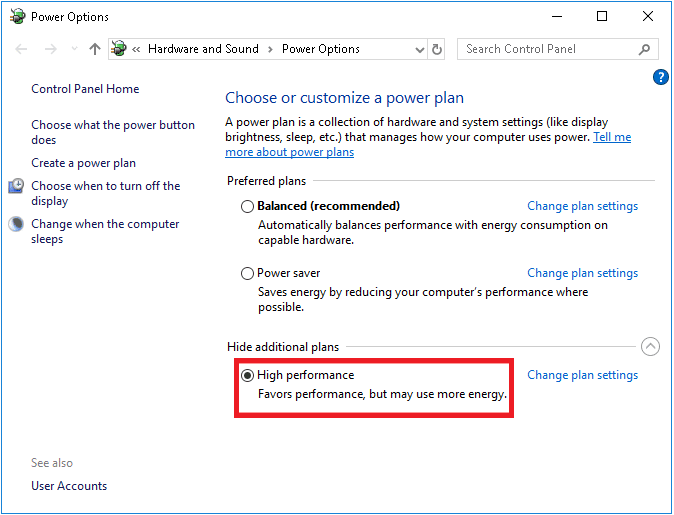
Now you have optimized your system, check if you have fixed MultiVersus won’t launch on startup issue.
Takođe pročitajte: Ispravite grešku u vezi s nedostajućim preuzetim datotekama na Steamu
Method 5: Update Steam App & MultiVersus Game
Ako koristite zastarjelu Steam aplikaciju, ne možete glatko pristupiti nijednoj igrici. Stoga uvijek provjerite koristite li ažuriranu verziju igre Steam i MultiVersus prije nego što je pokrenete.
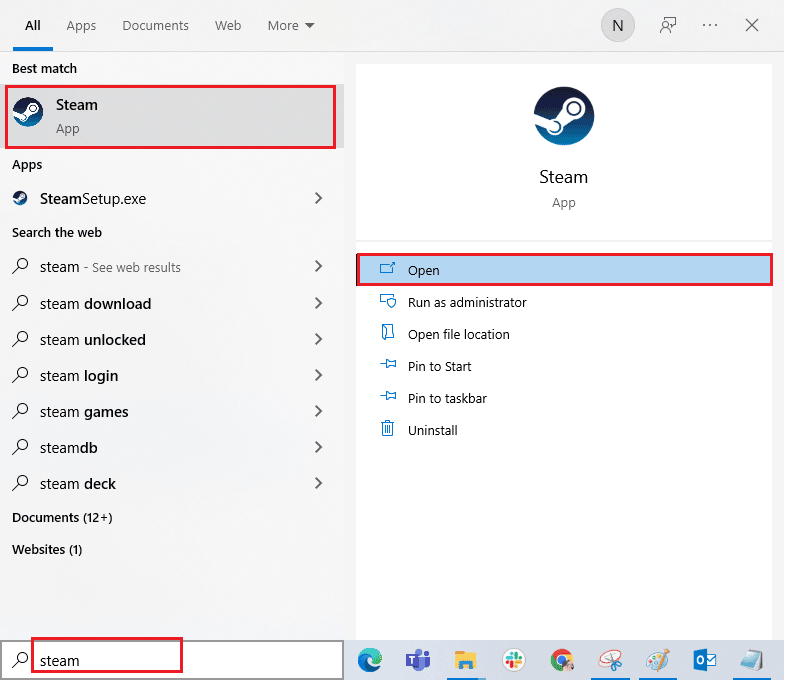
1. Hit Windows ključ i tip para, zatim kliknite na Otvori.
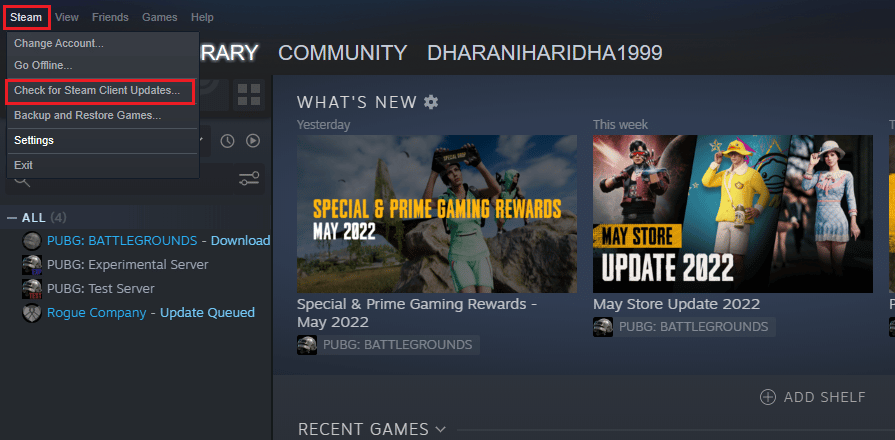
2. Sada kliknite na para u gornjem lijevom uglu ekrana nakon čega slijedi Provjerite ažuriranja Steam klijenta… kao što je istaknuto u nastavku.
3. Ako imate nove ispravke za preuzimanje, instalirajte ih i osigurajte vaš Steam klijent je ažuriran.
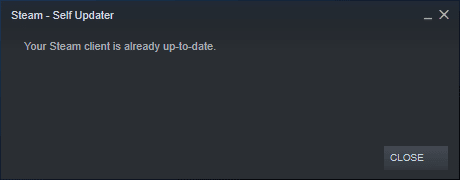
4. Sada, ponovo pokrenite Steam i provjerite da li je problem sada riješen.
Likewise, it is always essential that your game run at its latest version to avoid any conflicts. Until your game is updated, you cannot log in to MultiVersus servers successfully.
To update your game, follow the below-mentioned steps.
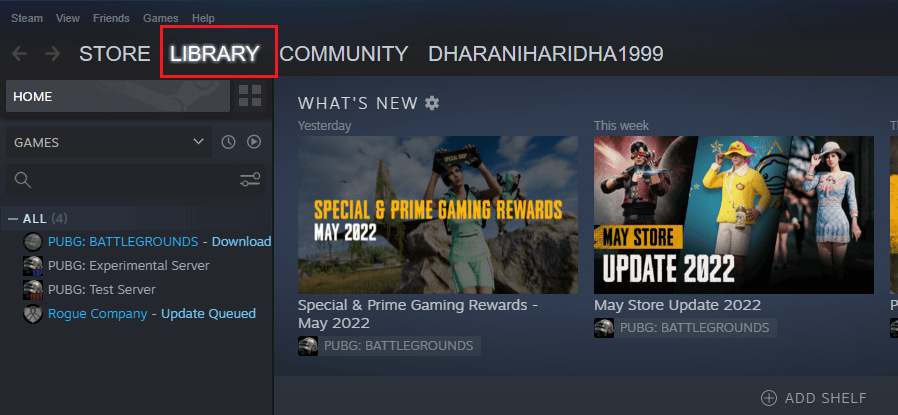
1. Pokretanje para i idite do BIBLIOTEKE.
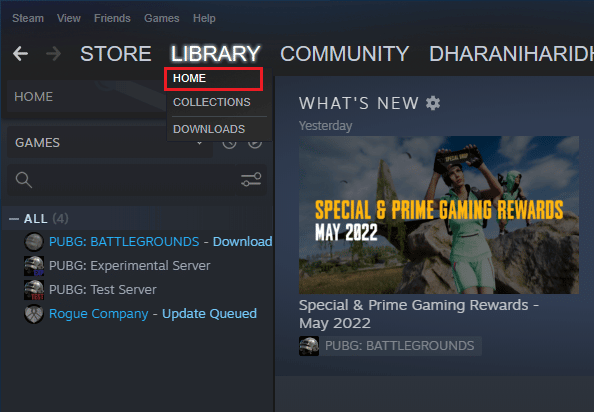
2. Sada kliknite na HOME i potražite MultiVersus.
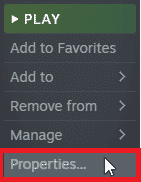
3. Zatim kliknite desnim tasterom miša na igru i izaberite Nekretnine… opcija.

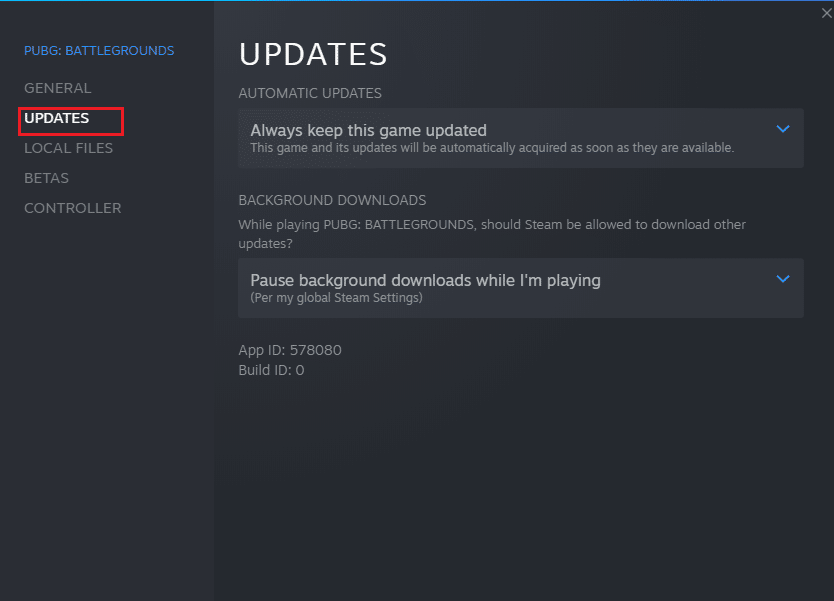
4. Sada, prebacite se na UPDATES karticu i provjerite jesu li ažuriranja na čekanju. Ako je tako, pratite uputstva na ekranu da preuzmete najnovija ažuriranja.
After an update, check if MultiVersus not launching issue is fixed.
6. metod: Onemogućite optimizacije celog ekrana
Few users have suggested that disabling full-screen optimizations on PC has helped them fix MultiVersus is not launching issue. Follow as instructed.
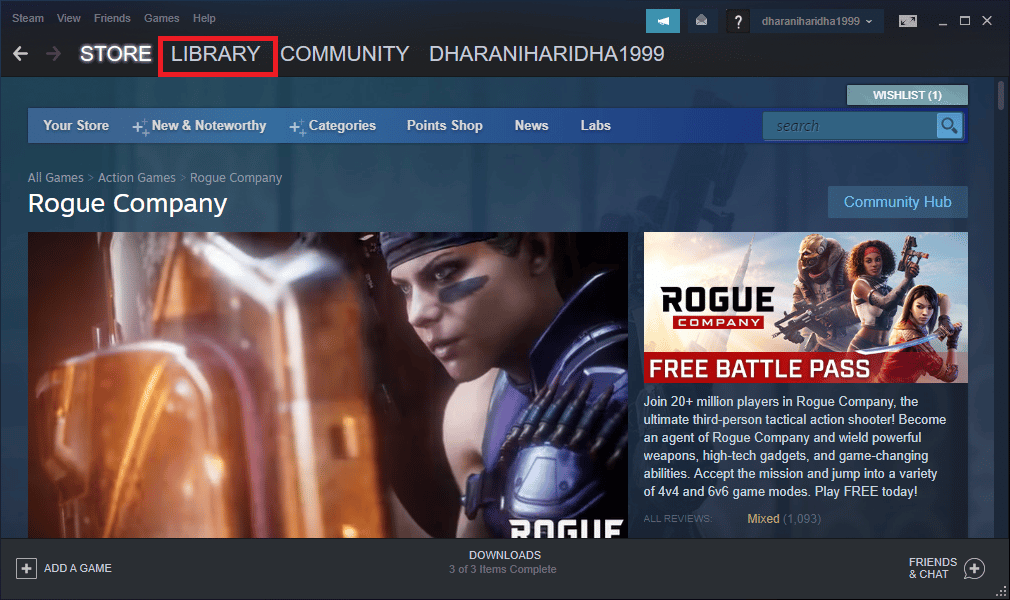
1. Idite na Steam BIBLIOTEKE meni.
2. Now, right-click on the MultiVersus game and click on Nekretnine…
3. Sada, prebacite se na GENERAL karticu i kliknite na POSTAVI OPCIJE POKRETANJA… kao što je prikazano.
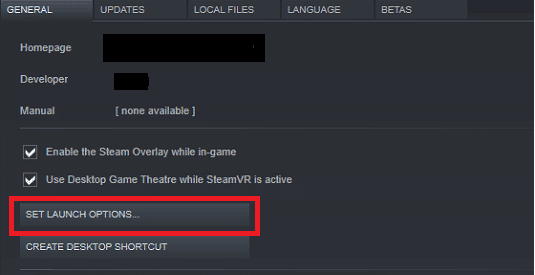
4. Sada će se otvoriti novi prozor sa upozorenjem naprednog korisnika. Da biste otvorili igru u prozorskom modu, otkucajte –prozor parametar.
5. Sada, sačuvajte promjene klikom OK i izađite iz prozora Svojstva.
6. Sada, ponovno pokretanje igra and ensure that it runs in windowed mode.
Bilješka: You can also navigate to POSTAVI OPCIJE POKRETANJA… ponovo i upišite sljedeće parametre umjesto posljednjeg parametra.
–prozor –w 1024
7. Sada, sačuvajte promjene klikom na OK.
Ovaj parametar će postaviti igru da se pokrene u prozorskom modu.
Takođe pročitajte: Popravite nedostupnu konfiguraciju aplikacije Steam u Windows 10
Metoda 7: Onemogućite prekrivanje u igri
The Steam Overlay is a piece of Steam that allows the users to access friends list, and web browser and allows in-game purchasing. It is a significant tool, yet it sometimes triggers MultiVersus not launching on startup issue. If you want to solve this problem, then turn off the Steam game overlay.
1. Otvorite para aplikaciju i kliknite na BIBLIOTEKE.
2. Sada, kliknite desnim tasterom miša Multi Versus i kliknite na Nekretnine…

3. Sada, prebacite se na GENERAL tab and uncheck the box containing Omogućite Steam Overlay dok ste u igri.
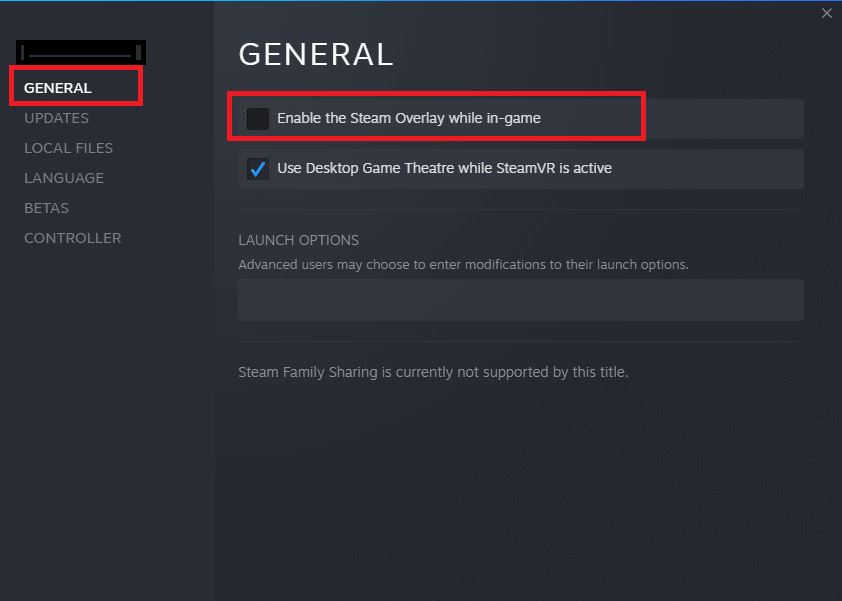
4. Konačno, ponovo pokrenite igru and check if the MultiVersus launching issue is solved.
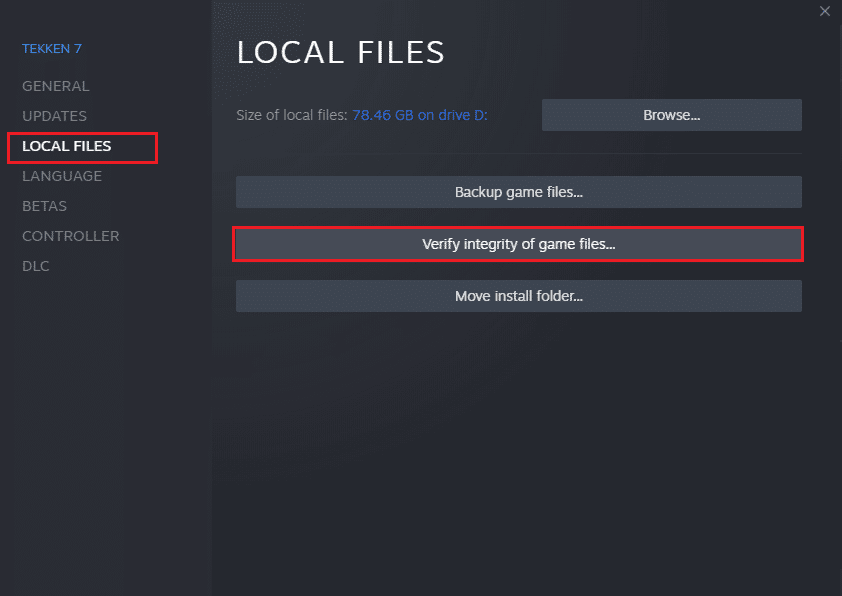
Metoda 8: Provjerite integritet datoteka igre
We have seen many cases in which the game files are either missing or corrupt or it had incomplete installations. Users could also experience MultiVersus not starting on PC issue if they are interrupted by the update process or if the game files are being moved. In this method, you will be opening Steam and using the built-in function for verifying the integrity of the game. It will be replaced if the application finds something. Read our guide on how to verify integrity of game files on Steam.
Takođe pročitajte: Fix Steam Client Bootstrapper Not Responding in Windows 10
Metoda 9: Ažurirajte .NET Framework
.NET framework in Windows 10 computer is essential for uninterrupted service of modern apps and games. Many games have an auto-update feature for the .NET framework, and thus it will be updated automatically whenever an update is available. In another case, if an update prompts in your PC, you can manually install the latest version of the .NET framework, as discussed below, to fix MultiVersus not launching issue.
1. Provjerite nova ažuriranja za .NET Framework iz službeno Microsoft web mjesto.
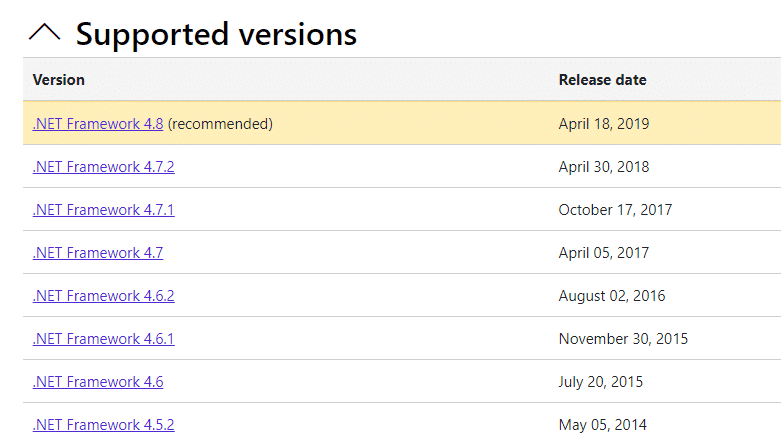
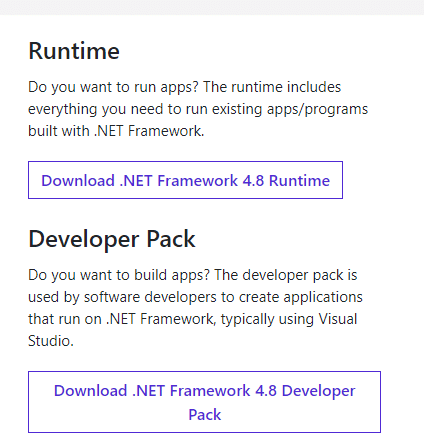
2. Ako postoje ažuriranja, kliknite na odgovarajući/preporučuje se vezu i kliknite Preuzmite .NET Framework 4.8 Runtime opcija.
Bilješka: Nemojte kliknuti na Preuzmite .NET Framework 4.8 Developer Pack kako ga koriste programeri softvera.
3. Idi Moja preuzimanja, double-click on the setup file to run the downloaded file and follow the uputstva na ekranu da biste uspješno instalirali .NET framework na vaš Windows PC. Kada završite, provjerite jeste li riješili problem o kojem se raspravljalo ili ne.
Metoda 10: Ažurirajte DirectX
To enjoy a seamless multimedia experience on MultiVersus, you have to make sure whether DirectX is installed, and it is updated to its latest version. DirectX helps you improve the visual media experience for graphical games and applications especially. It is worth updating DirectX needed for this game.
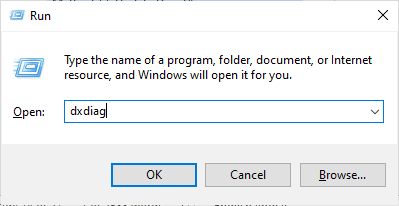
1. Pritisnite Windows + R tasteri istovremeno pokrenuti trčanje okvir za dijalog.
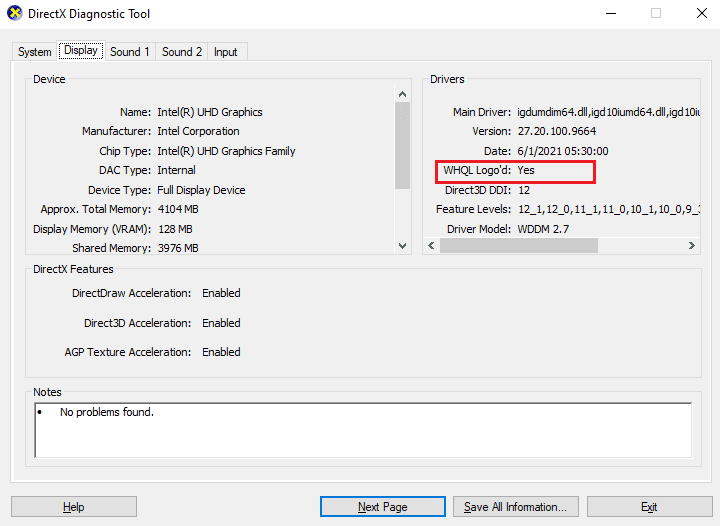
2. tip dxdiag i pritisnite Enter taster otvoriti Alat za dijagnostiku DirectX.
3. Provjerite Verzija DirectX-a, if it contains DirectX 12 ili ne.
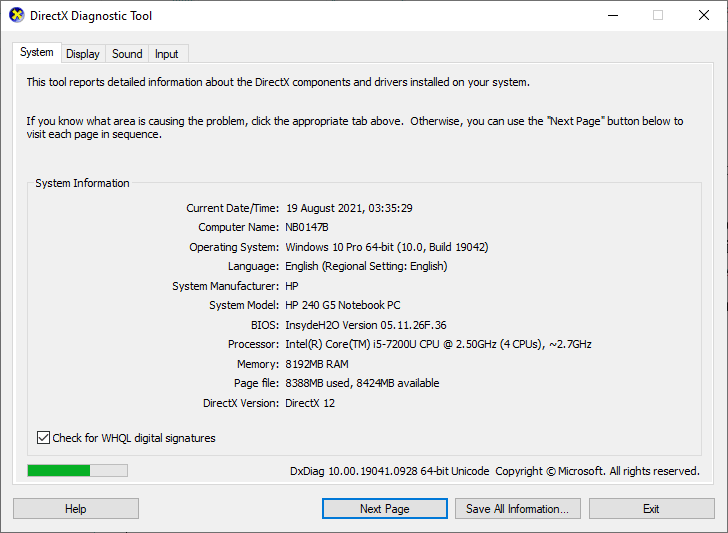
4. Ako nemate DirectX 12 u svom sistemu, preuzmite ga i instalirajte sa DirectX stranica za preuzimanje prateći uputstva na ekranu.
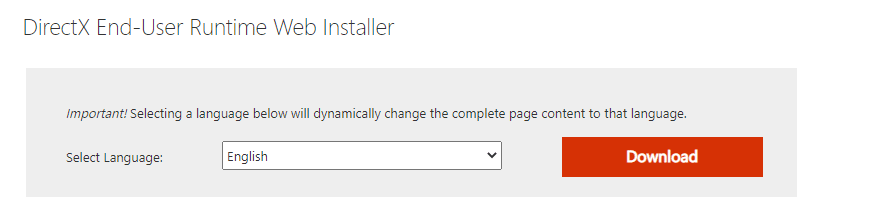
After installing DirectX, check if the issue occurs again.
Bilješka: obezbijediti Provjerite ima li WHQL digitalnih potpisa polje je prijavljeno sistem karticu i u svim karticama provjerite da li WHQL Logo'd biti postavljeno na Da.
Metoda 11: Popravite Microsoft Visual C++ koji se može redistribuirati
Alternately, you can try to repair the Microsoft Visual C++ Redistributable packages to fix MultiVersus not launching issue as follows:
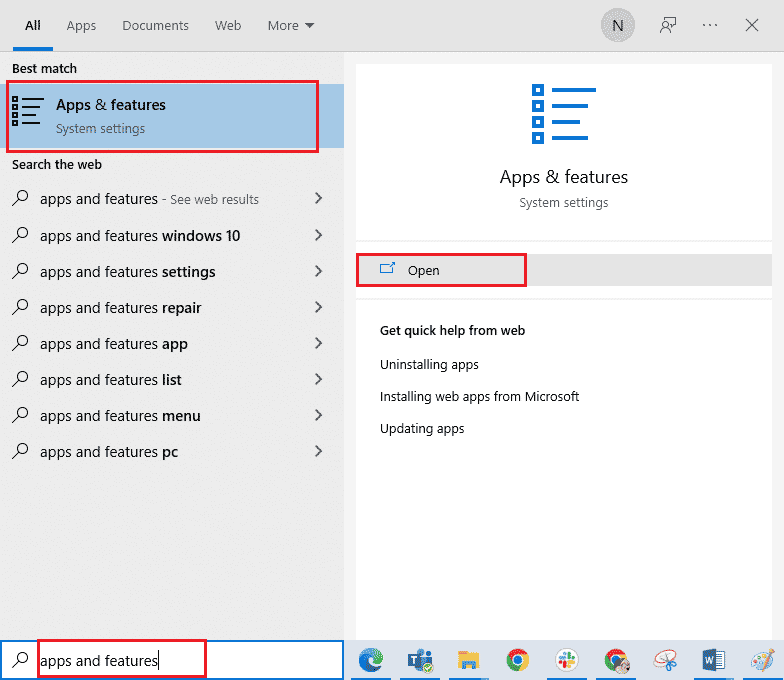
1. Pritisnite Windows ključ, tip Aplikacije i funkcije, zatim kliknite na otvoreno.
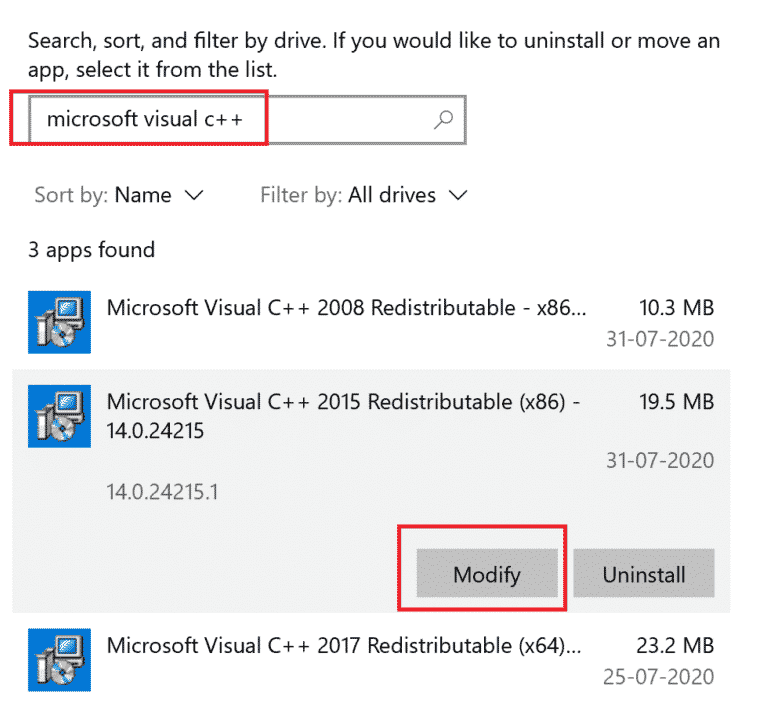
2. Potražite Microsoft Visual C ++ se može distribuirati paket.
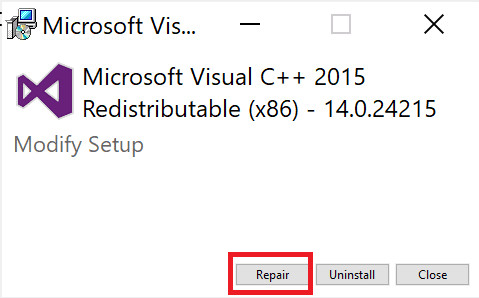
3. Then, select the package, and click on Izmijeniti opcija.
4. Zatim kliknite Da na Kontrola korisničkih naloga okvir za dijalog.
5. In the pop-up window that appears, click on popravka. Sačekajte da se postupak završi.
6. Repeat the above steps to modify all the Microsoft Visual C++ Redistributable packages.
7. Konačno, ponovo pokrenite računar.
Otvorite aplikaciju koju prethodno niste mogli otvoriti. Ako ovo ne uspije, pokušajte umjesto toga ponovo instalirati C++ redistributable.
Takođe pročitajte: Popravi grešku 2015x0 pri instaliranju Microsoft Visual C++ 80240017 koja se može ponovo distribuirati
Metod 12: Ponovo instalirajte Microsoft Visual C++ Redistributable
If the previous method of repairing the Microsoft C++ Visual Redistributable did not fix MultiVersus won’t launch issue, then you will have to reinstall the redistributable. Follow the given steps to uninstall & then install these again.
1. Otvorite Aplikacije i funkcije postavke sistema.
2. Izaberite Microsoft Visual C ++ se može distribuirati package, then click on Deinstalirati opcija.
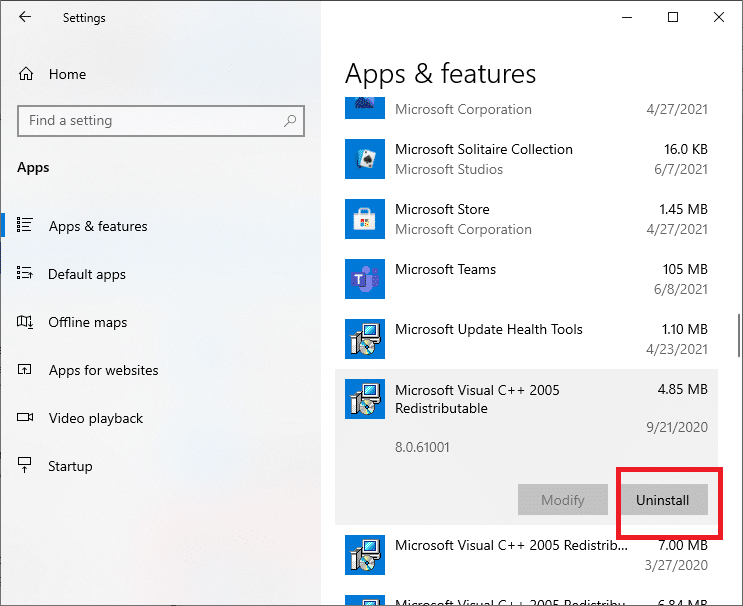
3. Kliknite na Deinstalirati option again to confirm and remove the package.
Bilješka: Make sure to uninstall all the Microsoft Visual C++ Redistributable packages.
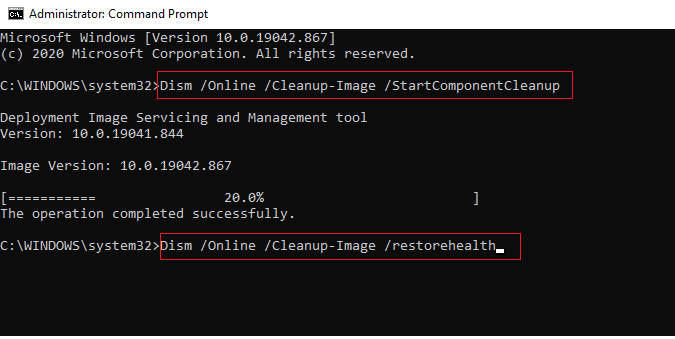
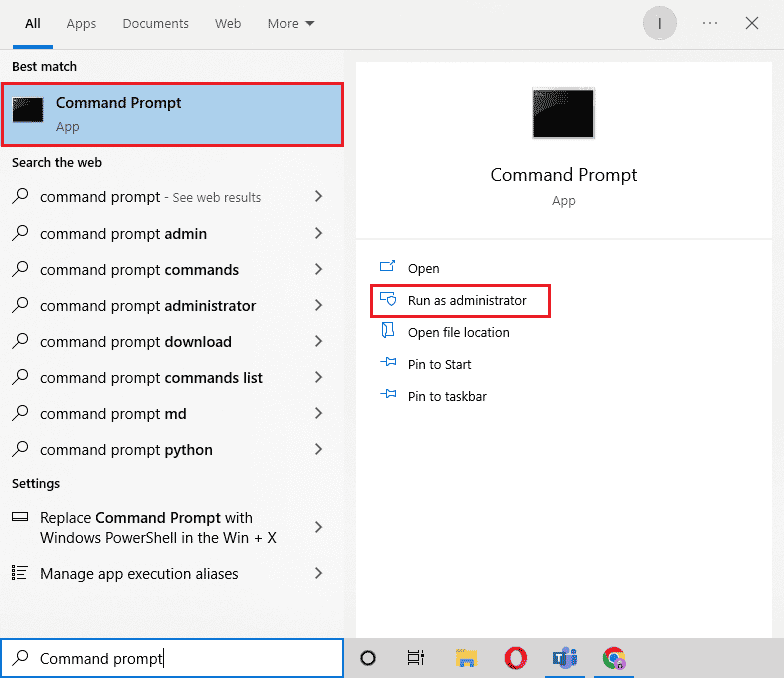
4. Pritisnite Windows ključ, tip Komandna linija, zatim kliknite na Pokreni kao administrator.
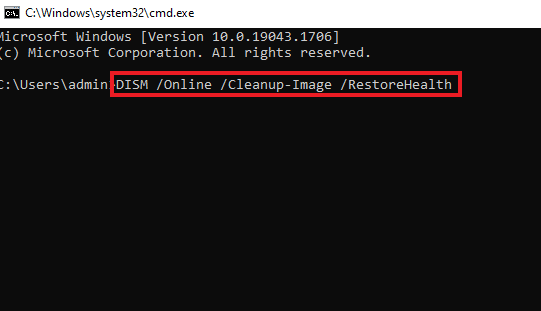
5. Upišite sljedeće komande i pritisnite ući ključ nakon svake:
DISM /online /Cleanup-Image /StartComponentCleanup
DISM /online /Cleanup-Image /RestoreHealth
6. Kada se proces završi, ponovo pokrenite računar.
7. Zatim posjetite Microsoft Visual C++ Redistributable webpage to download the latest C++ package as shown here.
8. Once downloaded, open the preuzeta datoteka by double-clicking on it in Moja preuzimanja. Instaliraj the package by following the on-screen instructions.
9. Once the installation is complete, finally ponovo pokrenite računar.
Preporučena:
Nadamo se da je ovaj vodič bio od pomoći i da ste mogli popraviti MultiVersus not launching issue on your Windows 10 PC. Let us know which method worked for you the best. Feel free to reach out to us with your queries and suggestions via the comments section below.