- in finestres by administració
Change Diagnostic and Usage Data Settings in Windows 10

Change Diagnostic and Usage Data Settings in Windows 10: You must be aware of the Diagnostic and Usage Data Settings which allows Microsoft to collect performance and usage information which helps Microsoft to troubleshoot issues with Windows and improve their product & services and resolve bugs as soon as possible. But the best part of this feature is that you can actually control the amount of diagnostic and usage data sent to Microsoft from your system.
You can select to only send basic diagnostic information which contains info about your device, its settings, and capabilities or you can select the Full diagnostic information which contains all the information about your system. You can also delete the Windows Diagnostic Data that Microsoft has collected from your device. Anyway, without wasting any time let’s see How to Change Diagnostic and Usage Data Settings in Windows 10 with the help of the below-listed tutorial.
Change Diagnostic and Usage Data Settings in Windows 10
Assegureu-vos de crear un punt de restauració per si alguna cosa va malament.
The initial settings can be configured during the Windows Setup when you get to Choose privacy settings for your device simply enable the toggle for Diagnostics to select “Full” and leave it disabled if you want to set Diagnostic and usage data collection policy to “Basic”.
Method 1: Change Diagnostic and Usage Data Settings in Settings App
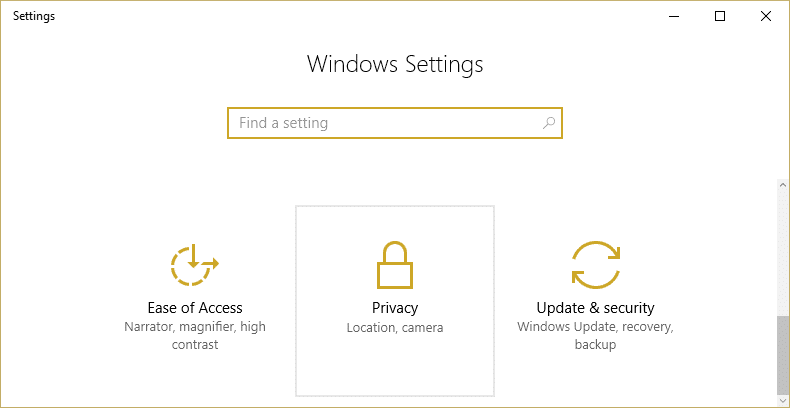
1.Premeu la tecla Windows + I per obrir Configuració després feu clic a Icona de privadesa.
2.Des del menú de l'esquerra, seleccioneu Diagnòstic i retroalimentació.
3.Now either select Basic or Full for the Diagnostic and usage data.
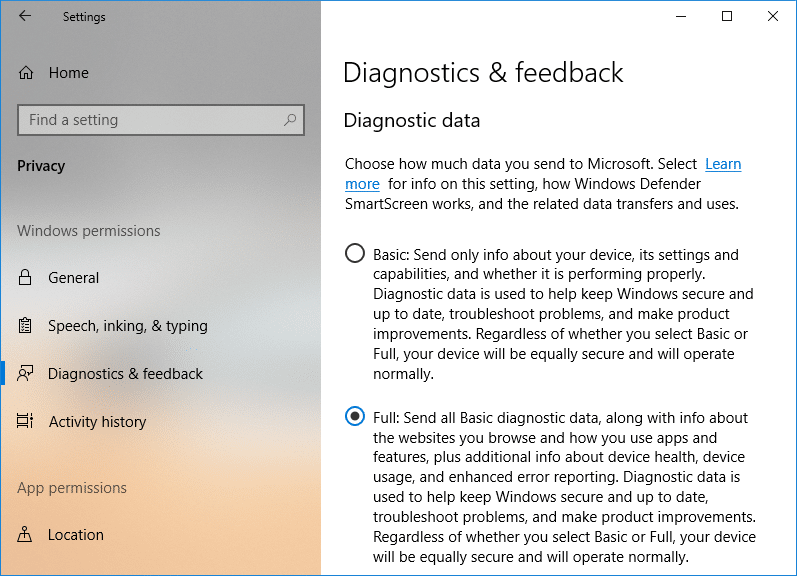
Nota: By default, the setting is set to “Full”.
4.Once finished, close the setting and reboot your PC.
Llegiu també Els diagnòstics de Quest prenen Walk Ins?
Method 2: Change Diagnostic and Usage Data Settings in Registry Editor
1.Premeu la tecla Windows + R i després escriviu regedit i premeu Retorn per obrir Editor del Registre.

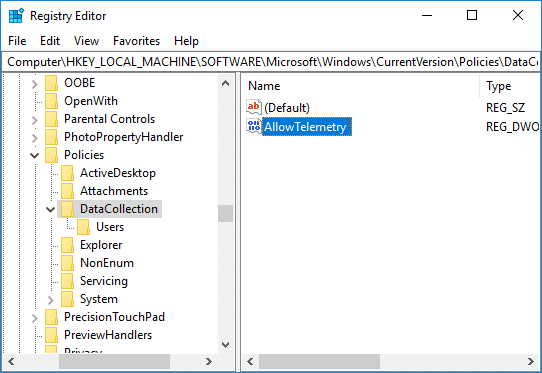
2.Navegueu a la següent clau de registre:
HKEY_LOCAL_MACHINESOFTWAREMicrosoftWindowsCurrentVersionPoliciesDataCollection
3.Assegureu-vos de seleccionar Recopilació de dades a continuació, al panell dret de la finestra, feu doble clic AllowTelemetry DWORD.
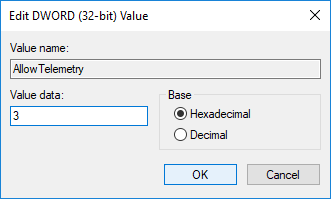
4.Now make sure to change the value of the AllowTelemetry DWORD according to:
0 = Security (Enterprise and Education editions only)
1 = Basic
2 = Enhanced
3 = Full (Recommended)
5.Once done, make sure to click OK and close registry editor.
Method 3: Change Diagnostic and Usage Data Settings in Group Policy Editor
1.Premeu la tecla Windows + R i després escriviu gpedit.msc i premeu Retorn per obrir Editor de polítiques de grup.
2. Navegueu al camí següent:
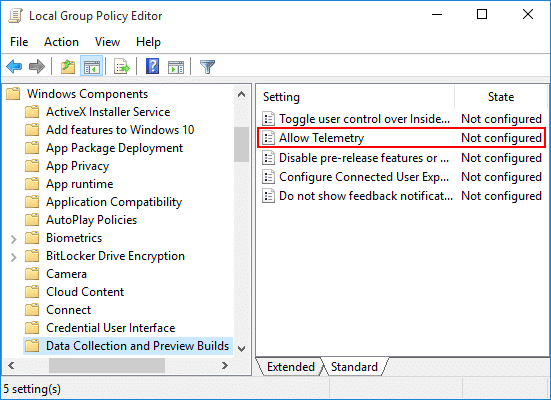
Computer ConfigurationAdministrative TemplatesWindows ComponentsData Collection and Preview Builds
3.Make sure to select Data Collection and Preview Builds then in right window pane double-click on Allow Telemetry Policy.
4.Now to restore default diagnostic and usage data collection setting simply select Not Configured or Disabled for Allow Telemetry policy and click OK.

5.If you want to force a diagnostic and usage data collection setting then seleccioneu Activat for Allow Telemetry policy and then under Options select Security (Enterprise Only), Basic, Enhanced, or Full.
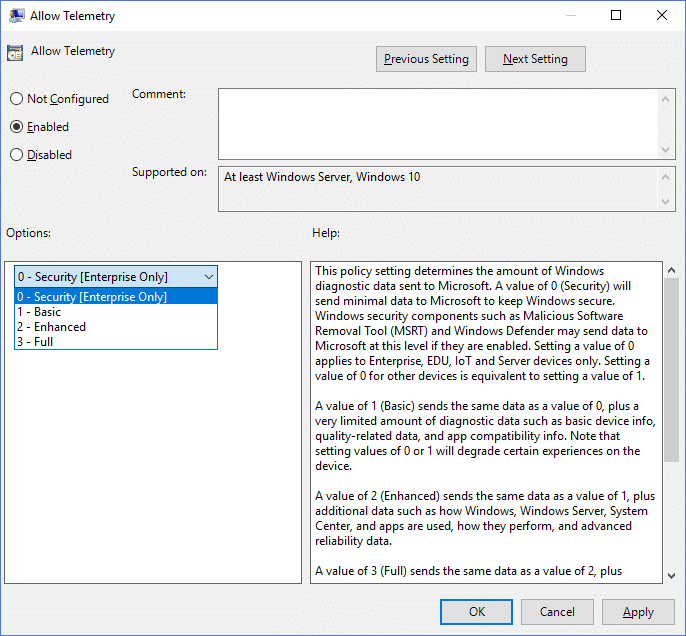
6. Feu clic a Aplicar seguit de D'acord.
7.When finished, reboot your PC to save changes.
Recomanat:
Això és el que has après amb èxit How to Change Diagnostic and Usage Data Settings in Windows 10 però si encara teniu preguntes sobre aquest tutorial, no dubteu a preguntar-les a la secció de comentaris.