How to Create a Local User Account on Windows 10

When you log in to Windows with your Microsoft account, it comes with several benefits. However, you need to agree to share information with Microsoft because based on that you will get personalized settings, your emails will sync automatically, accessing Windows App store and more. But what if you want to log in to Windows with a local account instead? In a situation where somebody does not have Microsoft account, in that case, the administrator can easily create a local user account on Windows 10 alang kanila.
Now using this local account, the users without having a Microsoft account can easily access your device and can do their work without any issues. In this article, we will explain the entire process of creating and converting your Microsoft account into a local account. However, it is important to know when you want to create a local account and for what purpose because there are some limitations associated with the Local account as compared to Microsoft account.
How to Create a Local User Account on Windows 10
Siguruha nga maghimo usa ka punto sa pagpasig-uli kung adunay sayup.
Method 1: Create a Local User Account using Windows 10 Settings
To start with this process, first, you have to log in to your Windows 10 with admin access. Once you are logged in, follow the steps.
1.Open Start Menu, click on the Icon sa tiggamit ug pagpili sa Change account settings kapilian.
![]()
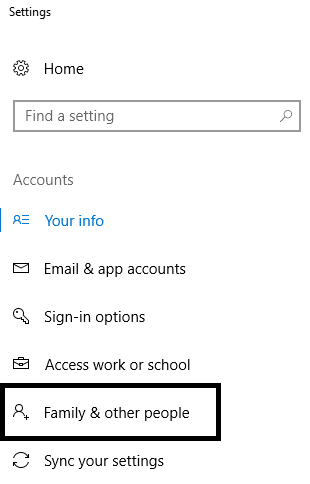
2.This will open the Account Settings window, from there you need to click on Family and Other Users gikan sa wala nga kamot nga menu.
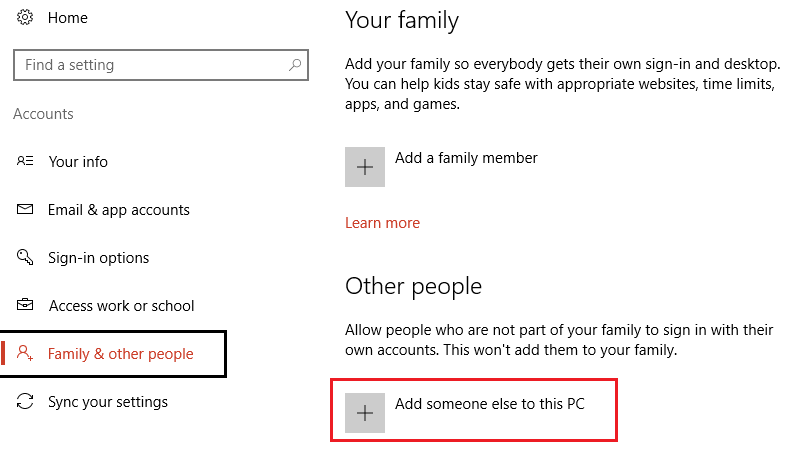
3.Here you need to click on Idugang ang usa ka tawo sa niini nga PC kapilian.
4.On the next screen when Windows Prompts to fill the box, you don’t need to type Email or phone number rather you need to click on “I don’t have this person’s sign in information"Kapilian.

5.On the next screen, you need to click on Add a User without a Microsoft account link on the bottom.

6.Karon type the name of the person in the box below “Who’s going to use this PC” and type password under “Make it Secure” heading.
Mubo nga sulat: You can set three security questions in order to recover your password in case you forget the password of this account.

7.Once finished, finally click Sunod.
Switch to the newly created Local User Account
Once you have created a local Windows 10 account, you can easily switch to a newly created local account. You do not need to sign out of your current account to switch to a local account. You simply need to click on the Sugdi ang menu, dayon i-klik ang user icon ug click on the newly created local account username.
Login to the New Local User Account
To login to your newly created local account, you just need to click on the username mentioned on the left side corner of your screen. Now enter the password. For the first time login, Windows takes some time to set up your account.
Pamaagi 2: Change the Account Type
When you create a new user account, it is by default, Standard user account, which is important from a security perspective. However, if you want to change it to an administrator account, you can easily do so. Make sure that you do not need to change the account type for someone whom you don’t trust.
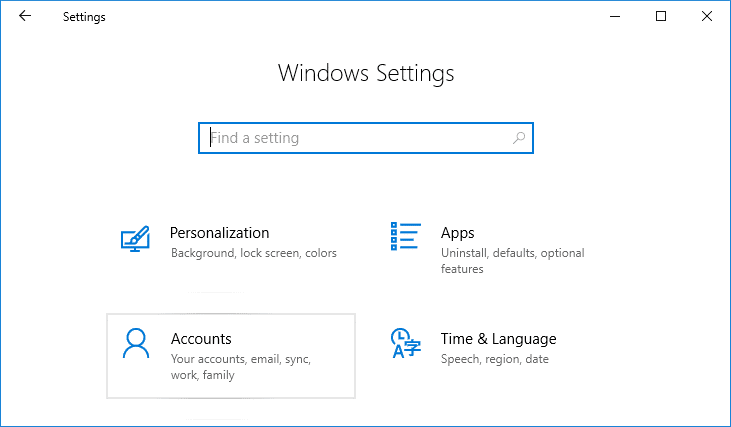
1.Press Windows Key + I sa pag-abli sa Settings unya i-klik sa Mga account.
2.Next, navigate to Accounts > Family & Other Users.
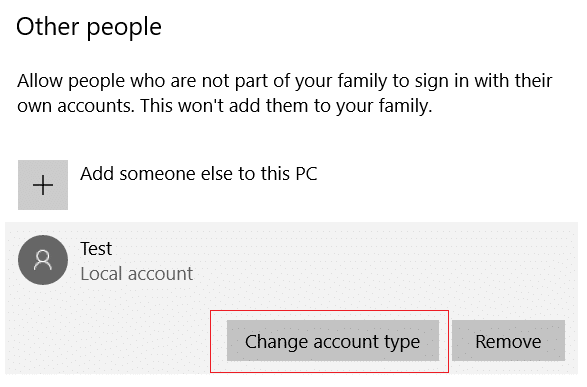
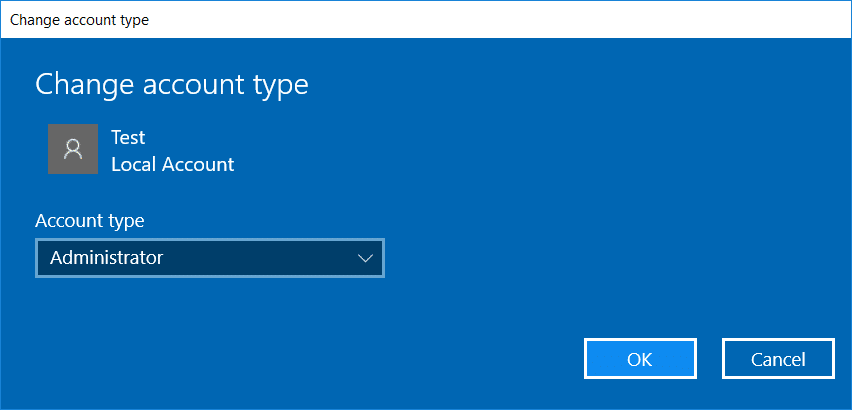
3.Choose the account name that you have created and click on Pag-usab sa type sa account kapilian.
4.Now from the “Account type” drop-down select Administrator ug i-klik ang OK.
Method 3: Remove a Local User Account
In case you want to delete a local user account, just follow the below steps.
1.Press Windows Key + I sa pag-abli sa Settings unya i-klik sa Mga account.
2.Now from the left-hand side menu click on Family & Other Users.
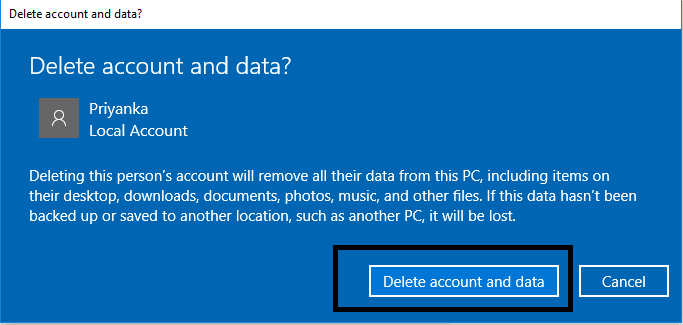
3.Next, click on the Account name which you want to remove and click on the Kuhaa ang buton.

Mubo nga sulat: When you delete a user account, all its related data will be deleted. Therefore, if you want to secure the data of that user account, you need to take a backup.
Pamaagi 4: Convert a Microsoft Account to a Local User Account
If you have signed in to your device with your Microsoft account, you can convert it to a local user account, if you want using the following steps:
1. Pangitaa ang setting in Windows search then i-klik kini.

2.I-klik ang Asoy sa section under the Settings app.
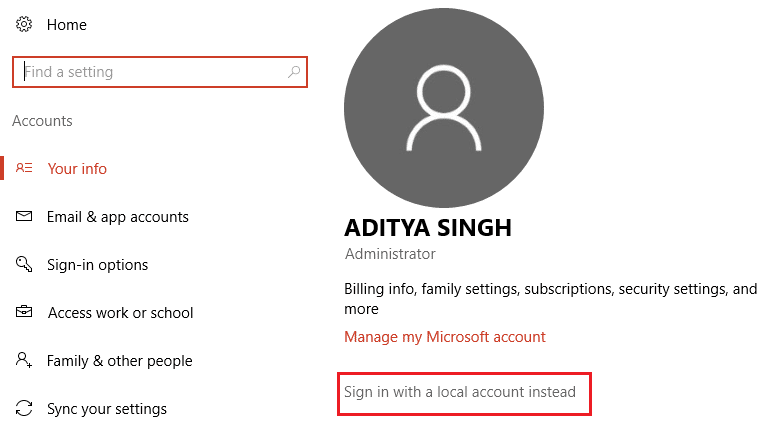
3.From the left pane, you need to click on Ang imong Info seksyon.
4.Here you need to click on Pagsulod uban sa usa ka lokal nga account hinoon kapilian.
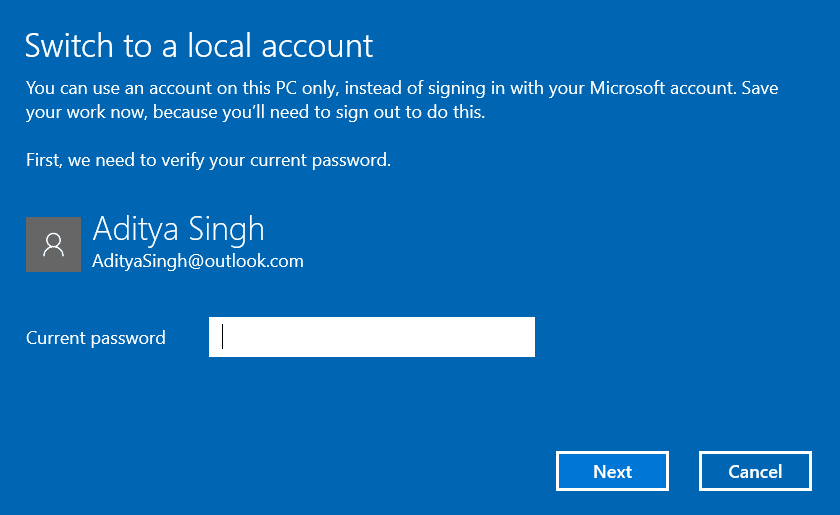
5. Pagsulod sa password for your Microsoft account and click Sunod.
6.Now you will need to Enter Password and Reenter the password including the Password hint then click on Sunod.
7. Sa katapusan, i-klik sa Paggawas and Finish option.
Now you can easily log in to the local user account which you just created. However, keep in mind that with your local user account you won’t be able to take benefit of features such as OneDrive app, sync your emails automatically, and other preferences. Using a local account comes with its own pros and cons. In most cases, you should only create a local account when you are giving access to your device to your friends or relatives who do not have a Microsoft account. Hopefully, by following the above given detailed methods of creating, deleting and converting your accounts, you will be able to get your job done.
girekomendar:
Nanghinaut ko nga kini nga artikulo makatabang ug dali ka na karon Create a Local Account on Windows 10, pero kung naa pa moy pangutana kalabot ani nga tutorial then feel free to ask them in the comment's section.