Fix MultiVersus ùn hè micca lanciatu in Windows 10

MultiVersus is a famous online multiplayer fighting game that is rocking today’s gaming world. Yet, few users complain about the MultiVersus not launching issue when the game is launched on their Windows 10 PC. If you are in the same boat, the troubleshooting hacks discussed in this article will help you sail the problem.
How to Fix MultiVersus Not Launching in Windows 10
If you are vexed by MultiVersus won’t launch issue in your Windows 10 computer, here are a few possible reasons why you must analyze them carefully to sort out the problem.
- U PC ùn risponde micca à i requisiti basi di u ghjocu.
- Qualchì altru prugramma di fondo interferiscenu cù u ghjocu.
- Aduprate una versione micca verificata di i drivers.
- I paràmetri grafici di u ghjocu sò misconfigurati.
- Presenza di malware è virus.
- U framework .NET è u sistema operatore ùn sò micca aghjurnati à a so ultima versione.
- A versione DirectX ùn hè micca aghjurnata.
- Overclocking.
- Qualchese fugliali d'installazione sbagliati o currutti di u ghjocu causanu ancu u prublema.
- I schedarii redistributable Microsoft C++ ùn sò micca cumpatibili cù u ghjocu è u PC.
Quì sò uni pochi di mètudi pussibili troubleshooting chì m'aiuti voi risolve u prublema discutitu.
Metudu 1: Metodi di risoluzione di prublemi di basa
Segui issi metudi basi di troubleshooting per risolve u prublema.
1A. Verificate i Requisiti di u Sistema
Multi versus Cunfigurazione Minima System
- CPU: Intel Core i5-2300 o AMD FX-8350
- RAM: 4 GB
- SCHEDA VIDEO: Nvidia GeForce GTX 550 Ti o AMD Radeon HD 5850 | Intel UHD 750
- PIXEL SHADER: 5.0
- VERTEX SHADER: 5.0
- SPAZU DISKU GRATUITU: 6 GB
- VIDEO RAM DEDICATA: 1024 MB
Multi versus Recipients Recurrenti
- CPU: Intel Core i5-3470 o AMD Ryzen 3 1200
- RAM: 8 GB
- SCHEDA VIDEO: Nvidia GeForce GTX 660 o AMD Radeon R9 270
- PIXEL SHADER: 5.0
- VERTEX SHADER: 5.0
- SPAZU DISKU GRATUITU: 6 GB
- VIDEO RAM DEDICATA: 2048 MB
1B. Check your internet connection
Unstable internet connection leads to MultiVersus is not working issue, also if there are any obstacles between your router and your computer, they may interfere with the wireless signal and will cause intermittent connection problems.
Pudete eseguisce a prucessu di veloce per sapè u livellu ottimale di velocità di rete necessaria per a cunnessione propria.
Assicurà chì u vostru dispusitivu satisface i criteri sottu.
- Truvate a forza di u signale di a vostra reta è s'ellu hè assai bassu, sguassate tutte l'obstruczioni trà a strada.
- Evite troppu dispusitivi cunnessi à a stessa reta.
- Cumprate sempre un modem / router verificatu da u vostru Internet Service Provider (ISP) è sò liberi di cunflitti.
- Ùn aduprate micca cavi vecchi, rotti o danneggiati. Sustituite i cables se ne necessariu.
- Assicuratevi chì i fili da u modem à u router è u modem à u muru sò stabile è fora di disturbu.
Se ci sò prublemi di cunnessione Internet, verificate a nostra guida Cumu risolve i prublemi di cunnessione di a rete in Windows 10 per risolve u listessu.
1C. Stop Overclocking
- Ogni computer high-end hè custruitu cù l'opzione di Overclocking chì aiuta à pruduce più sucu di e vostre specificazioni chì avete digià. Eseguisce a carta grafica o u processatore più veloce di a velocità predeterminata si riferisce à l'overclocking.
- Quandu succede questu, u vostru urdinatore ghjunghje à a temperatura massima dopu un tempu particulari. L'urdinatore detecta questu è aghjusta a velocità di u clock à a velocità normale finu à ch'ella hè rinfriscata. A velocità di u clock hè aumentata di novu dopu chì si rinfriscà.
- Questu aumenta u rendiment di u vostru urdinatore è hè un grande aiutu si ùn avete micca un urdinatore putente.
- Deve esse nutatu chì tutti i ghjochi ùn sustene micca l'overclocking. U listessu vale per MultiVersus. Dunque, duvete pruvà à disattivà tutti l'overclocking in u vostru urdinatore è pruvate à lancià u ghjocu. Se si lancia bè, u prublema hè risolta.
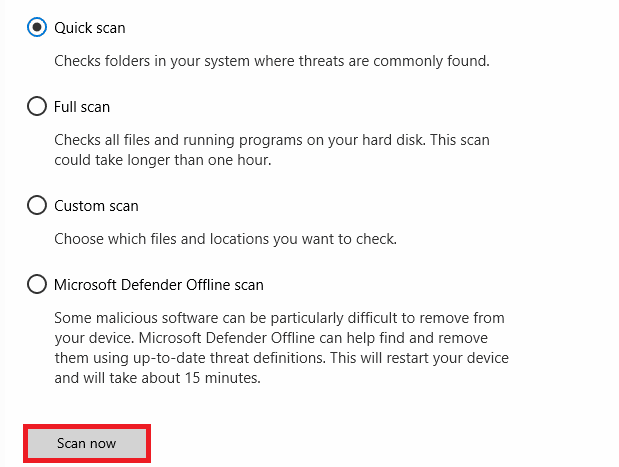
1D. Run Malware Scan
A prisenza di un attaccu di virus o malware hà da risultatu in prublemi di ghjocu in u vostru urdinatore. Se in casu, l'attaccu di virus hè assai severu, ùn pudete micca cunnette à qualsiasi ghjocu in linea continuamente. Per risolve u prublema, avete da caccià u virus o malware cumpletamente da u vostru Windows 10 computer.
Vi hè cunsigliatu di scansà u vostru urdinatore cum'è struitu in a nostra guida Cumu fà una scansione di virus in u mo Computer?
Inoltre, sè vo vulete caccià u malware da u vostru urdinatore, verificate a nostra guida Cumu sguassà Malware da u vostru PC in Windows 10.
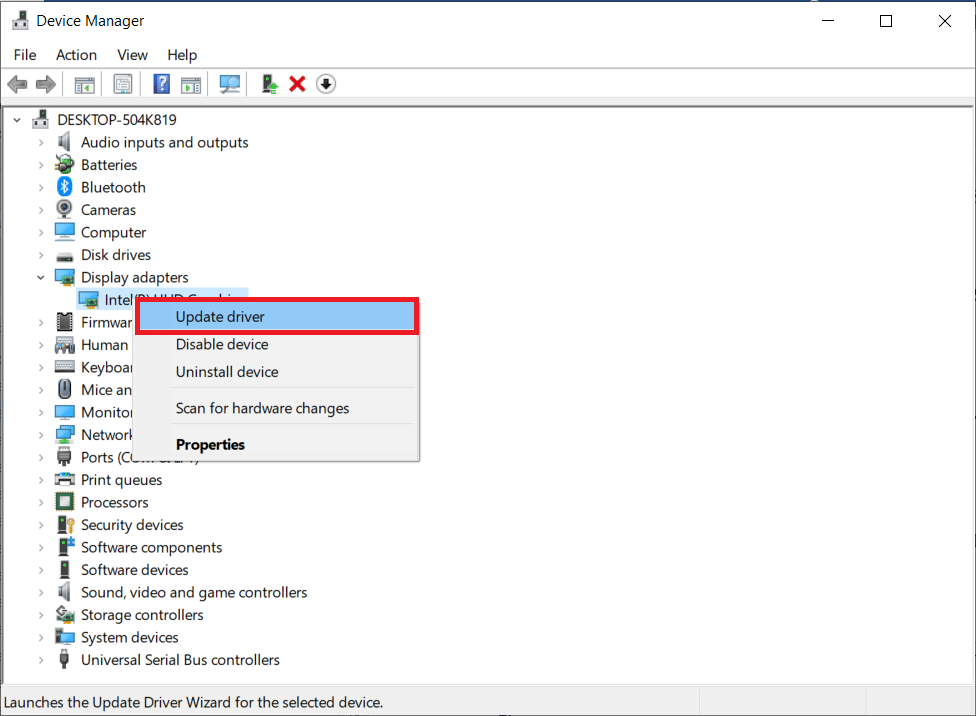
1E. Aghjurnate i Driver GPU
Graphical drivers are responsible for heavy graphical images and video processing games. If you face any launching conflicts in the MultiVersus game, make sure you use an updated version of device drivers, as they serve as a link between the hardware and Operating System of your PC. Many users have suggested that updating drivers have fixed MultiVersus not working issue. Read and implement the steps instructed in our guide 4 Ways to Update Graphics Drivers in Windows 10 to do so.
Also Read: Fix Windows Found Drivers per u vostru Dispositivu ma Scontru un Errore
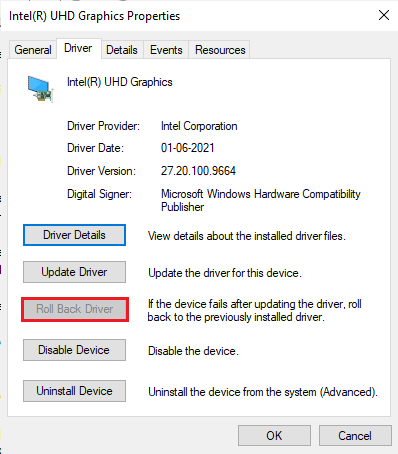
1F. Ripristina i Driver GPU
Sometimes, the current version of GPU drivers may cause the discussed launching issue in MultiVersus, and in this case, you have to restore previous versions of installed drivers. This process is called rollback di i cunduttori è pudete facilmente rinvià i vostri drivers di l'urdinatore à u so statu precedente seguitendu a nostra guida Cume Rollback Drivers in Windows 10.
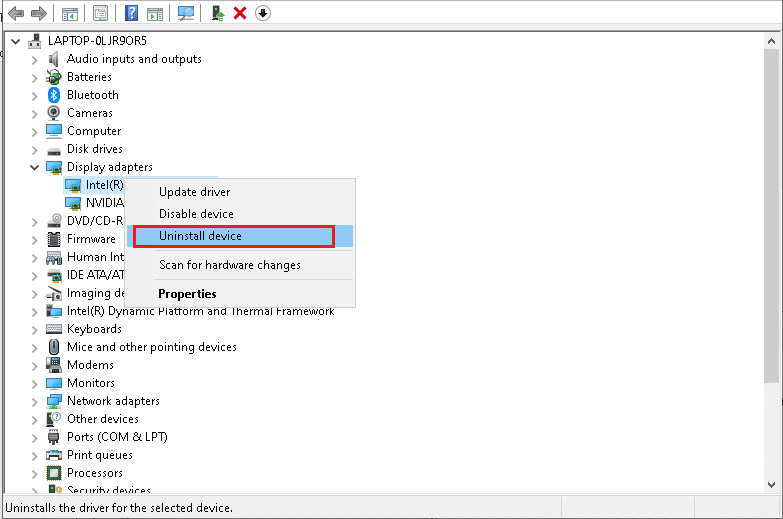
1G. Reinstalla u driver GPU
If you still face MultiVersus not starting issue after updating your GPU drivers, then reinstall device drivers to fix any incompatibility issues. There are several ways to reinstall drivers on your computer. Yet, you can easily reinstall Graphical drivers as instructed in our guide How to Uninstall and Reinstall Drivers on Windows 10.
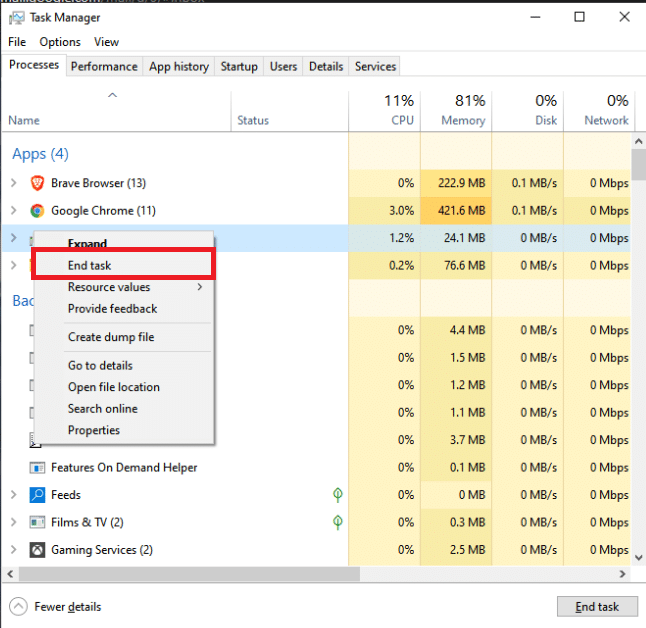
1H. End Background Processes
Several users have confirmed that MultiVersus not starting on PC can be resolved by closing all the background tasks running on your PC. To implement the task, follow our guide How to End Task in Windows 10, and proceed as instructed.
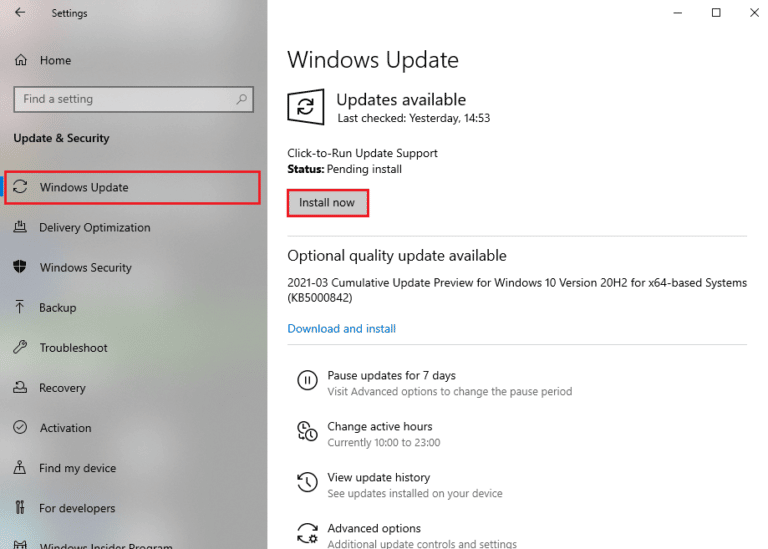
1I. Update Windows
You can also eradicate bugs in your computer and game by updating your Operating System. Always ensure if you have updated your Windows Operating System and if any updates are pending in action, use our guide How to Download and Install Windows 10 Latest Update
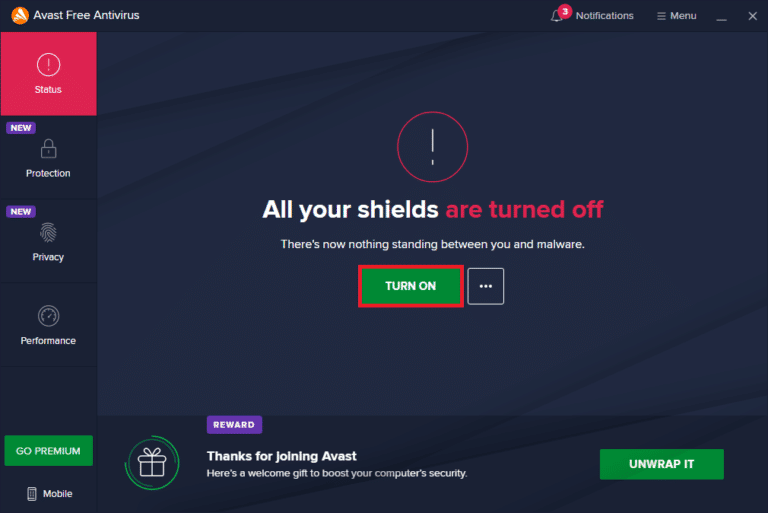
1J. Disable Antivirus Temporarily (If Applicable)
Some incompatible antivirus programs installed on your computer will cause MultiVersus launching problem. To avoid conflicts, you must ensure the security settings of your Windows 10 computer and check if they are stable or not. To find whether the antivirus suite is the reason for the discussed issue, disable it once and try connecting to a network.
Leghjite a nostra guida nantu à Cumu disattivà l'antivirus temporaneamente in Windows 10 è seguite l'istruzzioni per disattivà u vostru prugramma Antivirus temporaneamente in u vostru PC.
Sè avete una correzione per u vostru prublema dopu avè disattivatu u prugramma antivirus in u vostru urdinatore, vi cunsigliu di disinstallà completamente u prugramma da u vostru PC.
Read our guide Force Uninstall Programs which won’t Uninstall in Windows 10 to uninstall your antivirus program on your computer.
Also Read: Cumu disinstalla McAfee LiveSafe in Windows 10
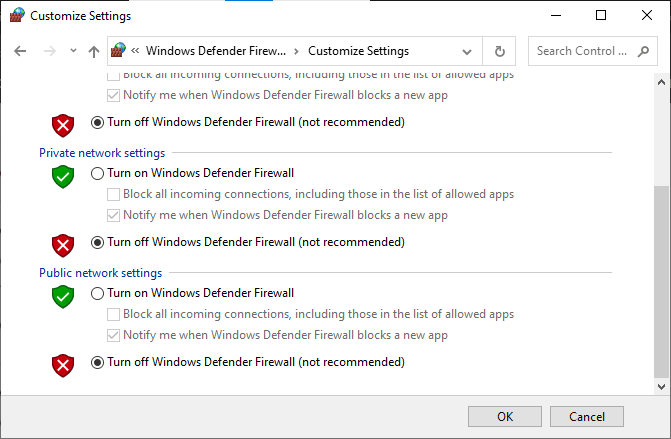
1K. Turn Off Windows Defender Firewall (Not Recommended)
Your computer will face MultiVersus is not working issue, due to an over-protective firewall suite in the Windows 10 PC. To resolve the problem, you can either add a new rule for your game, whitelist the game or as the last fix, disable the firewall temporarily.
Our guide on How to Disable Windows 10 Firewall will help you.
1L. Ripara i schedarii di u sistema
If there are any missing or damaged files on your Windows 10 PC, you will face MultiVersus takes forever to launch issue. Yet, you are repairing these corrupt files by using inbuilt utilities namely, Sistema di Verificante di Schedariu e Implacement Image Servicing and Management.
Leghjite a nostra guida nantu à Cumu riparà i schedarii di u sistema in Windows 10 è seguite i passi cum'è urdinatu per riparà tutti i vostri fugliali currutti.
Metudu 2: Run MultiVersus Game cum'è Amministratore
If MultiVersus does not have required administrative privileges, a few essential features of the game will be limited causing you MultiVersus not launching issue whenever you open the game or install any updates. Follow the below-mentioned instructions to run the game as an administrator.
1. Cliccate cù u dirittu nantu à u Scorciatoia MultiVersus nant'à u Desktop.
nota: Pudete ancu andà à u cartulare di stallazione è fate cliccate dirittu nantu à questu.
2. Dopu, selezziunate u Joint funziunalità.
3. Avà, spustà à u Vincenti tabulazione è cliccà nantu Eseguite stu prugrammu cum'è amministratore.
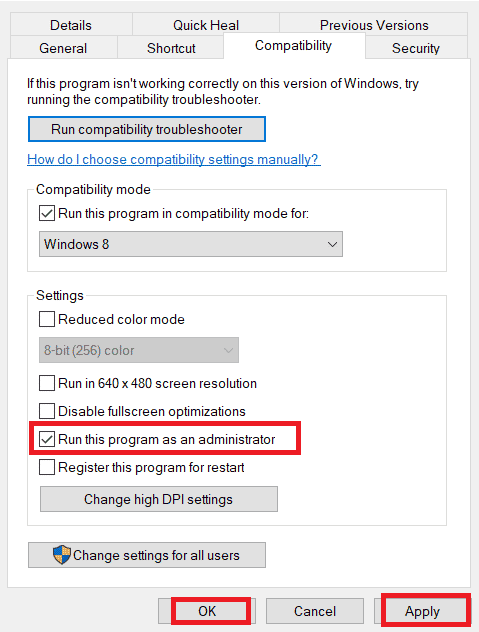
4. Infine, cliccate nant'à Dumandà> OK per salvà i cambiamenti.
Check if you have fixed MultiVersus launching issues.
Also Read: Fix WoW Prend Forever to Launch in Windows 10
Metudu 3: Cambia a Priorità di Prucessu di u ghjocu
The preference of an application or process tells the computer the importance and if it should be given preference over the others while allocating the resources. The priority of every application is normal except the system processes, by default. MultiVersus might crash if it didn’t get enough resources.
1. Premete u Tasti Ctrl + Shift + Esc inseme per apre Taskbar.
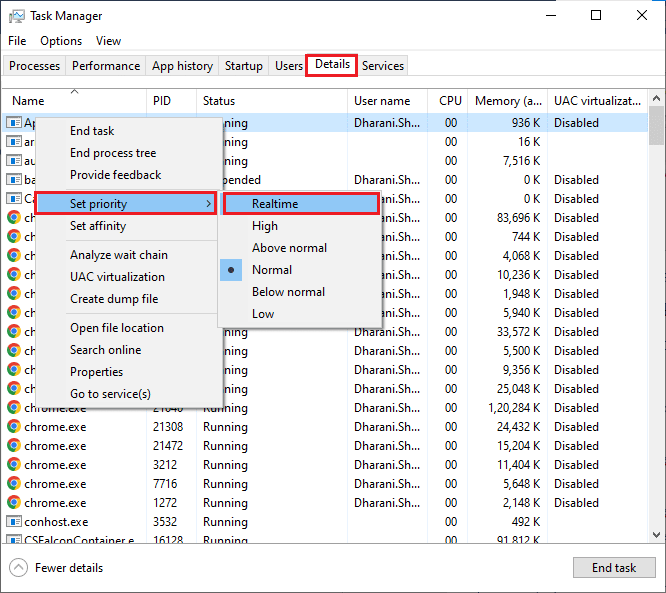
2. Avà, cercate Prucessu MultiVersus.
3. Allora cambià a priorità à Alta priorità è verificate s'ellu funziona.
nota: Cambia a priorità cun grande prudenza cum'è cambià a priorità di u prucessu senza cura puderia rende u vostru sistema estremamente lento o inestabile.
4. Chiudi lu Task Manager e reboot u vostru computer.
Metudu 4: Set High Performance
Pudete ancu ottimisà u vostru ghjocu quandu stabilisce i vostri paràmetri di u pianu di putere di altu rendiment. Questi piani di putenza sò sviluppati per gestisce i paràmetri di putenza in i paràmetri portatili. Segui l'istruzzioni quì sottu per utilizà i paràmetri di u pianu di putenza di altu rendiment in u vostru sistema.
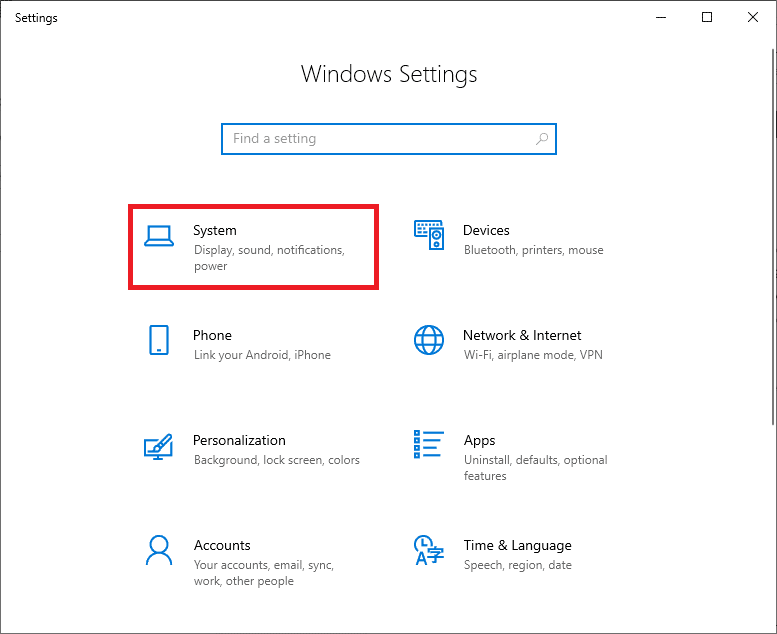
1. Premete u Tasti Windows + I simultaneamente per apre Impostazioni Windows.
2. Ora, cliccate nantu à System scatula.
3. Avà, selezziunà u Potenza è sonnu opzione è cliccate nantu Impostazioni di potenza addiziunali sottu Impostazioni relative.
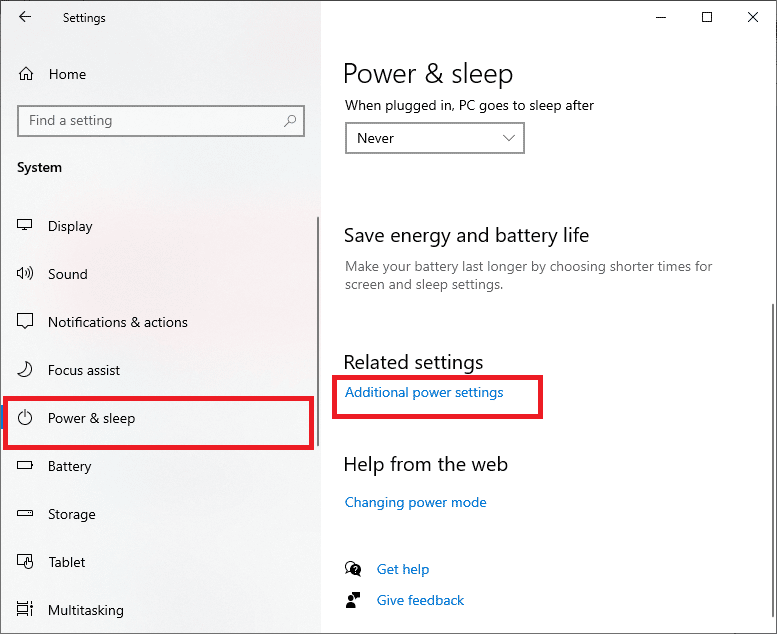
4. Avà, sceglie u High-performance opzione sottu Alti piani supplementari cum'è mostra in a stampa sottu.
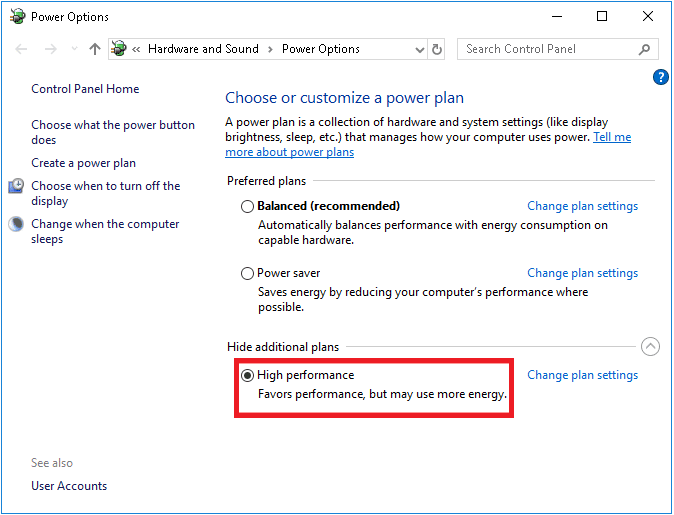
Now you have optimized your system, check if you have fixed MultiVersus won’t launch on startup issue.
Also Read: Fixing Missing Files Scaricatu Errore nantu à Steam
Method 5: Update Steam App & MultiVersus Game
Sè vo aduprate una applicazione Steam obsoleta, ùn pudete micca accede à qualsiasi ghjocu in modu fluidu. Dunque, assicuratevi sempre di aduprà una versione aghjurnata di u ghjocu Steam è MultiVersus prima di lancià.
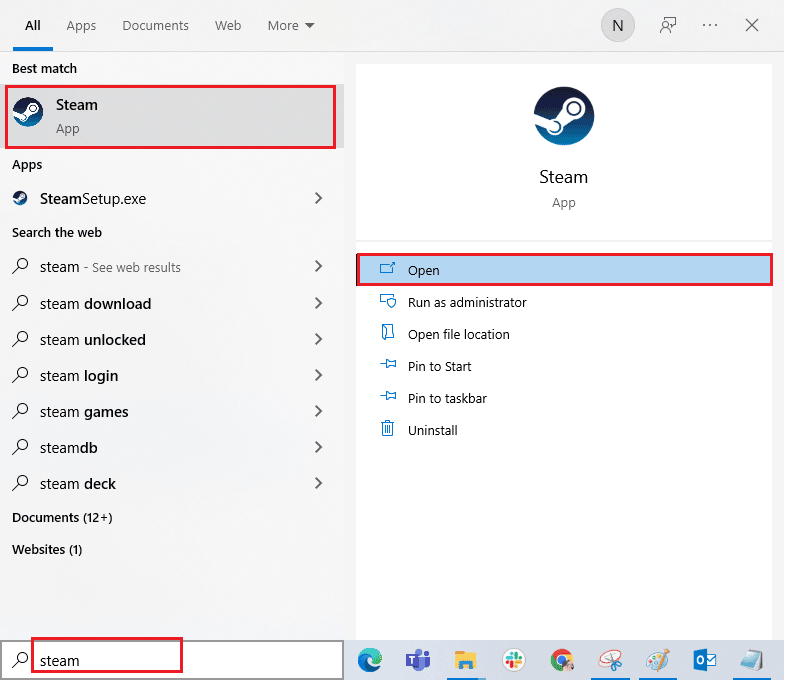
1. Hit Windows key è tipu vapore, dopu cliccate Apertu.
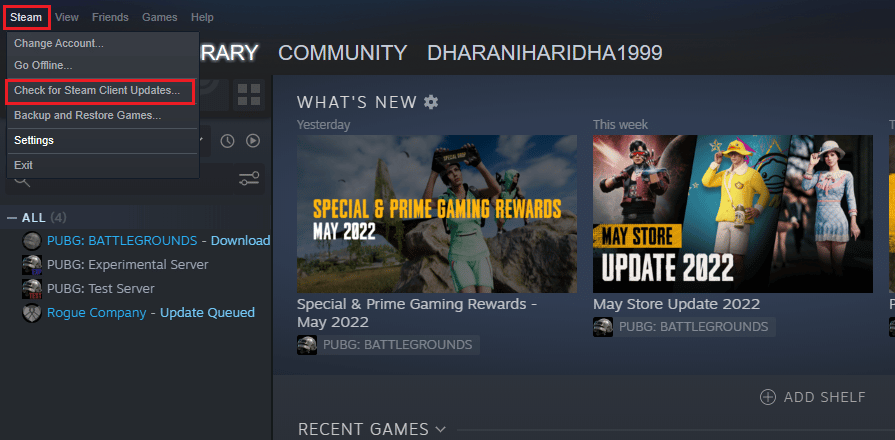
2. Ora, cliccate nantu à vapore in u cantonu superiore manca di u screnu seguita da Verificate l'aghjurnamenti di i Clienti Steam... cum'è evidenziatu sottu.
3. Sè vo avete ogni novu aghjurnamenti à esse telecaricatu, stallà elli è assicurà u vostru cliente Steam hè aghjurnatu.
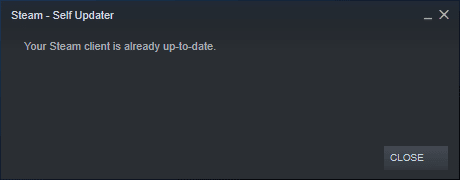
4. Avà, rilancià Steam è verificate se u prublema hè risolta avà.
Likewise, it is always essential that your game run at its latest version to avoid any conflicts. Until your game is updated, you cannot log in to MultiVersus servers successfully.
To aghjurnà u vostru ghjocu, seguitate i passi quì sottu.
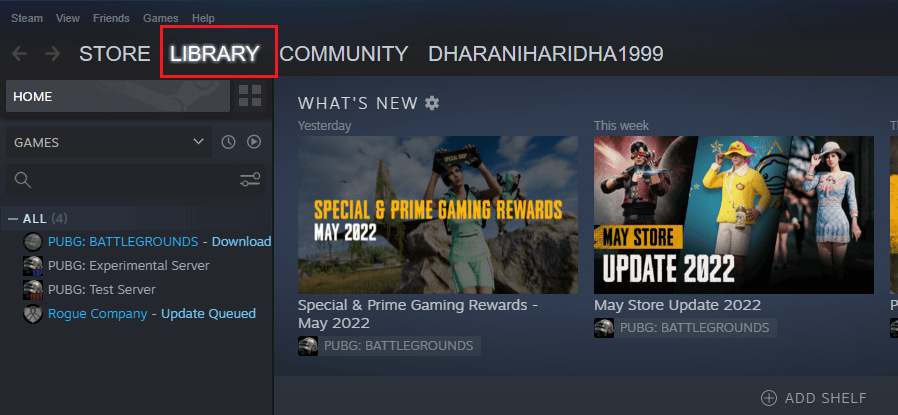
1. Launch vapore and navigate LIBRARY.
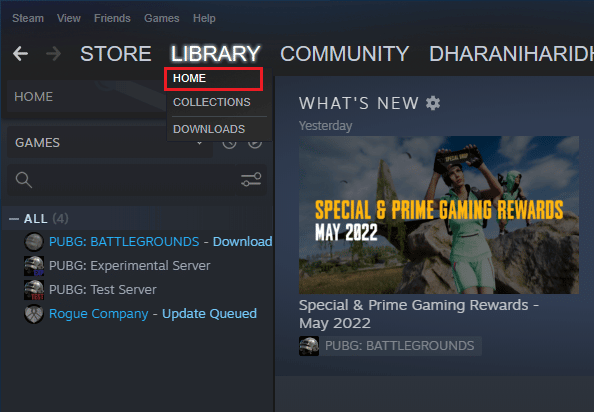
2. Ora, cliccate nantu à Home è cercate MultiVersus.
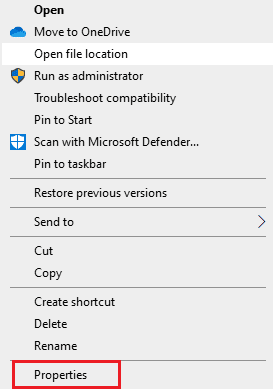
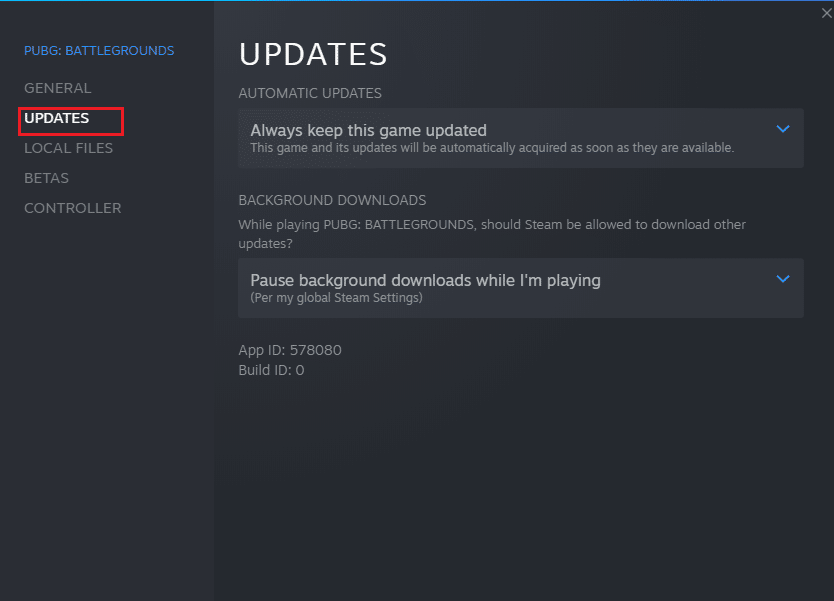
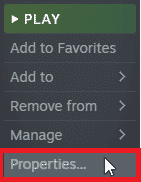
3. Allora, right-click nant'à u ghjocu è selezziunà u Pruprietà ... funziunalità.

4. Avà, cambià à u UPDATES tabulazione è verificate se alcune aghjurnamenti sò pendenti in azzione. Sì cusì, seguitate e struzzioni nantu à u screnu per scaricà l'ultime aghjurnamenti.
After an update, check if MultiVersus not launching issue is fixed.
Metudu 6: Disattivà l'Ottimisazioni Full-Screen
Few users have suggested that disabling full-screen optimizations on PC has helped them fix MultiVersus is not launching issue. Follow as instructed.
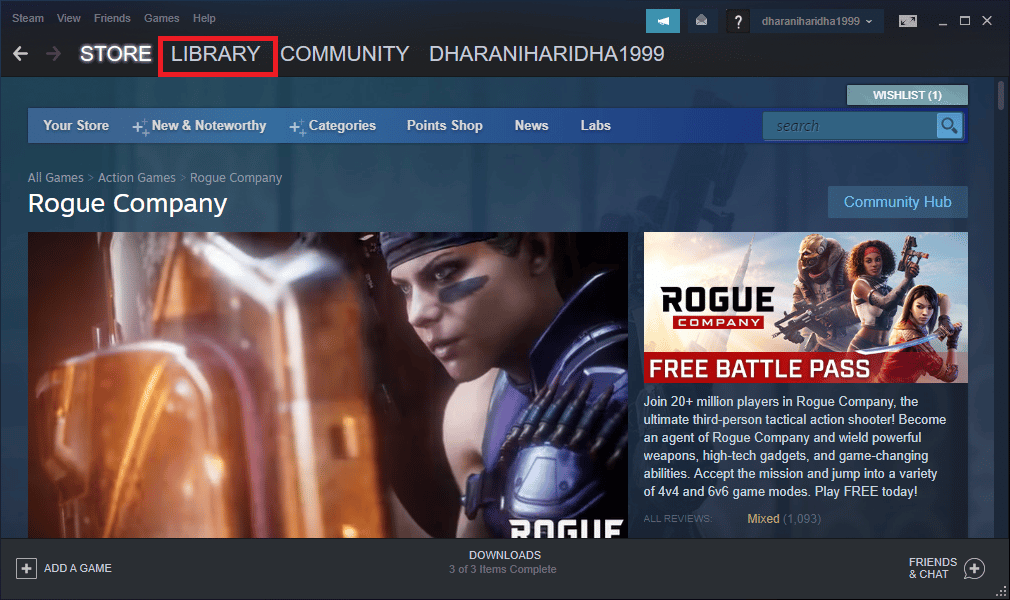
1. Navigate à u vapore LIBRARY lu menu.
2. Now, right-click on the MultiVersus game and click on Pruprietà ...
3. Avà, cambià à u GENERAL tabulazione è cliccà nantu SET OPZIONI DI LANCIA... cum'è illustratu.
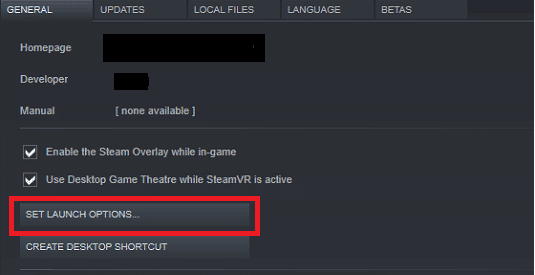
4. Avà, una nova finestra sarà aperta cù un avvirtimentu utilizatori avanzata. Per apre u ghjocu in modalità finestra, scrivite u - finestra paràmetru.
5. Avà, salvà i cambiamenti clicchendu OK è esce da a finestra di Pruprietà.
6. Avà, rilancià u ghjocu and ensure that it runs in windowed mode.
nota: You can also navigate to SET OPZIONI DI LAUNCH... di novu è scrivite i seguenti paràmetri invece di l'ultimu paràmetru.
-finestra -w 1024
7. Avà, salvà i cambiamenti clicchendu nant'à OK.
Stu paràmetru stabilisce u ghjocu per esse lanciatu in modalità finestra.
Also Read: Fix a configurazione di l'app Steam ùn hè micca dispunibule in Windows 10
Metudu 7: Disattivà a superposizione in u ghjocu
The Steam Overlay is a piece of Steam that allows the users to access friends list, and web browser and allows in-game purchasing. It is a significant tool, yet it sometimes triggers MultiVersus not launching on startup issue. If you want to solve this problem, then turn off the Steam game overlay.
1. Grapi lu vapore app è cliccate nantu LIBRARY.
2. Avà, right-cliccate nant'à Multi versus è cliccà nantu Pruprietà ...

3. Avà, cambià à u GENERAL tabulazione è desmarcate a casella chì cuntene Abilita u Steam Overlay mentre in u ghjocu.
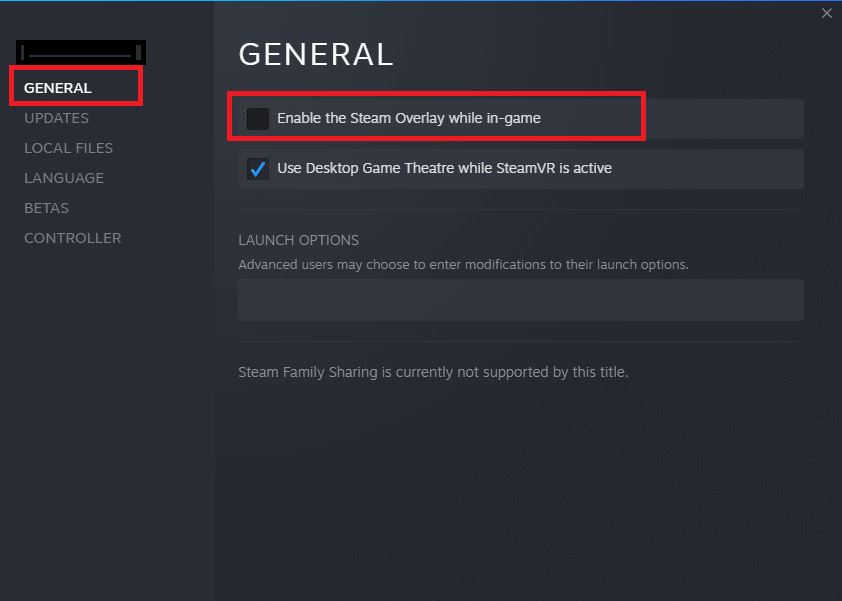
4. Infine, rilancià u ghjocu and check if the MultiVersus launching issue is solved.
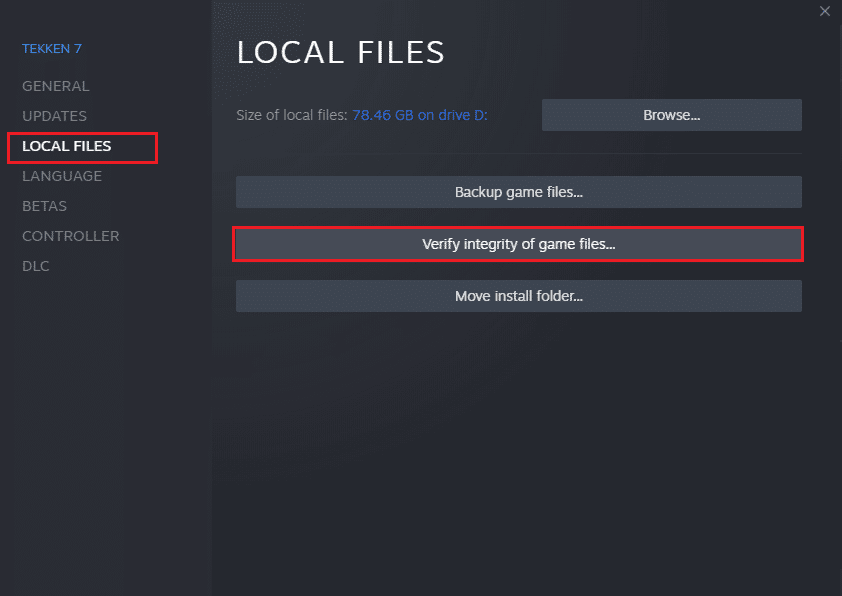
Metudu 8: Verificate l'integrità di i schedarii di u ghjocu
We have seen many cases in which the game files are either missing or corrupt or it had incomplete installations. Users could also experience MultiVersus not starting on PC issue if they are interrupted by the update process or if the game files are being moved. In this method, you will be opening Steam and using the built-in function for verifying the integrity of the game. It will be replaced if the application finds something. Read our guide on how to verify integrity of game files on Steam.
Also Read: Fix Steam Client Bootstrapper ùn risponde micca in Windows 10
Metudu 9: Update .NET Framework
.NET framework in Windows 10 computer is essential for uninterrupted service of modern apps and games. Many games have an auto-update feature for the .NET framework, and thus it will be updated automatically whenever an update is available. In another case, if an update prompts in your PC, you can manually install the latest version of the .NET framework, as discussed below, to fix MultiVersus not launching issue.
1. Verificate per novi aghjurnamenti per u Framework .NET da u u situ ufficiale di Microsoft.
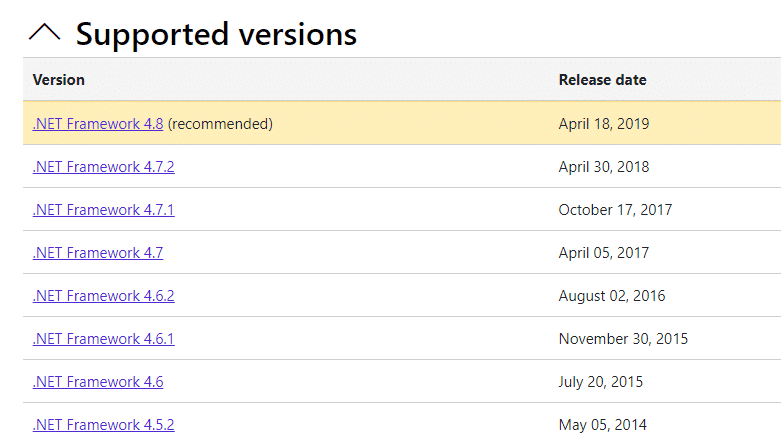
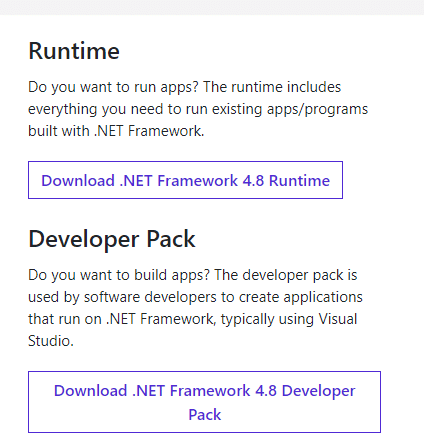
2. Se ci sò aghjurnamenti, cliccate nant'à u currispundente /cunsigliu ligame è cliccate Scaricate .NET Framework 4.8 Runtime funziunalità.
nota: Ùn cliccate micca Scaricate .NET Framework 4.8 Developer Pack cum'è hè utilizatu da i sviluppatori di software.
3. Andà à I mo scaricamenti, cliccate doppiu nantu à u schedariu di cunfigurazione per eseguisce u schedariu telecaricatu è seguite u struzzioni nantu à u screnu per stallà u framework .NET cù successu in u vostru PC Windows. Una volta finitu, verificate s'ellu avete risoltu u prublema discututu o micca.
Metudu 10: Aghjurnate DirectX
To enjoy a seamless multimedia experience on MultiVersus, you have to make sure whether DirectX is installed, and it is updated to its latest version. DirectX helps you improve the visual media experience for graphical games and applications especially. It is worth updating DirectX needed for this game.
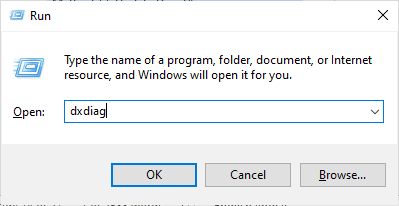
1. Colpite u Chjave Windows + R simultaneamente per lancià u Run box di dialogu.
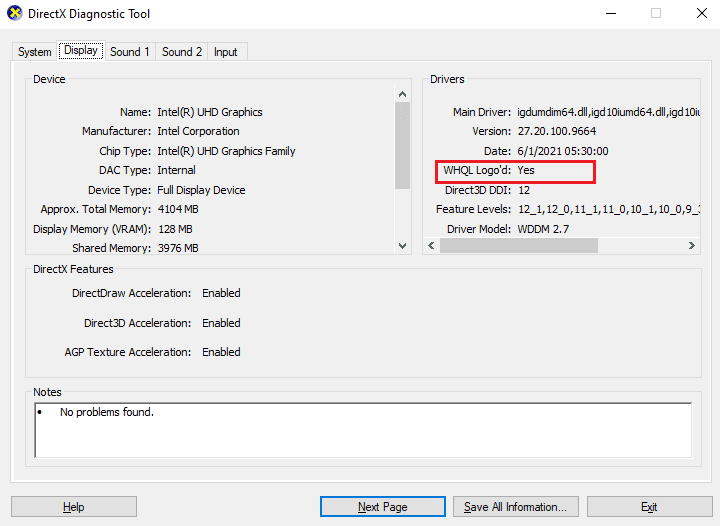
2. Type dxdiag è presse a Intra chjave à apre Strumentu Diagnosticu DirectX.
3. Verificate u Versione DirectX, if it contains DirectX 12 o micca.
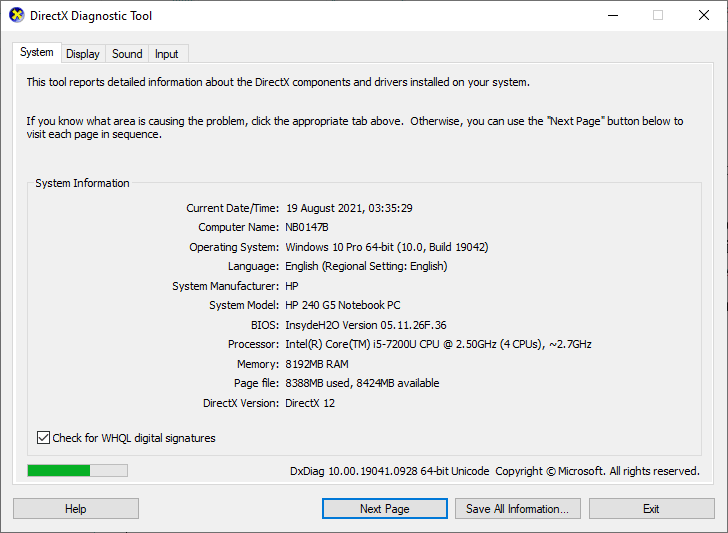
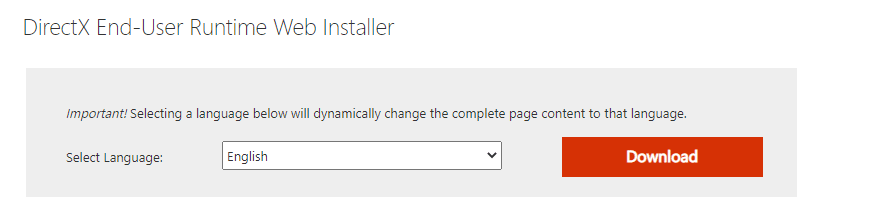
4. Sè vo ùn hannu DirectX 12 in u vostru sistema, scaricà è stallà lu da u Pagina di scaricamentu di DirectX seguendu l'istruzzioni nantu à u screnu.
After installing DirectX, check if the issue occurs again.
nota: pigliinu in contu Verificate e firme digitali WHQL a casella hè verificata System tab è in tutte e tabulazioni, verificate s'ellu WHQL Logo'd esse stabilitu à Iè.
Metudu 11: Riparazione Microsoft Visual C++ Redistributable
Alternately, you can try to repair the Microsoft Visual C++ Redistributable packages to fix MultiVersus not launching issue as follows:
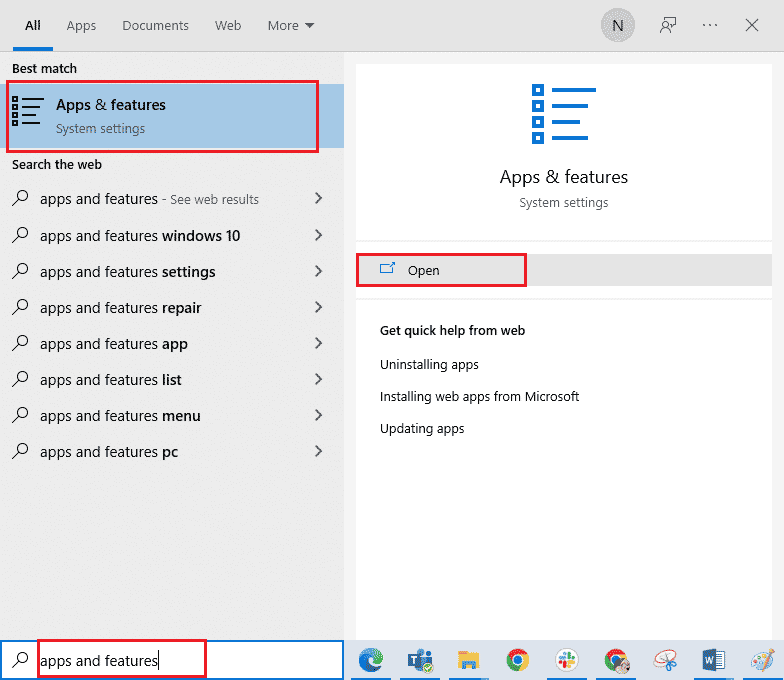
1. Colpite u Windows key, tipu Apps & funziunalità, dopu cliccate Open.
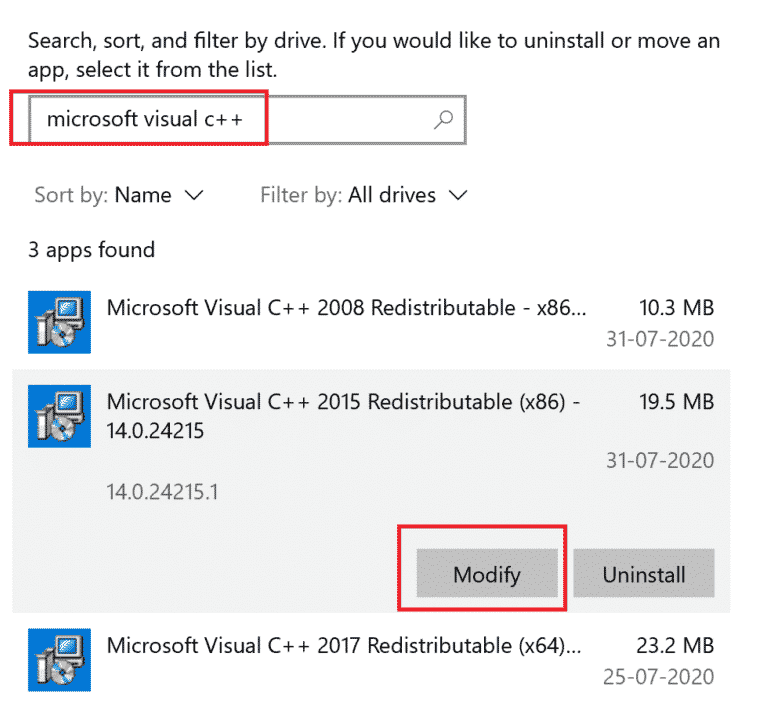
2. Cerca Microsoft Visual C ++ Redistribuibile U pacchettu.
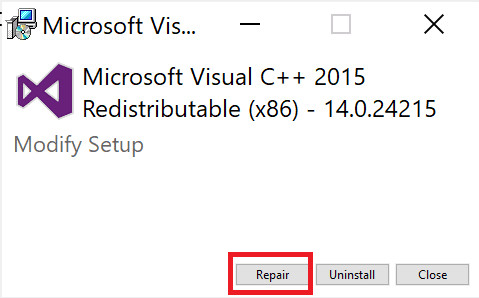
3. Then, select the package, and click on Modificà funziunalità.
4. Allora, cliccate Iè nantu à u Control di Cunsigliu d'Usuariu box di dialogu.
5. In the pop-up window that appears, click on Repubblica. Aspittendu u prucessu per finisce.
6. Repeat the above steps to modify all the Microsoft Visual C++ Redistributable packages.
7. Infine, riavvia u PC.
Aprite l'applicazione chì ùn avete micca pussutu apre prima. Se questu ùn hà micca travagliatu, pruvate à reinstallà u C++ redistributable invece.
Also Read: Fix Microsoft Visual C++ 2015 Redistributable Setup Falls Error 0x80240017
Metudu 12: Reinstalla Microsoft Visual C++ Redistributable
If the previous method of repairing the Microsoft C++ Visual Redistributable did not fix MultiVersus won’t launch issue, then you will have to reinstall the redistributable. Follow the given steps to uninstall & then install these again.
1. Grapi lu Apps & funziunalità i paràmetri di u sistema.
2. Sceglite u Microsoft Visual C ++ Redistribuibile package, then click on Uninstall funziunalità.
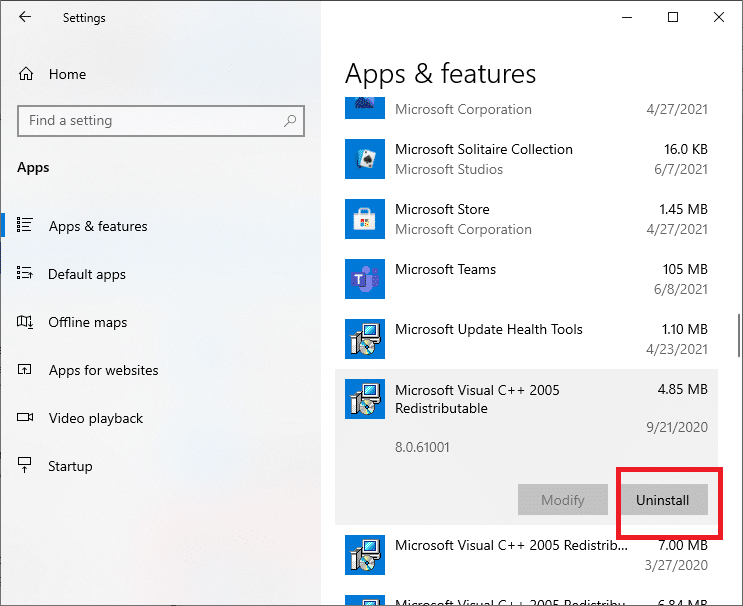
3. Cliccate nant'à Uninstall option again to confirm and remove the package.
nota: Make sure to uninstall all the Microsoft Visual C++ Redistributable packages.
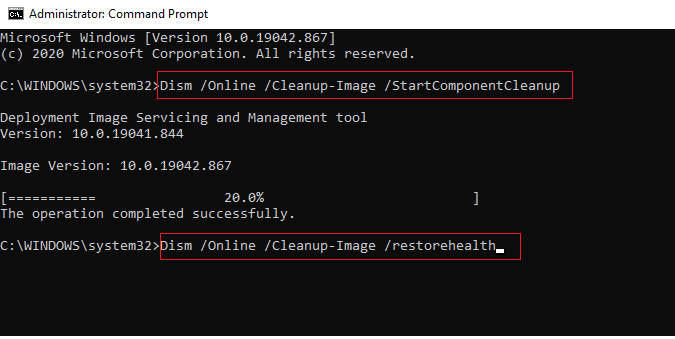
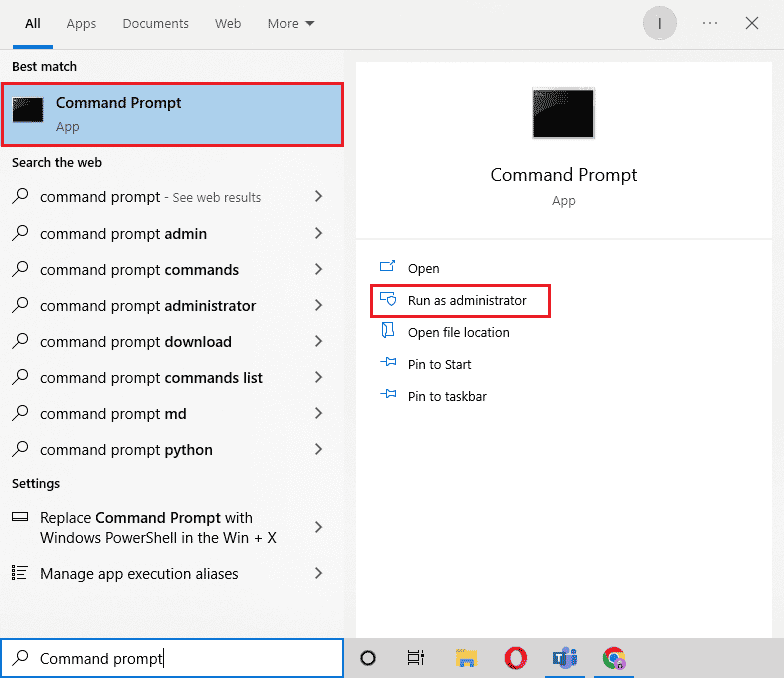
4. Colpite u Windows key, tipu Command Prompt, dopu cliccate Executà cum'è amministratore.
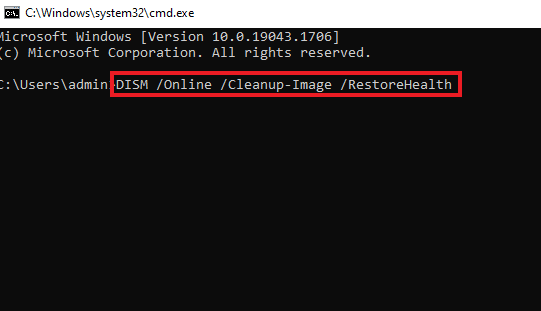
5. Type i seguenti cumandamenti È stampa Rinsignate chiavi dopu à ognunu:
DISM /online /Cleanup-Image /StartComponentCleanup
DISM /online /Cleanup-Image /RestoreHealth
6. Una volta u prucessu hè cumpleta, riavvia u PC.
7. Dopu, visitate u Microsoft Visual C++ Redistributable webpage to download the latest C++ package as shown here.
8. Once downloaded, open the schedariu telecaricatu by double-clicking on it in I mo scaricamenti. stallà the package by following the on-screen instructions.
9. Once the installation is complete, finally riavvia u PC.
ricumandatu:
Speremu chì sta guida hè stata utile è pudete riparà MultiVersus not launching issue on your Windows 10 PC. Let us know which method worked for you the best. Feel free to reach out to us with your queries and suggestions via the comments section below.