- in Windows 10 by Admin
F8 Not Working In Windows 10? 5 Things To Try

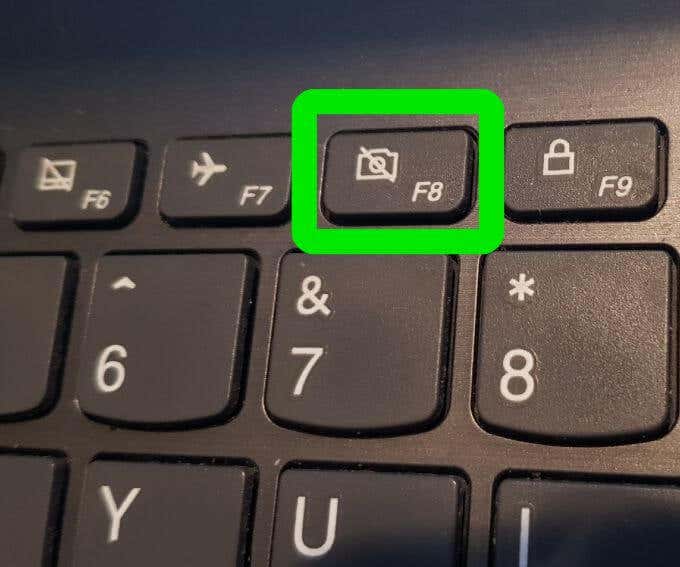
If you’ve upgraded to Windows 10 from older versions like Windows XP, Vista and Windows 7, you may have noticed that the F8 function key you pressed during startup for at gå ind i fejlsikret tilstand fungerer ikke længere.
The F8 key is still available on your keyboard, but it works with other key combinations to perform certain functions, especially when your touchpad or mouse isn’t working and you need to Brug tastaturgenveje i stedet.
In this guide, we’re going to show you what to do when you find F8 not working in Windows 10, but first, let’s look at why this happens.
Why Is F8 Not Working In Windows 10?
fejlsikret tilstand is a native Windows feature in all versions of the operating system, which is used to troubleshoot various problems such as driver installation issues, problems booting into Windows, and malware or virus-related issues among others.
The F8 boot menu was removed in order to improve system boot time. This is because Windows 10 boots much faster than previous versions, so you won’t have enough time to press the F8 key and enter Safe Mode during startup. Plus, it can’t recognize the key press during the boot process, which prevents access to the boot options screen from where you can select the Safe Mode option.
Instead, Microsoft provided a new Advanced Boot Options menu feature that lets you access troubleshooting options such as Safe Mode and others.
You can still access the Safe Mode feature by pressing the F8 key, but you have to re-enable it manually using a few simple steps, and there are other methods that can also get you into Safe Mode, but they’re not as straightforward.
Fix F8 Not Working In Windows 10
1. Manually Re-enable F8 Key
- Type CMD i søgefeltet og klik Kør som administrator.
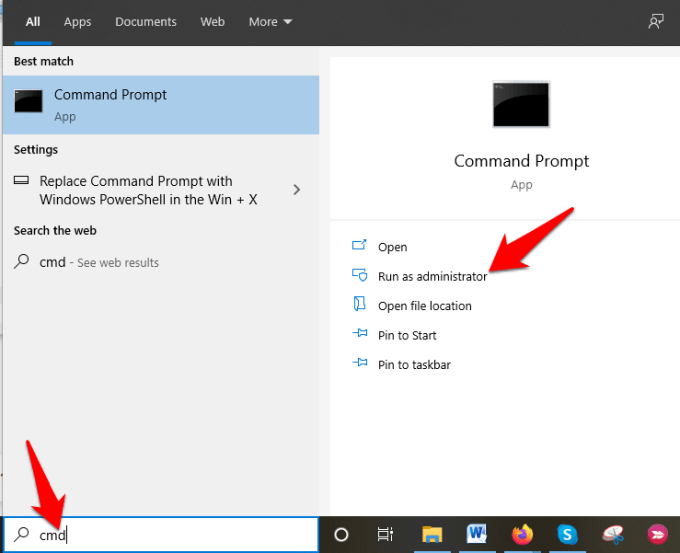
- Type this command in the Command Prompt: bcdedit / set {standard} bootmenupolicy arv og tryk Indtast..

Bemærk: BCD or Boot Configuration Data Edit command is a native tool in Windows that controls how the operating system starts. It also helps you easily re-activate the F8 boot menu.
- Genstart din pc, and press the F8 key repeatedly on the keyboard while it starts up and you’ll see the Advanced Boot Options menu, from where you can select Safe Mode, Safe Mode with Networking eller Fejlsikret tilstand med kommandoprompt.
To disable the F8 key again, open the elevated Command Prompt and type this command: bcdedit / set {standard} standard bootmenupolicy
2. Enter Safe Mode From Start Menu
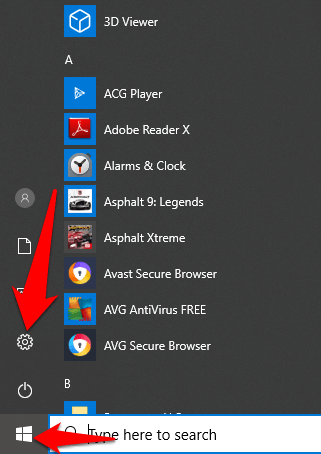
- Klik Starten og vælg Indstillinger.
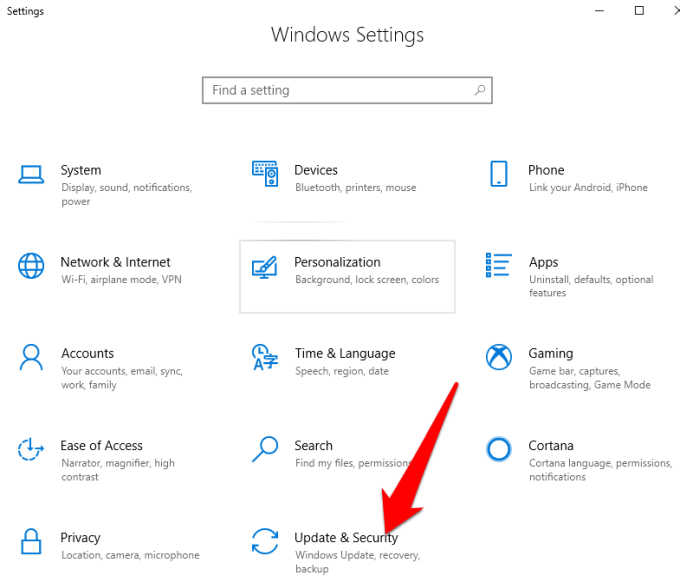
- Klik derefter på Opdatering og sikkerhed i menuen Indstillinger.
- Klik på i venstre rude Recovery og klik derefter på Genstart nu.

- Windows will restart automatically and display the Vælg et valg skærmen. Klik Fejlfinding.


- Klik derefter på Startup Settings.

- A screen will appear showing different startup options.
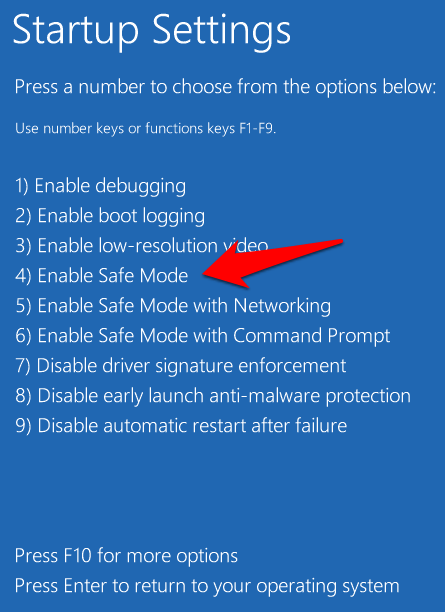
- On your keyboard, press the F4 key or number 4 key to enter fejlsikret tilstand, or the corresponding key to enter Fejlsikret tilstand med netværk or with Command Prompt afhængigt af hvad du vil gøre.
Bemærk: Du kan også klikke på Starten, højreklik på Power knappen, og hold nede Flytte key when you click Genstart. This automatically restarts Windows and brings up the Vælg et valg screen, after which you can continue with the steps to access Safe Mode.
3. Start Safe Mode By System Configuration
System Configuration also known as msconfig, is a system utility used when troubleshooting the Windows startup process. It can disable or re-enable device drivers and programs that run during the boot process to figure out why the problem you’re experiencing occurred. It saves time compared to other methods that require you to repeat several steps just to enter Safe Mode.
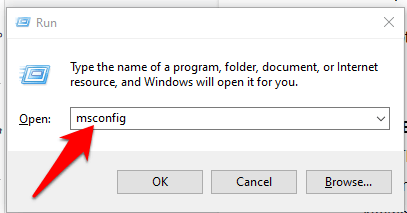
- Tryk Windows-logotast + R at åbne Kør dialogboks og skriv msconfig. Tryk derefter på Indtast eller klik OK.
- Klik Boot and mark the checkbox next to Safe Boot. Vælg Minimum og klik OK. There are other options available such as Alternate Shell (Safe Mode with Command Prompt), Active Directory Repairog Network (Safe Mode with Networking support), so you can pick the one you need.
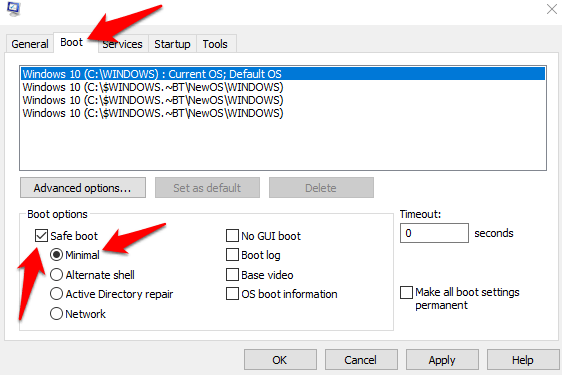
- Klik Anvend> OK for the changes to take effect and Windows will restart in Safe Mode.
To exit Safe Mode from System Configuration, open the Boot options window again, uncheck the box next to Safe Boot, og klik på OK. Klik Genstart to apply the changes, and restart your computer normally.
4. Enter Safe Mode When Windows Can’t Boot Normally
Safe Mode loads with a minimum set of programs and drivers. If Windows can’t start normally, you won’t have a problem entering Safe Mode, because you can restart the PC twice and go to the Automatic Repair screen from where you can enter Safe Mode.
- Make sure your PC is off and then press and hold down the Power button until the computer goes off. Repeat this about two or three times (to trigger the boot recovery mechanism) until the Forbereder automatisk reparation skærmen vises.
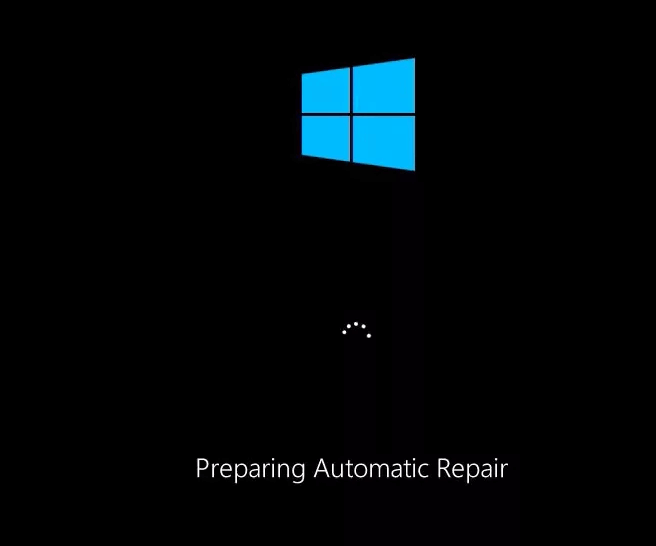
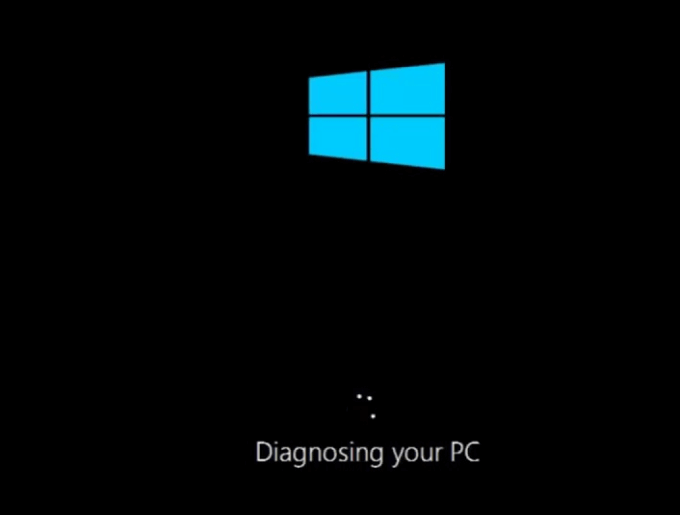
- If you see the Preparing Automatic Repair screen when you power on the computer the first time, skip to the next step, and the Diagnosing Your PC screen will appear. This will be followed by the forsøger at reparere besked.
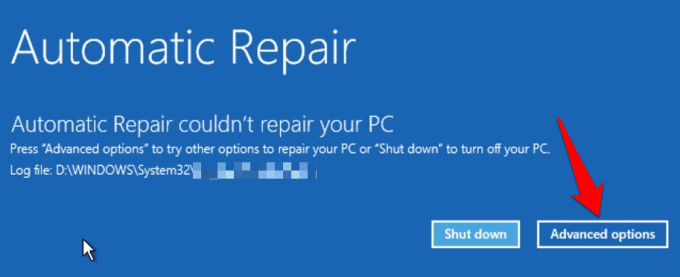
- Windows will show the Automatic Repair kunne ikke reparere din pc message and give you the Luk ned , Avancerede indstillinger i Startup Repair skærmen. Klik Avancerede indstillinger.
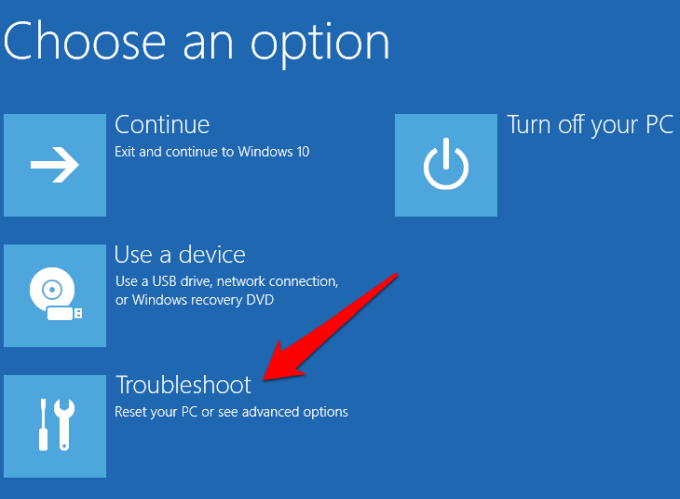
- Klik Fejlfinding i Vælg en mulighed skærmbilledet.
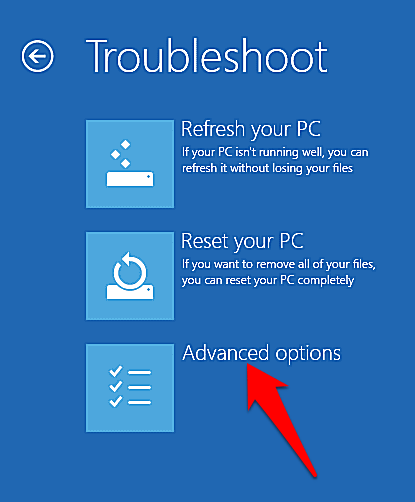
- Klik derefter på Avancerede indstillinger.

- Your PC will restart and show different startup options on the next screen.

- Press the F4 key or number 4 key on your keyboard to enter fejlsikret tilstand. You can also press the corresponding key to enter Fejlsikret tilstand med kommandoprompt or med netværk afhængigt af hvad du vil gøre.
Bemærk: If you have a Windows 10 bootable USB drive or setup disc, you can use that to start your PC in Safe Mode if Windows can’t load. Boot the PC using the bootable drive or setup disc, select Reparer computeren and you’ll get to the Choose an option screen from where you can take the steps above to enter Safe Mode.
5. Start In Safe Mode When You Can’t Login to Desktop
This is another method you can use if you find Windows 10 Safe Mode not working. If you can access your login screen (welcome or sign-in screen) but can’t access or login to Desktop, use these steps to restart your computer in Safe Mode.
- Klik på Power at the bottom right side of the Windows 10 Login screen.
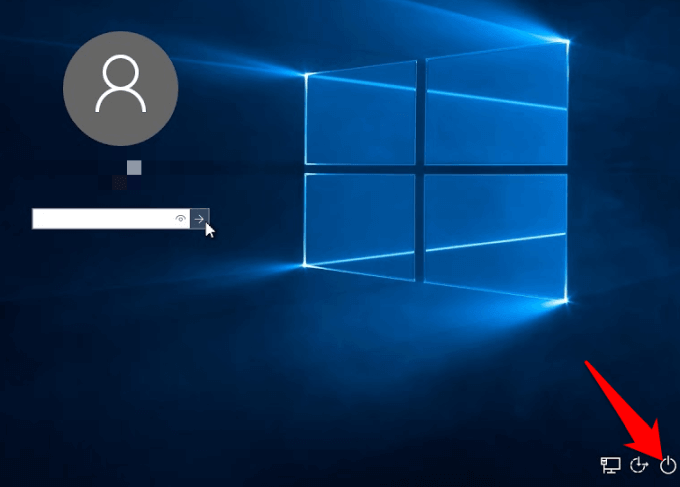
- Tryk og hold nede Flytte tast på dit tastatur og vælg Genstart. Du vil se Vent venligst screen appear briefly, and the Vælg et valg skærmen. Klik Fejlfinding.

- I Avancerede indstillinger skærm, klik Startup Settings.
- In the Startup Settings screen, press the key(s) corresponding to the fejlsikret tilstand option you want to use.

More Ways To Boot To Safe Mode
We hope you found this guide useful in helping you boot into Safe Mode when you find F8 not working in Windows 10. If you know of other methods you can use to access Safe Mode, you’re welcome to share them with us.