- in Hvordan man by Admin
Sådan opretter og bruger du en Windows 10/11 Sleep Mode-genvej

Putting your PC in sleep mode shouldn’t be difficult, and Microsoft knows that. Whether using a Windows 10 or a Windows 11 PC, you have multiple ways to make your system enter sleep mode. In case you don’t like the default offerings, you can make your own shortcuts and put your PC to sleep.
Some ways to access Windows Sleep Mode include using an option in the Power User Menu, running a command in a Command Prompt, and making a desktop shortcut. We’ll explain how to use all these methods on your computer.
Bemærk: This guide uses screenshots from a Windows 10 PC. However, the steps for Windows 11 should be similar.
Brug Power User Menu til at gå ind i dvaletilstand
Power User Menu er en hurtig måde at sætte din pc i dvaletilstand. Du kan få adgang til denne menu ved hjælp af en tastaturgenvej og derefter vælge en mulighed for at gå i dvaletilstand.
Denne menu tilbyder også genveje til andre Windows-værktøjer som Indstillinger og Task Manager.
- Presse Windows + X på samme tid for at åbne Power User Menu.
- Type U på dit tastatur for at vælge Luk ned eller log ud valgmulighed.
- Vælg Sleep mulighed ved at trykke på S På dit tastatur.
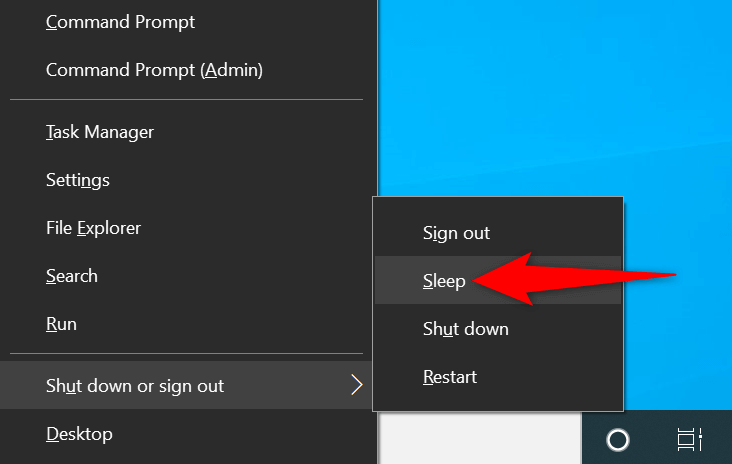
Hvis du ikke foretrækker at trykke på tastaturknapperne, kan du vælge emnerne i menuen ved hjælp af din mus eller pegefelt.
Use the Alt + F4 Keyboard Shortcut to Put Your PC in Sleep Mode
Both Windows 10 and 11 offer a Luk Windows ned dialog box that you can use to put your PC in sleep mode. This dialog box opens using a quick keyboard shortcut, making entering sleep mode faster.
One minor drawback of this method is that pressing the keyboard shortcut will close your focused windows. So, you’ll want to use this method by first accessing your PC’s desktop.
- Presse andre + F4 på samme tid på dit tastatur.
- Vælg Sleep fra What do you want the computer to do? Drop down menu.
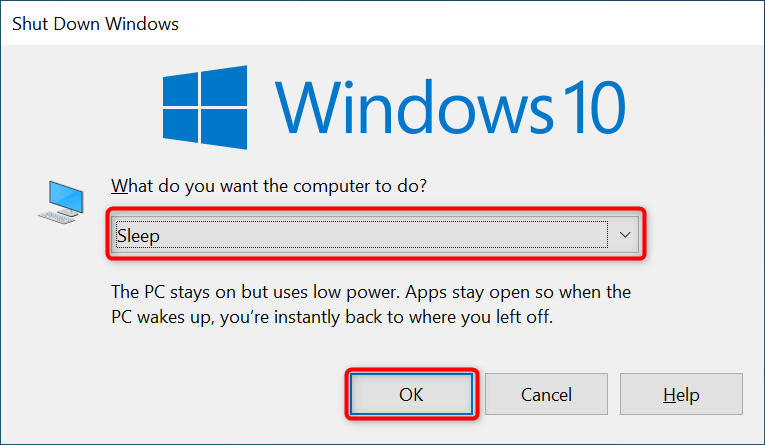
- Type OK nederst i dialogboksen.
Access the Power Menu to Enter Sleep Mode on Windows
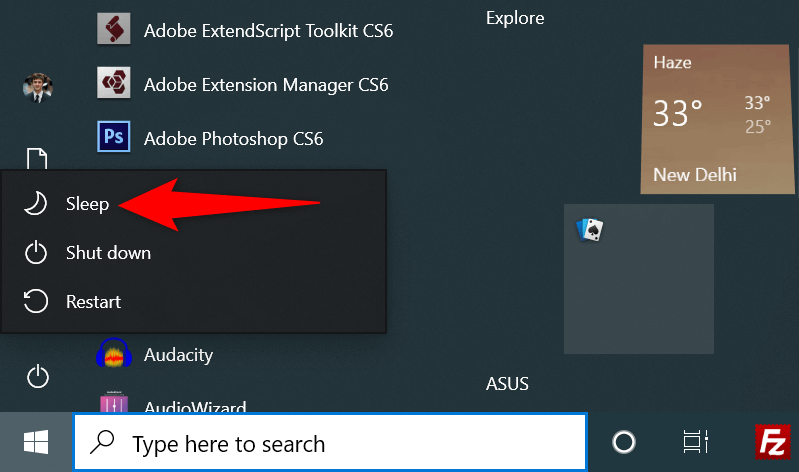
Windows’ Start menu hosts shortcuts to nearly all the apps and features on your PC. One of these is a Power menu shortcut that reveals various power options, including the sleep mode option.
If you prefer using the Start menu for your tasks, you’ll like this way of entering your PC’s sleep mode.
- Adgang til Starten menu by either pressing the Windows key on your keyboard or selecting the Starten menu icon at the lower-left corner of your screen.
- Vælg den Power icon in the Start menu.
- Vælg Sleep option in the Power menu.
Make Windows Fall Asleep With a Command Prompt Command
You’re in luck if you prefer using commands to execute tasks on your PC. Windows offers a dedicated command that you can use in a Command Prompt window to put your PC to sleep.
The only drawback of this method is that the method will hibernate your PC instead of entering sleep mode if you have that feature enabled. You can turn off hibernation on your PC to avoid this situation, though.
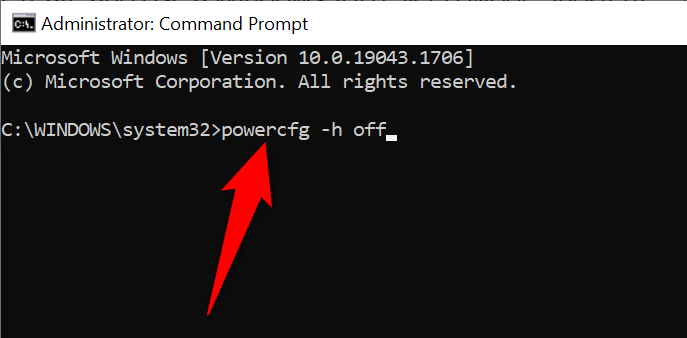
Sådan gør du disable hibernation on your PC:
- Åbne Starten menu, søg efter Kommandoprompt, og vælg Kør som administrator.
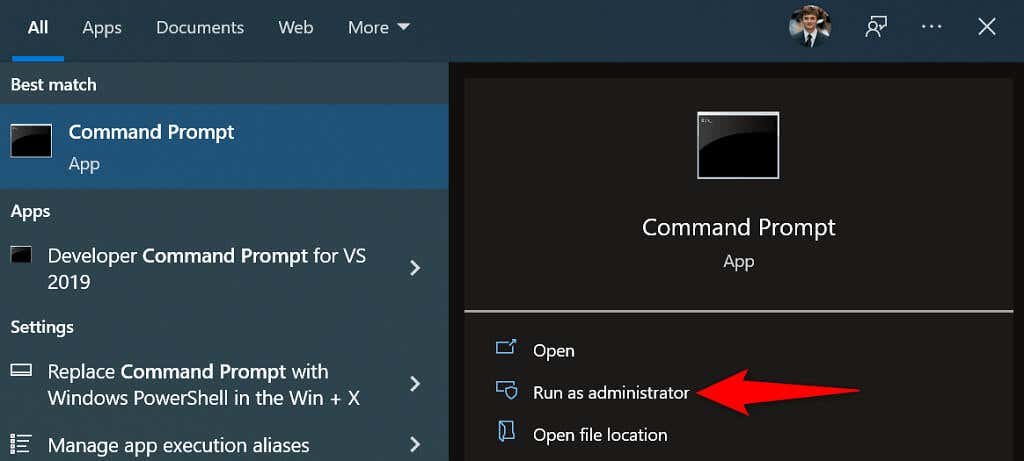
- Vælg Ja i User Account Control hurtig.
- Indtast følgende kommando i kommandoprompt, og tryk på Indtast: powercfg -h off
If you have hibernation disabled already, or you’ve just turned the feature off using the above steps, here’s how to make your PC sleep with a command:
- Åbne Kommandoprompt with admin rights on your PC.
- Indtast følgende kommando i kommandoprompt, og tryk på Indtast:
rundll32.exe powrprof.dll, SetSuspendState 0,1,0
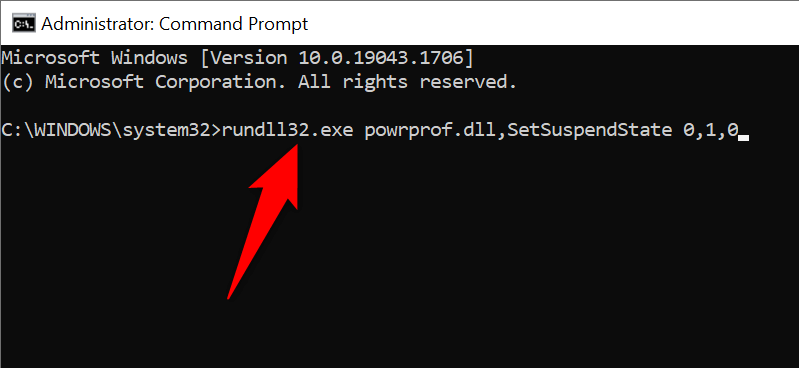
- Your PC will enter sleep mode.
Create a Desktop Shortcut for Sleep Mode
Windows lets you create a desktop shortcut for nearly every item stored on your PC. You can make a sleep mode shortcut on your desktop and double-click that shortcut each time you want to use sleep mode.
Creating this shortcut involves using a command instead of linking to a file on your PC. Optionally, you can assign the shortcut to a keyboard key to quickly place your PC in sleep mode.
- Access your desktop by pressing Windows + D.
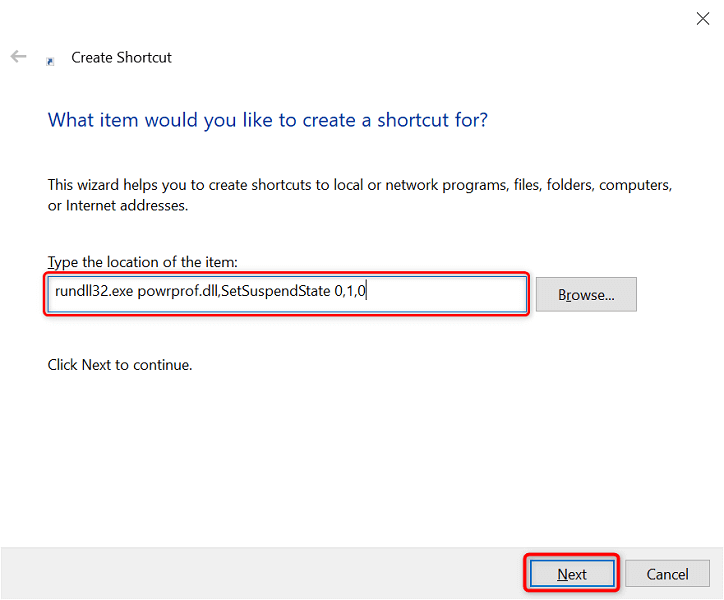
- Right-click anywhere blank and select Ny > genvej.
- Indtast følgende kommando i Indtast placering af elementet field. Then, select Næste.
rundll32.exe powrprof.dll, SetSuspendState 0,1,0
- Enter your shortcut’s name in the Skriv et navn til denne genvej field. This can be any name of your choice. Then, select Finish.
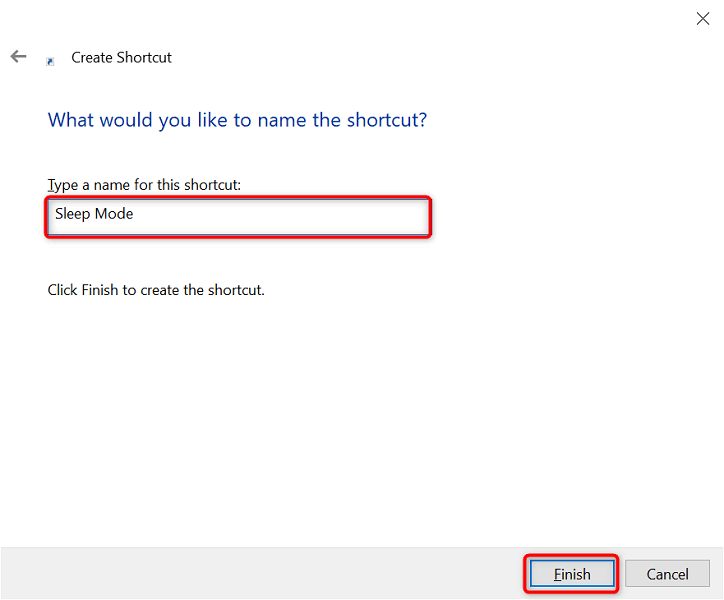
- Your sleep mode shortcut is now ready on your desktop. Double-click this shortcut each time you want your PC to sleep.
You can now assign a keyboard shortcut to the sleep mode shortcut, so your PC enters sleep mode with a keystroke:
- Right-click your sleep mode shortcut and select Ejendomme.
- Vælg den genvej fanen øverst.
- Vælg genvejstast felt.
- Press the keys on your keyboard you’d like to assign to the sleep mode shortcut.
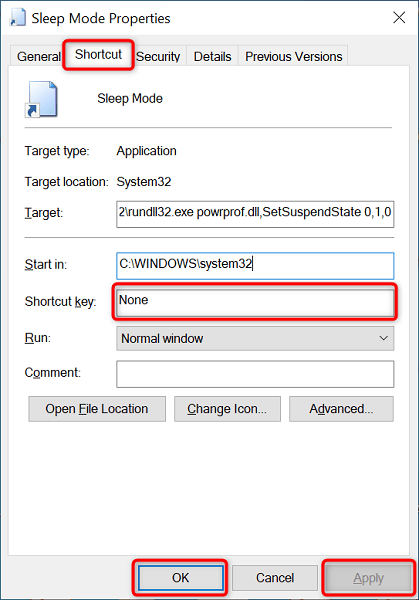
- Type Indløs efterfulgt af OK på bunden.
- Press the keyboard shortcut you just specified to make your PC enter sleep mode.
Use Your PC’s Power Button as a Sleep Button
Some computers offer a dedicated Sleep button that you can use to put your PC in sleep mode. If you haven’t got that, you can turn your keyboard’s Power button into a Sleep button.
You don’t have to take your key off your keyboard or anything else. You just have to change your PC’s power settings, and your Power key will act as a Sleep key.
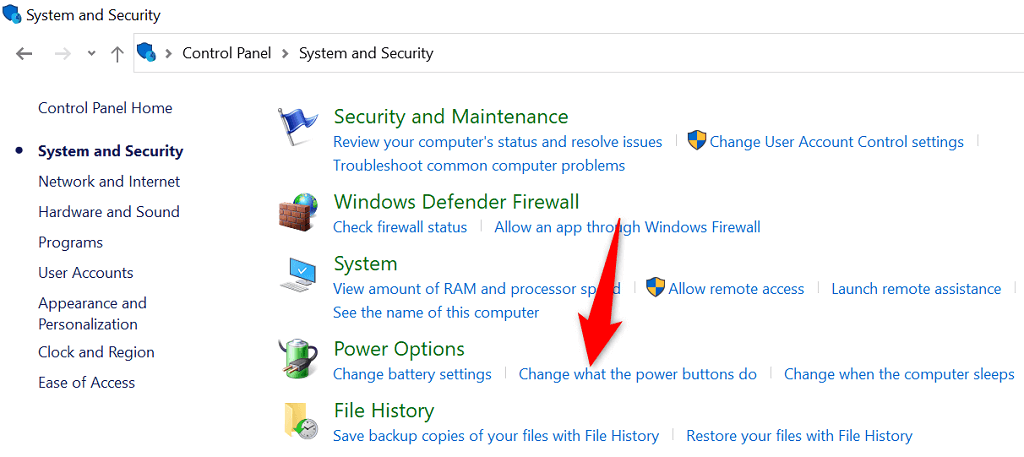
- Launch kontrol panel ved at få adgang til Starten menu, søger efter kontrol panel, og vælge værktøjet i søgeresultaterne.
- Vælg System og sikkerhed i kontrolpanelet.
- Type Skift, hvad tænd/sluk-knapperne gør under Strømstyring.
- Vælg Sleep fra begge På batteri , Tilsluttet dropdown menus next to Når jeg trykker på afbryderknappen.
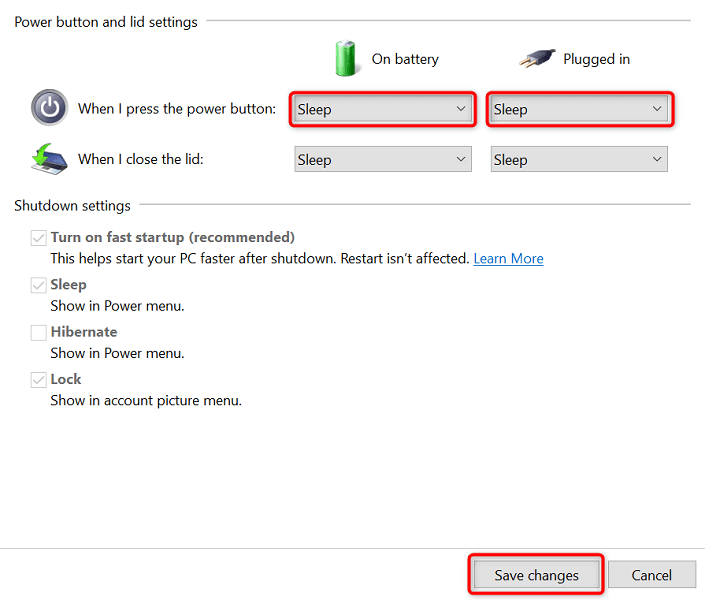
- Type Gem ændringer på bunden.
- Press your PC’s Power button to enter sleep mode.
Use the Sleep Mode to Take Breaks From Your PC
If you’re someone who often needs to put their PC in sleep mode, Windows’ sleep mode shortcuts are real-time-savers for you. You can use both built-in shortcuts and your own shortcuts to ensure entering sleep mode on your PC isn’t a hassle.