Windows 10 has a serious bug since it’s inception which makes text blurred on users PC and the problem is faced system-wide by the user. So it doesn’t matter if you go to System Settings, Windows Explorer or Control Panel, all the text will be somewhat blurred because of the DPI Scaling Level for Displays feature in Windows 10. So today we are going to discuss How To Change DPI Scaling Level for Displays in Windows 10.
Ändern Sie die DPI-Skalierungsstufe für Anzeigen in Windows 10
Stellen Sie sicher, dass Sie einen Wiederherstellungspunkt erstellen, für den Fall, dass etwas schief geht.
Method 1: Change DPI Scaling Level for Displays Using Settings App
1. Press Windows Key + I to open Settings and then click on -System.

2. From the left-hand menu, make sure to select Anzeige.
3. If you have more than one display, then select your display at the top.
4. Jetzt unter Ändern Sie die Größe von Text, Apps und anderen ElementenWählen Sie die DPI percentage aus der Dropdown-Liste.
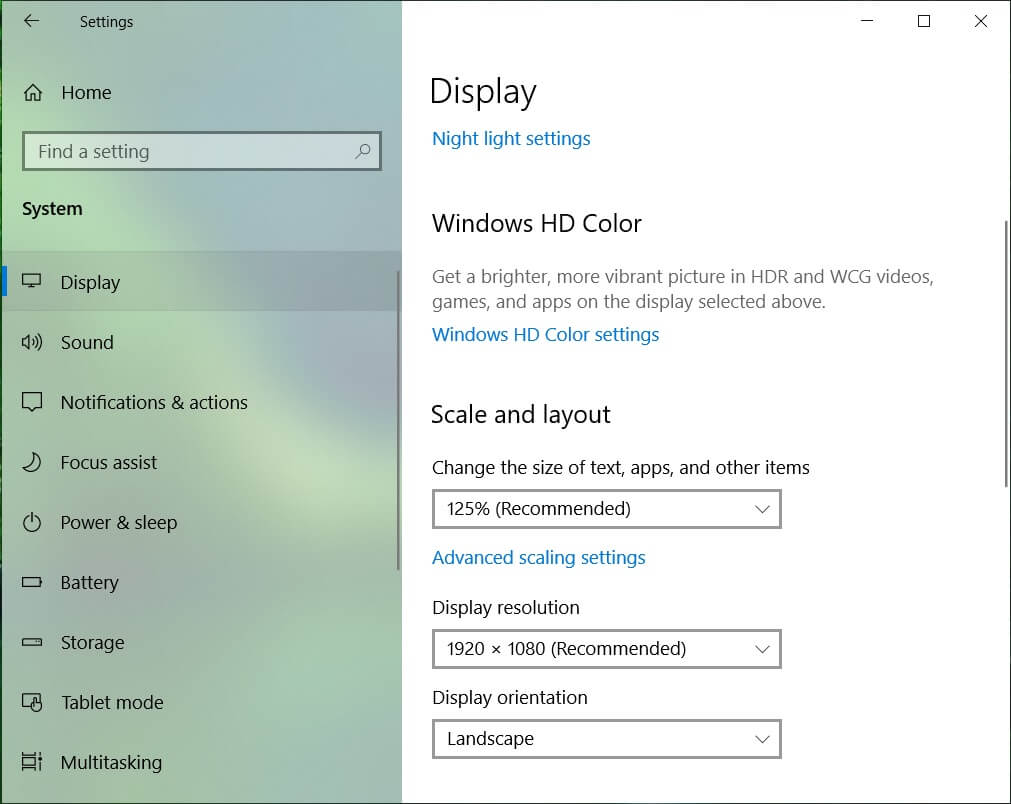
5. Click on the Sign out now link to save changes.
Method 2: Change Custom DPI Scaling Level for All Displays in Settings
1. Press Windows Key + I to open Settings and then click on -System.
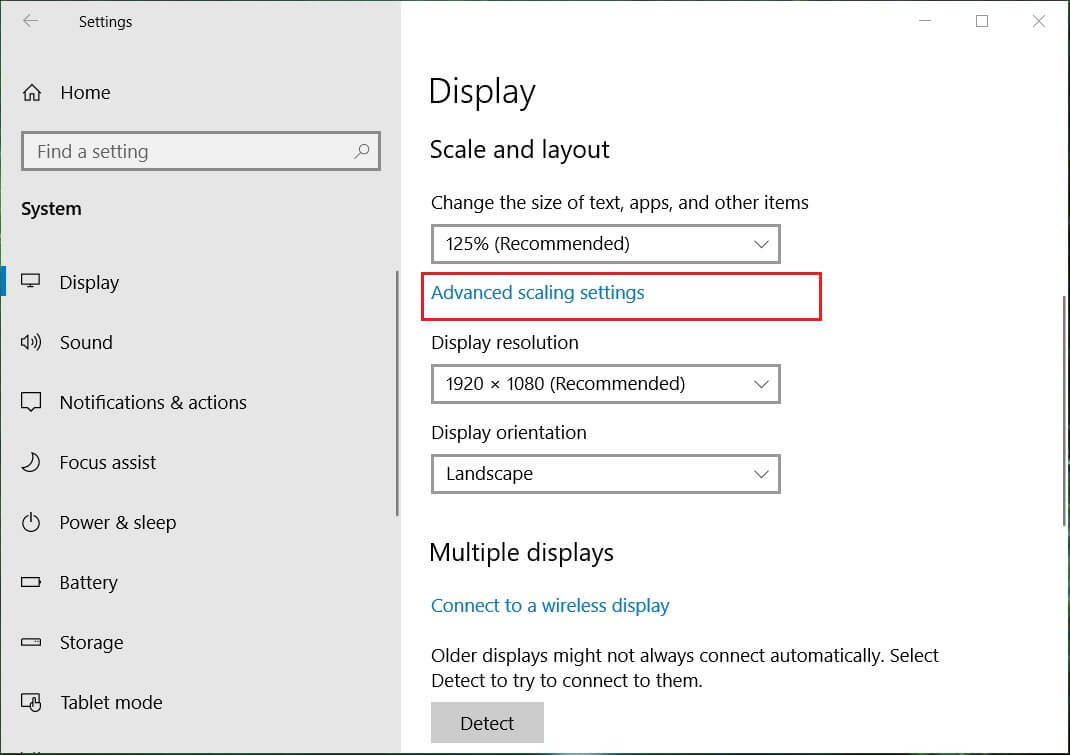
2. From the left-hand menu, make sure to select Anzeige.
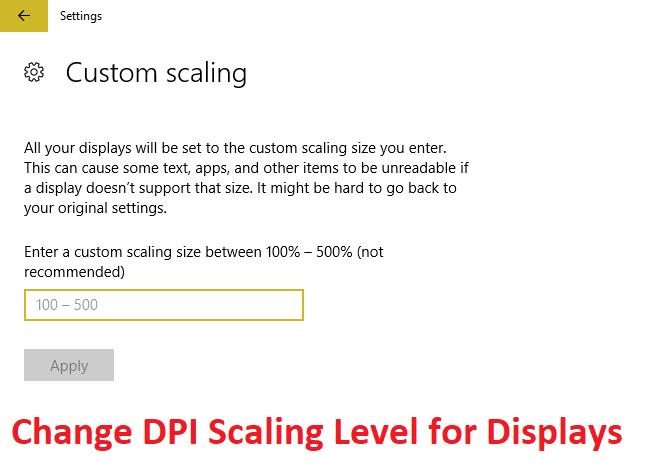
3. Now under Scale and layout click Custom scaling.
4. Enter a custom scaling size between 100% – 500% for all the displays and click on Apply.

5. Click on Sign out now to save changes.
Method 3: Change Custom DPI Scaling Level for All Displays in Registry Editor
1. Drücken Sie die Windows-Taste + R und geben Sie dann ein regedit und drücke Enter.

2. Navigate to the following Registry key:
HKEY_CURRENT_USERControl PanelDesktop
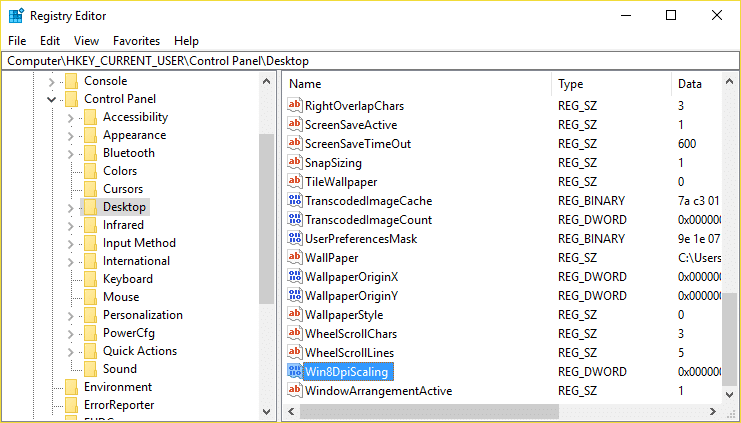
3. Make sure you have highlighted Desktop in the left window pane and then in the right window pane double click on LogPixels DWORD.
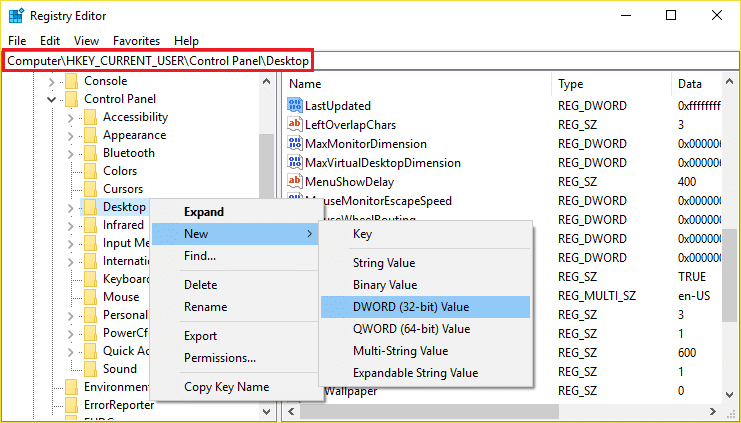
Hinweis: If the above DWORD doesn’t exist, you need to create one, right-click on Desktop and select Neu > DWORD-Wert (32-Bit).. Name this newly created DWORD as LogPixels.
4 Wählen Dezimal under Base then change its value to any of the following data and then click OK:
| DPI Scaling Level |
Wert auf |
| Smaller 100% (default) | 96 |
| Mittel 125 % | 120 |
| Larger 150% | 144 |
| Extra Large 200% | 192 |
| Maßgeschneidert 250 % | 240 |
| Maßgeschneidert 300 % | 288 |
| Maßgeschneidert 400 % | 384 |
| Maßgeschneidert 500 % | 480 |
![]()
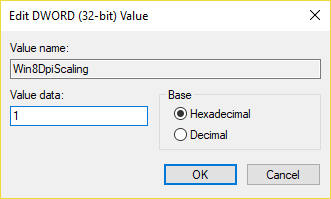
5. Again make sure Desktop is highlighted and in the right window pane double click on Win8DpiScaling.
Hinweis: If the above DWORD doesn’t exist, you need to create one, right-click on Desktop and select Neu > DWORD-Wert (32-Bit).. Benennen Sie dieses DWORD als Win8DpiScaling.
6. Now change its value to 0 if you have chosen 96 from the above table for LogPixels DWORD but if you have chosen any other value from the table then set its Wert auf 1.
7. Klicken Sie auf OK und schließen Sie den Registrierungseditor.
8. Starten Sie Ihren PC neu, um die Änderungen zu speichern.
Empfohlen:
Das haben Sie erfolgreich gelernt How To Change DPI Scaling Level for Displays in Windows 10 Wenn Sie jedoch noch Fragen zu diesem Beitrag haben, können Sie diese gerne im Kommentarbereich stellen.
")
