WmiPrvSE is the acronym for Windows Management Instrumentation Provider Service. Windows Management Instrumentation (WMI) is a component of the Microsoft Windows operating system that provides management information and control in an enterprise environment. Many people believe it’s a virus as sometimes WmiPrvSE.exe causes high CPU usage, but it’s not a virus or malware instead WmiPrvSE.exe is manufactured by Microsoft itself.
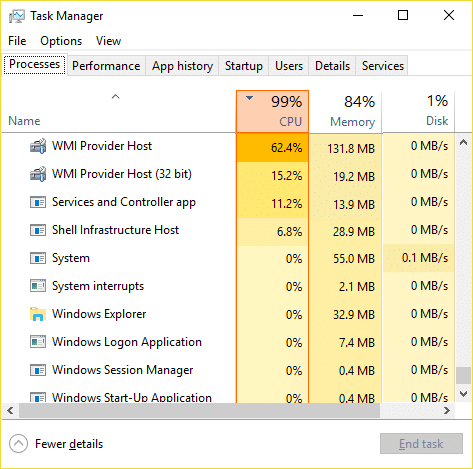
The main problem is that the Windows freezes or stuck when WmiPrvSE.exe is taking many system resources, and all the other apps or programs are left with a little or no resources at all. This will cause your PC to become sluggish, and you won’t be able to use it all, at last, you will have to reboot your PC. Even after a reboot, sometimes this issue will not be resolved, and you will again face the same problem. So without wasting any time let’s see how to actually Fix High CPU Usage by WmiPrvSE.exe with the below-listed troubleshooting guide.
Fix High CPU Usage by WmiPrvSE.exe
Stellen Sie sicher, dass Sie einen Wiederherstellungspunkt erstellen, für den Fall, dass etwas schief geht.
Method 1: Restart Windows Management Instrumentation Service
1. Drücken Sie die Windows-Taste + R und geben Sie dann ein services.msc und drücke Enter.

2. Finden Windows Management Instrumentation Service in the list then right-click on it and select Neustart.
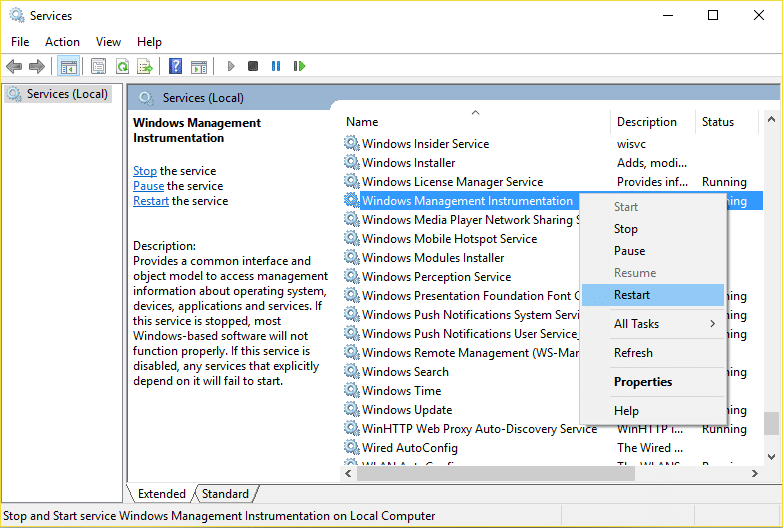
3. This will restart all the service associated with WMI services and Fix High CPU Usage by WmiPrvSE.exe.
Method 2: Restart Other Services associated with WMI
1. Press Windows Key + X then select Eingabeaufforderung (Admin).

2. Type the following into cmd and hit Enter after each one:
net stop iphlpsvc
net stop wscsvc
net stop winmgmt
net start winmgmt
Nettostart wscsvc
Nettostart iphlpsvc
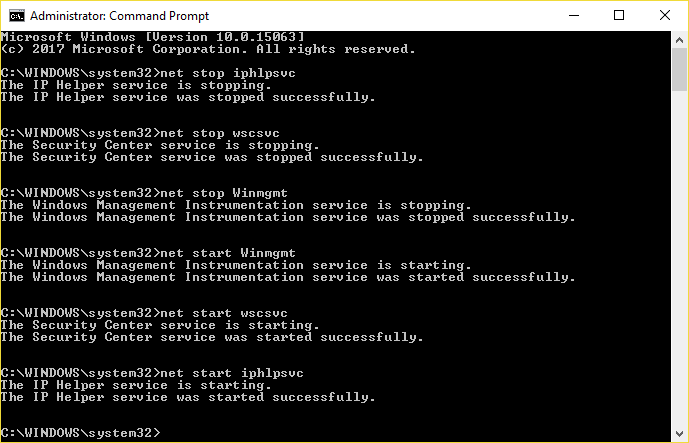
3. Starten Sie Ihren PC neu, um die Änderungen zu speichern.
Methode 3: Führen Sie CCleaner und Malwarebytes aus
1. Herunterladen und installieren CCleaner & Malwarebytes.
2. Führen Sie Malwarebytes aus und lassen Sie Ihr System nach schädlichen Dateien scannen. Wenn Malware gefunden wird, wird sie automatisch entfernt.

3. Führen Sie nun CCleaner aus und wählen Sie Benutzerdefinierte Reinigung.
4. Wählen Sie unter Custom Clean die aus Windows-Registerkarte then make sure to checkmark defaults and click Analysieren.

5. Stellen Sie nach Abschluss der Analyse sicher, dass Sie die zu löschenden Dateien entfernen.

6. Klicken Sie abschließend auf Laufreiniger klicken und CCleaner seinen Lauf lassen.
7. Um Ihr System weiter zu reinigen, Wählen Sie die Registerkarte Registrierung, und stellen Sie sicher, dass Folgendes aktiviert ist:

8. Klicken Sie auf Nach Problemen suchen Schaltfläche und erlauben Sie CCleaner zu scannen, dann klicken Sie auf die Löse ausgewählte Probleme .

9. Wenn CCleaner fragt: „Möchten Sie Änderungen an der Registrierung sichern?" Wählen Sie Ja.
10. Sobald Ihre Sicherung abgeschlossen ist, klicken Sie auf Beheben Sie alle ausgewählten Probleme .
11. Starten Sie Ihren PC neu, um die Änderungen zu speichern.
Methode 4: Führen Sie die Fehlerbehebung für die Systemwartung aus
1. Drücken Sie die Windows-Taste + X und klicken Sie auf Systemsteuerung.

2. Search Troubleshoot and click on Fehlerbehebung.

3. Next, click on view all in the left pane.
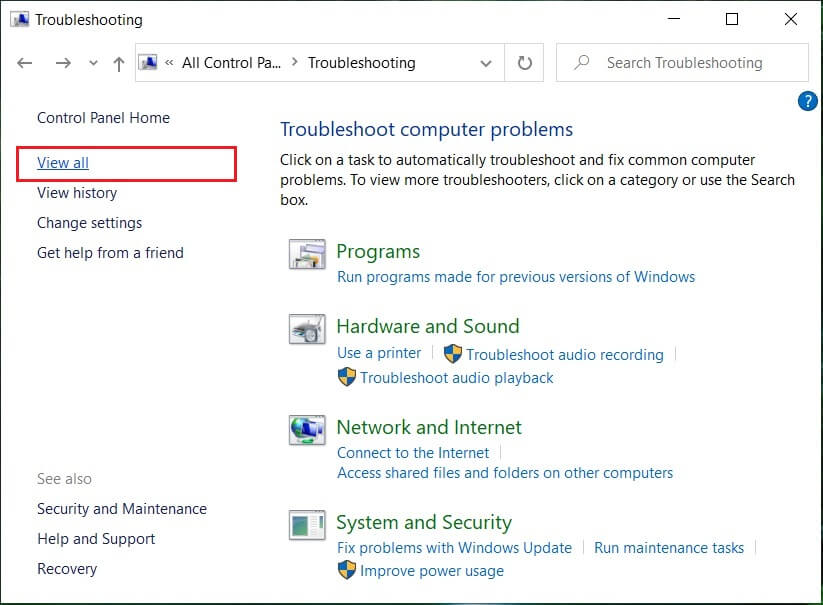
4. Click and run the Troubleshooter for System Maintenance.

5. The Troubleshooter may be able to Fix High CPU Usage by WmiPrvSE.exe.
Method 5: Locate the process manually using Event Viewer
1. Drücken Sie die Windows-Taste + R und geben Sie dann ein eventvwr.msc und drücken Sie die Eingabetaste, um zu öffnen Ereignisanzeige.

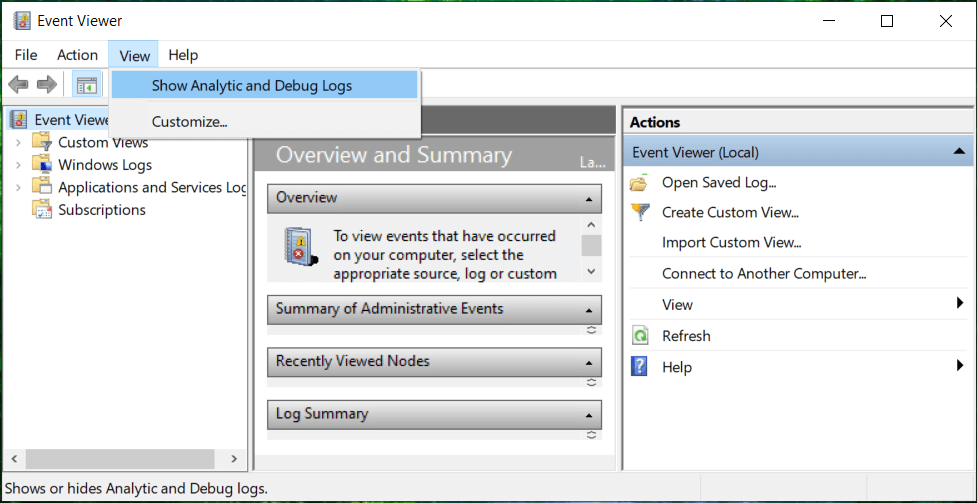
2. From the top menu, click on Anzeigen und dann auswählen Show Analytic and Debug Logs option.
3. Now, from the left pane navigate to the following by double-clicking on each of them:
Applications and Services Logs > Microsoft > Windows > WMI-Activity
4. Once you are under WMI-Aktivität folder (make sure you have expanded it by double-clicking on it) select Operationally.
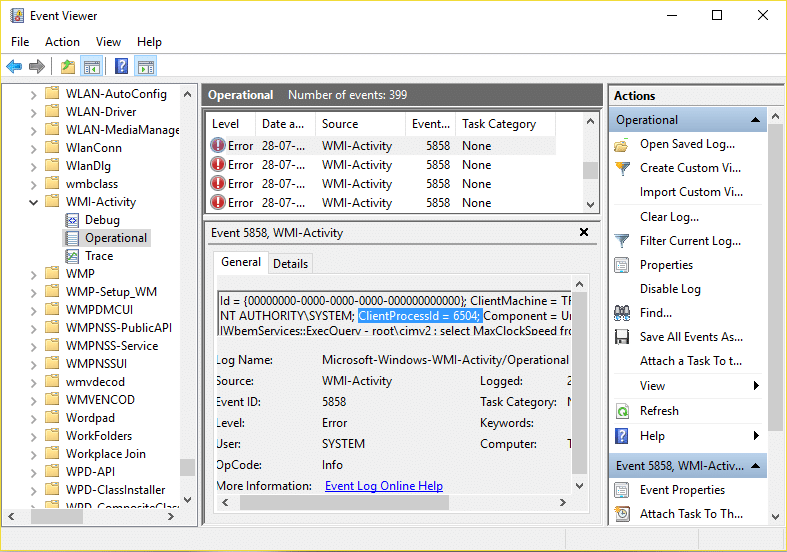
5. In the right window pane select Fehler under Operational and General tab look for the ClientProcessId for that particular service.
6. Now we have the Process Id of the particular service causing High CPU usage, we need to disable this particular service um dieses Problem zu beheben.
7. Drücken Sie Ctrl + Shift + Esc zusammen, um den Task-Manager zu öffnen.

8. Wechseln Sie zu Registerkarte „Dienst“. und suchen Sie nach dem Process Id which you noted above.
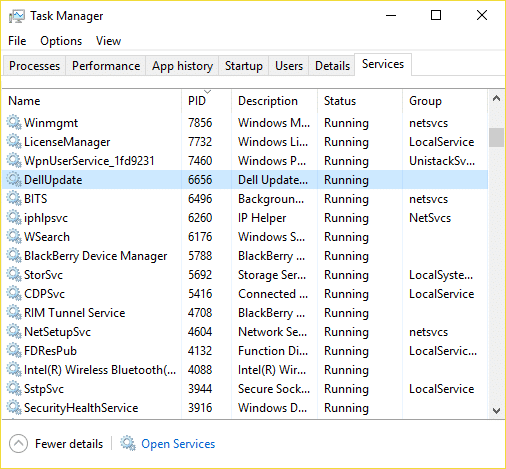
9. The service with the corresponding Process ID is the culprit, so once you find it go to Control Panel > Uninstall a Program.
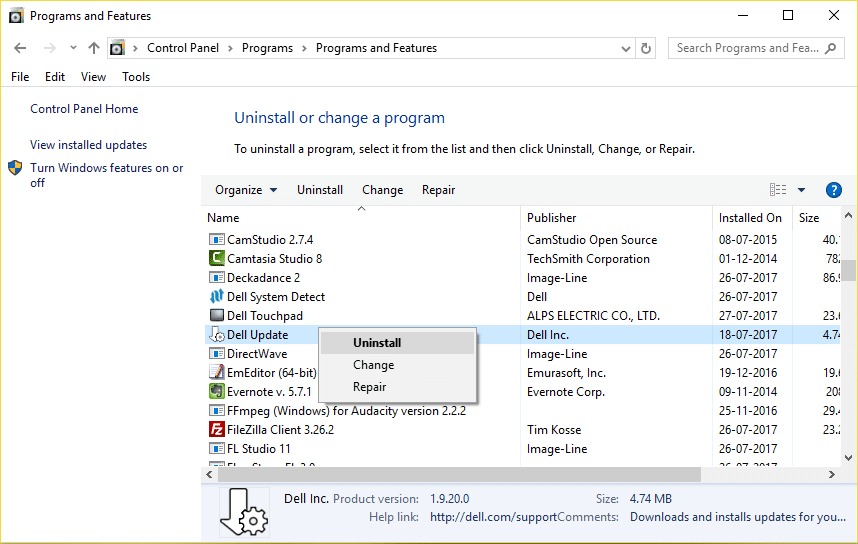
10 Uninstall the particular program or service associated with above Process ID then reboot your PC.
Empfohlen:
Das ist es, was Sie erfolgreich haben Fix High CPU Usage by WmiPrvSE.exe Wenn Sie jedoch noch Fragen zu diesem Beitrag haben, können Sie diese gerne im Kommentarbereich stellen.

