- in Fenster by Administrator
So deaktivieren Sie Live-Kacheln im Windows 10-Startmenü
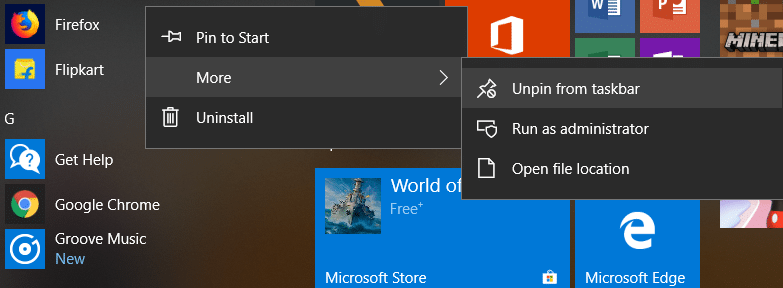
Live tiles in Windows 10 Start Menu display information at a glance without opening the app. Also, Live tiles show live previews of application content and show notifications to the users. Now, many users don’t want these Live tiles in their Start Menu as they consume a lot of data to update the previews. Now Windows 10 have an option to disable particular applications Live tiles, and you just have to right-click on a tile and select “Turn live tile off” option.

But if you want to disable the Live tile preview for all the applications completely, then there are no such settings in Windows 10. But there is a registry hack through which this can be easily achieved. So without wasting any time let’s see How to Disable Live Tiles in Windows 10 Start Menu with the help of the below-listed guide.
Stellen Sie sicher, dass Sie einen Wiederherstellungspunkt erstellen, für den Fall, dass etwas schief geht.
Although this will only work for a particular application, this method is sometimes useful if you want to disable the Live tiles for a particular app.
1. Klicke auf Startseite oder drücken Sie Windows-Schlüssel auf der Tastatur.
2. Klicken Sie mit der rechten Maustaste auf particular app, then selects “Unpin über Start"
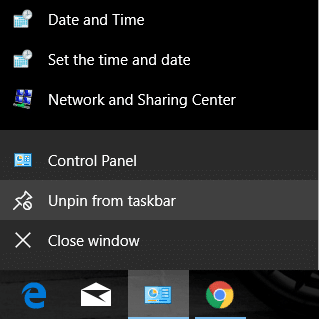
3. This will successfully remove the particular tile from the Start Menu.
Method 2: Turn Off Live Tiles
1. Klicke auf Startseite oder drücken Sie Windows-Schlüssel auf der Tastatur.
2. Klicken Sie mit der rechten Maustaste auf particular app dann chooses More.
3. From the Choose menu, click on “Schalten Sie Live Tile aus".
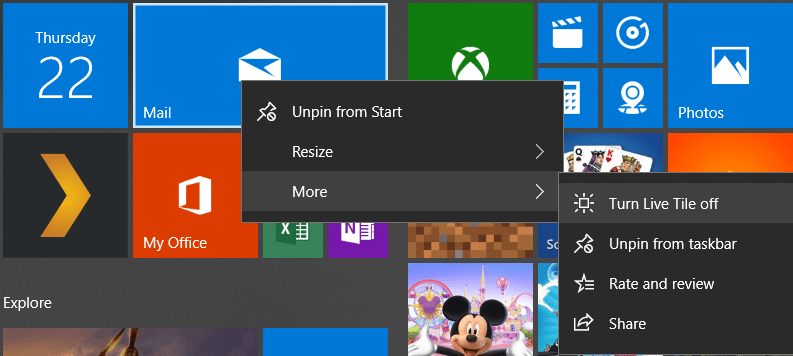
4. This will disable Live tiles in Windows 10 Start Menu for a particular app.
Method 3: Disable Live Tiles using Group Policy Editor
1. Drücken Sie die Windows-Taste + R und geben Sie dann ein gpedit.msc und drücke Enter.

2. Navigieren Sie nun im Gruppenrichtlinien-Editor zum folgenden Pfad:
User Configuration -> Administrative Templates -> Start Menu and Taskbar -> Notifications
3. Make sure to select Notifications then from right window pane double-click on “Turn off tile notifications."
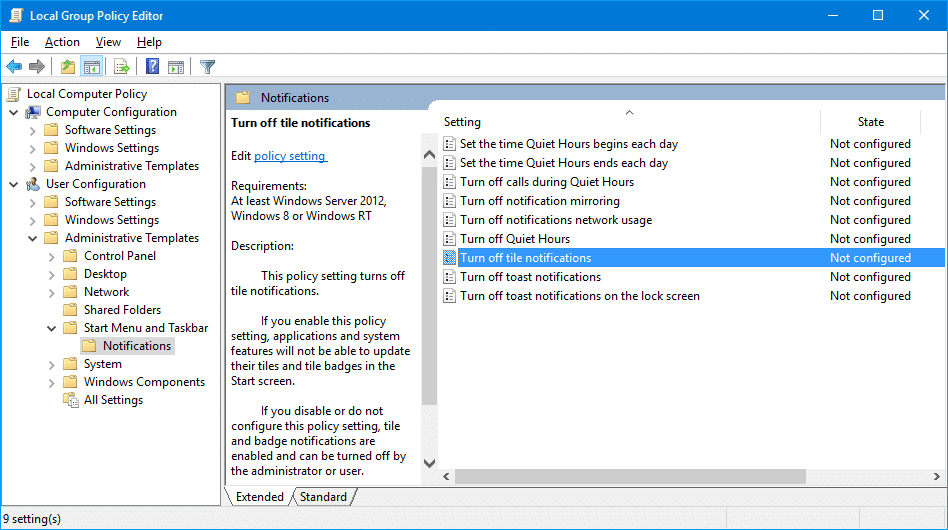
4. Make sure to set it to Enabled then click Apply followed by OK.
5. This will disable live tiles feature for all apps on Start Screen.
Method 4: Disable Live Tiles using Registry Editor
1. Drücken Sie die Windows-Taste + R und geben Sie dann ein regedit und drücke Enter.

2. Navigieren Sie nun zum folgenden Registrierungsschlüssel:
HKEY_CURRENT_USERSoftwarePoliciesMicrosoftWindowsCurrentVersion
3. Klicken Sie mit der rechten Maustaste auf CurrentVersion Dann wählen Sie Neu> Schlüssel and then name this key as PushNotifications.
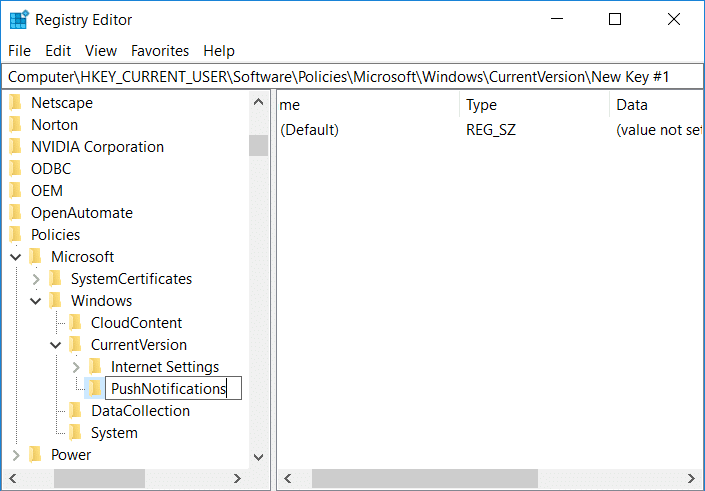
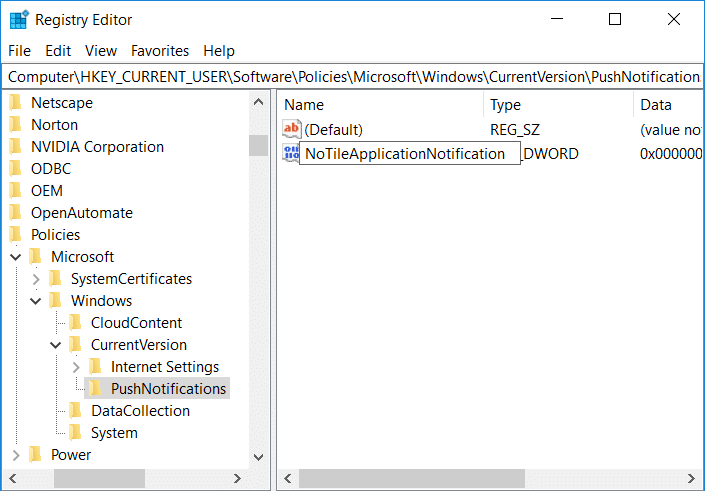
4. Now right-click on PushNotifications key and select Neu > DWORD (32-Bit)-Wert.
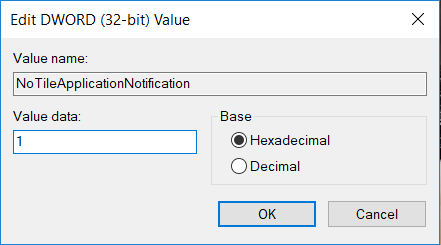
5. Benennen Sie dieses neue DWORD als NoTileApplicationNotification und doppelklicken Sie dann darauf.
6. Change the value of this DWORD zu 1 und klicken Sie auf OK.
7. Schließen Sie den Registrierungseditor und starten Sie Ihren PC neu, um die Änderungen zu speichern.
Empfohlen:
Das haben Sie erfolgreich gelernt So erreichen Disable Live Tiles in Windows 10 Start Menu but if you still have any questions regarding this post then feel free to ask them in the comment’s section.