- in Fenster by Administrator
How to install Internet Explorer on Windows 10

How to install Internet Explorer on Windows 10: Obwohl Microsoft Edge is the default browser that is pre-installed on Windows 10 but many users still prefer to use Internet Explorer over other web browsers. As a user, you cannot uninstall Internet Explorer because it’s a Windows feature. But there are ways to turn on and off IE on Windows 10. If Internet Explorer is turned off in the Windows feature then you won’t be able to use IE on your system. IE will essentially be hidden until you again turn on Internet Explorer. In this article, you will learn about how to install/uninstall Internet Explorer in Windows 10.
Internet Explorer is Missing on Windows 10?
Users are reporting that they are not being able to open Internet Explorer on their Windows 10 PC. Another case is when users are doing a clean installation of Windows 10 they are unable to find Internet Explorer. In reality, Internet Explorer is turned off in Windows feature, although you can’t uninstall Internet Explorer, but you can turn it off or on.
How to install Internet Explorer on Windows 10
Stellen Sie sicher, dass Sie einen Wiederherstellungspunkt erstellen, für den Fall, dass etwas schief geht.
Method 1: Pin the IE to your Taskbar in Windows 10
This Internet Explorer will most likely be installed on your system, so you have to search it and then pin it to your taskbar so that it becomes easily available. To do this the steps are –
1.Drücken Sie Windows-Taste + S to bring up the search then type “Internet Explorer".
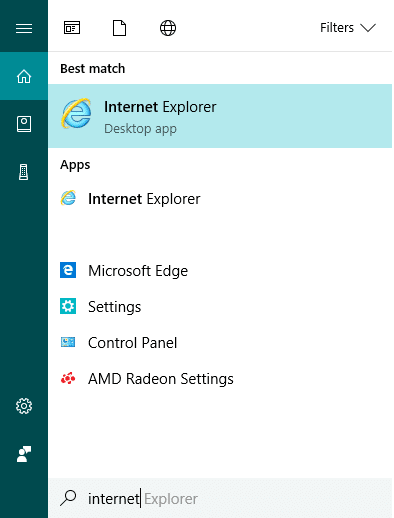
2.You will see that Internet Explorer will come in the top result of the search list.
3.Right-click on IE and choose the option “Zur Taskleiste".
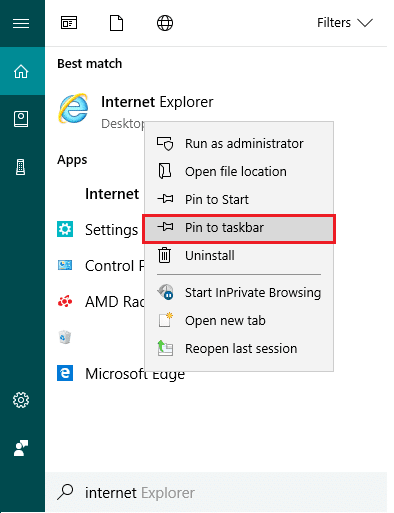
4.Now, you will see the Internet Explorer icon on your taskbar using which you can easily access IE anytime you want.
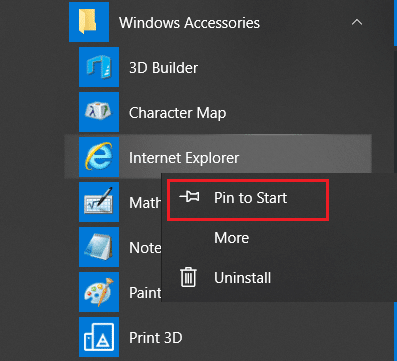
Method 2: Find Internet Explorer using Windows Accessories
Another way to find & pin Internet Explorer on Desktop is by using Windows 10 Settings:
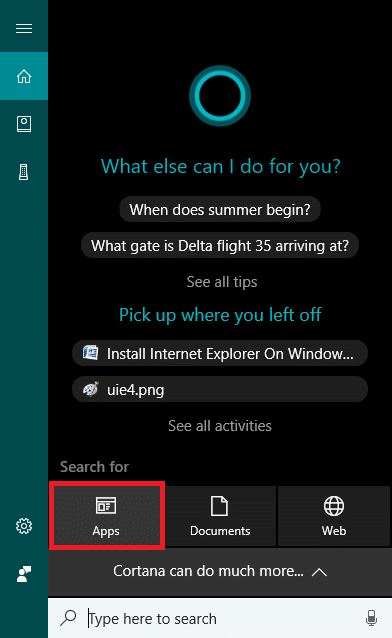
1.Go to the Start button then click on “Alle Apps“. Or you can click on Apps under the Cortana search.

2.From there, you have to scroll down until you find the “Windows Zubehör" Mappe.
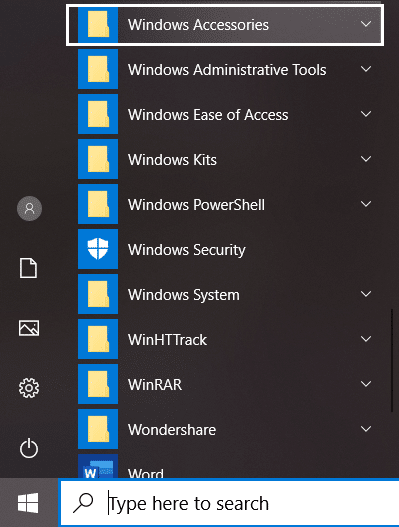
3.Click on it and you will find Internet Explorer in the list.
5.Right-click on Internet Explorer & choose the option “Zur Taskleiste".
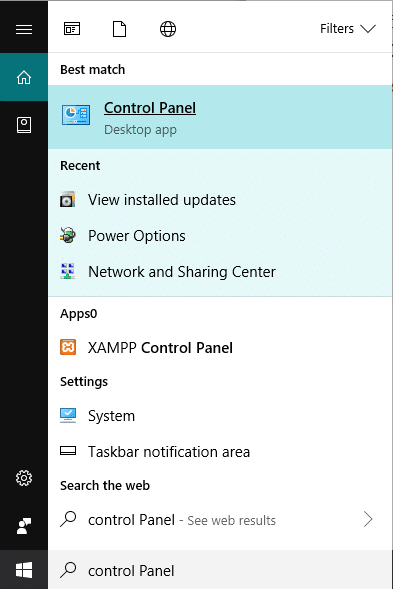
Method 3: Turn On/Off Internet Explorer
In this step, we will learn how you can Turn On or Off Internet Explorer on your PC. To do this the steps are –
1.Typ Smartgeräte App Klicken Sie dann in der Windows-Suche auf Systemsteuerung aus dem Suchergebnis.
2.Klicken Sie auf “Programm deinstallieren” under Control Panel.

3.From the left-hand menu click on “Schalten Sie die Windows-Funktion ein oder aus".
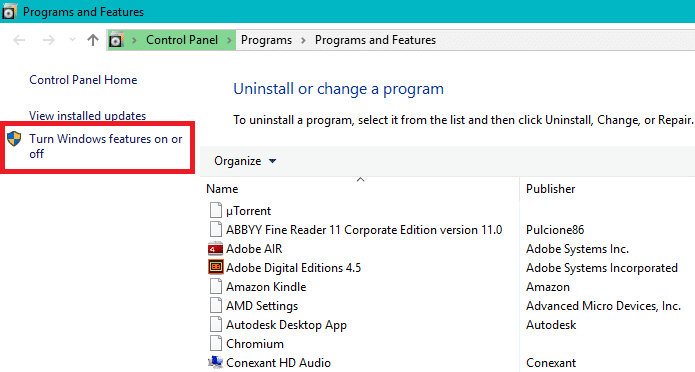
4.You will see a new pop up window will open (which is Windows Feature Window).
5.In the list, checkmark the box next to the Internet Explorer. This will turn ON the Internet Explorer on your system.
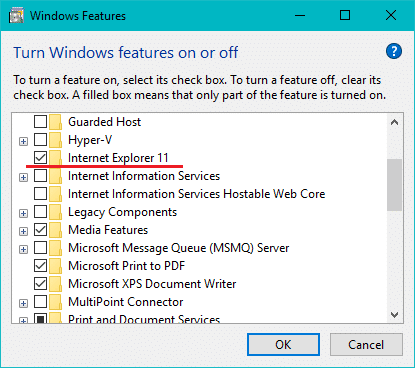
6.One done, click OK to save changes.
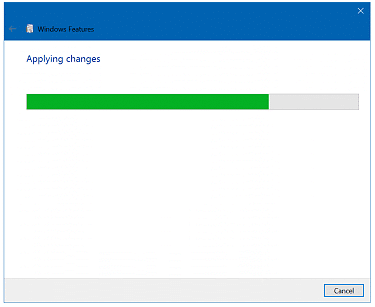
Hinweis: It will take some time for Windows to apply the changes.
7.Starten Sie Ihren PC neu, um die Änderungen zu speichern.
Once the PC restart, you will notice that Internet Explorer is easily accessible through Windows search.
Method 4: Install or Uninstall Internet Explorer on Windows 10
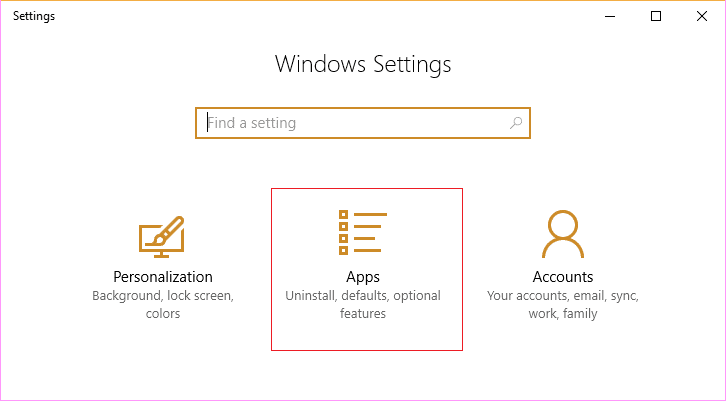
1. Drücken Sie die Windows-Taste + I, um die Einstellungen zu öffnen, und klicken Sie dann auf Apps.
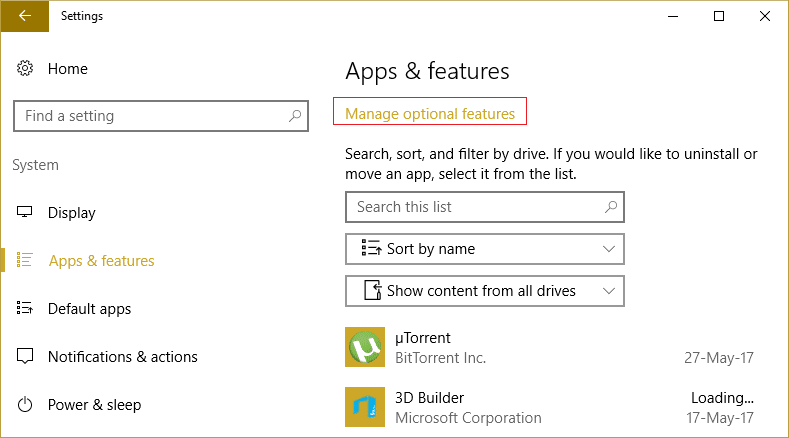
2. Klicken Sie im Menü auf der linken Seite auf Apps und Funktionen.
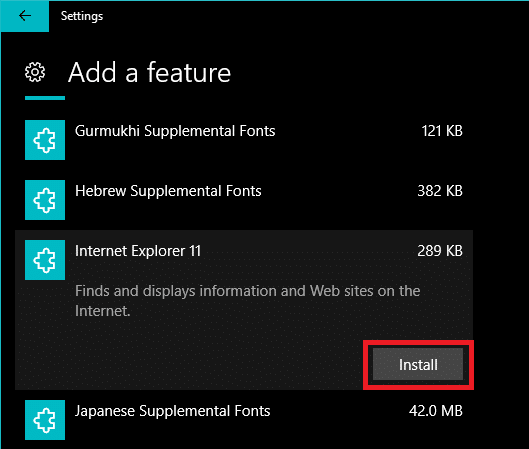
3.Now under Apps & features, click on “Verwalten Sie optionale Funktionen" oder "Optionale Funktionen".
4.Scroll down the list and look for Internet Explorer.
5.Once you find it, you can either Uninstall Internet Explorer (if IE is installed) or es installieren (if IE is uninstalled) on your system.
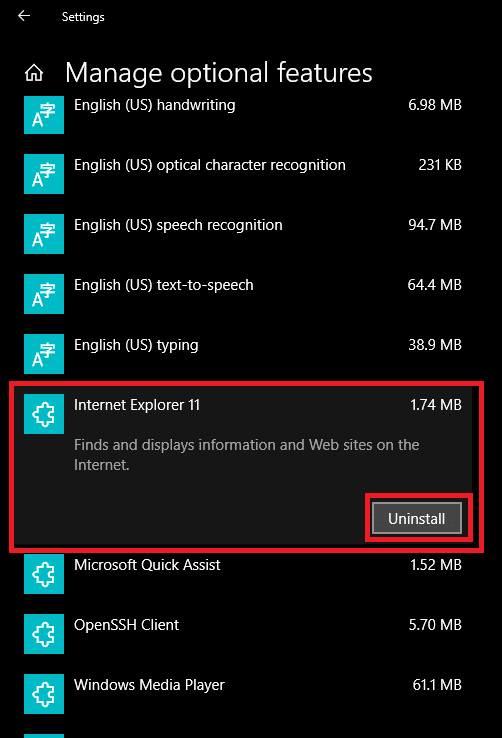
6. Klicken Sie nun Installieren oder deinstallieren button depending upon the status of IE on your system.
7. Sobald Sie fertig sind, starten Sie Ihren PC neu, um die Änderungen zu speichern.
Method 5: Use PowerShell to Install or Uninstall Internet Explorer
Another way to Install or Uninstall Internet Explorer on Windows 10 is via PowerShell. To do this the steps you need to follow are –
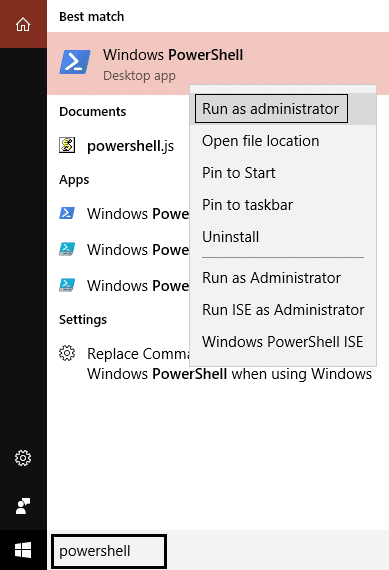
1.Click the Start and search the term “PowerShell ".
2.Right-click the PowerShell application, and open it as “Als Administrator ausführen”Modus.
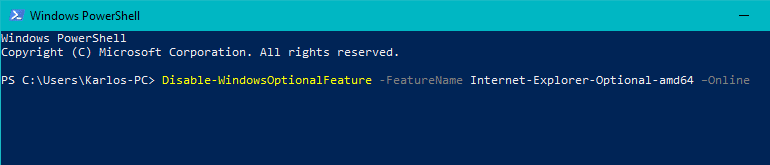
3.Type the following command depending on your choice:
To Uninstall Internet Explorer:
Disable-WindowsOptionalFeature –FeatureName "Internet-Explorer-Optional-amd64" -Online

To Install Internet Explorer:
Enable-WindowsOptionalFeature –FeatureName "Internet-Explorer-Optional-amd64" -All –Online
4.Once you type any one of the above commands and hit Enter, it will then prompt you to restart your system. You have to Typ Y und drücke Enter.
5.Your system will reboot to apply changes.
Empfohlen:
Das ist, wenn Sie erfolgreich gelernt haben, wie es geht Uninstall or Install Internet Explorer on Windows 10 Wenn Sie jedoch noch Fragen zu diesem Artikel haben, können Sie diese gerne im Kommentarbereich stellen.