- in παράθυρα by διαχειριστής
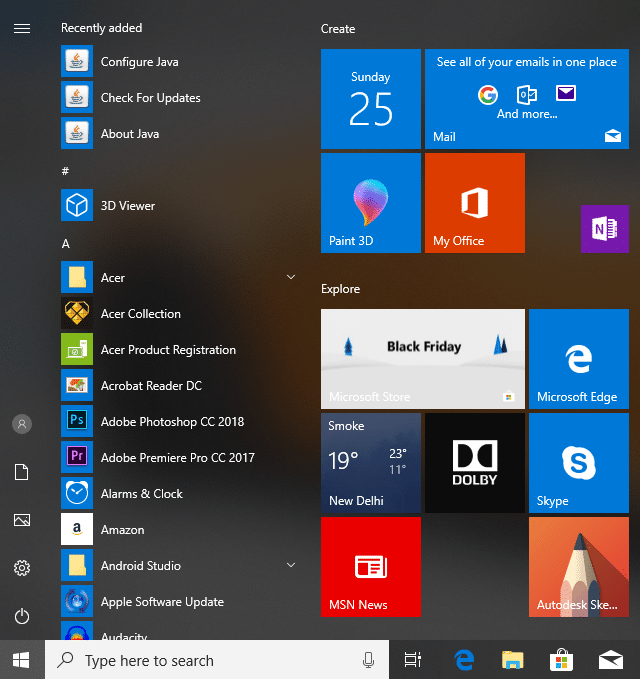
Διορθώστε το μενού Έναρξη που δεν λειτουργεί στα Windows 10

If you have recently updated or upgraded to Windows 10, then chances are your Start Menu may not work properly, making it impossible for users to navigate around Windows 10. Users are experiencing various issues with Start Menu such as Start Menu does not open, Start Button is not working, or Start Menu freezes etc. If your Start Menu isn’t working then don’t worry as today we will see a way to fix this issue.
This exact cause is different for different users because each user has a different system configuration and environment. But the problem can be related to anything like corrupted user account or drivers, damaged system files, etc. So without wasting any time, let’s see How to Fix Start Menu Not Working in Windows 10 with the help of the below-listed tutorial.
Φροντίστε να δημιουργήσετε ένα σημείο επαναφοράς σε περίπτωση που κάτι πάει στραβά.
To run Command Prompt as an administrator, press Ctrl + Shift + Esc to open Task Manager. Then click on Αρχεία Στη συνέχεια επιλέξτε Εκτελέστε νέα εργασία. Τύπος cmd.exe και σημάδι επιλογής "Δημιουργήστε αυτήν την εργασία με δικαιώματα διαχειριστή” then click OK. Similarly, to open PowerShell, type powershell.exe and again checkmark the above field then hit Enter.

Μέθοδος 1: Επανεκκινήστε την Εξερεύνηση των Windows
1. Τύπος Ctrl + Shift + Esc πλήκτρα μαζί για την εκκίνηση του Διαχείριση εργασιών.
2. Εύρημα explorer.exe in the list then right-click on it and select End Task.

3. Now, this will close the Explorer and to rerun it, click File > Run new task.
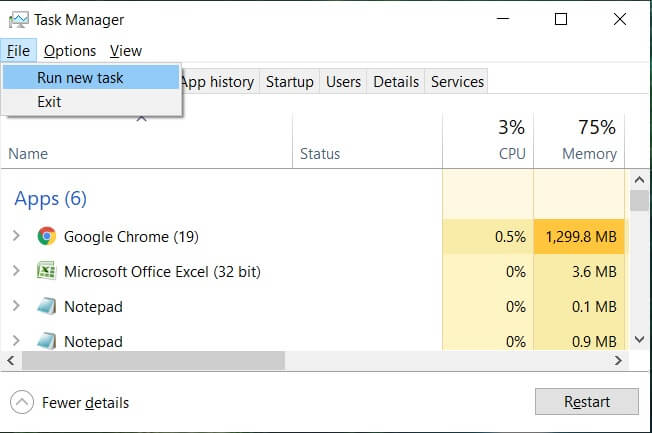
4. Τύπος explorer.exe and hit OK to restart the Explorer.

5. Exit Task Manager and see if you’re able to Fix Start Menu Not Working in Windows 10.
6. If you’re still facing the issue, then log out from your account and re-login.
7. Τύπος Ctrl+Shift+Del key at the same time and click on Signout.
8. Type in your password to login to Windows and see if you’re able to fix the issue.
Method 2: Create a new local administrator account
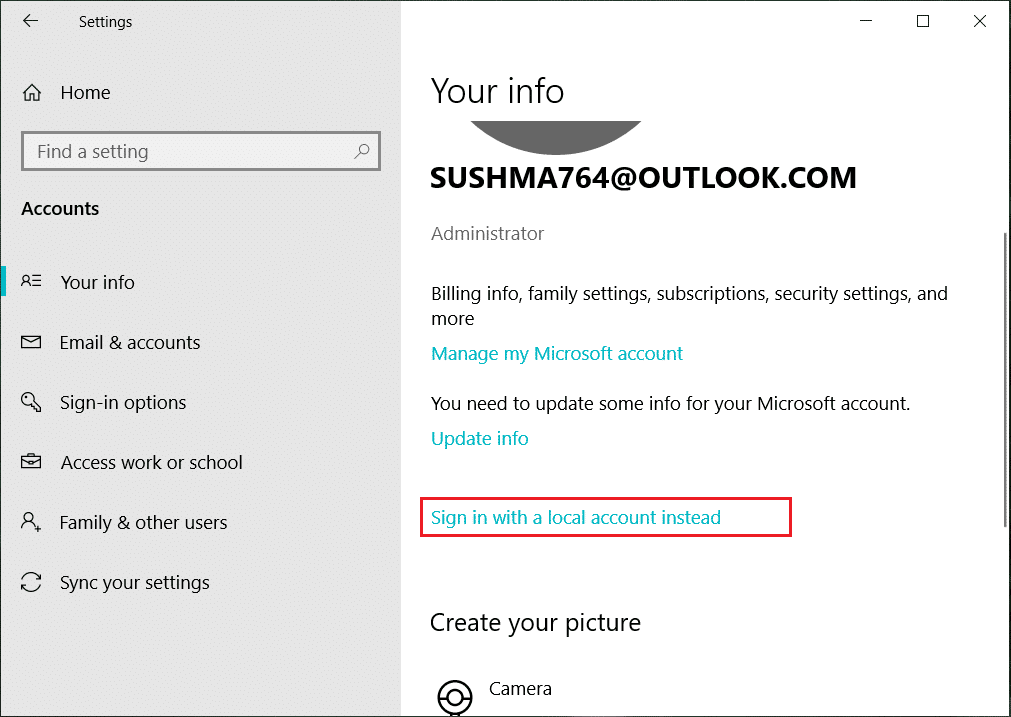
Εάν είστε υπογεγραμμένοι με τον λογαριασμό σας Microsoft, καταργήστε πρώτα τη σύνδεση με αυτόν τον λογαριασμό:
1. Πατήστε Windows Key + R και μετά πληκτρολογήστε "ms-settings:” (χωρίς εισαγωγικά) και πατήστε Enter.
2. επιλέξτε Λογαριασμός > Συνδεθείτε με έναν τοπικό λογαριασμό.
3. Πληκτρολογήστε το δικό σας Κωδικός πρόσβασης λογαριασμού Microsoft και κάντε κλικ στο κουμπί Επόμενο.
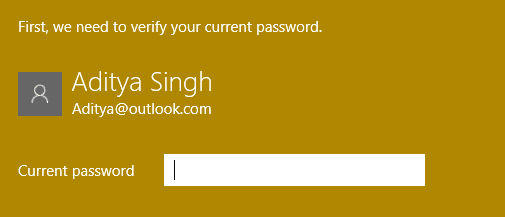
4. Επιλέξτε ένα νέο όνομα λογαριασμού και κωδικό πρόσβασηςκαι, στη συνέχεια, επιλέξτε Τέλος και αποσυνδεθείτε.
#1. Create the new administrator account:
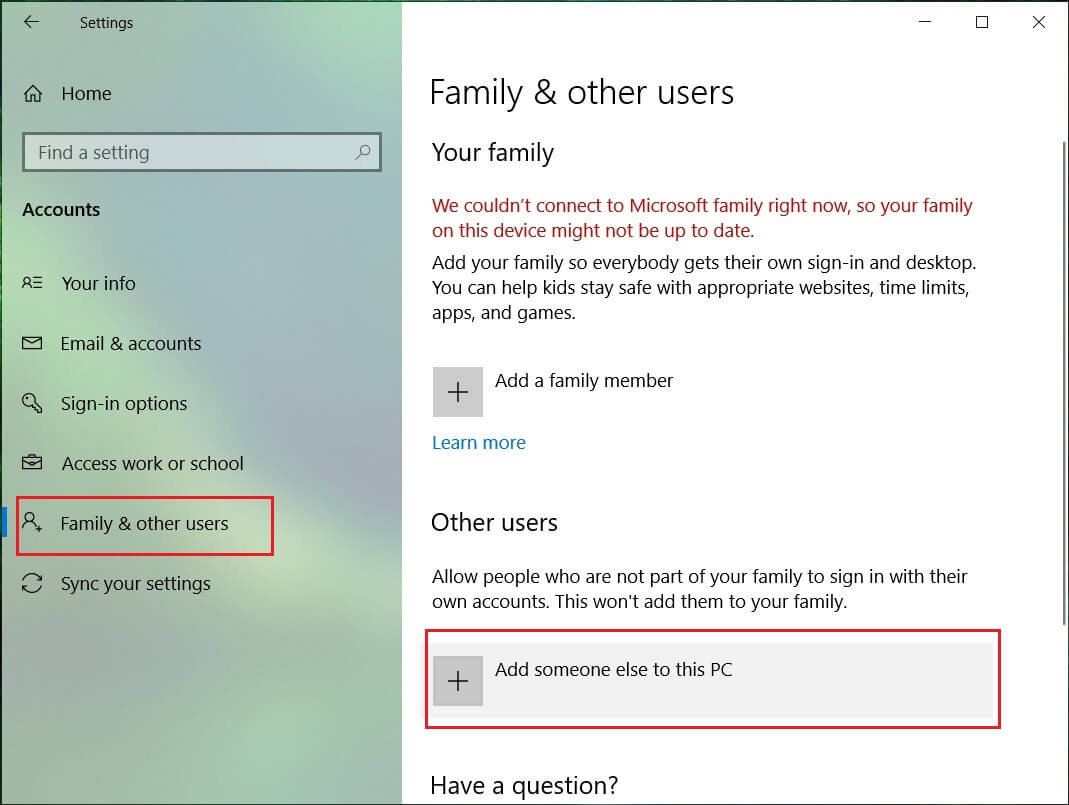
1. Πατήστε Windows Key + I για να ανοίξετε τις Ρυθμίσεις και μετά κάντε κλικ Λογαριασμοί.
2. Στη συνέχεια, μεταβείτε στο Οικογένεια και άλλοι άνθρωποι.
3. Στην περιοχή Άλλα άτομα κάντε κλικ στο «Προσθέστε κάποιον άλλο σε αυτόν τον υπολογιστή."
4. Στη συνέχεια, δώστε ένα όνομα για το user and a password then select Next.
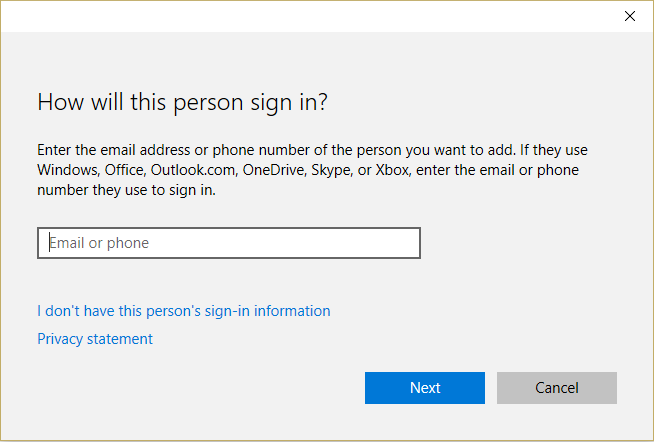
5. Ορίστε ένα όνομα χρήστη και κωδικός, Στη συνέχεια, επιλέξτε Επόμενο > Τέλος.
#2. Next, make the new account an administrator account:
1. Πάλι ανοιχτό Ρυθμίσεις των Windows και κάντε κλικ στο Λογαριασμός.

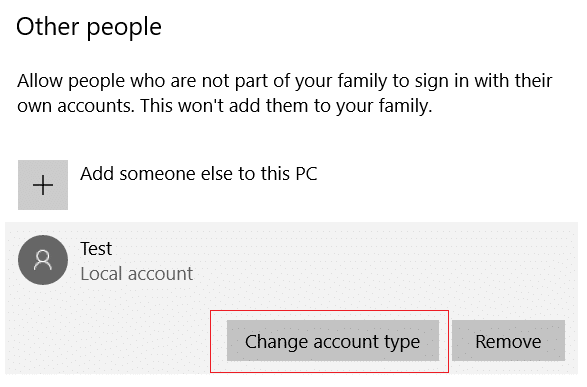
2. Πηγαίνετε να το Καρτέλα Οικογένεια και άλλα άτομα.
3. Άλλα άτομα επιλέγουν τον λογαριασμό που μόλις δημιουργήσατε και μετά επέλεξαν α Αλλαγή τύπου λογαριασμού.
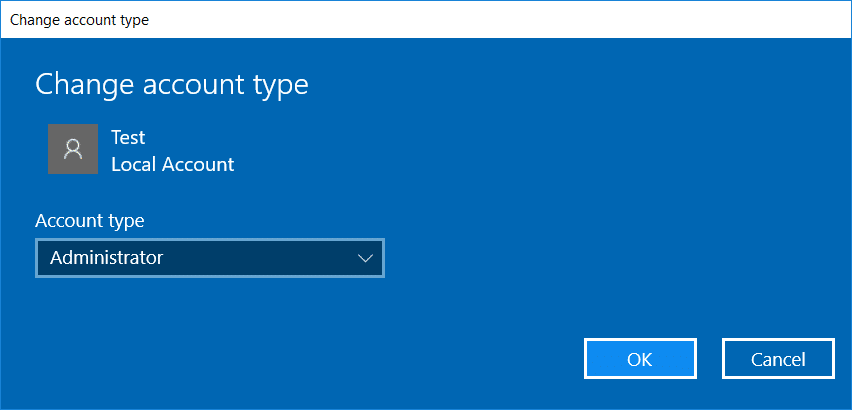
4. Στην περιοχή Τύπος λογαριασμού, επιλέξτε Διαχειριστής στη συνέχεια κάντε κλικ στο κουμπί Εντάξει.
#3. If the issue persists try deleting the old administrator account:
1. Στη συνέχεια, μεταβείτε ξανά στις Ρυθμίσεις των Windows Λογαριασμός > Οικογένεια και άλλα άτομα.
2. Στην περιοχή Άλλοι χρήστες, επιλέξτε τον παλιό λογαριασμό διαχειριστή και κάντε κλικ Αφαιρώ, και επιλέξτε Διαγραφή λογαριασμού και δεδομένων.

3. If you were using a Microsoft account to sign in before, you can associate it with the new administrator by following the next step.
4. σε Ρυθμίσεις Windows > Λογαριασμοί, επιλέξτε Είσοδος με λογαριασμό Microsoft και εισαγάγετε τα στοιχεία του λογαριασμού σας.
Τέλος, θα πρέπει να μπορείτε Διορθώστε το μενού Έναρξη που δεν λειτουργεί στα Windows 10 as this step seems to fix the issue in most cases.
If you continue to experience Start Menu’s issue, it’s recommended to download and run Start Menu Troubleshooter.
1. Download and run Start Menu Troubleshooter.
2. Κάντε διπλό κλικ στο κατεβασμένο αρχείο Και στη συνέχεια κάντε κλικ στο κουμπί Επόμενο.
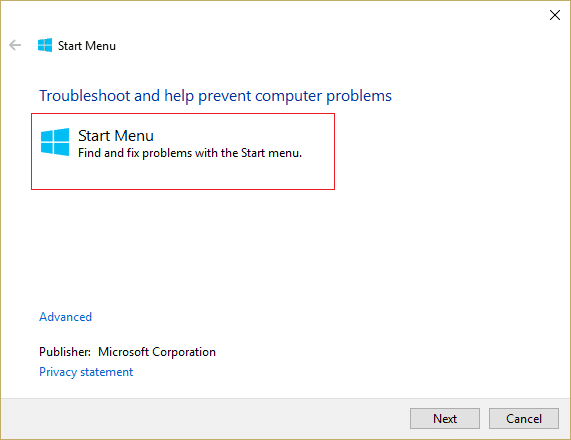
3. Let it finds and automatically Fixes Start Menu Not Working in Windows 10.
Method 4: Run System File Checker (SFC) and Check Disk
1. Ανοίξτε τη γραμμή εντολών. Ο χρήστης μπορεί να εκτελέσει αυτό το βήμα αναζητώντας «cmd» Και στη συνέχεια πατήστε Enter.

2. Τώρα πληκτρολογήστε τα παρακάτω στο cmd και πατήστε enter:
sfc /scannow sfc /scannow /offbootdir=c: /offwindir=c:windows

3. Περιμένετε να ολοκληρωθεί η παραπάνω διαδικασία και μόλις ολοκληρωθεί, επανεκκινήστε τον υπολογιστή σας.
4. Στη συνέχεια, εκτελέστε το CHKDSK από Διορθώστε τα σφάλματα συστήματος αρχείων με το Check Disk Utility (CHKDSK).
5. Αφήστε την παραπάνω διαδικασία να ολοκληρωθεί και επανεκκινήστε ξανά τον υπολογιστή σας για να αποθηκεύσετε τις αλλαγές.
Method 5: Force Cortana to Rebuild Settings
Open Command Prompt with administrative rights then type the following one by one and hit Enter after each command:
CD /d "%LOCALAPPDATA%PackagesMicrosoft.Windows.Cortana_cw5n1h2txyewy"
Taskkill /F /IM SearchUI.exe
RD /S /Q Settings
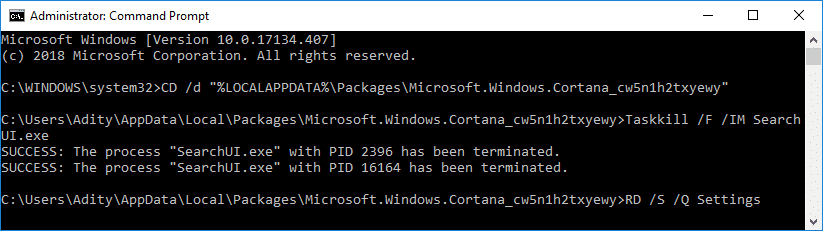
This will force Cortana to rebuild the settings and will Fix Start Menu and Cortana Not Working in Windows 10.
If the issue is still not resolved, follow this guide to fix any issues related to Cortana.
Method 6: Re-Register Windows App
1. Τύπος PowerShell in Windows Search then right-click on PowerShell and select Εκτέλεση ως διαχειριστής.
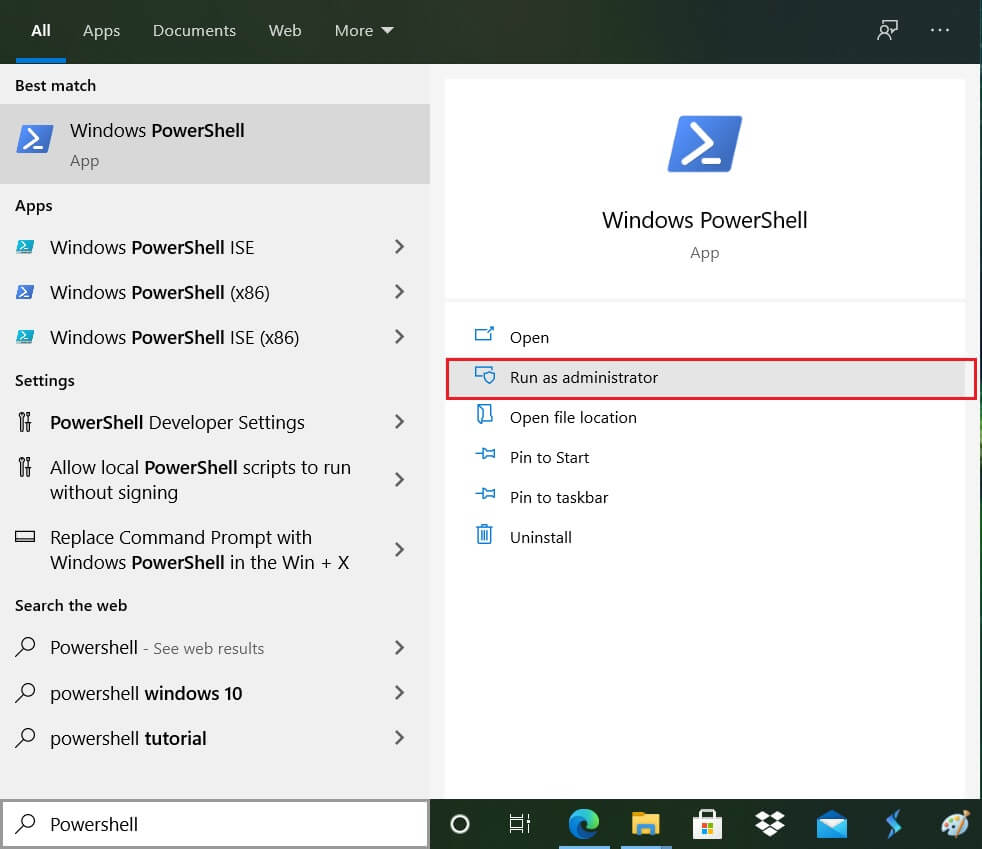
2. Now type the following command into PowerShell window:
Get-AppXPackage -Όλες οι χρήστες | Foreach {Προσθέστε-AppxPackage -DisableDevelopmentMode -Register "$ ($ _. InstallLocation) AppXManifest.xml"}

3. Wait for the Powershell to execute the above command and ignore the few errors which may come along.
4. Επανεκκινήστε τον υπολογιστή σας για να αποθηκεύσετε τις αλλαγές.
Μέθοδος 7: Διόρθωση μητρώου
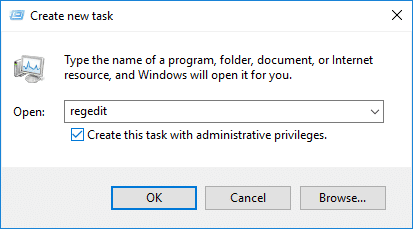
1. Press Ctrl + Shift + Esc to open Task Manager then click on Αρχεία και επιλέξτε Εκτέλεση νέας εργασίας.
2. Τύπος regedit και σημάδι επιλογής "Δημιουργήστε αυτήν την εργασία με δικαιώματα διαχειριστή” then click OK.
3. Now navigate to the following registry key in the Registry Editor:
ComputerHKEY_LOCAL_MACHINESYSTEMCurrentControlSetServicesWpnUserService
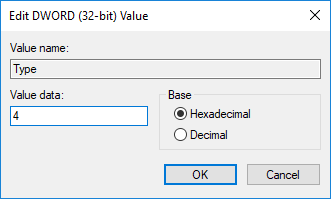
4. Φροντίστε να επιλέξετε WpnUserService then in the right window double-click on the Ξεκινήστε το DWORD.
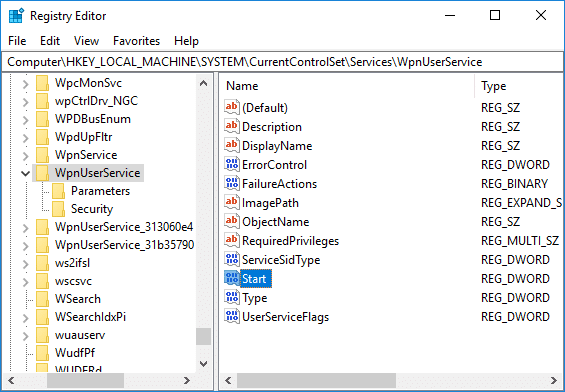
5. Change its value to 4 then click Εντάξει.
6. Επανεκκινήστε τον υπολογιστή σας για να αποθηκεύσετε τις αλλαγές.
Μέθοδος 8: Ανανέωση ή επαναφορά των Windows 10
Σημείωση: If you can’t access your PC, restart your PC a few times until you start Αυτόματη Επισκευή. Στη συνέχεια, πλοηγηθείτε στο Αντιμετώπιση προβλημάτων > Επαναφορά αυτού του υπολογιστή > Κατάργηση όλων.
1. Πατήστε Windows Key + I για να ανοίξετε τις Ρυθμίσεις και, στη συνέχεια, κάντε κλικ στο Εικονίδιο ενημέρωσης και ασφάλειας.
![]()
2. Από το αριστερό μενού επιλέξτε Recovery.
3. Κάτω από Επαναφέρετε αυτόν τον υπολογιστή, Κάνε κλικ στο "Ξεκινήστε Τώρα"Κουμπί.

4. Επιλέξτε την επιλογή για να Κρατήστε τα αρχεία μου.

5. For the next step, you might be asked to insert Windows 10 installation media, so ensure you have it ready.
6. Now, select your Windows version and click μόνο στη μονάδα δίσκου όπου είναι εγκατεστημένα τα Windows > remove my files.

5. Κάντε κλικ στο Κουμπί επαναφοράς.
6. Ακολουθήστε τις οδηγίες στην οθόνη για να ολοκληρώσετε την επαναφορά.
Συνιστάται:
Αυτό είναι που έχεις με επιτυχία Διορθώστε το μενού Έναρξη που δεν λειτουργεί στα Windows 10 αλλά αν εξακολουθείτε να έχετε απορίες σχετικά με αυτό το σεμινάριο, μπορείτε να τις ρωτήσετε στην ενότητα των σχολίων.