- in παράθυρα by διαχειριστής
Διορθώστε το πρόβλημα που λείπει το προφίλ δικτύου των Windows 10

Whether connecting to a wired device, like a keyboard or speaker, or a wireless device, like a mouse, printer, or display, the computer and the device are connected through a network link and operate with the help of a medium like a USB port (Universal Serial Bus), Bluetooth, Wi-Fi, or radio frequency, and through network profile, wireless network adapter. Connecting a new device to a computer can be incredibly painful sometimes as it displays the message of Windows doesn’t have a network profile for this device. If you are also dealing with the same problem, you are at the right place. We bring you a perfect guide that will help you fix Windows 10 network profile missing problem. Before that, let’s quickly understand a little about Network Profile.
How to Fix Windows 10 Network Profile Missing Problem
Network profiles are used to set up how machines connect over networks. To establish a connection with other devices, a network profile is needed that interacts with the other devices and stores essential network settings, security, and other relevant data.
Below listed are some of the reasons behind the missing error problem:
- Outdated or faulty driver
- Change in the network profile type
- The problem could be the device itself or the USB port
But don’t worry, we have a few solutions to fix the Windows 10 Network Profile Missing. First and foremost, ensure that the device to which you are trying to connect is compatible with your system. For example, USB 3.0 devices will not function properly with the older USB 2.0 ports. Therefore, check the device’s website for system requirements.
Now, we have shown the troubleshooting methods to fix Windows doesn’t have a network profile for this device issue.
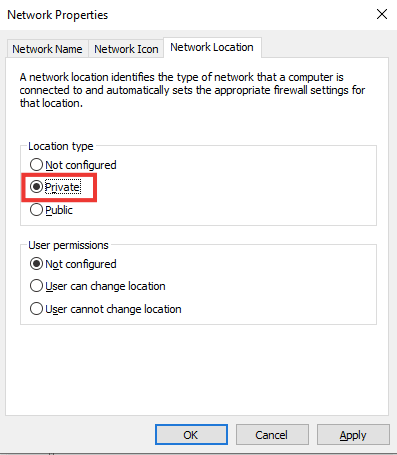
Method 1: Switch to Private Network Profile
The PC is hidden from other devices on the same network when using the public network profile. Private network profiles, on the other hand, allow visibility to other nearby devices. Here’s how you can make your network profile visible:
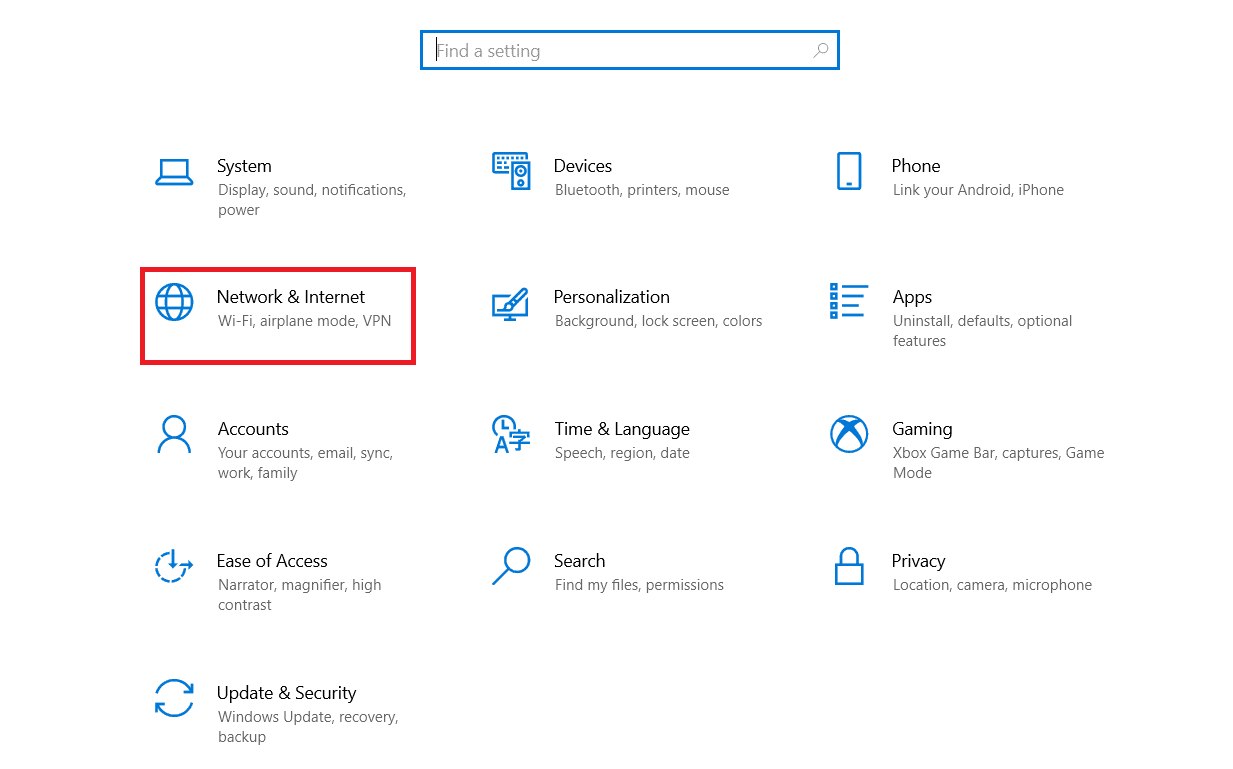
1. Πατήστε το κουμπί Κλειδιά Windows + I ταυτόχρονα για την εκκίνηση του ρυθμίσεις.
2. Κάντε κλικ στο Δίκτυο & Διαδίκτυο ρύθμιση.
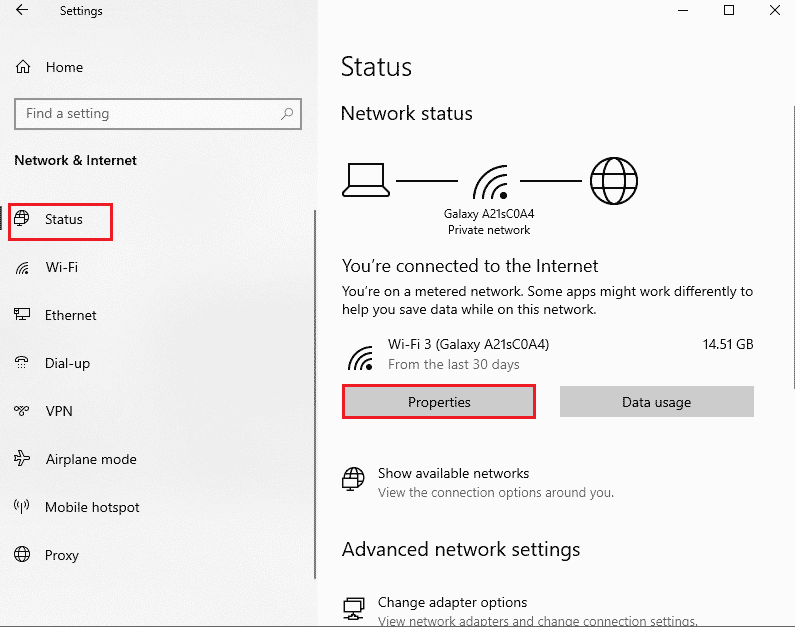
3. Select the connected network and then click on Ιδιοκτησίες.
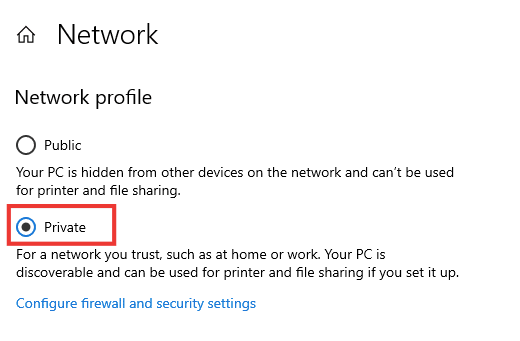
4. Switch from Δημόσιο προς την Private Network Profile.
5. Τέλος, επανεκκινήστε τον υπολογιστή.
Διαβάστε επίσης: Διορθώστε τους υπολογιστές που δεν εμφανίζονται στο δίκτυο στα Windows 10
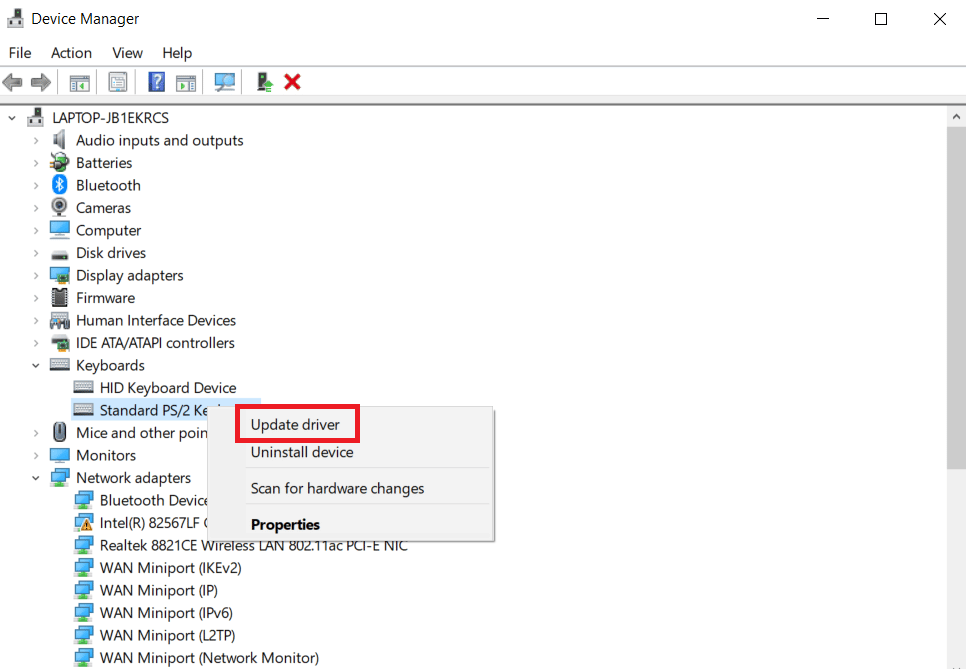
Μέθοδος 2: Ενημερώστε το πρόγραμμα οδήγησης συσκευής
If the same error message appears of Windows doesn’t have a network profile for this device, the problem could also lie in the particular device driver. To fix the Windows 10 network profile missing, try updating the driver of the specific device. Read our guide on how to update Device Drivers on Windows 10.
Μέθοδος 3: Εκτελέστε την Αντιμετώπιση προβλημάτων προσαρμογέα δικτύου
Still facing the Windows 10 network profile missing problem, you can try the network adapter troubleshooter. Read our guide on How to Troubleshoot Network Connectivity problems on Windows 10.

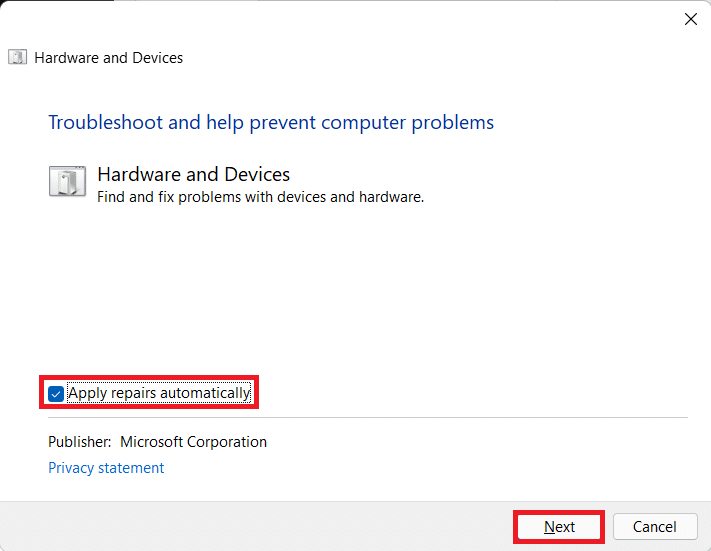
Μέθοδος 4: Εκτελέστε το εργαλείο αντιμετώπισης προβλημάτων υλικού και συσκευής
If after running the network troubleshooter, the said issue still persists, then you can run the appropriate troubleshooter for the device you are trying to connect to. For example, if you are having trouble connecting to a keyboard, select the keyboard troubleshooter, which will identify and resolve the issue. Get rid of the error message Windows doesn’t have a network profile for this device by performing this method. Read our guide Run Hardware and Devices troubleshooter to fix issues.
Διαβάστε επίσης: Πώς να επαναφέρετε τις ρυθμίσεις δικτύου στα Windows 10
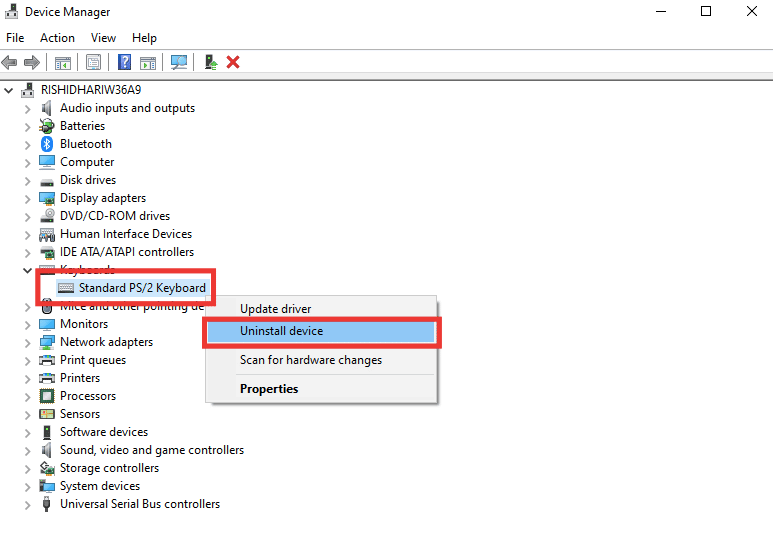
Μέθοδος 5: Επανεγκαταστήστε το πρόγραμμα οδήγησης συσκευής
Some problems go undetected because of corrupted data files or unknown causes. We recommend reinstalling the driver with fresh settings using this method. To uninstall and reinstall the driver, read our guide on how to uninstall and reinstall drivers on Windows 10.
Method 6: Modify Network Profile
If your network profile has not changed yet, or you can’t find the option to do so, here’s an alternative method to switch from a public to a private profile.
Option I: Through Registry Editor
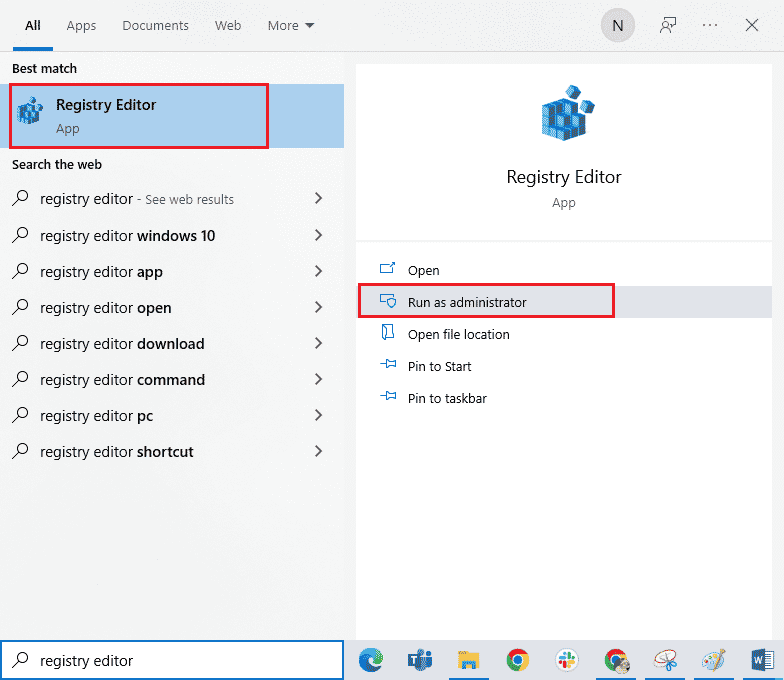
1. Πάτα το Πλήκτρο Windows, τύπου επεξεργαστή μητρώου, και κάντε κλικ στο Εκτέλεση ως διαχειριστής.
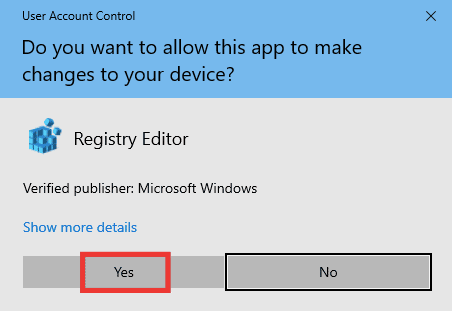
2. Κάντε κλικ στο Ναι στο Έλεγχος λογαριασμού χρήστη προτροπή.
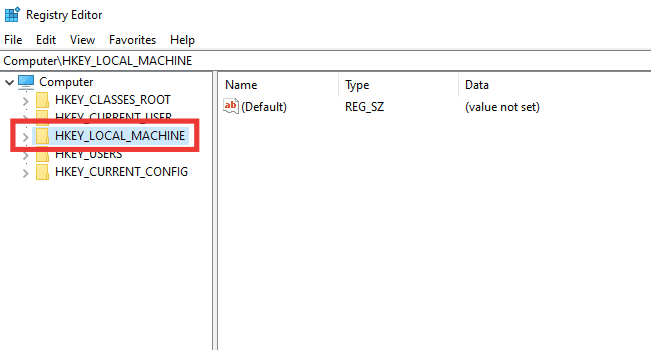
3. Κάντε διπλό κλικ στο HKEY_LOCAL_MACHINE φάκελο.
4. Αναπτύξτε το SOFTWARE folder and then click on the Microsoft φάκελο κλειδιού.

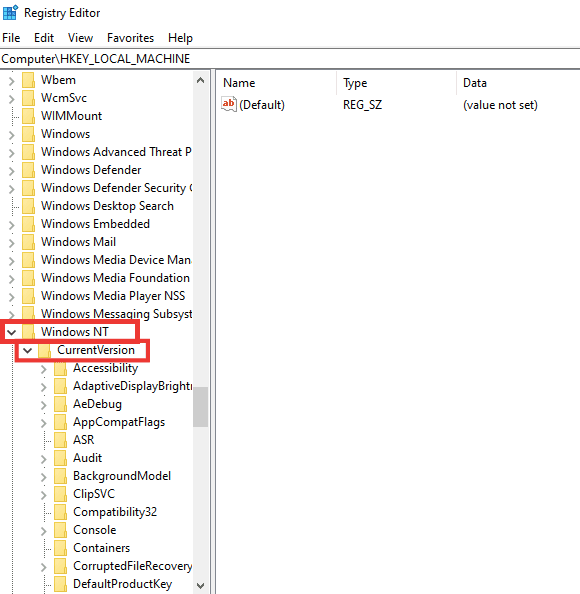
5. Κάντε κύλιση προς τα κάτω και μεταβείτε στο Windows NT > CurrentVersion φάκελο κλειδιού.
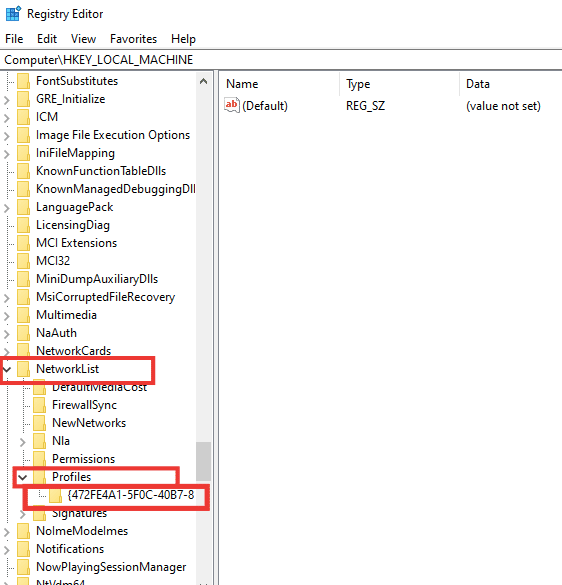
6. Scroll down again and expand the NetworkList key folder. Then expand προφίλ folder and click on the profile name.
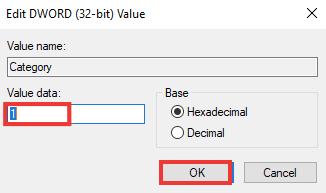
7. Κάντε διπλό κλικ στο κατηγορία αξία.
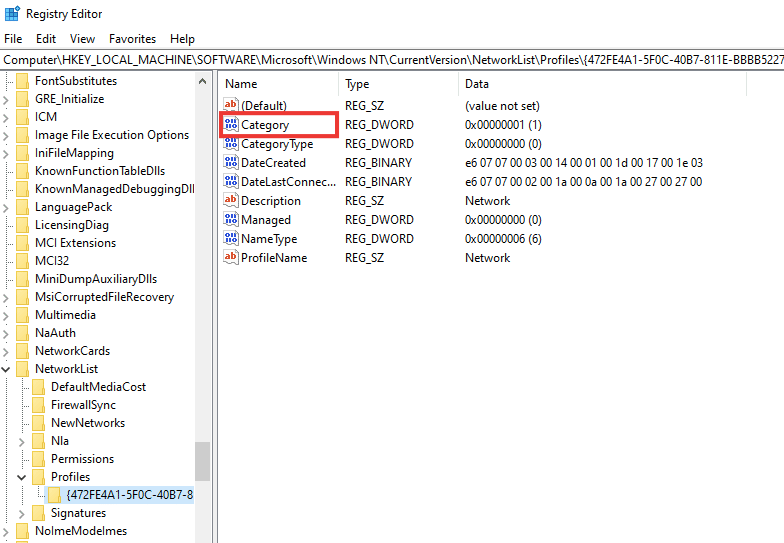
8. Αλλαξε το Αξία για από 0 προς την 1. Στη συνέχεια, κάντε κλικ στο OK.
Διαβάστε επίσης: Διορθώστε το σφάλμα μπλε οθόνης των Windows 10 Netwtw04.sys
Option II: Through Windows PowerShell
Similar to the above method, this is also an alternative method to switch from a public to a private profile to fix Windows 10 network profile missing issue.
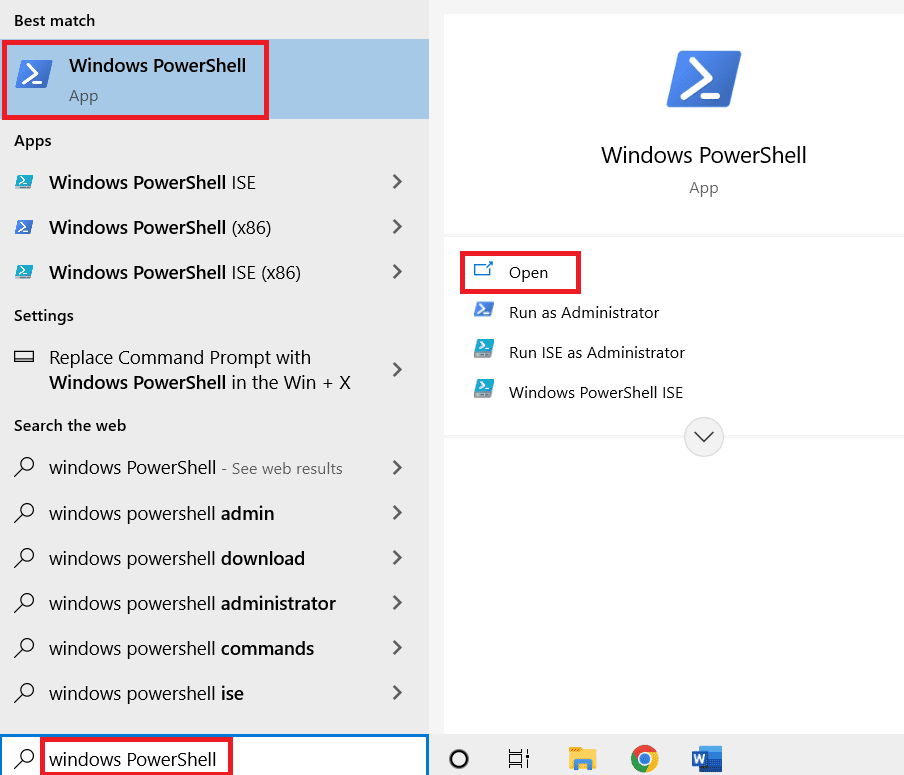
1. Πάτα το Πλήκτρο Windows, τύπου PowerShell, και κάντε κλικ στο Ανοικτό.
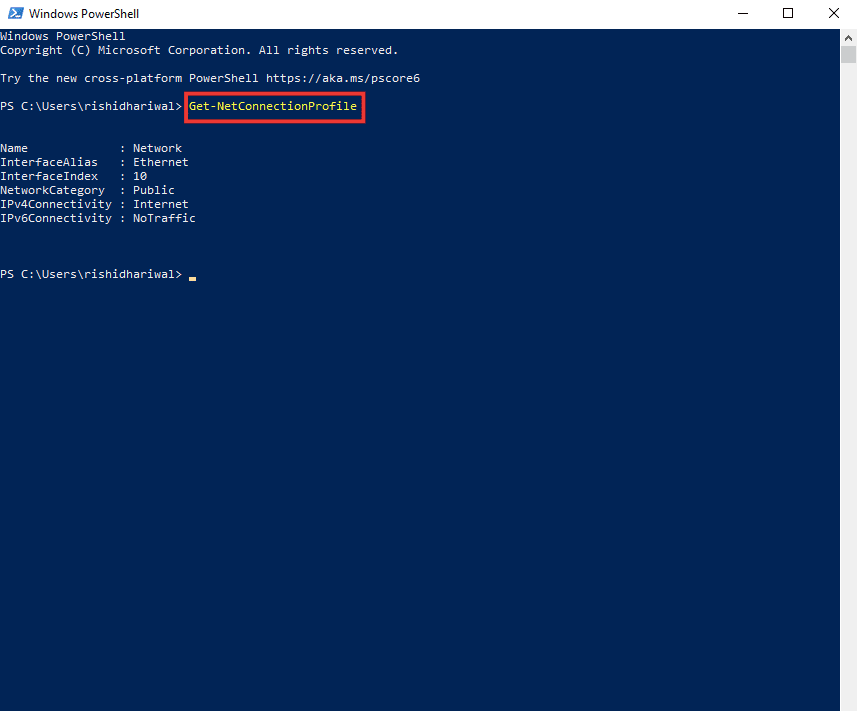
2. Πληκτρολογήστε το Get-NetConnectionProfile εντολή και πατήστε το Εισάγετε κλειδί to check your network profile.
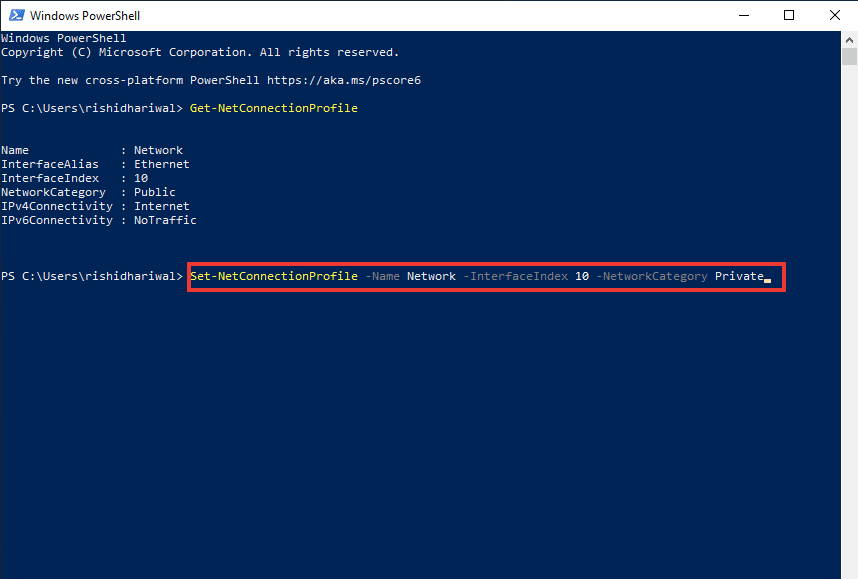
3. To change it to private, type the following command and press the Εισάγετε κλειδί.
Set-NetConnectionProfile -Name Network -InterfaceIndex 10 -NetworkCategory Private
Σημείωση: Αντικαταστήστε το InterfaceIndex number in the command according to your system.
4. Finally, check if Windows doesn’t have a network profile for this device issue is resolved.
Option III: Through Local Security Policy
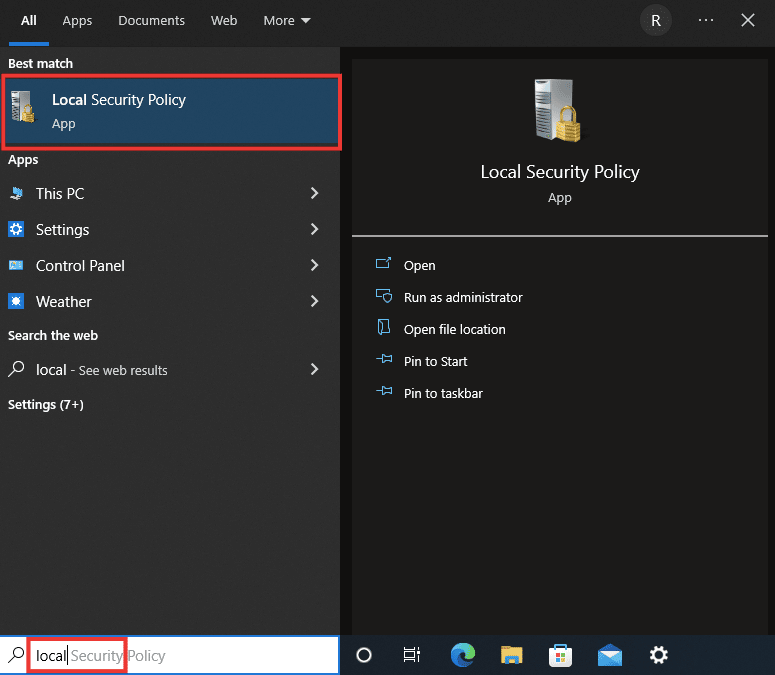
1. Πάτα το Πλήκτρο Windows, τύπου τοπικός, και κάντε κλικ στο Τοπική πολιτική ασφαλείας.
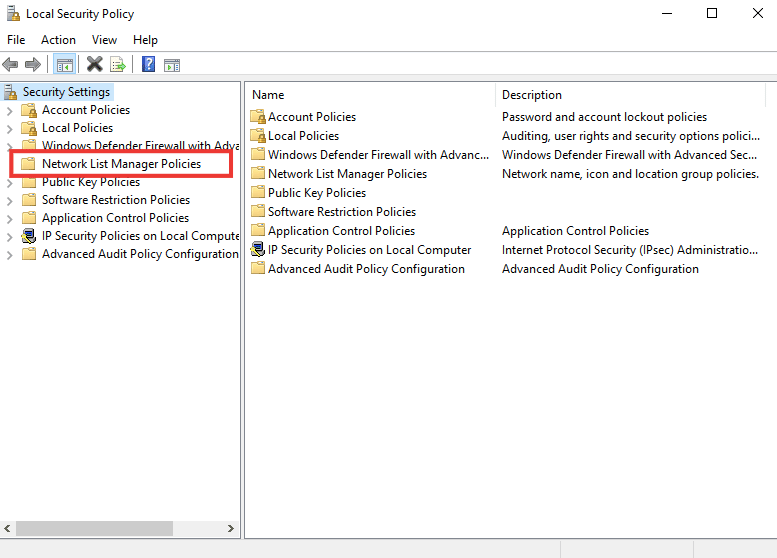
2. Κάντε κλικ στο Network List Manager Policies.
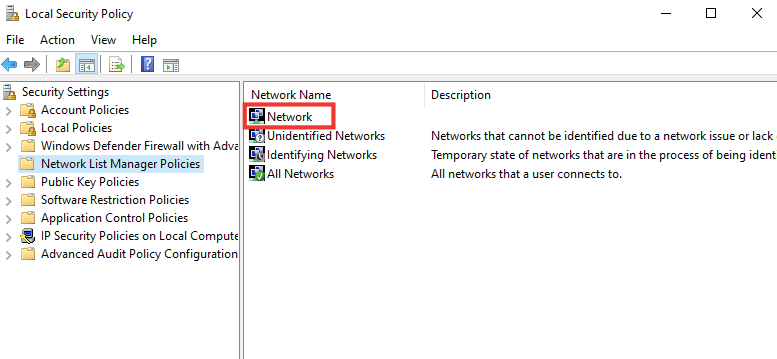
3. Select the connected Δίκτυο και κάντε διπλό κλικ σε αυτό.
4. Πηγαίνετε να το Τοποθεσία δικτύου τμήμα.
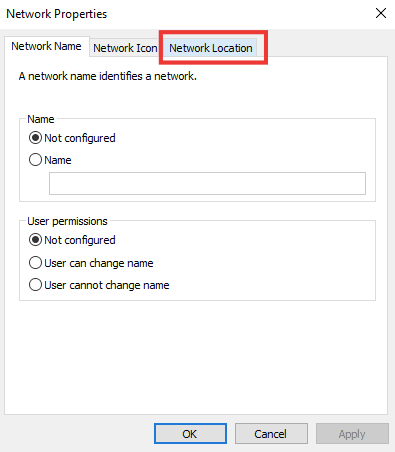
5. Επιλέξτε το Private επιλογή.
6. Κάντε κλικ στο Εφαρμογή και έπειτα κάντε κλικ στο OK.
Διαβάστε επίσης: Διορθώστε ότι δεν βρέθηκαν δίκτυα WiFi στα Windows 10
Method 7: Modify SNMP Service Settings
SNMP (Simple Network Management Protocol) provides network managers with information about the devices that are connected to the network. To resolve the Windows 10 network profile missing issue, we will use this method to check the status of SNMP and enable automatic startup.
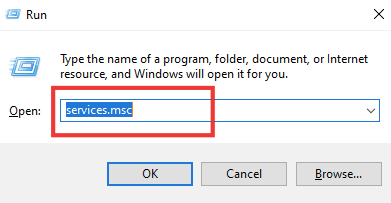
1. Πάτα το Windows+ πλήκτρα R ταυτόχρονα για να ανοίξετε το τρέξιμο κουτί διαλόγου.
2. Τύπος services.msc και πατήστε το πλήκτρο Εισάγετε κλειδί για να ανοίξετε Υπηρεσίες παράθυρο.
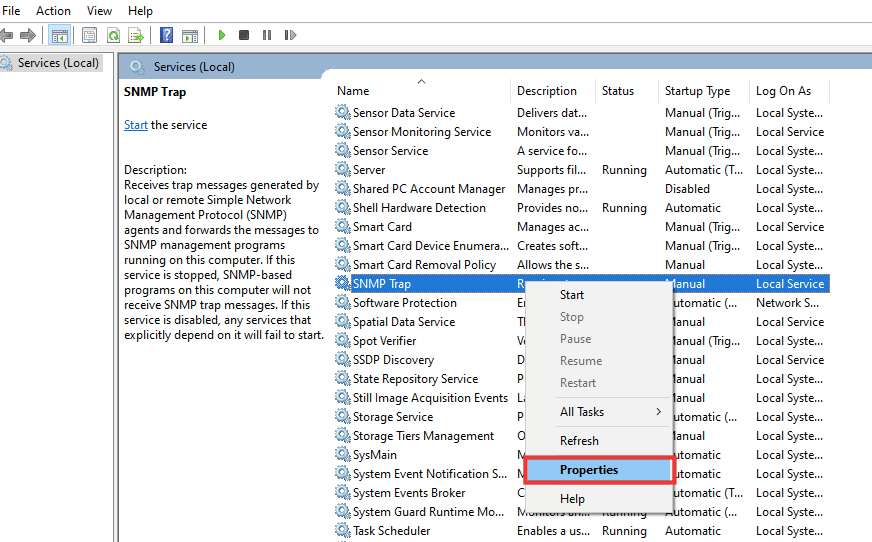
3. Κάντε δεξί κλικ στο Παγίδα SNMP it and then click on Ιδιοκτησίες.
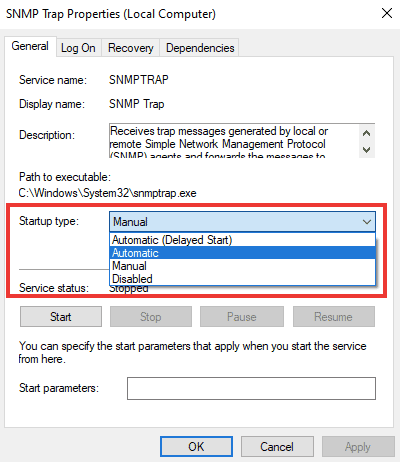
4. από το τύπος εκκίνησης drop-down menu, switch to Αυτόματο mode as illustrated below.
5. Κάντε κλικ στο Εφαρμογή και έπειτα κάντε κλικ στο OK.
Συνιστάται:
Ελπίζουμε ότι αυτός ο οδηγός ήταν χρήσιμος και μπορέσατε να το διορθώσετε Windows 10 network profile missing problem. Let us know which method worked for you best. If you have any queries or suggestions, then feel free to drop them in the comments section below.