Fix Windows Modules Installer Worker High CPU Usage
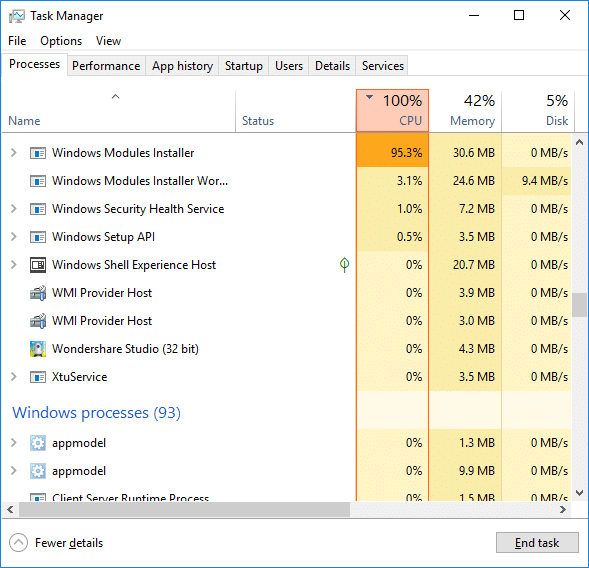
If you are facing the High CPU Usage by Windows Modules Installer Worker, then don’t worry as thousands of other users are also facing the similar problem and therefore, there are many working fixes which we will be discussing today in this article. To verify if you are facing this issue open Task Manager (Ctrl + Shift + Esc) and you will find that the Windows Modules Installer Worker is consuming High CPU or Disk Usage.

Pro Konsilo: You may leave your PC overnight or for a few hours to see the issue rectify itself once the Windows is finished downloading and installing updates.
What is Windows Modules Installer worker (WMIW)?
Windows Modules Installer worker (WMIW) is a service which takes cares of automatically installing Windows Update. According to its service description, WMIW is a system process that enables automatic installation, modification, and removal of Windows updates and optional components.
This process is responsible for finding new Windows Update automatically and installing them. As you might be aware that Windows 10 automatically install newer builds (i.e. 1803 etc.) via Windows Updates, so this process is responsible for installing these updates in the background.
Although this process is called Windows Modules Installer worker (WMIW) and you will see the same name in the Processes tab in the Task Manager, but if you switch to Details tab, then you will find the name of the file as TiWorker.exe.
Why Is Windows Modules Installer worker Using So Much CPU?
As Windows Modules Installer worker (TiWorker.exe) runs continuously in the background, sometimes it might utilize high CPU or disk usage when installing or uninstalling Windows Updates. But if its constantly using high CPU then the Windows Modules Installer worker may have become unresponsive while checking new updates. As a result, you may be experiencing lags, or your system might hang or freeze completely.
The first thing users do when they experience freezing, or lagging issues on their system is to restart their PC, but I assure you that this strategy won’t work in this case. This is because the issue will not resolve by itself until and unless you fix the underlying cause.
Fix Windows Modules Installer Worker High CPU Usage
Nepre kreu restarigin punkton por se io misfunkcias.
Windows Modules Installer Worker (WMIW) is an important service, and it should not be disabled. WMIW or TiWorker.exe is not a virus or malware, and you cannot just delete this service from your PC. So without wasting any time let’s see How to Fix Windows Modules Installer Worker High CPU Usage helpe de la sube listigita gvidilo pri solvo de problemoj.
Metodo 1: Rulu Windows Update Troubleshooter
1. Premu Vindozan Ŝlosilon + I por malfermi Agordoj tiam alklaku Ikono pri Ĝisdatigo kaj Sekureco.
![]()
2. El la maldekstra menuo, elektu Problemo sub "Leviĝu kaj kurante" alklaku Windows Update.
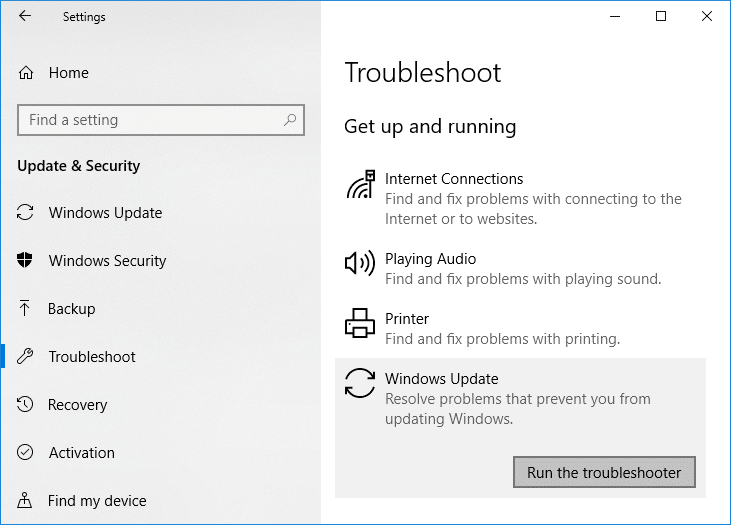
3. Nun alklaku "Rulu la solvoj” sub Windows Update.
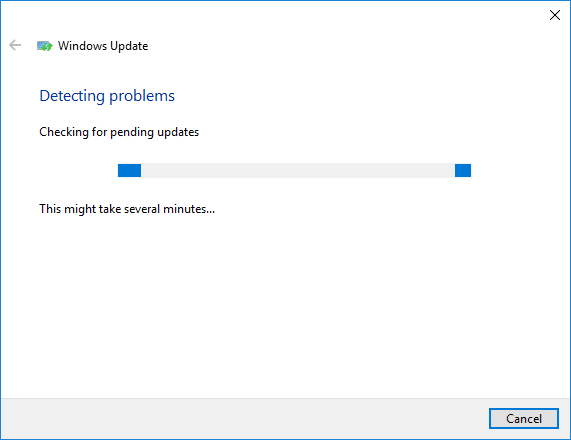
4. Let the troubleshooter run, and it will automatically fix any issues found with Windows Update taking forever.
Method 2: Manually Check for Windows Updates
1. Premu Vindozan Ŝlosilon + I tiam elektu Ĝisdatigo kaj Sekureco.
2. De la maldekstra flanko, menuo klakas sur Windows Update.
3. Nun alklaku la "Kontrolu ĝisdatigojn”butono por kontroli ajnajn disponeblajn ĝisdatigojn.

4. Se iuj ĝisdatigoj atendas, tiam alklaku Elŝutu kaj Instalu ĝisdatigojn.

5. Post kiam la ĝisdatigoj estas elŝutitaj, instalu ilin, kaj via Vindozo estos ĝisdatigita.
Method 3: Configure Windows Update to Manual
singardemo: This method will switch Windows Update from automatically installing the new updates to the manual. This means you have to manually check for Windows Update (weekly or monthly) to keep your PC secure. But follow this method, and you can again set the Updates to Automatic once the issue is resolved.
1.Premu Vindozan Ŝlosilon + R kaj tiam tajpu servoj.msc kaj batis Enter.

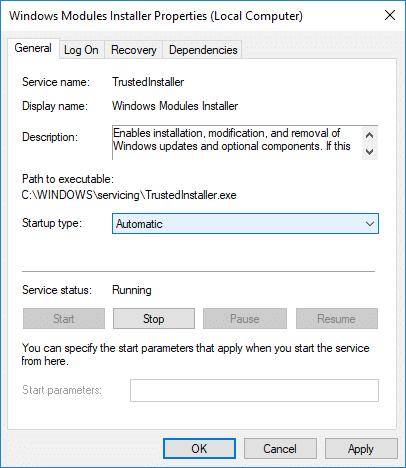
2. Scroll down and find Instalilo de Vindozaj Moduloj service in the list.
3. Dekstre alklaku Servo de Instalilo de Vindozaj Moduloj kaj elektu Propraĵoj.
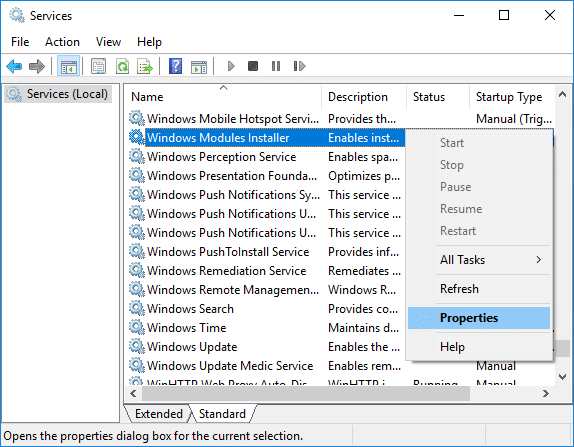
4. Nun alklaku ĉesigi then from the Startup-tipo drop-down select Manlibro.
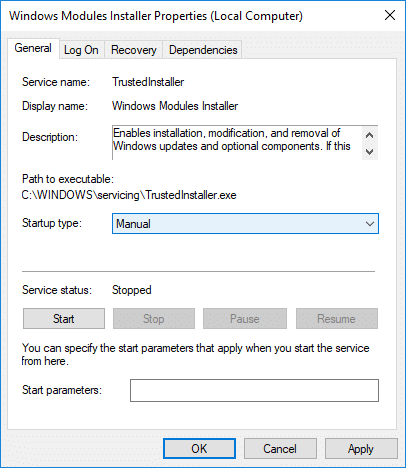
5. Klaku Apliki, sekvita de OK.
6. Similarly, follow the same step for the Windows Update service.
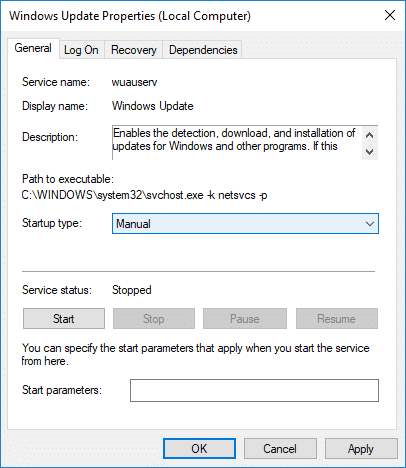
7. Rekomencu vian komputilon por konservi ŝanĝojn.
8. Denove kontroli por Windows Updates Manually and install any pending updates.
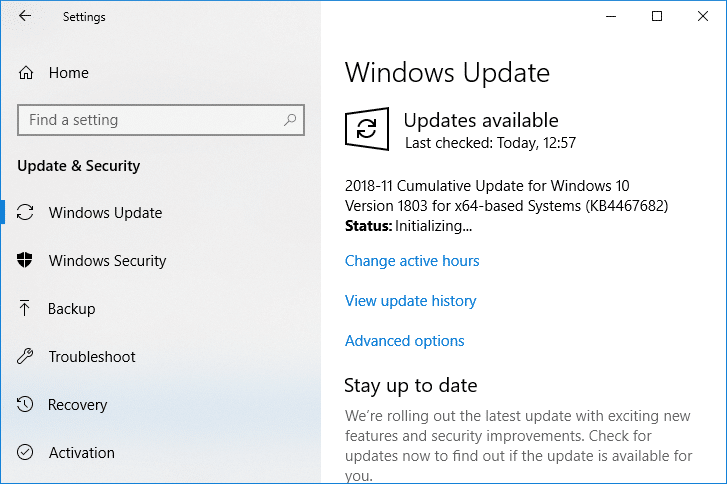
9. Once is done, again go back to services.msc window and open the Windows Modules Installer & Windows Update Properties fenestro.
10. Fiksi la Startup-tipo al aŭtomata kaj klaku komenco. Then click Apply followed by OK.
11. Rekomencu vian komputilon por konservi ŝanĝojn.
Metodo 4: Rulu Sisteman Bontenadon Troubleshooter
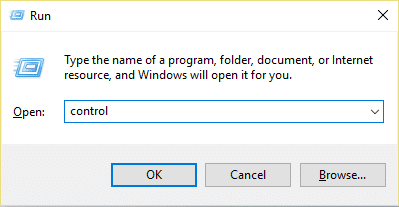
1. Premu Vindozan Ŝlosilon + R tiam tajpu kontrolon kaj premu Enter por malfermi Kontrola Panelo.
2. Serĉu Troubleshoot kaj alklaku Problemoj.

3. Poste alklaku Rigardi ĉiujn en la maldekstra panelo.
4. Alklaku “System Maintenance” por funkciigi la System Maintenance Troubleshooter.

5. La Troubleshooter eble povos Fix Windows Modules Installer Worker High CPU Usage, but if it didn’t, then you need to run System Performance Troubleshooter.
6. Malfermu Komandon. La uzanto povas plenumi ĉi tiun paŝon serĉante 'cmd' kaj tiam premu Eniri.

7. Tajpu la jenan komandon en cmd kaj alklaku Enter:
msdt.exe / id PerformanceDiagnostic
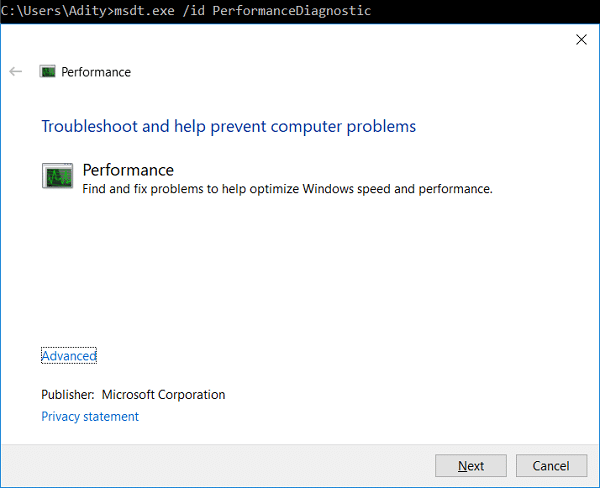
8. Follow the on-screen instruction to run the troubleshooter and fix any issues find the System.
9. Finally, exit the cmd and reboot your PC.
Method 5: Disable Automatic Maintenance
Sometimes Automatic Maintenance can conflict with the Windows Modules Installer Worker service, so try to disable Automatic Maintenance using this guide and see if this fixes your issue.
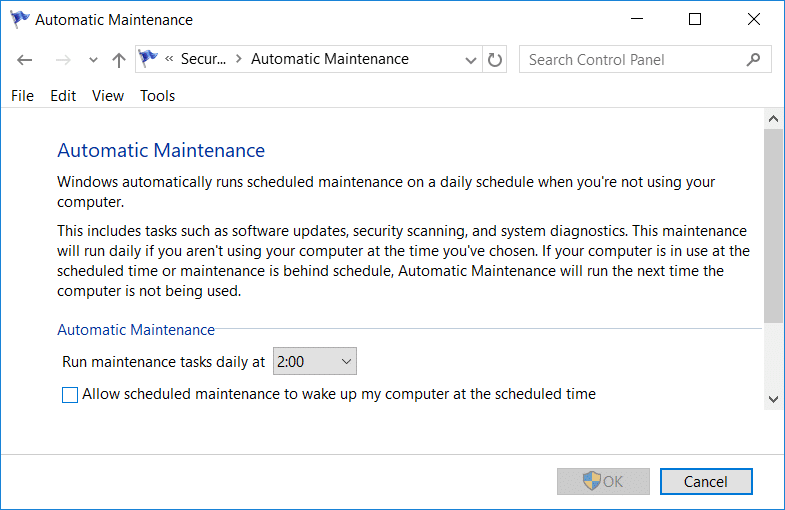
Although disabling Automatic Maintenance is not a good idea, but there might be some case where you need to actually disable it, for example, if your PC freezes during automatic maintenance or Windows Modules Installer Worker High CPU Usage issue then you should disable maintenance to troubleshoot the issue.
Method 6: Run System File Checker and DISM
1. Malfermu Komandon. La uzanto povas plenumi ĉi tiun paŝon serĉante 'cmd' kaj tiam premu Eniri.
2.Nun tajpu la jenon en la cmd kaj premu enen:
Sfc /scannow sfc /scannow /offbootdir=c: /offwindir=c:windows (Se supre malsukcesas, provu ĉi tiun)

3. Atendu, ke la ĉi-supra procezo finiĝos kaj post tio, rekomencu vian komputilon.
4. Denove malfermu cmd kaj tajpu la jenan komandon kaj premu eniron post ĉiu:
Dism /Enreta /Puriga-Bildo /CheckHealth Dism /Enreta /Puriga-Bildo /ScanHealth Dism /Enreta /Puriga-Bildo /RestoreHealth

5. Lasu la DISM-komandon kuri kaj atendu, ke ĝi finiĝos.
6. Se la supra komando ne funkcias, provu la sube:
Dism /Bildo:C:senrete /Cleanup-Image /RestoreHealth /Source:c:testmountwindows Dism /Enreta /Cleanup-Image /RestoreHealth /Source:c:testmountwindows /LimitAccess
Noto: Anstataŭigu la C:RepairSourceWindows per via riparfonto (Vindoza Instalado aŭ Reakira Disko).
7. Rekomencu vian komputilon por konservi ŝanĝojn kaj vidi ĉu vi kapablas Fix Windows Modules Installer Worker High CPU Usage.
Metodo 7: Faru Puran Boton
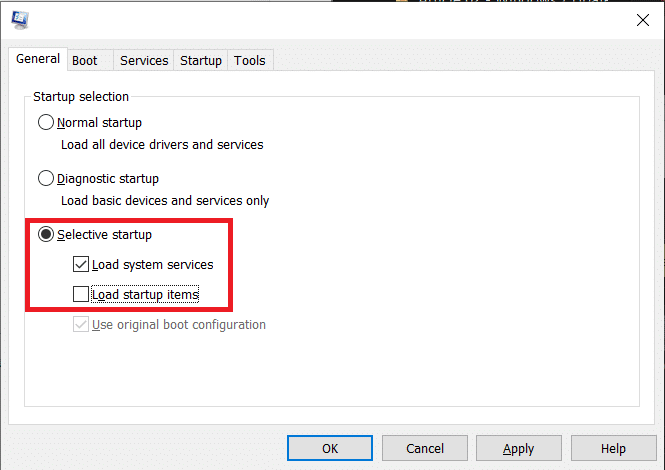
Sometimes 3rd party software can conflict with Windows and can cause the issue. To Fix Windows Modules Installer Worker High CPU Usage issue, vi devas fari puran lanĉon en via komputilo kaj diagnozi la problemon paŝon post paŝo.
Method 8: Set your WiFi as Metered Connection
Noto: This will stop Windows Automatic Update, and you will need to manually check for Updates.
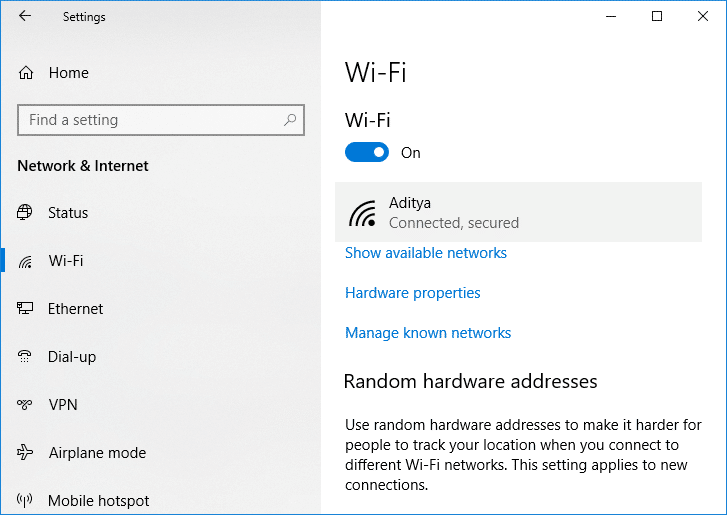
1. Premu Vindozan Ŝlosilon + I por malfermi Agordoj tiam alklaku Reto kaj Interreto.

2. El la maldekstra menuo, elektu WiFi
3. Under Wi-Fi, klako on your currently connected network (WiFi).
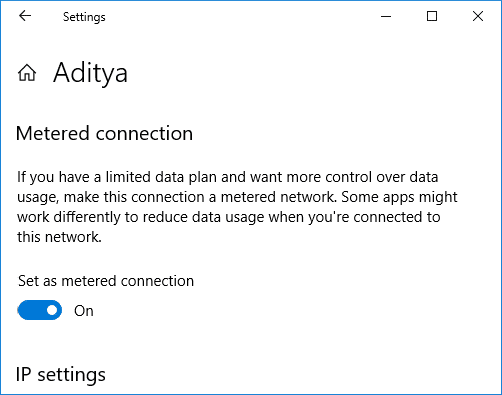
4. Scroll down to Metered connection and ebligu la baskulon sub "Fiksita kiel mezurita konekto".
5. Close Settings and reboot your PC to save changes.
rekomendita:
Jen ĝi, vi sukcese Fix Windows Modules Installer Worker High CPU Usage sed se vi ankoraŭ havas demandojn pri ĉi tiu lernilo, bonvolu demandi ilin en la sekcio de komentoj.
