- in ventanas by Administración
Fix Computer does not start until restarted multiple times

Fix Computer does not start until restarted multiple times: There seems to be a new issue with PC users, which is when they first turn ON their PC the power comes ON, fans start to spin but everything suddenly stops and PC never gets a display, in short, PC automatically turned OFF without any warning. Now if the user, powers off the PC and then turned it back ON, the computer boots normally without any additional issues. Basically, Computer does not start until restarted multiple times which is very annoying for basic Windows users.
Sometimes you need to boot up to 4-5 time before you could see the display or even boot your PC, but there is no guarantee that it will boot. Now living in this uncertainty, that you may or may not be able to use your PC next day is not such a good thing, so you need to address this problem immediately.
Now there are only a few issues which can cause this problem, so you can definitely troubleshoot this issue easily. The problem sometimes can be related to software like the main culprit seems to be Fast Startup in many cases and disabling it seems to fix the issue. But if this doesn’t fix the issue then you can be sure that the issue is related to hardware. In hardware, this can be a memory issue, faulty power supply, BIOS Settings or CMOS battery dried up, etc. So without wasting any time let’s see how to Fix Computer does not start until restarted multiple times with the help of the below-listed guide.
Fix Computer does not start until restarted multiple times
Asegúrate de crear un punto de restauración, en caso de que algo salga mal.
Nota: Some of the methods require expert supervision as you can seriously damage your PC while performing the steps, so if you don’t know what you’re doing then take your laptop/PC to a service repair center. If your PC is under warranty then opening the case can temper/void the warranty.
Método 1: desactivar el inicio rápido
1.Presione la tecla Windows + R, luego escriba control y presione Enter para abrir Panel de control.

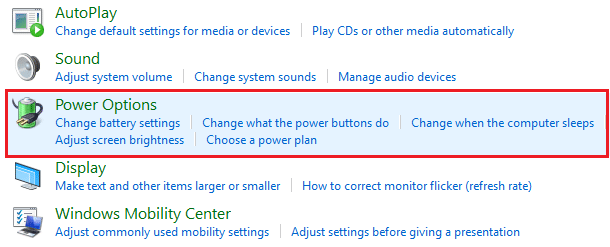
2.Haga clic en Hardware y sonido a continuación, haga clic en Opciones de energía.
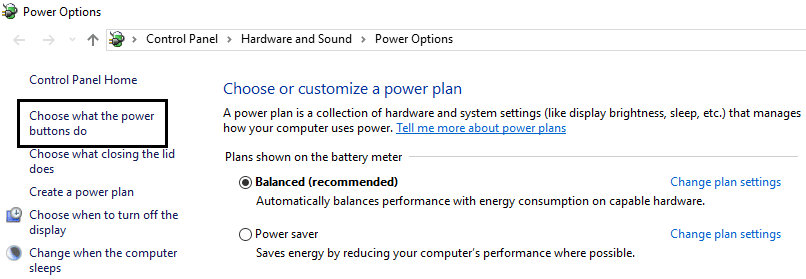
3. Luego, desde el panel de la ventana izquierda, seleccione "Elija lo que hacen los botones de encendido."
4.Ahora haga clic en "Cambiar la configuración que actualmente no está disponible."

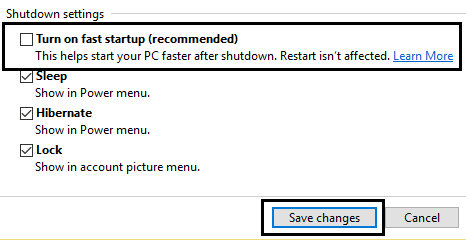
5.Desmarque “Encienda el inicio rápido”Y haga clic en Guardar cambios.
Método 2: ejecutar reparación automática
1.Inserte el DVD de instalación de arranque de Windows 10 y reinicia tu PC.
2.Cuando se le solicite presiona cualquier tecla Para iniciar desde CD o DVD, presione cualquier tecla para continuar.

3.Seleccione sus preferencias de idioma y haga clic en Siguiente. Haga clic en reparar su computadora en la parte inferior izquierda.

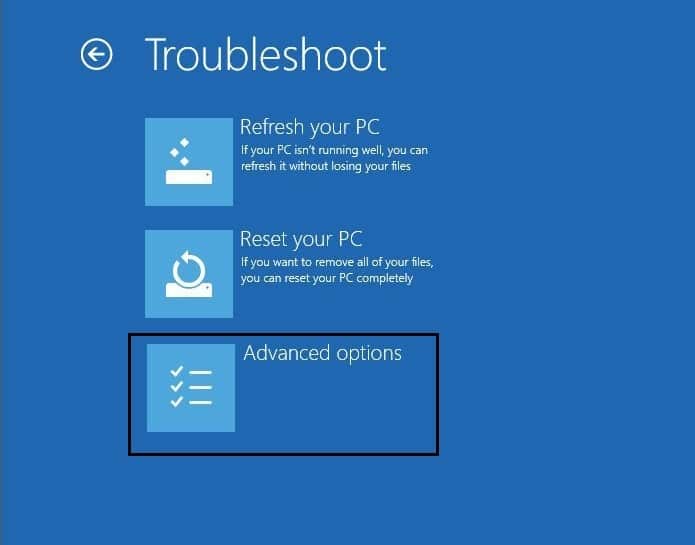
4.En la pantalla de elegir una opción, haga clic en Solucionar problemas.

5.En la pantalla Solucionar problemas, haga clic en Opción avanzada.
6.En la pantalla Opciones avanzadas, haga clic en Reparación automática o reparación de inicio.
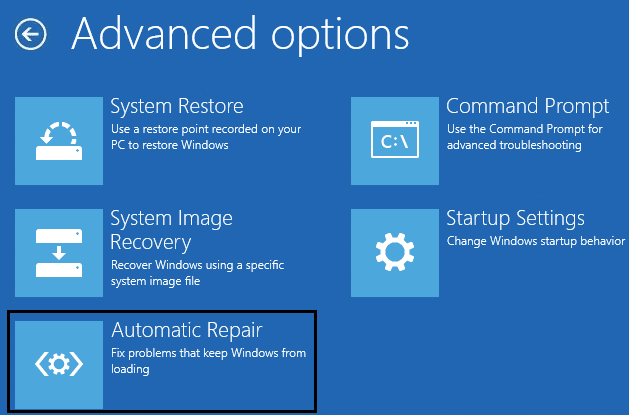
7.Espera hasta que Reparaciones automáticas/de inicio de Windows completa.
8.Reinicie y tendrá éxito. Fix Computer does not start until restarted multiple times issue, si no, continúa.
Además, lee Cómo reparar la reparación automática no pudo reparar su PC.
Método 3: restablecer el BIOS a la configuración predeterminada
1.Apague su computadora portátil, luego enciéndala y simultáneamente presione F2, SUPR o F12 (dependiendo de su fabricante) para entrar en Configuración del BIOS.

2.Ahora necesitarás encontrar la opción de reinicio para cargar la configuración predeterminada y puede denominarse Restablecer los valores predeterminados, Cargar los valores predeterminados de fábrica, Borrar la configuración del BIOS, Cargar los valores predeterminados de configuración o algo similar.

3. Selecciónelo con las teclas de flecha, presione Entrar y confirme la operación. Su BIOS ahora usará su configuración por defecto.
4. Una vez que haya iniciado sesión en Windows, vea si puede Fix Computer does not start until restarted multiple times issue.
Method 4: Check if hard disk is failing
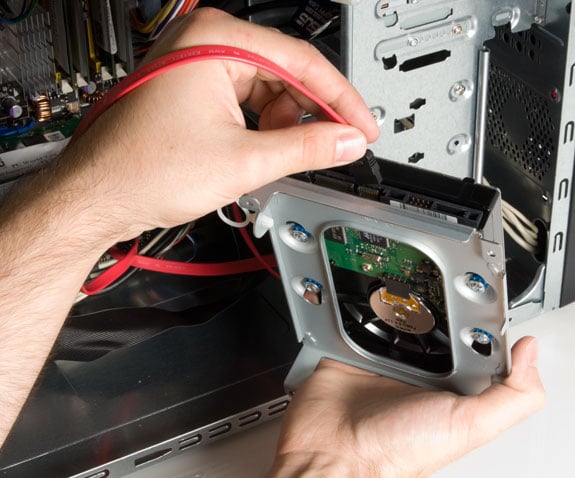
In many cases, the issue occurs because of the failing hard disk and to check if this is the problem here you need to disconnect the hard disk from your PC and connect it to another PC and try to boot from it. If you can boot from the hard disk without any issue on the other PC then you can be sure that the issue is not related to it.
Another way to test your hard disk is download and burn the SeaTools for DOS on a CD then run the test to check if your hard disk is failing or not. You will need to set the first boot to CD/DVD from BIOS in order for this to work.
Método 5: verificar la fuente de alimentación
A faulty or failing Power Supply is generally the cause for PC not starting at the first boot. Because if the power consumption of hard disk is not met, it won’t get enough power to run and subsequently you may need to restart the PC several times before it can take the adequate power from PSU. In this case, you may need to replace the power supply with a new one or you could borrow a spare power supply to test if this is the case here.
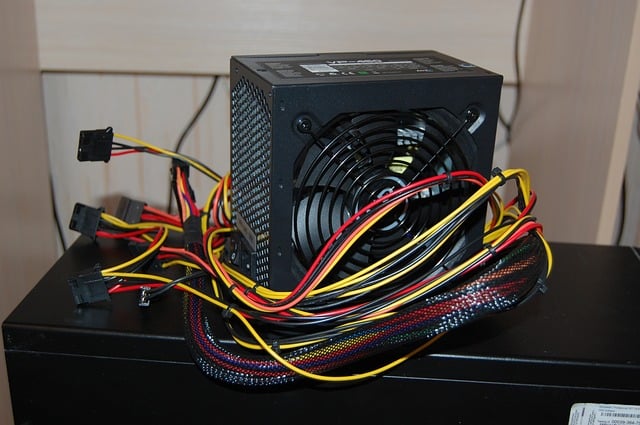
If you have recently installed a new hardware such as video card then chances are the PSU is not able to deliver the necessary power needed by the graphic card. Just temporary remove the hardware and see if this fixes the issue. If the issue is resolved then in order to use the graphic card you may need to purchase a higher voltage Power Supply Unit.
Method 6: Replace CMOS battery
If CMOS battery has dried up or no longer deliver powers then your PC won’t start and after few days it will eventually start hanging up. In order to fix the issue, it’s advised to replace your CMOS battery.
Método 7: reinicio de ATX
Nota: Este proceso generalmente se aplica a las computadoras portátiles, por lo que si tiene una computadora, deje este método.
1.Power off your laptop then remove the power cord, leave it for few minutes.
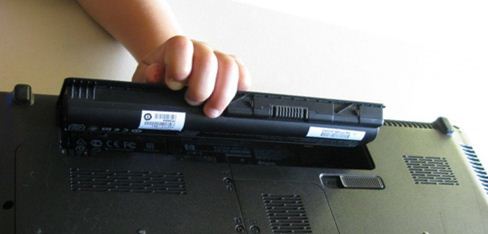
2.Ahora quitar la batería desde atrás y presione y mantenga presionado el botón de encendido durante 15 a 20 segundos.
Nota: No conectes el cable de alimentación todavía, te diremos cuándo hacerlo.
3.Now plug in tu cable de alimentación (la batería no debe estar insertada) e intente iniciar su computadora portátil.
4.If it’s boot properly then again turn off your laptop. Put in the battery and again start your laptop.
If the problem is still there again turn off your laptop, remove power cord & battery. Press & hold the power button for 15-20 seconds and then insert the battery. Power on the laptop and this should fix the issue.
Now if any of the above methods weren’t helpful then it means the problem is with your motherboard and unfortunately, you need to replace it in order to fix the issue.
Recomendado:
Eso es todo lo que has logrado Fix Computer does not start until restarted multiple times issue pero si todavía tiene alguna pregunta sobre esta guía, no dude en hacerla en la sección de comentarios.