- in ventanas by Administración
Fix Missing Photos or Picture Icons after Creators Update
Fix Missing Photos or Picture Icons after Creators Update: If you have recently installed Creators Update then it might be possible that your photos or picture icons might be missing instead you might be seeing blank spaces in place of your icons. This is quite a common problem after updating Windows to the latest build, although the latest updates are essential they seem to broke more things than they seem to fix. Anyway, this error doesn’t seem to cause any problem with the working of applications as when you double click on your photos or pictures they will open in the default photos app. But this doesn’t mean that there is no problem because you still can’t see the icons. So without wasting any time let’s see how to actually Fix Missing Photos or Picture Icons after Creators Update with the below-listed steps.
![]()
Fix Missing Photos or Picture Icons after Creators Update
Nota: Asegúrese de crear un punto de restauración solo en caso de que algo salga mal.
Method 1: Set the Photo App as Default
1.Presione la tecla Windows + I para abrir Configuración de la aplicación then navigate to:
Apps > Default Apps > Set defaults by app
2.This would open a window where you could Set Default Programs for a particular file type.
3.From the list, select Photo App a continuación, haga clic en Set this program as default.
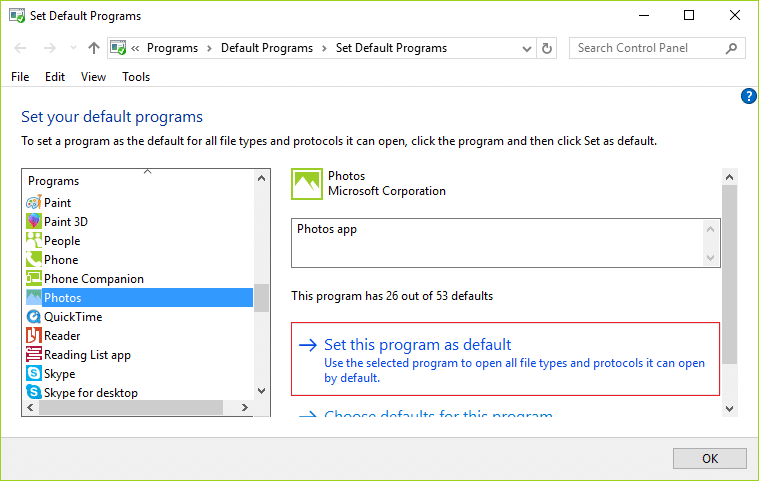
4.Reinicie su PC para guardar los cambios.
Método 2: corrección del registro
1.Presione la tecla Windows + R y luego escriba regedit y presione Enter para abrir el Editor del Registro.

2.Navegue a la siguiente ruta de registro:
HKEY_CURRENT_USERSOFTWAREMicrosoftWindowsCurrentVersionExplorerFileExts.jpg
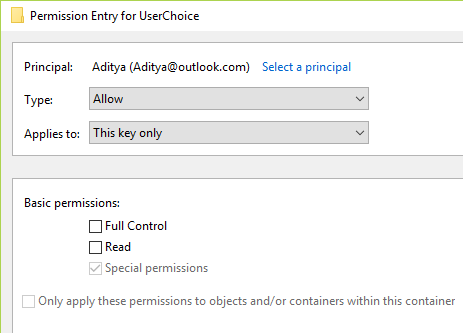
3.Expandir .jpg y luego haga clic derecho en Elección de usuario y seleccionar Permisos.
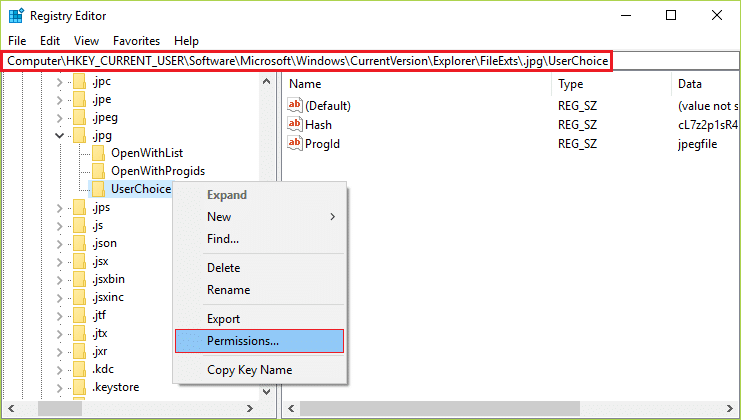
4.Now from the permissions window select TODOS LOS PAQUETES DE APLICACIÓN Luego haga clic Avanzado en la esquina inferior derecha.
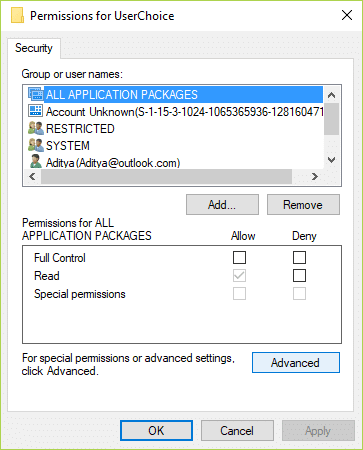
5.In the Advanced Security Settings window make sure the Local Account (Computer nameUser) should have Access (set to allow) and configured to Set Value, Inherited from None and Applies to This key only.

6.If the Local Account is not configured as above then double click on it and change the values according to the above configuration.
7.A continuación, asegúrese de que Cuenta de administrador should have Access (set to allow) and configured to Full Control, Inherited from CURRENT_USERSOFTWAREMicrosoftWindowsCurrentVersionExplorer, and Applies to This key and subkeys.
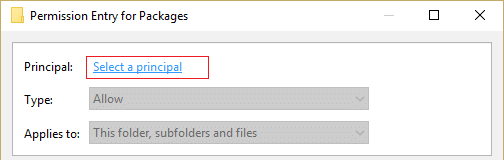
8.Also, if you can’t change the above settings then remove the entry and then click ADD.(Also applies if you don’t see the above permission values).
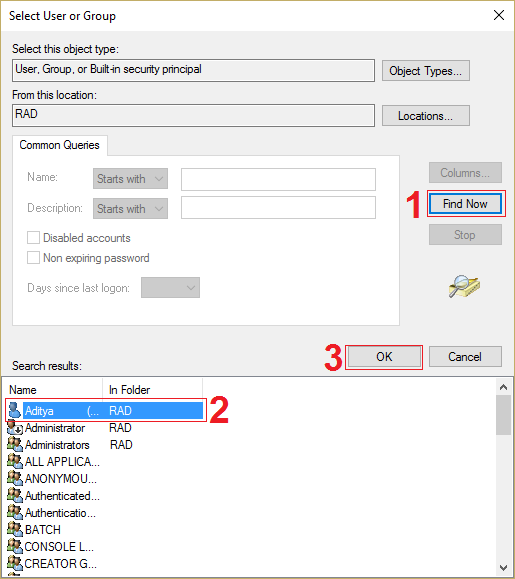
9.Click Seleccione un director Luego haga clic Avanzado y haga clic Encuentra ahora.
10.Seleccione su Cuenta Local luego Cuenta de administrador one by one and click OK to add each one of them.
11.Change the configuration according to above-specified values.
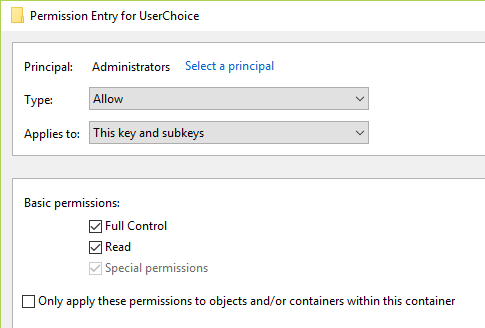
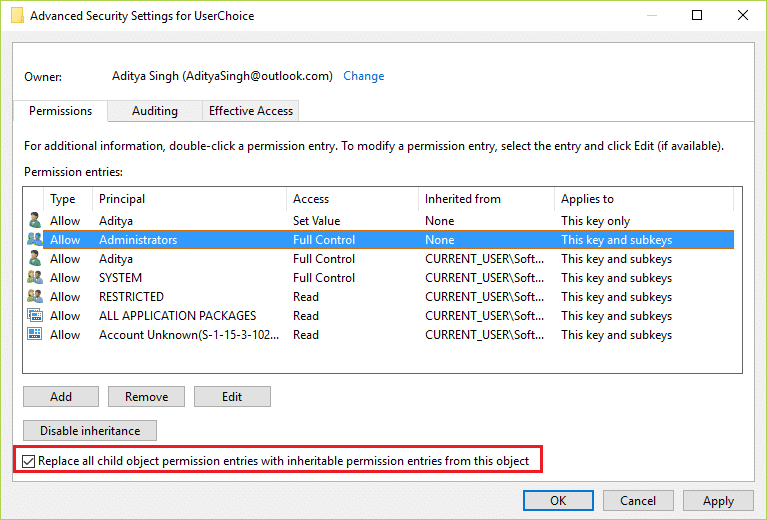
12.Checkmark the box at the bottom that reads “Replace all child object permission entries with inheritable permission entries from this object."
13.Haga clic en Aplicar y luego en Aceptar.
14.Find the photo apps that was missing its icon then double click on it.
15.You should see a pop-up “An app default was reset” and the icon should get back to normal.
16.Reboot your PC.
Recomendado para ti:
Eso es todo lo que has logrado Fix Missing Photos or Picture Icons after Creators Update but if you still have any queries regarding this guide then feel free to ask them in the comment’s section.