- in ventanas by Administración
Reparar MultiVersus que no se inicia en Windows 10

MultiVersus is a famous online multiplayer fighting game that is rocking today’s gaming world. Yet, few users complain about the MultiVersus not launching issue when the game is launched on their Windows 10 PC. If you are in the same boat, the troubleshooting hacks discussed in this article will help you sail the problem.
How to Fix MultiVersus Not Launching in Windows 10
If you are vexed by MultiVersus won’t launch issue in your Windows 10 computer, here are a few possible reasons why you must analyze them carefully to sort out the problem.
- La PC no cumple con los requisitos básicos del juego.
- Algún otro programa en segundo plano está interfiriendo con el juego.
- Está utilizando una versión no verificada de controladores.
- La configuración de gráficos del juego está mal configurada.
- Presencia de malware y virus.
- El marco .NET y el sistema operativo no están actualizados a su última versión.
- La versión de DirectX no está actualizada.
- Overclocking
- Cualquier archivo de instalación del juego mal configurado o corrupto también causa el problema.
- Los archivos redistribuibles de Microsoft C++ no son compatibles con el juego ni con la PC.
Here are a few possible troubleshooting methods that will help you fix the discussed issue.
Método 1: métodos básicos de solución de problemas
Siga estos métodos básicos de solución de problemas para solucionar dicho problema.
1A. Verifique los requisitos del sistema
MultiVersus Requisitos mínimos del sistema
- CPU: Intel Core i5-2300 o AMD FX-8350
- RAM: 4 GB
- TARJETA DE VIDEO: Nvidia GeForce GTX 550 Ti or AMD Radeon HD 5850 | Intel UHD 750
- Sombreador de píxeles: 5.0
- SOMBREADOR DE VERTEX: 5.0
- ESPACIO LIBRE EN DISCO: 6 GB
- RAM DE VÍDEO DEDICADA: 1024 MB
MultiVersus Requerimientos Recomendados
- CPU: Intel Core i5-3470 o AMD Ryzen 3 1200
- RAM: 8 GB
- TARJETA DE VIDEO: Nvidia GeForce GTX 660 or AMD Radeon R9 270
- Sombreador de píxeles: 5.0
- SOMBREADOR DE VERTEX: 5.0
- ESPACIO LIBRE EN DISCO: 6 GB
- RAM DE VÍDEO DEDICADA: 2048 MB
1B. Check your internet connection
Unstable internet connection leads to MultiVersus is not working issue, also if there are any obstacles between your router and your computer, they may interfere with the wireless signal and will cause intermittent connection problems.
Puedes ejecutar un prueba de velocidad para conocer el nivel óptimo de velocidad de red requerido para una conexión adecuada.
Asegúrese de que su dispositivo cumpla con los siguientes criterios.
- Encuentre la intensidad de la señal de su red y, si es muy baja, elimine todas las obstrucciones en el camino.
- Evite demasiados dispositivos conectados a la misma red.
- Compre siempre un módem/enrutador verificado por su proveedor de servicios de Internet (ISP) y que esté libre de conflictos.
- No utilice cables viejos, rotos o dañados. Reemplace los cables si es necesario.
- Asegúrese de que los cables del módem al enrutador y del módem a la pared estén estables y sin perturbaciones.
Si hay algún problema de conectividad a Internet, consulte nuestra guía Cómo solucionar problemas de conectividad de red en Windows 10 para solucionar el mismo.
1C. Detener el overclocking
- Every high-end computer is built with the option of Overclocking which helps in outputting more juice than your specifications that you already have. Running the graphics card or processor faster than the default speed refers to overclocking.
- Cuando esto sucede, su computadora alcanzará la temperatura máxima después de un tiempo determinado. La computadora detecta esto y ajusta la velocidad del reloj a la velocidad normal hasta que se enfríe. La velocidad del reloj aumenta nuevamente después de que se enfrían.
- Esto aumenta el rendimiento de tu computadora y es de gran ayuda si no tienes una computadora potente.
- It must be noted that all the games do not support overclocking. The same applies to MultiVersus. So, you must try disabling all overclocking on your computer and try launching the game. If it launches well, the issue is fixed.
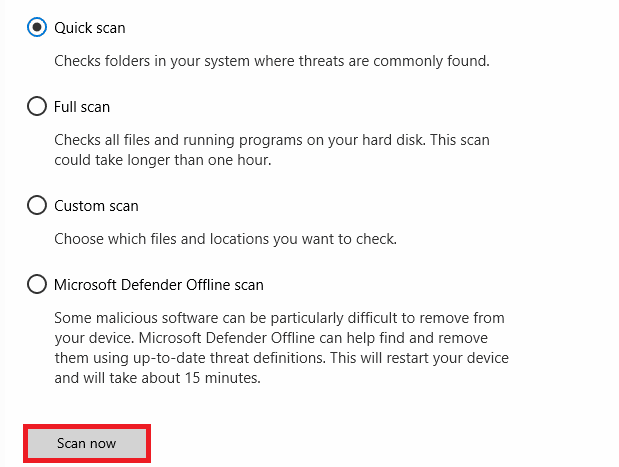
1D. Ejecutar análisis de malware
The presence of a virus or malware attack will result in gaming problems on your computer. If in case, the virus attack is very severe, you cannot connect to any online game continuously at all. To resolve the problem, you have to remove the virus or malware completely from your Windows 10 computer.
Se recomienda escanear su computadora como se indica en nuestra guía ¿Cómo ejecuto un análisis antivirus en mi computadora?
Además, si desea eliminar malware de su computadora, consulte nuestra guía Cómo eliminar malware de su PC en Windows 10.
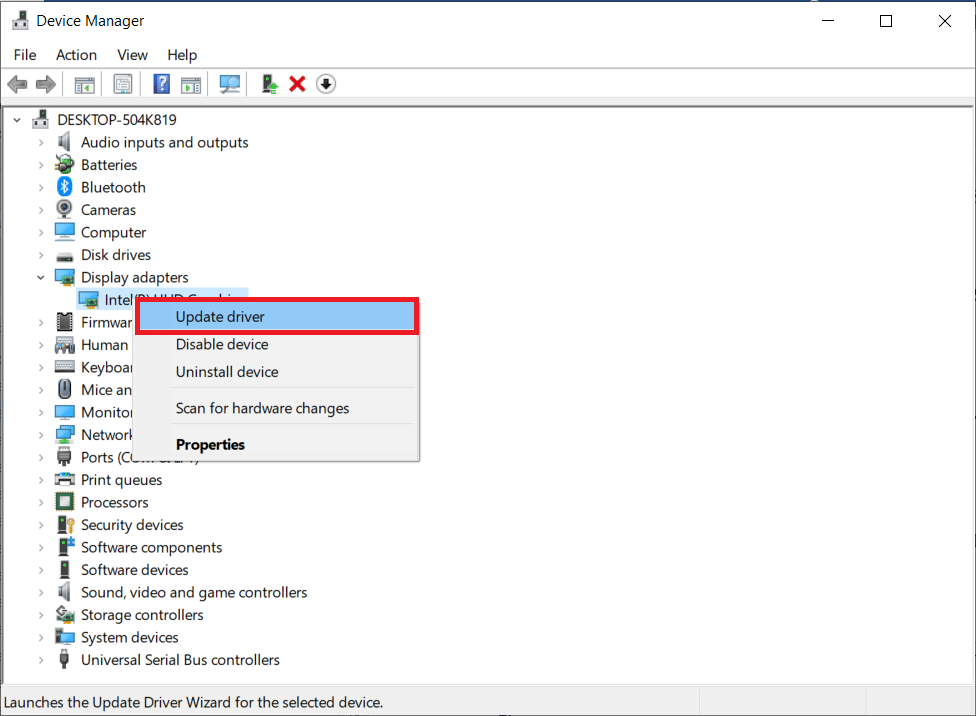
1E. Actualizar controladores de GPU
Graphical drivers are responsible for heavy graphical images and video processing games. If you face any launching conflicts in the MultiVersus game, make sure you use an updated version of device drivers, as they serve as a link between the hardware and Operating System of your PC. Many users have suggested that updating drivers have fixed MultiVersus not working issue. Read and implement the steps instructed in our guide 4 Ways to Update Graphics Drivers in Windows 10 to do so.
Lea también Repare los controladores encontrados por Windows para su dispositivo pero encontró un error
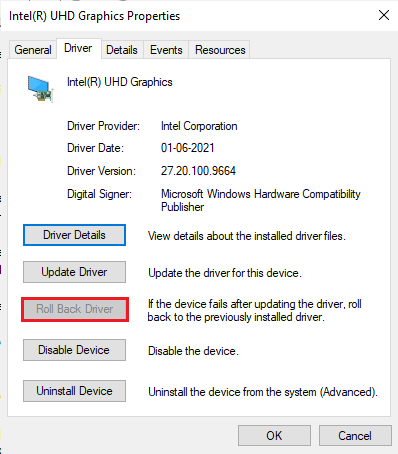
1F. Roll Back GPU Drivers
Sometimes, the current version of GPU drivers may cause the discussed launching issue in MultiVersus, and in this case, you have to restore previous versions of installed drivers. This process is called reversión de controladores y puede revertir fácilmente los controladores de su computadora a su estado anterior siguiendo nuestra guía Cómo revertir los controladores en Windows 10.
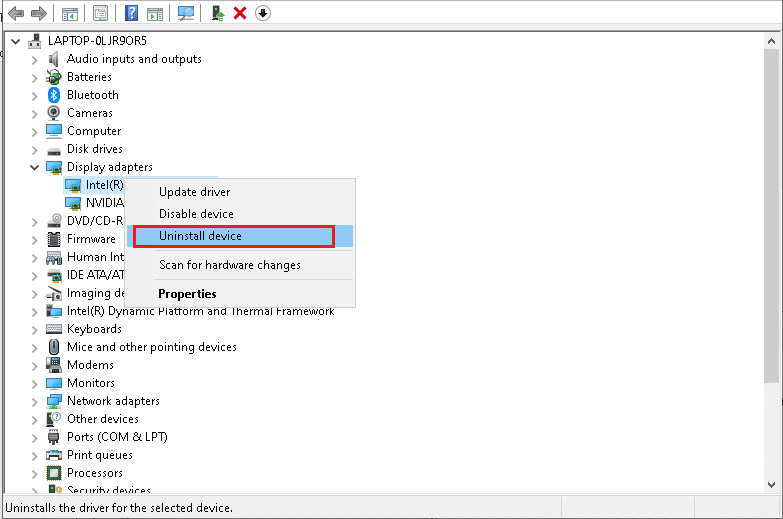
1G. Reinstall GPU Driver
If you still face MultiVersus not starting issue after updating your GPU drivers, then reinstall device drivers to fix any incompatibility issues. There are several ways to reinstall drivers on your computer. Yet, you can easily reinstall Graphical drivers as instructed in our guide How to Uninstall and Reinstall Drivers on Windows 10.
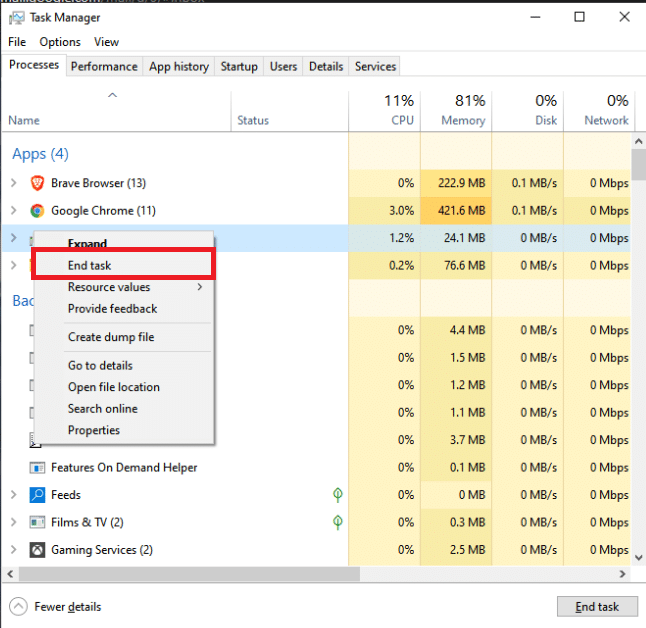
1H. End Background Processes
Several users have confirmed that MultiVersus not starting on PC can be resolved by closing all the background tasks running on your PC. To implement the task, follow our guide How to End Task in Windows 10, and proceed as instructed.
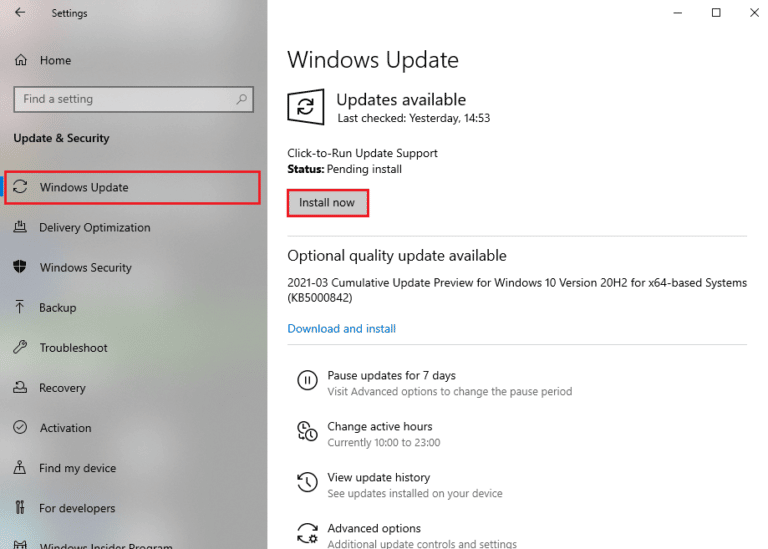
1I. Actualizar Windows
También puedes erradicar errores en tu computadora y juego actualizando tu sistema operativo. Asegúrese siempre de haber actualizado su sistema operativo Windows y si hay alguna actualización pendiente en acción, utilice nuestra guía Cómo descargar e instalar la última actualización de Windows 10.
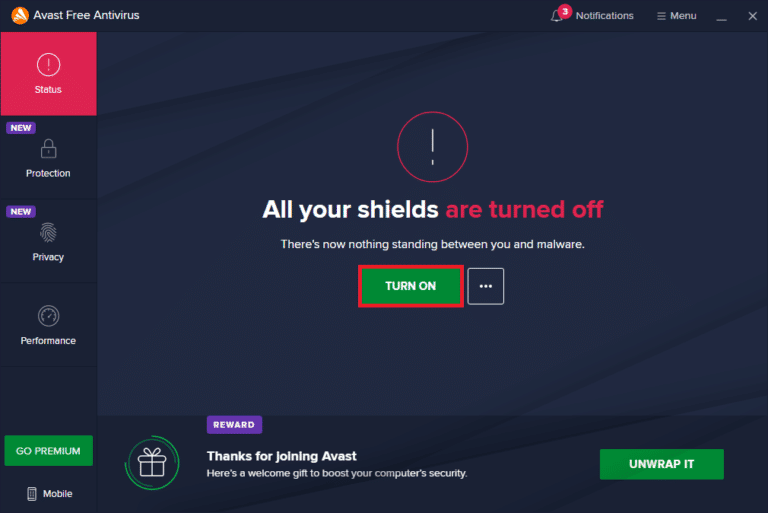
1J. Disable Antivirus Temporarily (If Applicable)
Some incompatible antivirus programs installed on your computer will cause MultiVersus launching problem. To avoid conflicts, you must ensure the security settings of your Windows 10 computer and check if they are stable or not. To find whether the antivirus suite is the reason for the discussed issue, disable it once and try connecting to a network.
Lea nuestra guía sobre Cómo deshabilitar temporalmente el antivirus en Windows 10 y siga las instrucciones para deshabilitar temporalmente su programa antivirus en su PC.
Si tiene una solución para su problema después de desactivar el programa antivirus en su computadora, se recomienda desinstalar el programa por completo de su PC.
Read our guide Force Uninstall Programs which won’t Uninstall in Windows 10 to uninstall your antivirus program on your computer.
Lea también Cómo desinstalar McAfee LiveSafe en Windows 10
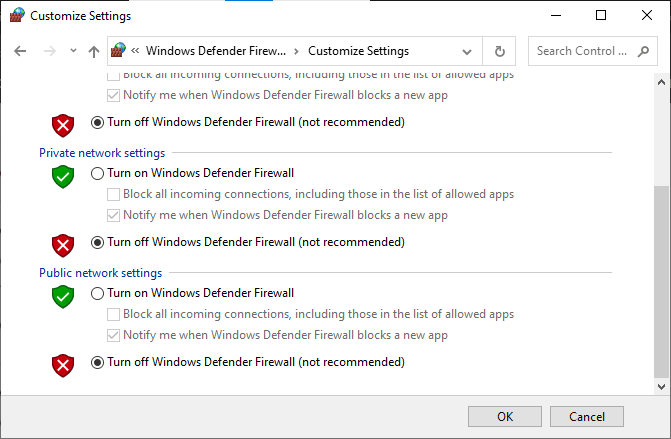
1K. Turn Off Windows Defender Firewall (Not Recommended)
Your computer will face MultiVersus is not working issue, due to an over-protective firewall suite in the Windows 10 PC. To resolve the problem, you can either add a new rule for your game, whitelist the game or as the last fix, disable the firewall temporarily.
Our guide on How to Disable Windows 10 Firewall will help you.
1 litro. Reparar archivos del sistema
If there are any missing or damaged files on your Windows 10 PC, you will face MultiVersus takes forever to launch issue. Yet, you are repairing these corrupt files by using inbuilt utilities namely, Comprobador de archivos de sistema y Servicio y gestión de imágenes de implementación.
Lea nuestra guía sobre Cómo reparar archivos del sistema en Windows 10 y siga los pasos indicados para reparar todos sus archivos corruptos.
Method 2: Run MultiVersus Game as Administrator
If MultiVersus does not have required administrative privileges, a few essential features of the game will be limited causing you MultiVersus not launching issue whenever you open the game or install any updates. Follow the below-mentioned instructions to run the game as an administrator.
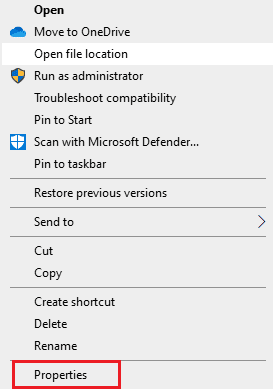
1. Haga clic derecho en el MultiVersus shortcut en el escritorio.
Nota: También puedes ir al directorio de instalación y haga clic derecho sobre él.
2. Luego, seleccione el Propiedades .
3. Ahora, pasa a la Compatibilidad pestaña y haga clic en Ejecutar este programa como administrador años.
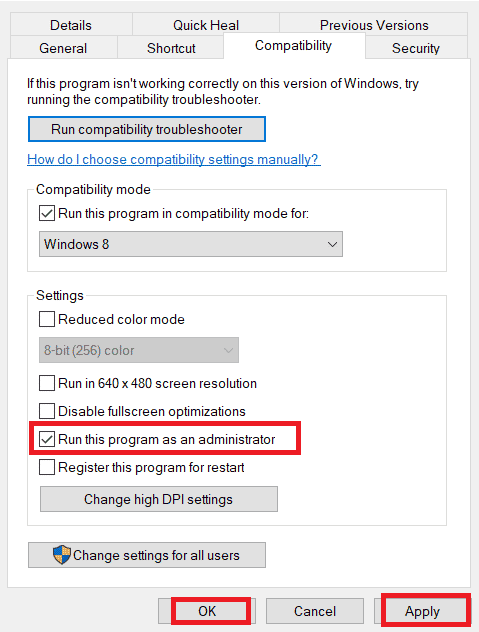
4. Finalmente, haga clic en Aplicar> Aceptar Para guardar los cambios.
Check if you have fixed MultiVersus launching issues.
Lea también Fix WoW tarda una eternidad en iniciarse en Windows 10
Método 3: cambiar la prioridad del proceso del juego
The preference of an application or process tells the computer the importance and if it should be given preference over the others while allocating the resources. The priority of every application is normal except the system processes, by default. MultiVersus might crash if it didn’t get enough resources.
1. presione el Ctrl + Shift + Esc teclas juntos para abrir barra de tareas.
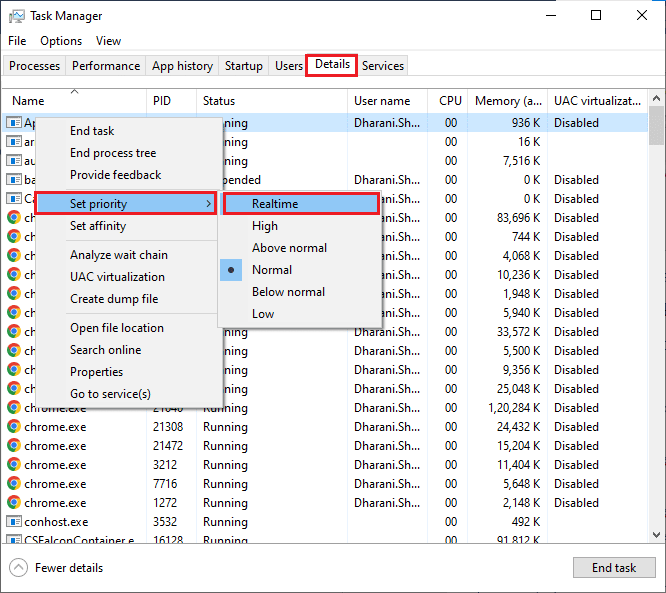
2. Ahora, busca MultiVersus process.
3. Luego cambie la prioridad a Alta Prioridad y comprueba si esto funciona.
Nota: Cambie la prioridad con mucha precaución, ya que cambiar la prioridad del proceso sin cuidado podría hacer que su sistema sea extremadamente lento o inestable.
4. Cierra el Administrador de tareas y reiniciar tu computadora.
Método 4: establecer un alto rendimiento
También puedes optimizar tu juego al configurar la configuración del plan de energía de alto rendimiento. Estos planes de energía se desarrollan para administrar la configuración de energía en configuraciones portátiles. Siga las instrucciones que se mencionan a continuación para utilizar la configuración del plan de energía de alto rendimiento en su sistema.
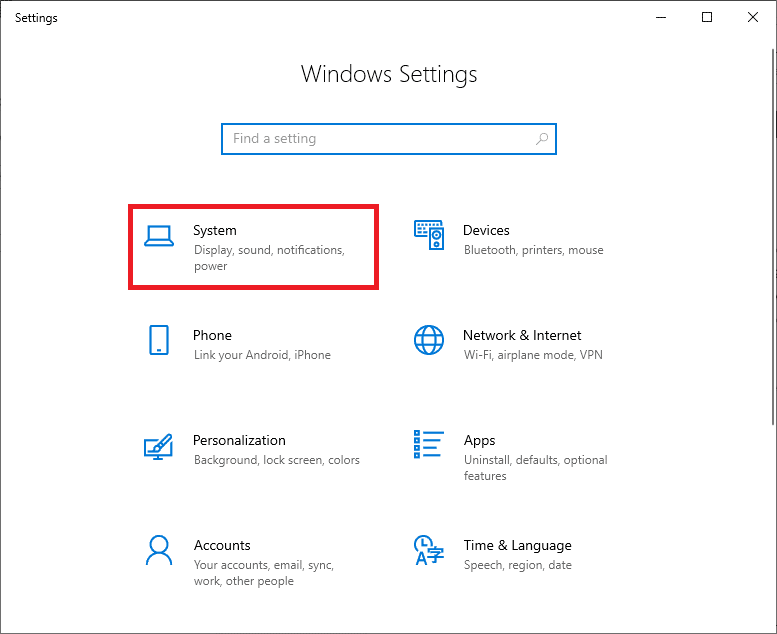
1. presione el Windows + I teclas simultáneamente para abrir Configuración de Windows.
2. Ahora, haga clic en System ajuste.
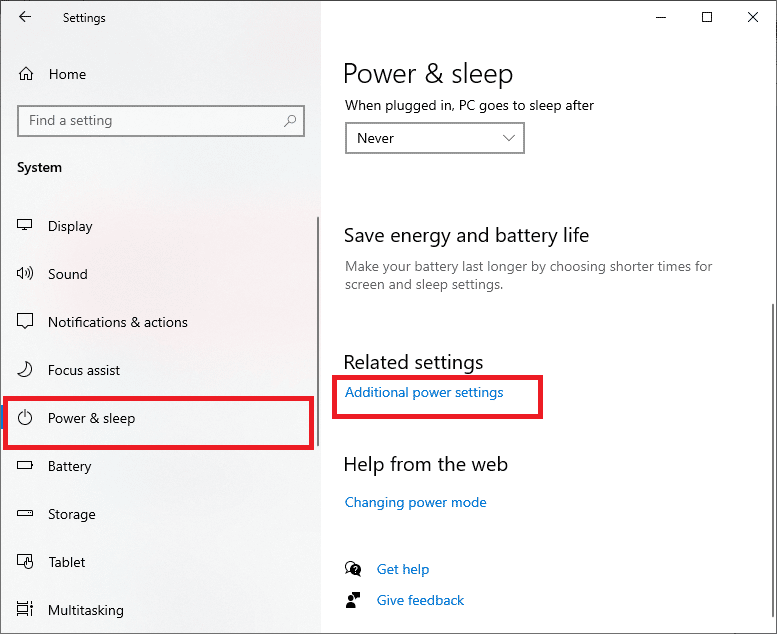
3. Ahora, seleccione el Energía y sueño opción y haga clic en la configuración de energía adicionales bajo Configuraciones relacionadas.
4. Ahora, elige el Alto rendimiento opción bajo Planes adicionales altos como se muestra en la imagen de abajo.
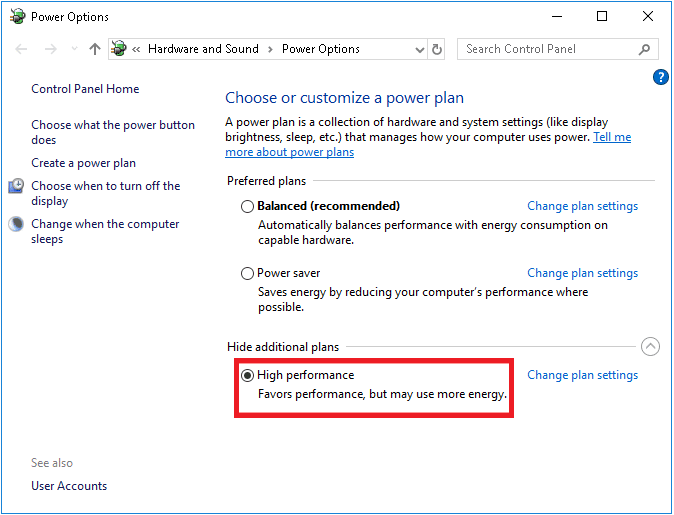
Now you have optimized your system, check if you have fixed MultiVersus won’t launch on startup issue.
Lea también Solucionar el error de archivos descargados que faltan en Steam
Method 5: Update Steam App & MultiVersus Game
If you use an outdated Steam application, you cannot access any games smoothly. Hence always make sure you use an updated version of Steam and MultiVersus game before launching it.
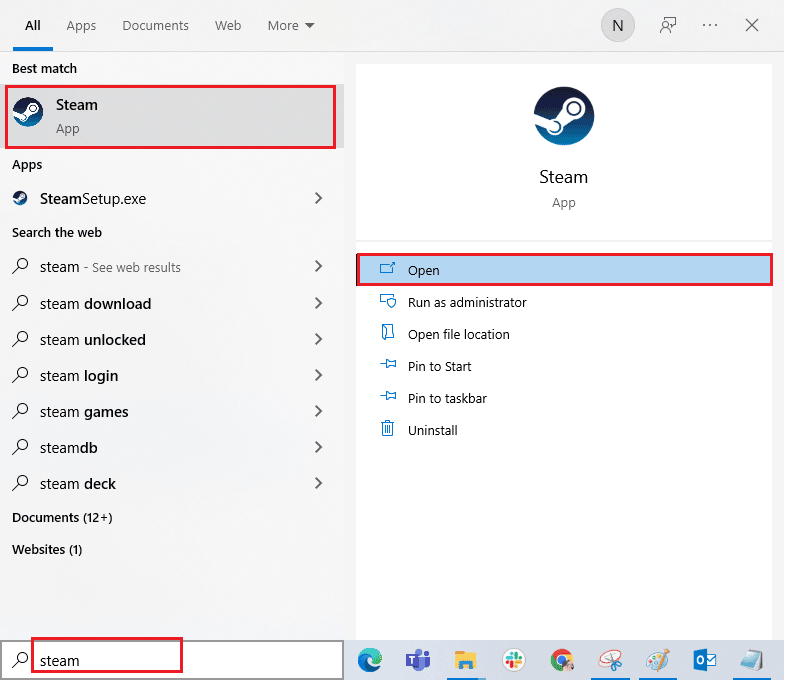
1. Golpear Tecla de Windows y el tipo Steam, luego haz clic en Abierta.
2. Ahora, haga clic en Steam en la esquina superior izquierda de la pantalla seguido de Busque actualizaciones del cliente Steam... como se destaca a continuación.
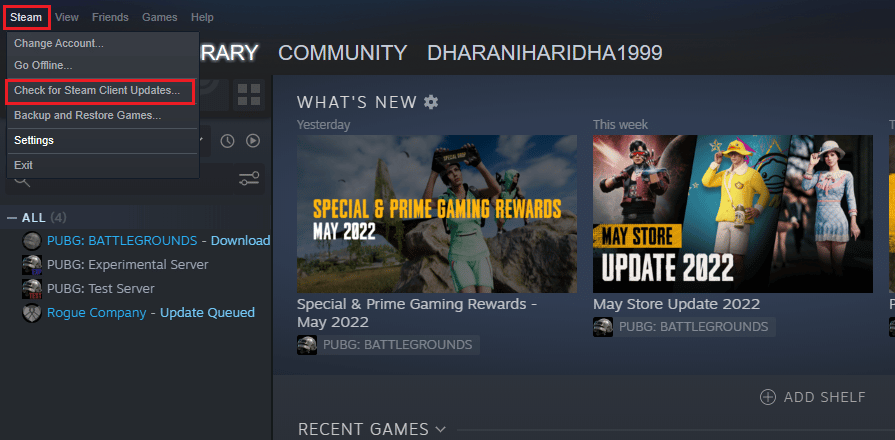
3. Si tiene que descargar nuevas actualizaciones, instálelas y asegúrese de tu cliente Steam está actualizado.
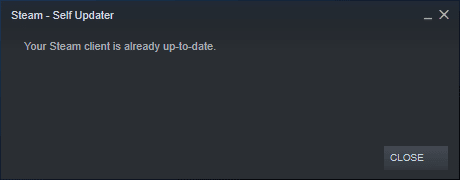
4. Ahora relanzar vapor y verifique si el problema está resuelto ahora.
Likewise, it is always essential that your game run at its latest version to avoid any conflicts. Until your game is updated, you cannot log in to MultiVersus servers successfully.
A actualiza tu juego, siga los pasos mencionados a continuación.
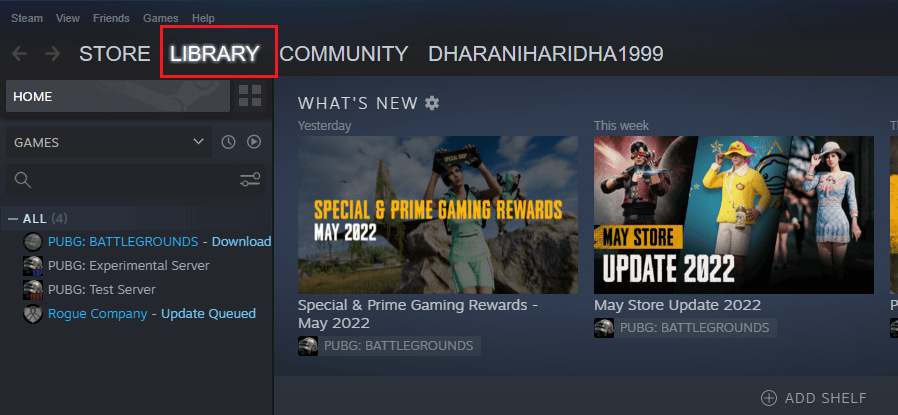
1. Lanzamiento Steam y navega a LIBRERÍA.
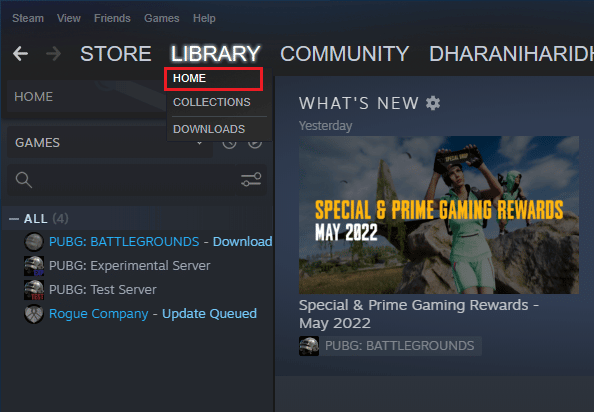
2. Ahora, haga clic en INICIO and search for MultiVersus.
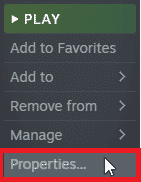
3. Luego, haz clic derecho en el juego y selecciona el Propiedades ... .

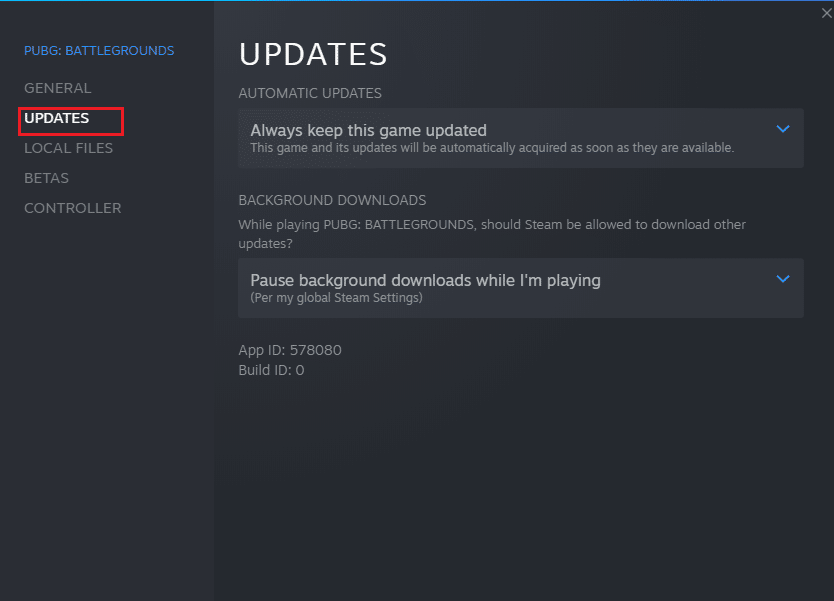
4. Ahora, cambie al ACTUALIZACIONES y verifique si hay actualizaciones pendientes en acción. Si es así, siga las instrucciones que aparecen en pantalla para descargar las últimas actualizaciones.
After an update, check if MultiVersus not launching issue is fixed.
Método 6: deshabilitar las optimizaciones de pantalla completa
Few users have suggested that disabling full-screen optimizations on PC has helped them fix MultiVersus is not launching issue. Follow as instructed.
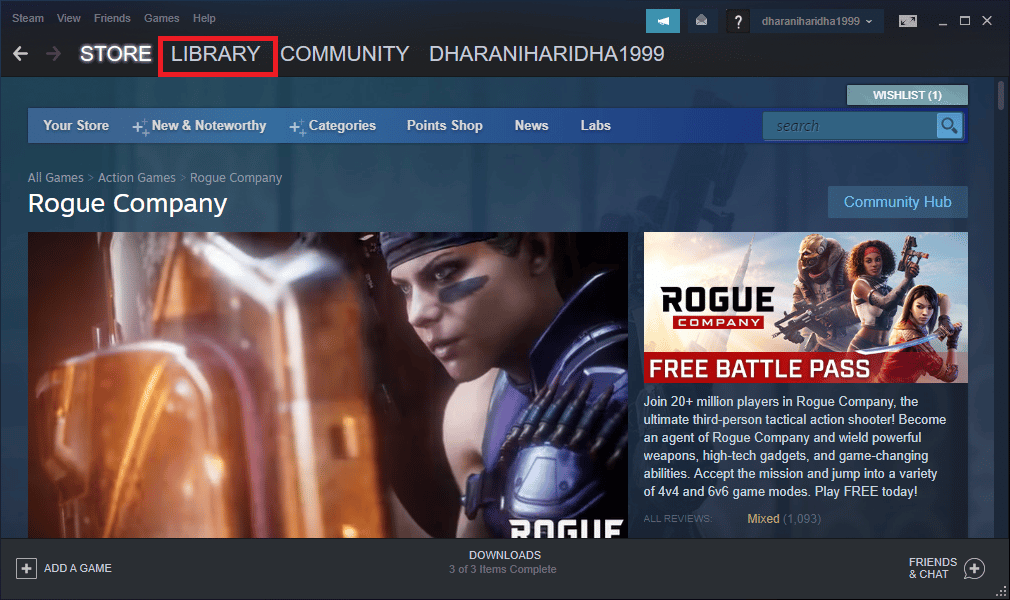
1. Navigate to the Steam LIBRERÍA .
2. Now, right-click on the MultiVersus game and click on Propiedades ...
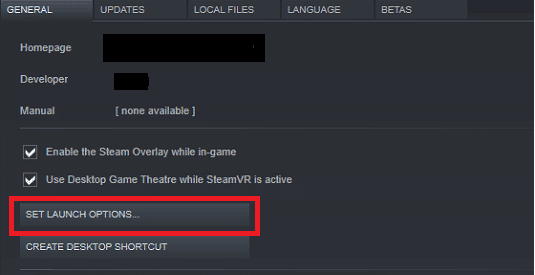
3. Ahora, cambie al GENERAL pestaña y haga clic en CONFIGURAR LAS OPCIONES DE LANZAMIENTO… como se representa.
4. Ahora se abrirá una nueva ventana con una advertencia avanzada para el usuario. Para abrir el juego en modo ventana, escribe el –ventana parámetro.
5. Ahora, guarde los cambios haciendo clic OK y salir de la ventana Propiedades.
6. Ahora relanzar el juego and ensure that it runs in windowed mode.
Nota: También puede navegar a CONFIGURAR LAS OPCIONES DE LANZAMIENTO… nuevamente y escriba los siguientes parámetros en lugar del último parámetro.
–en ventana -w 1024
7. Now, save the changes by clicking on OK.
Este parámetro configurará el juego para que se inicie en modo ventana.
Lea también Reparar la configuración de la aplicación Steam no disponible en Windows 10
Método 7: deshabilitar la superposición en el juego
The Steam Overlay is a piece of Steam that allows the users to access friends list, and web browser and allows in-game purchasing. It is a significant tool, yet it sometimes triggers MultiVersus not launching on startup issue. If you want to solve this problem, then turn off the Steam game overlay.
1. Abre el Steam aplicación y haga clic en LIBRERÍA.
2. Ahora, haga clic derecho en MultiVersus y haga clic en Propiedades ...

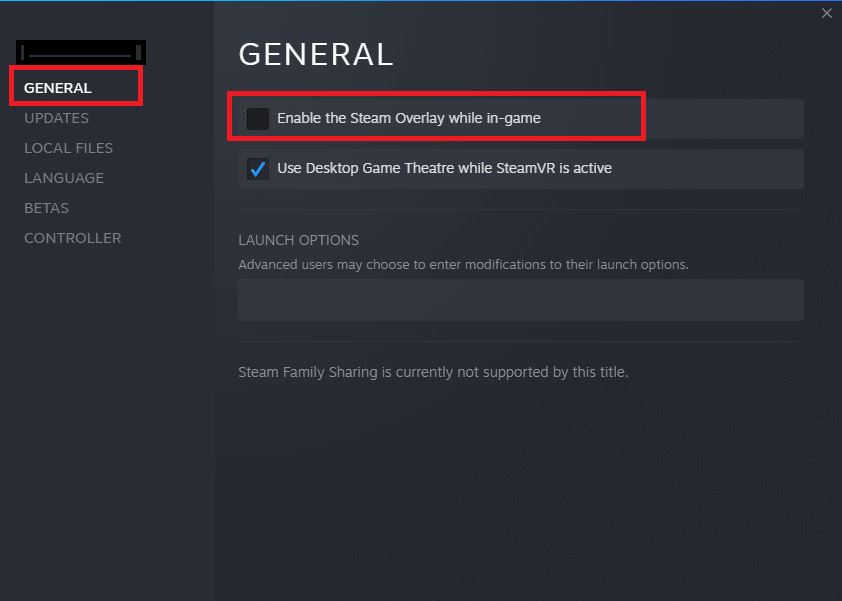
3. Ahora, cambie al GENERAL tab and uncheck the box containing Enable the Steam Overlay while in-game.
4. Finalmente, reiniciar el juego and check if the MultiVersus launching issue is solved.
Método 8: verificar la integridad de los archivos del juego
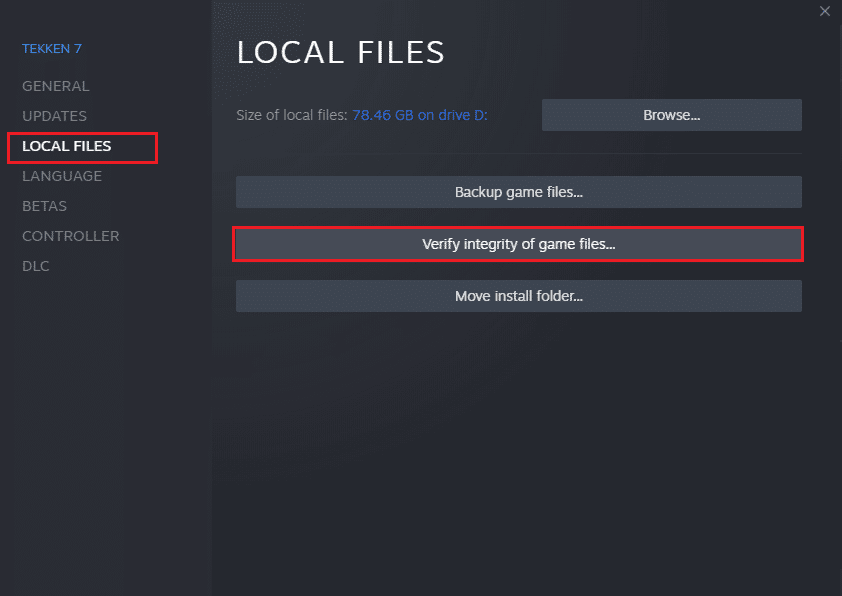
We have seen many cases in which the game files are either missing or corrupt or it had incomplete installations. Users could also experience MultiVersus not starting on PC issue if they are interrupted by the update process or if the game files are being moved. In this method, you will be opening Steam and using the built-in function for verifying the integrity of the game. It will be replaced if the application finds something. Read our guide on how to verify integrity of game files on Steam.
Lea también Reparar el programa previo del cliente Steam que no responde en Windows 10
Método 9: actualizar .NET Framework
.NET framework in Windows 10 computer is essential for uninterrupted service of modern apps and games. Many games have an auto-update feature for the .NET framework, and thus it will be updated automatically whenever an update is available. In another case, if an update prompts in your PC, you can manually install the latest version of the .NET framework, as discussed below, to fix MultiVersus not launching issue.
1. Compruebe Nuevas actualizaciones Para el NET Framework del desplegable página web oficial de Microsoft.
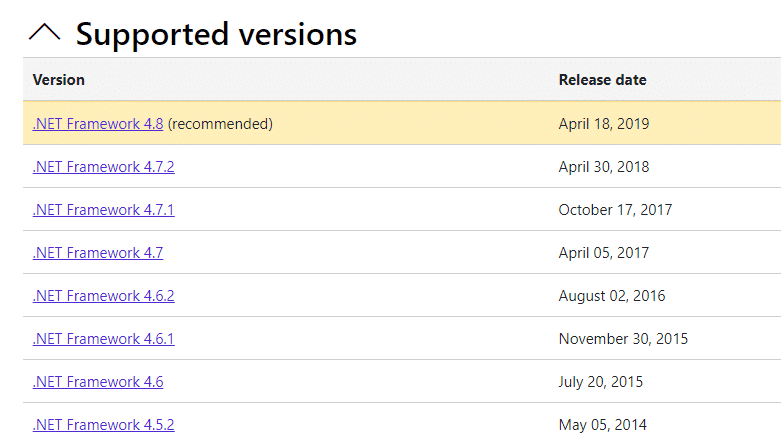
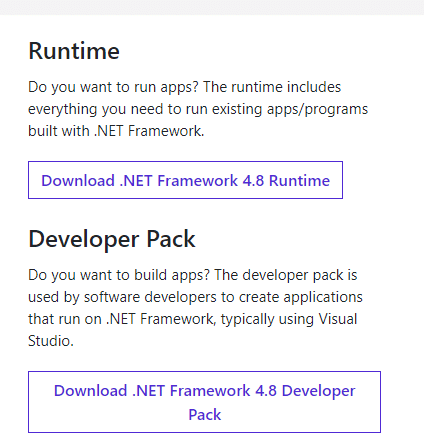
2. Si hay alguna actualización, haga clic en el correspondiente/recomendado enlace y haga clic en Descargar el tiempo de ejecución de .NET Framework 4.8 .
Nota: No hagas clic en Descargar el paquete para desarrolladores .NET Framework 4.8 tal como lo utilizan los desarrolladores de software.
3. Ir Mis descargas, double-click on the setup file to run the downloaded file and follow the instrucciones en pantalla para instalar .NET framework exitosamente en su PC con Windows. Una vez hecho esto, verifique si ha solucionado el problema discutido o no.
Método 10: actualizar DirectX
To enjoy a seamless multimedia experience on MultiVersus, you have to make sure whether DirectX is installed, and it is updated to its latest version. DirectX helps you improve the visual media experience for graphical games and applications especially. It is worth updating DirectX needed for this game.
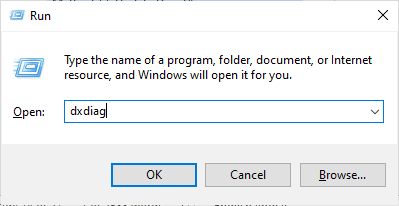
1. Presione el Teclas Windows + R simultáneamente para lanzar el Ejecutar caja de diálogo.
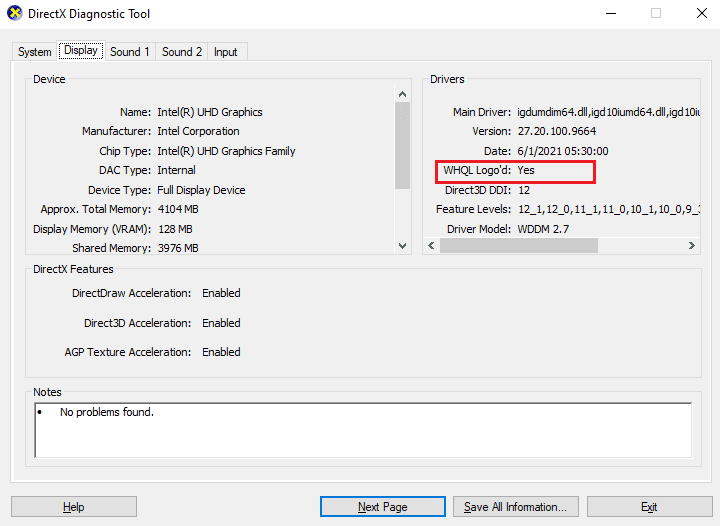
2. Escribe dXDIAG Y pulse el botón Introducir clave para abrir Herramienta de diagnóstico de DirectX.
3. Revisa el Versión de DirectX, if it contains DirectX 12 o no.
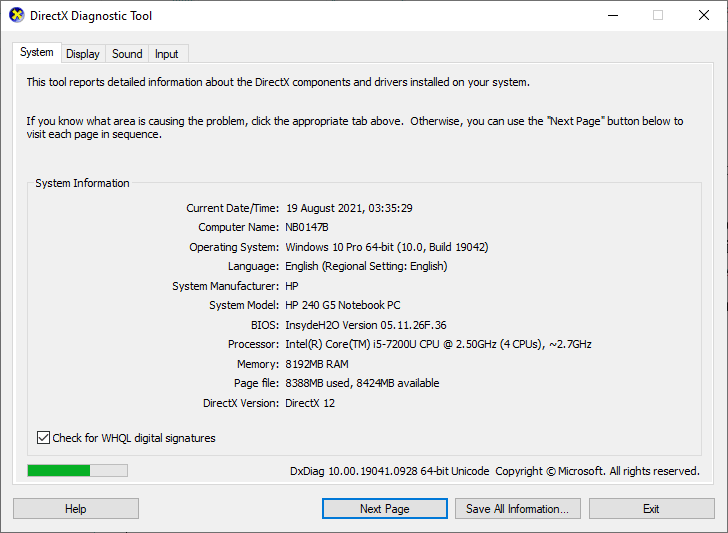
4. Si no tiene DirectX 12 en su sistema, descárguelo e instálelo desde Página de descarga de DirectX siguiendo las instrucciones en pantalla.
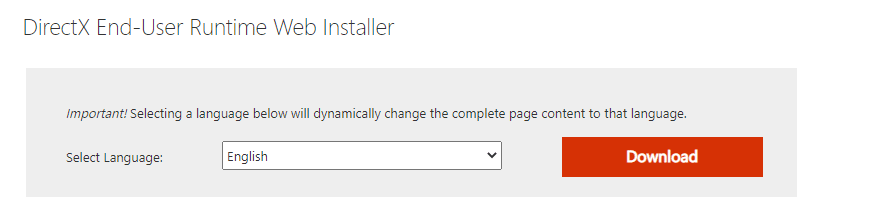
Después de instalar DirectX, verifique si el problema vuelve a ocurrir.
Nota: Asegurar Verifique las firmas digitales WHQL la casilla está marcada System pestaña y en todas las pestañas, compruebe si Logotipo de WHQL estar configurado para Sí.
Método 11: Reparar Microsoft Visual C++ Redistribuible
Alternately, you can try to repair the Microsoft Visual C++ Redistributable packages to fix MultiVersus not launching issue as follows:
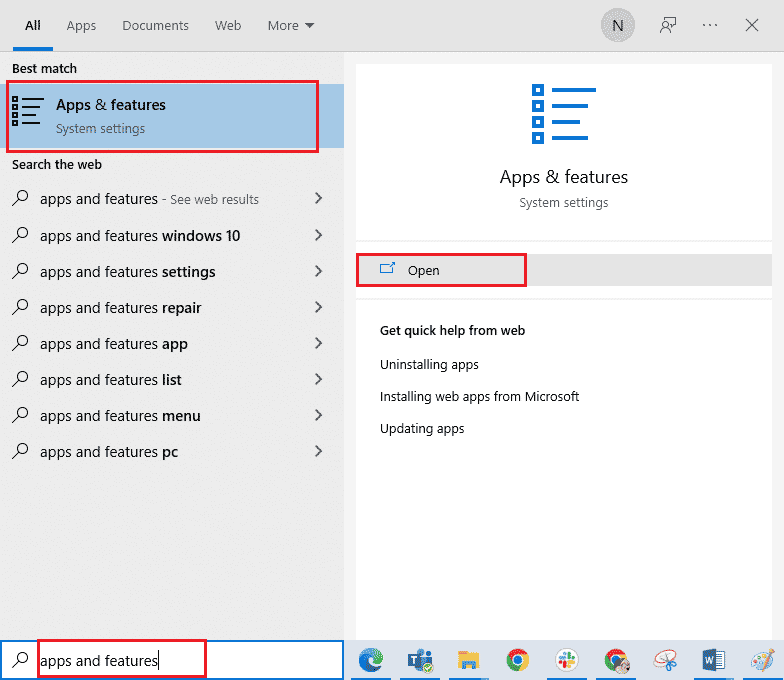
1. Presione el Tecla de Windows, tipo Aplicaciones y características, luego haz clic en Abierto.
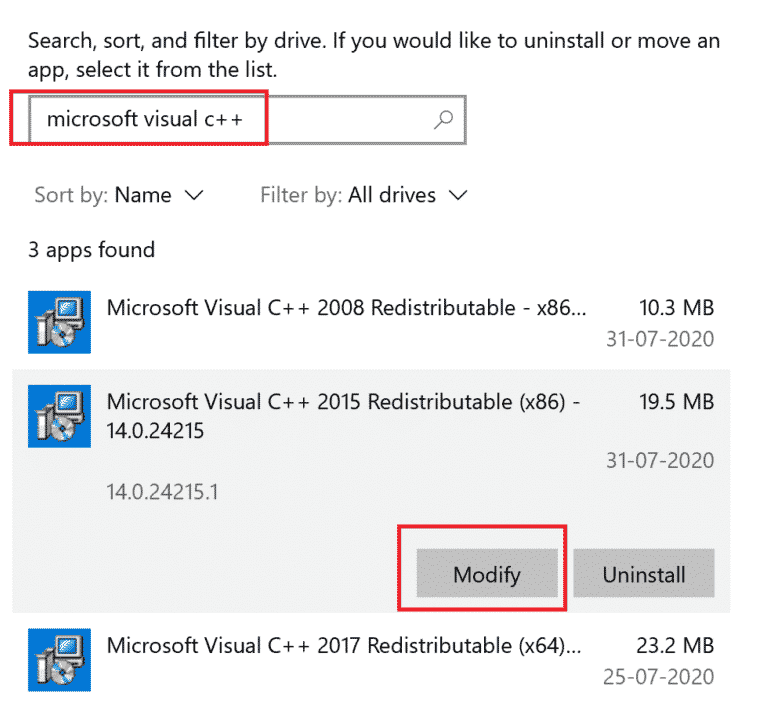
2. Buscar Microsoft Visual C ++ redistribuible paquete.
3. Then, select the package, and click on modificar .
4. Luego, haga clic en Sí en Control de cuentas de usuario caja de diálogo.
5. En la ventana emergente que aparece, haga clic en Reparacion. Espere a que finalice el proceso.
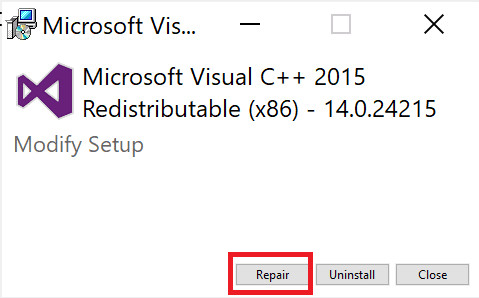
6. Repita los pasos anteriores para modificar todos los paquetes redistribuibles de Microsoft Visual C++.
7. Finalmente, reiniciar la PC.
Abra la aplicación que no pudo abrir anteriormente. Si esto no funcionó, intente reinstalar el redistribuible de C++.
Lea también Reparar el error de configuración redistribuible de Microsoft Visual C++ 2015 falla 0x80240017
Método 12: reinstalar Microsoft Visual C++ Redistribuible
If the previous method of repairing the Microsoft C++ Visual Redistributable did not fix MultiVersus won’t launch issue, then you will have to reinstall the redistributable. Follow the given steps to uninstall & then install these again.
1. Abre el Aplicaciones y características ajustes del sistema.
2. Seleccione Microsoft Visual C ++ redistribuible paquete, luego haga clic en Desinstalar .
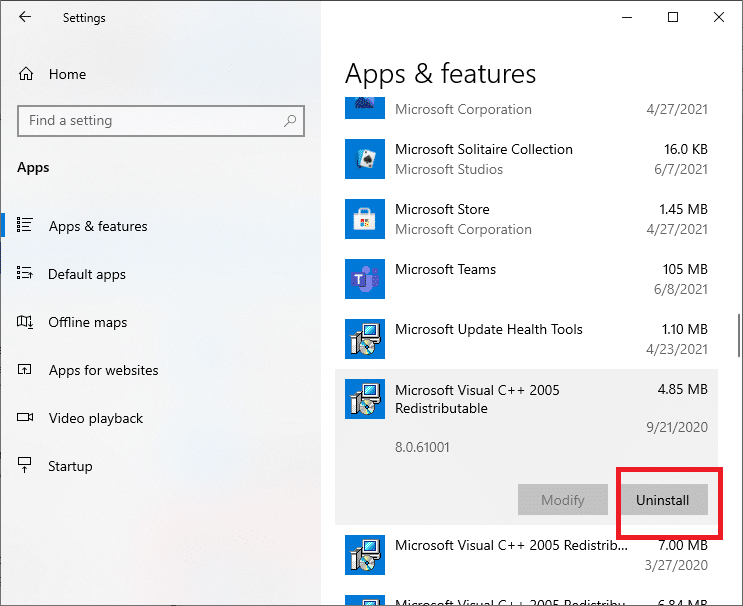
3. Hacer clic en Desinstalar opción nuevamente para confirmar y eliminar el paquete.
Nota: Asegúrese de desinstalar todos los paquetes redistribuibles de Microsoft Visual C++.
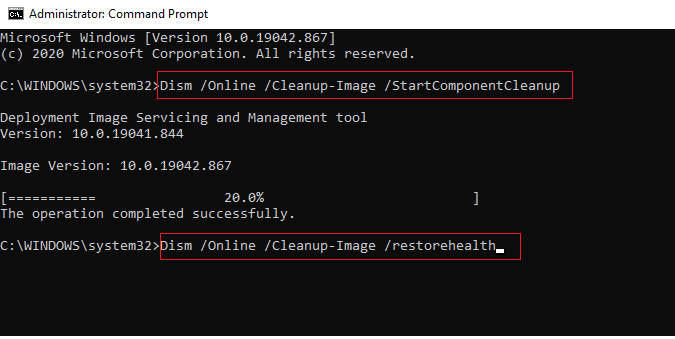
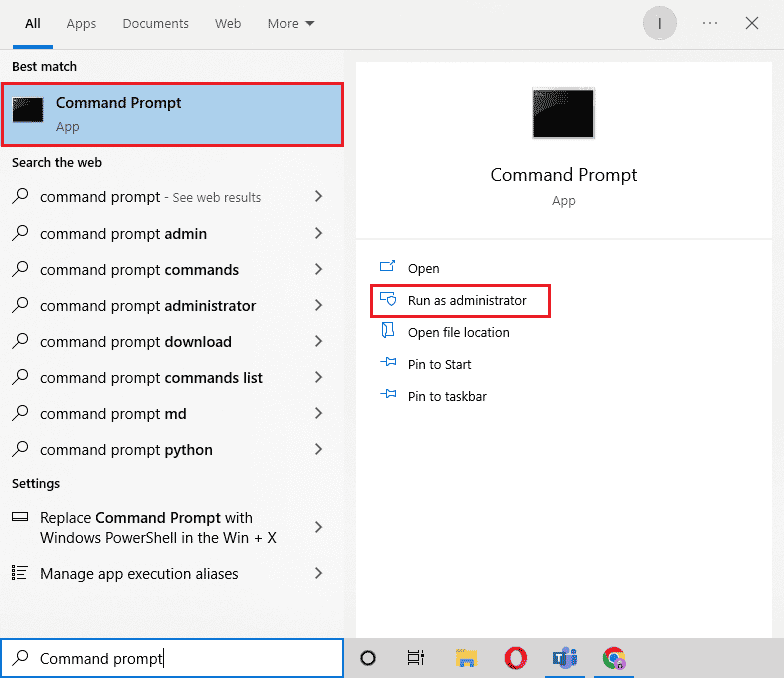
4. Presione el Tecla de Windows, tipo Símbolo del sistema, luego haz clic en Ejecutar como administrador.
5. Escriba lo siguiente comandos y pulse Participar clave después de cada:
DISM /online /Cleanup-Image /StartComponentCleanup
DISM /online /Cleanup-Image /RestoreHealth
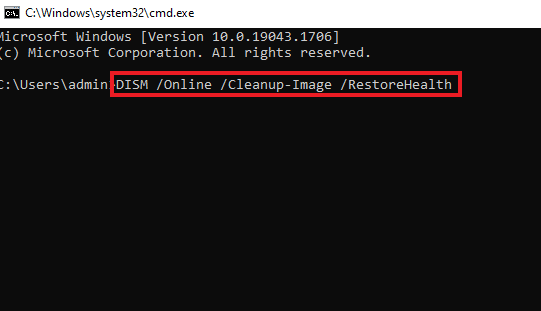
6. Una vez completado el proceso, reiniciar la PC.
7. A continuación, visita la Página web redistribuible de Microsoft Visual C++ para descargar el último paquete de C++ como se muestra aquí.
8. Una vez descargado, abra el archivo descargado haciendo doble clic en él en Mis descargas. Instalar el paquete siguiendo las instrucciones que aparecen en pantalla.
9. Una vez completada la instalación, finalmente reiniciar la PC.
Recomendado:
Esperamos que esta guía haya sido útil y puedas solucionarlo. MultiVersus not launching problema en su PC con Windows 10. Háganos saber qué método funcionó mejor para usted. No dude en comunicarse con nosotros con sus consultas y sugerencias a través de la sección de comentarios a continuación.