- in ventanas by Administración
Eliminar herramientas administrativas en Windows 10

Remove Administrative Tools in Windows 10: Administrative Tool is a folder in Control Panel which contains tools for system administrators and advanced users. So it’s pretty safe to assume that the guest or novice Windows users should not have access to Administrative Tools and in this post, we will exactly see how to hide, remove or disable Administrative Tools in Windows 10. These tools are critical and messing with them can damage your system and that’s why restricting access to them is a good idea.
There are few ways via which you can easily disable or remove Administrative Tools for guest users but we are going to discuss each of them in detail. So without wasting any time let’s see how to Remove Administrative Tools in Windows 10 with the help of the below-listed guide.
Eliminar herramientas administrativas en Windows 10
Asegúrate de crear un punto de restauración, en caso de que algo salga mal.
1.Presione la tecla Windows + R, luego escriba lo siguiente y presione Enter:
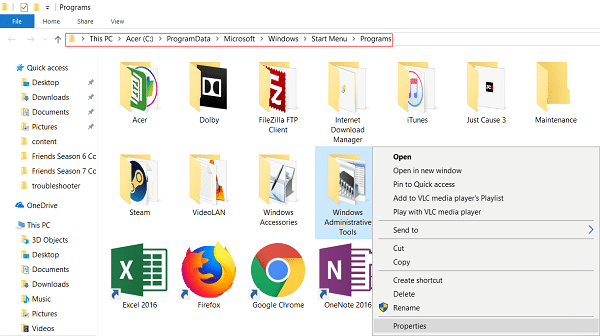
C: ProgramDataMicrosoftWindowsStart MenuPrograms
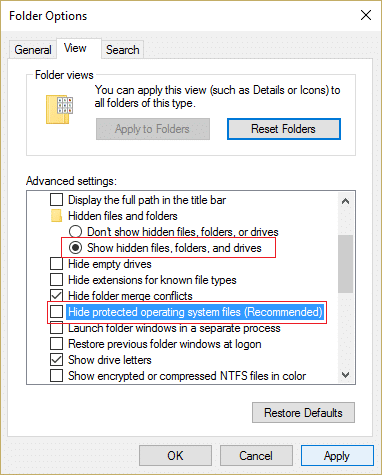
Nota: Make sure show hidden files and folders are enable in File Explorer.
2 bajo programas búsqueda de carpeta para Windows Administrative Tools, luego haga clic derecho sobre él y seleccione Propiedades.
3.Cambie a Pestaña de seguridad y haga clic Botón editar.

4.Select Todos from Group or user name and checkmark Deny next to Full Control.
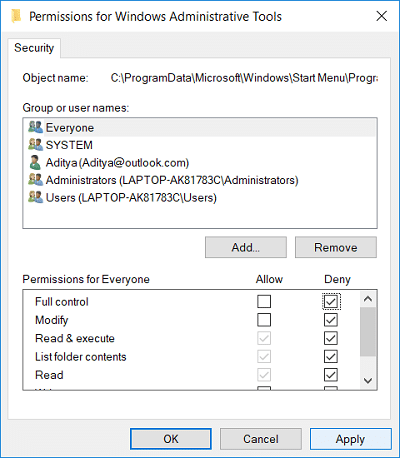
5.Do this for every account you want to restrict access to.
6.If this doesn’t work then you can simply select Everyone and select Remove.
7.Reinicie su PC para guardar los cambios.
Method 2: Remove Administrative Tools Using Group Policy Editor
Nota: Este método no funcionará para los usuarios de Windows 10 Home Edition.
1.Presione la tecla Windows + R y luego escriba gpedit.msc y presiona Enter.

2.Next, navigate to the following path:
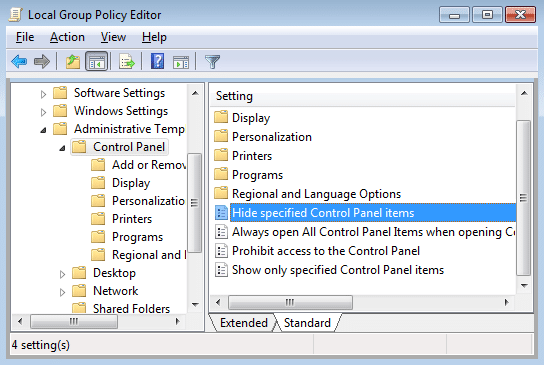
Configuración de usuario> Plantilla administrativa> Panel de control
3.Make sure to select Control Panel then in the right window double click on Hide Specified Control Panel Items.
4.Select implante y haga clic en el Mostrar botón en Opciones.
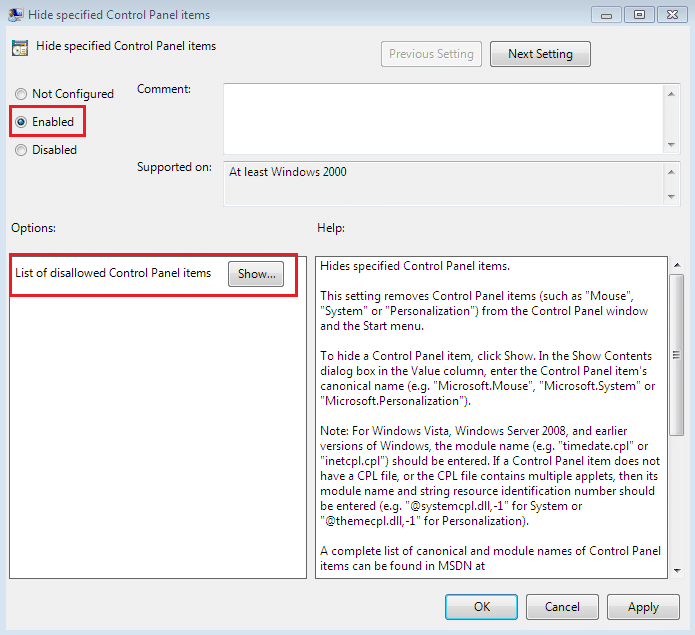
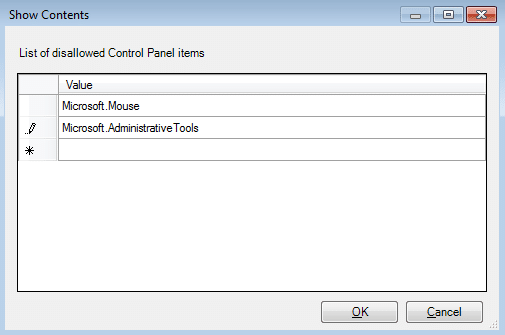
5.In the Show context box type the following value and click OK:
Microsoft.AdministrativeTools
6.Haga clic en Aplicar y luego en Aceptar.
7.Reinicie su PC para guardar los cambios.
Method 3: Remove Administrative Tools Using Registry Editor
1.Presione la tecla Windows + R y luego escriba regedit y presiona Enter.

2. Navegue hasta la siguiente clave de registro:
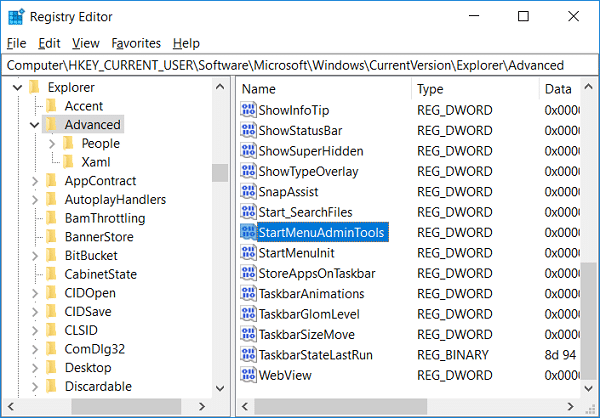
HKEY_CURRENT_USERSoftwareMicrosoftWindowsCurrentVersionExplorerAdvanced
3.Select Avanzado luego, desde el panel derecho de la ventana, haga doble clic en StartMenuAdminTools.
4.Set the value to 0 in the value data field in order to disable it.
To disable Administrative Tools: 0
To enable Administrative Tools: 1
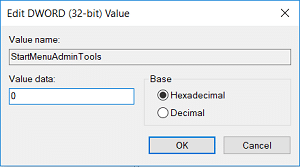
5.Click OK and close Registry Editor.
Recomendado:
Eso es todo lo que has logrado Eliminar herramientas administrativas en Windows 10 but if you still have any questions regarding this post then feel free to ask them in the comment’s section.