When you try to install apps on Windows Store, you may face Error Code 0x80073cf9, which can be very frustrating as Windows Store is a reliable source to install apps. If you try to install 3rd party apps from any other source, you risk your machine to malware or infections but what other option you have if you cannot install apps from Windows Store. Well, that’s where you’re wrong this error can be fixed, and that’s what exactly we are going to teach you in this article.
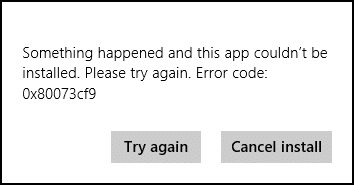
Something happened, and this app couldn’t be installed. Please try again. Error code: 0x80073cf9
There is no single cause as to why this error occurs so that various methods can fix this error. Most of the times it completely depends on the user machine configuration as to which method might work for them, so without wasting any time, let’s see how to fix this error.

Parandage Windows 10 poe tõrge 0x80073cf9
Looge kindlasti taastepunkt juhuks, kui midagi läheb valesti.
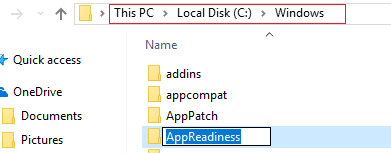
Method 1: Create A Folder AppReadiness
1. Vajutage Windowsi klahvi + R ja seejärel tippige C: Windows ja vajuta Enter.
2. Find the folder AppReadniess in the Windows folder, if you can’t follow the next step.
3. Right-click in an empty area and select Uus > Kaust.
4. Name the newly created folder as Rakenduse valmisolek ja vajuta Enter.
5. Reboot your PC to save changes. Again try to access the Store, and this time it might work perfectly.
Method 2: Reinstall Windows Store
1. Open Command Prompt as an Administraator.

2. Run below PowerShell command
Get-AppxPackage -AllUsers | Foreach {Add-AppxPackage -DisableDevelopmentMode -Registreeri “$ ($ _. InstallLocation) AppXManifest.xml”}

3. Once done, close command prompt and Restart your PC.
This step re-register Windows Store apps which should automatically Fix Windows 10 Store Error 0x80073cf9.
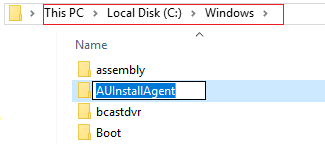
Method 3: Create a folder AUInstallAgent
1. Vajutage Windowsi klahvi + R ja seejärel tippige C: Windows ja vajuta Enter.
2. Find the folder AUInstallAgent in the Windows folder, if you can’t then follow the next step.
3. Right-click in an empty area and select Uus > Kaust.
4. Name the newly created folder as AAUInstallAgent ja vajuta Enter.
5. Reboot your PC to save changes. This step may fix Windows 10 Store Error 0x80D05001 or 0x80073cf9 but if it didn’t then continue.
Method 4: Allow Full System Access to Packages in AppRepository
1. Vajutage Windowsi klahve + R ja seejärel tippige C: ProgramDataMicrosoftWindows ja vajuta Enter.
2. Now double click on AppRepository folder to open it, but you will receive an error:
You have been denied permission to access this folder.
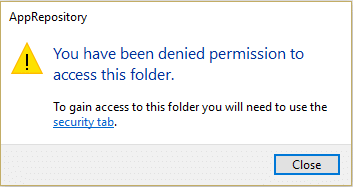
3. This means you need to take ownership of this folder before you can access it.
4. You can take ownership of the folder via the following method: How To Fix Destination Folder Access Denied Error.
5. Now you need to give the SYSTEM account, and the APPLICATION PACKAGES account full control on the folder C:ProgramDataMicrosoftWindowsAppRepositoryPackages. To this follow the next step.
6. Paremklõpsake ikooni Packages folder ja valige Omadused.
7. Valige Sakk Turvalisus ja seejärel klõpsake Advanced.
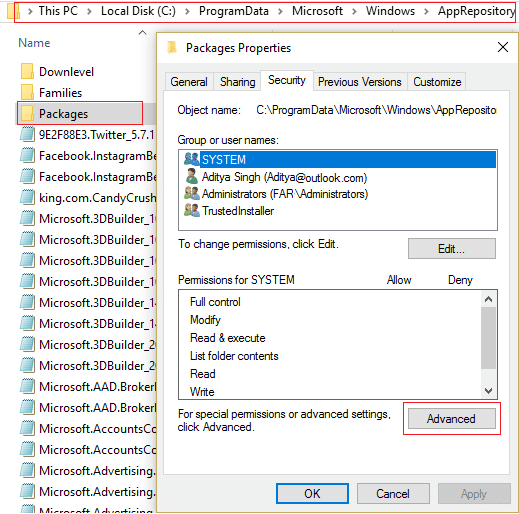
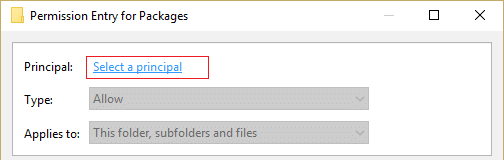
8. In Advanced Security Settings, click lisama and click on Select a peamine.
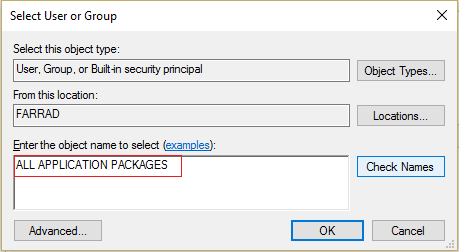
9. Järgmisena tippige "KÕIK RAKENDUSPAKETID” (without quote) in the field Enter the object name to select and click OK.
10. Now, on the next window check mark Full control and then click OK.
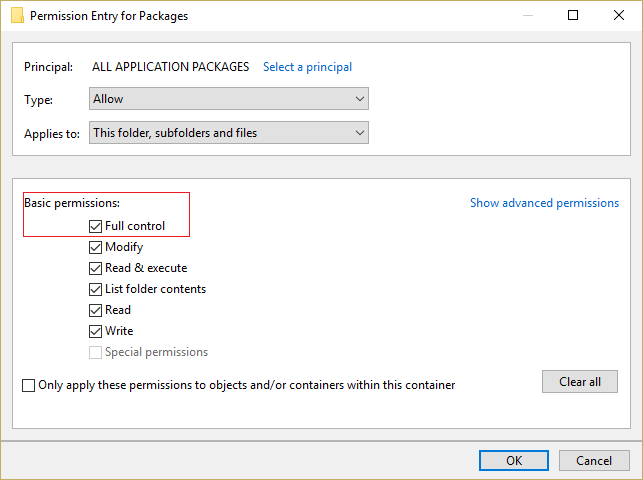
11. Do the same with the SYSTEM account. Reboot your PC to save changes.
Method 5: Rename Software Distribution Folder
1. Press Windows Key + Q to open Charms Bar and type cmd.
2. Right-click on cmd and select Käivita administraatorina.
3. Type these commands and hit enter:
net stop wuauserv
ren c:windowsSoftwareDistribution softwaredistribution.old
net start wuauserv
exit
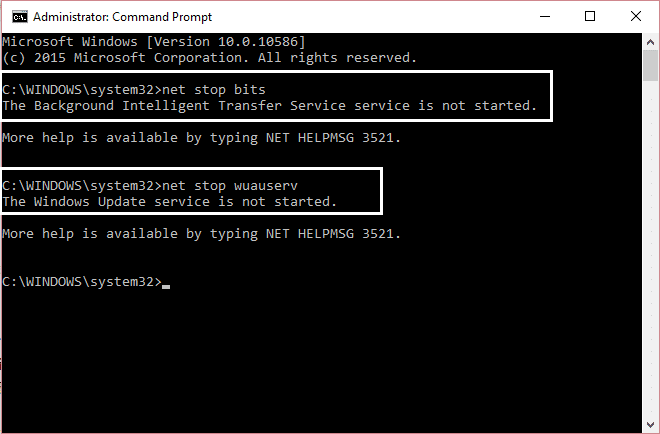
4. Reboot your PC to saves changes and again try to download updates.
6. meetod: käivitage DISM (juurutuspildi teenindamine ja haldamine)
1. Vajutage Windowsi klahv + X ja seejärel valige Käsuviip (administraator).

2. Enter the following command in cmd and hit enter:
NB! DISM-i eemaldamisel peab teil olema Windowsi installikandja valmis.
DISM.exe /Võrgus /Cleanup-Image /RestoreHealth /Allikas:C:RepairSourceWindows /LimitAccess
Märge: Asendage C:RepairSourceWindows oma parandusallika asukohaga

3. Press enter to run the above command and wait for the process to complete; usually, it takes 15-20 minutes.
MÄRKUS: Kui ülaltoodud käsk ei tööta, proovige järgmist: Dism /Image:C:offline /Cleanup-Image /RestoreHealth /Source:c:testmountwindows Dism /Online /Cleanup-Image /RestoreHealth /Source:c:testmountwindows /LimitAccess
4. After the DISM process is complete, type the following in the cmd and hit Enter: sfc / scannow
5. Let System File Checker run and once it’s complete, restart your PC.
7. meetod: käivitage CCleaner ja Malwarebytes
1. Laadige alla ja installige CCleaner & Malwarebytes.
2. Käivitage Malwarebytes ja laske sellel skannida teie süsteemi kahjulike failide suhtes. Kui leitakse pahavara, eemaldab see need automaatselt.

3. Nüüd käivitage CCleaner ja valige Kohandatud puhas.
4. Valige jaotises Kohandatud puhastus Windowsi vahekaart ja märkige vaikeväärtused ning klõpsake Analüüsima.

5. Kui analüüs on lõpetatud, veenduge, et eemaldate kindlasti kustutatavad failid.

6. Lõpuks klõpsake nuppu Käivita Cleaner nuppu ja laske CCleaneril omasoodu joosta.
7. Süsteemi täiendavaks puhastamiseks valige vahekaart Registerja kontrollige järgmist:

8. Klõpsake nupul Otsige välja probleeme nuppu ja lubage CCleaneril skannida, seejärel klõpsake nuppu Parandage valitud probleemid nuppu.

9. Kui CCleaner küsibKas soovite registri muudatused varundada?" valige Jah.
10. Kui varundamine on lõpetatud, klõpsake nuppu Parandage kõik valitud probleemid nuppu.
11. Muudatuste salvestamiseks taaskäivitage arvuti.
Method 8: Clear Windows Store cache
1. Vajutage Windowsi klahvi + R ja seejärel tippige Wsreset.exe ja vajuta enter.
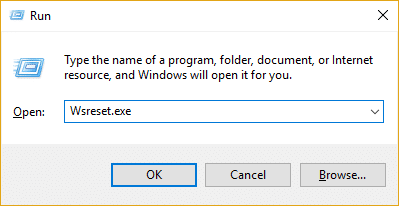
2. Kui protsess on lõppenud, taaskäivitage arvuti.
Method 9: Run Windows Update and Windows Store Apps troubleshooter
1. Tüüp tõrkeotsing in the Windows Search bar and click on Tõrkeotsing.
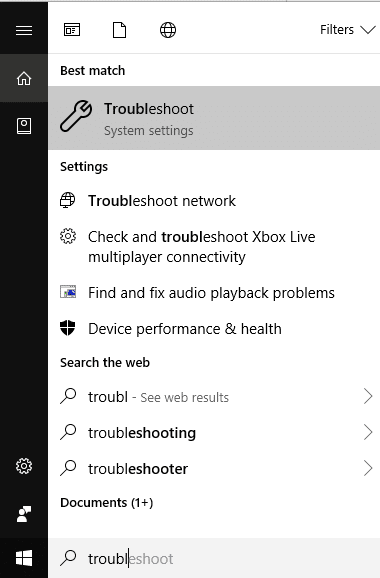
2. Järgmiseks valige vasakpoolsest aknast paan Vaata kõiki.
3. Seejärel valige loendist Arvutiprobleemide tõrkeotsing Windows Update.

4. Follow on-screen instruction and let the Windows Update Troubleshoot run.

5. Now again go back to the View all window but this time select Windowsi poe rakendused. Run the troubleshooter and follow on-screen instructions.
6. Restart your PC and again try to install apps from Windows Store.
Soovitan:
See on teil edukalt Parandage Windows 10 poe tõrge 0x80073cf9 kuid kui teil on selle postituse kohta endiselt küsimusi, küsige neid kommentaaride jaotises.

