Fix Windows Modules Installer Worker High CPU Usage
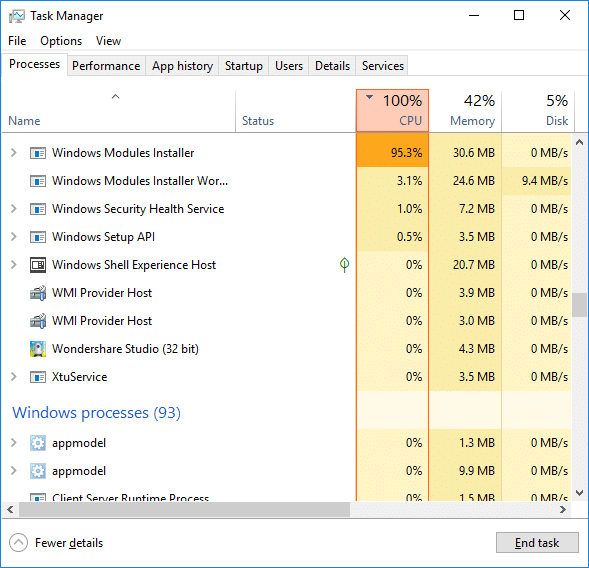
If you are facing the High CPU Usage by Windows Modules Installer Worker, then don’t worry as thousands of other users are also facing the similar problem and therefore, there are many working fixes which we will be discussing today in this article. To verify if you are facing this issue open Task Manager (Ctrl + Shift + Esc) and you will find that the Windows Modules Installer Worker is consuming High CPU or Disk Usage.

Pro Vihje: You may leave your PC overnight or for a few hours to see the issue rectify itself once the Windows is finished downloading and installing updates.
What is Windows Modules Installer worker (WMIW)?
Windows Modules Installer worker (WMIW) is a service which takes cares of automatically installing Windows Update. According to its service description, WMIW is a system process that enables automatic installation, modification, and removal of Windows updates and optional components.
This process is responsible for finding new Windows Update automatically and installing them. As you might be aware that Windows 10 automatically install newer builds (i.e. 1803 etc.) via Windows Updates, so this process is responsible for installing these updates in the background.
Although this process is called Windows Modules Installer worker (WMIW) and you will see the same name in the Processes tab in the Task Manager, but if you switch to Details tab, then you will find the name of the file as TiWorker.exe.
Why Is Windows Modules Installer worker Using So Much CPU?
As Windows Modules Installer worker (TiWorker.exe) runs continuously in the background, sometimes it might utilize high CPU or disk usage when installing or uninstalling Windows Updates. But if its constantly using high CPU then the Windows Modules Installer worker may have become unresponsive while checking new updates. As a result, you may be experiencing lags, or your system might hang or freeze completely.
The first thing users do when they experience freezing, or lagging issues on their system is to restart their PC, but I assure you that this strategy won’t work in this case. This is because the issue will not resolve by itself until and unless you fix the underlying cause.
Fix Windows Modules Installer Worker High CPU Usage
Looge kindlasti taastepunkt juhuks, kui midagi läheb valesti.
Windows Modules Installer Worker (WMIW) is an important service, and it should not be disabled. WMIW or TiWorker.exe is not a virus or malware, and you cannot just delete this service from your PC. So without wasting any time let’s see How to Fix Windows Modules Installer Worker High CPU Usage alltoodud tõrkeotsingu juhendi abil.
1. meetod: käivitage Windows Update'i tõrkeotsing
1. Avamiseks vajutage klahvikombinatsiooni Windows Key + I Seaded siis klõpsake nuppu Värskendus- ja turvaikoon.
![]()
2. Valige vasakpoolsest menüüst Tõrkeotsing allPüsti ja töötab" kliki Windows Update.
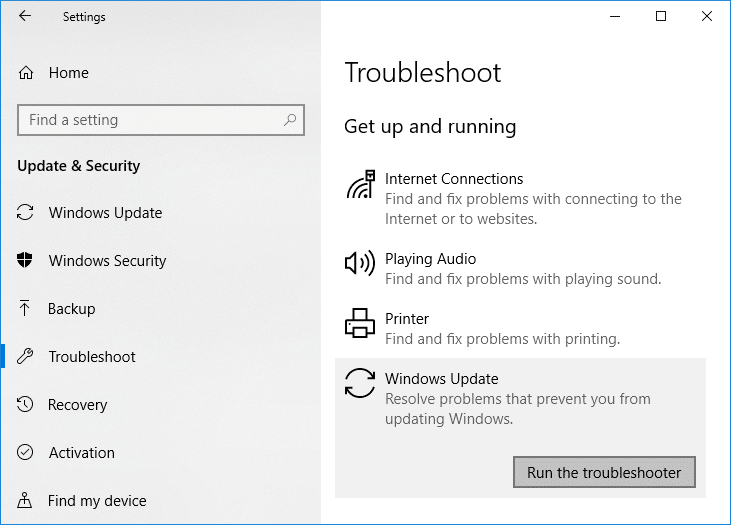
3. Klõpsake nüüd nuppuKäivitage tõrkeotsing” Windows Update'i all.
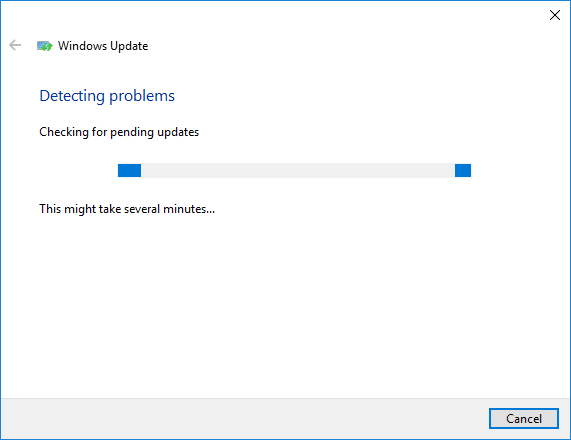
4. Let the troubleshooter run, and it will automatically fix any issues found with Windows Update taking forever.
Method 2: Manually Check for Windows Updates
1. Vajutage Windows Key + I ja seejärel valige Värskendamine ja turvalisus.
2. Vasakpoolses servas klõpsab menüü Windows Update.
3. Nüüd klõpsake "Kontrolli uuendusi” nuppu, et kontrollida saadaolevaid värskendusi.

4. Kui värskendusi on ootel, klõpsake nuppu Laadige alla ja installige värskendused.

5. Kui värskendused on alla laaditud, installige need ja teie Windows muutub ajakohaseks.
Method 3: Configure Windows Update to Manual
Ettevaatust: This method will switch Windows Update from automatically installing the new updates to the manual. This means you have to manually check for Windows Update (weekly or monthly) to keep your PC secure. But follow this method, and you can again set the Updates to Automatic once the issue is resolved.
1. Vajutage Windows Key + R ja seejärel tippige services.msc ja vajuta Enter.

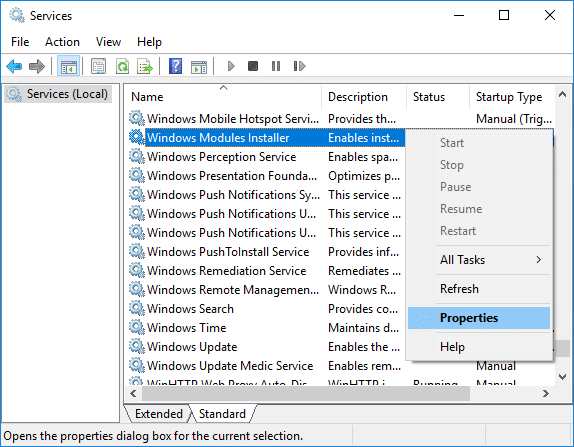
2. Scroll down and find Windows Modules Installer service in the list.
3. Paremklõpsake nuppu Windowsi moodulite installimisteenus ja valige Omadused.
4. Nüüd klõpsake Peatus then from the Startup tüüp drop-down select Käsitsi.
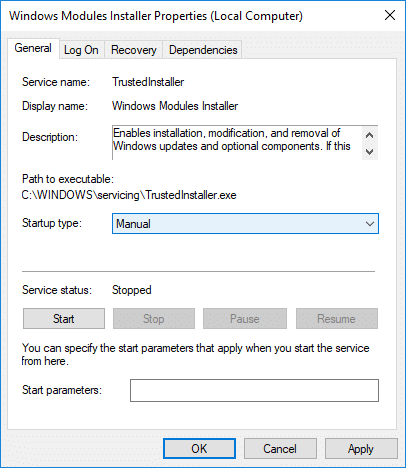
5. Klõpsake nuppu Rakenda ja seejärel nuppu OK.
6. Similarly, follow the same step for the Windows Update service.
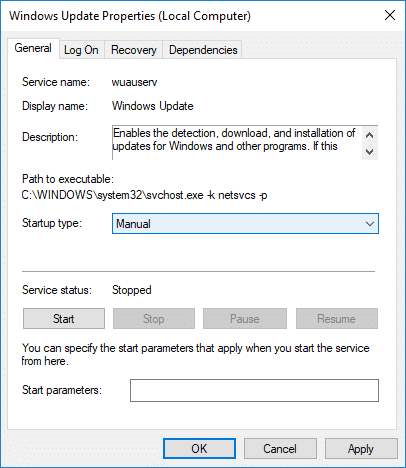
7. Muudatuste salvestamiseks taaskäivitage arvuti.
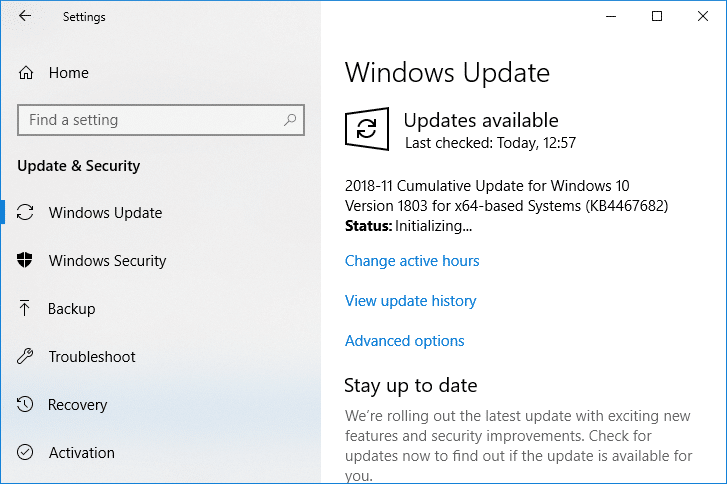
8. Jälle kontrollige Windows Updates Manually ja installige kõik ootel olevad värskendused.
9. Once is done, again go back to services.msc window and open the Windows Modules Installer & Windows Update Properties aken.
10. Seadke Startup tüüp et Automaatne ja kliki Avaleht. Then click Apply followed by OK.
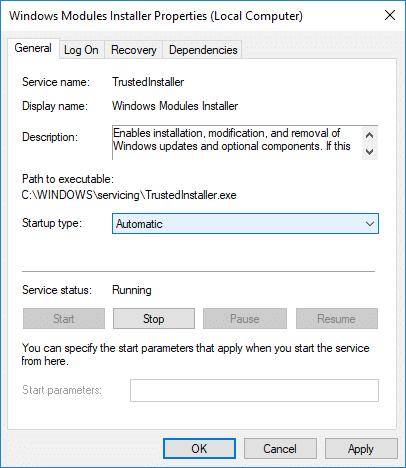
11. Muudatuste salvestamiseks taaskäivitage arvuti.
4. meetod: käivitage süsteemihoolduse tõrkeotsing
1. Vajutage Windowsi klahvi + R, seejärel tippige control ja vajutage avamiseks sisestusklahvi Kontrollpaneel.
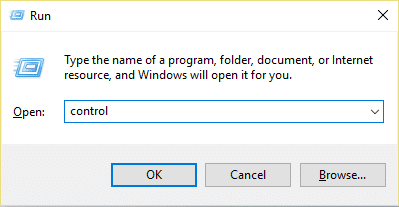
2. Otsige tõrkeotsingut ja klõpsake nuppu Tõrkeotsing.

3. Seejärel klõpsake nuppu Vaata kõiki vasakul paanil.
4. Kliki “System Maintenance” käivitada System Maintenance Troubleshooter.

5. Tõrkeotsing võib seda teha Fix Windows Modules Installer Worker High CPU Usage, but if it didn’t, then you need to run System Performance Troubleshooter.
6. Avage käsuviip. Kasutaja saab selle toimingu sooritada otsides 'cmd' Ja seejärel vajutage sisestusklahvi.

7. Tippige cmd-sse järgmine käsk ja vajutage sisestusklahvi:
msdt.exe / id PerformanceDiagnostic
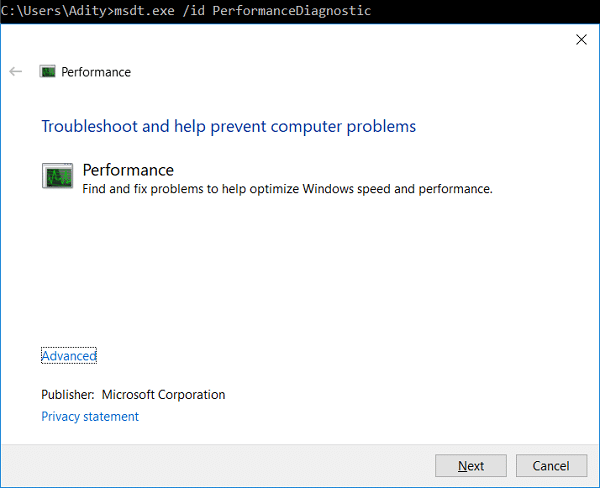
8. Follow the on-screen instruction to run the troubleshooter and fix any issues find the System.
9. Finally, exit the cmd and reboot your PC.
Method 5: Disable Automatic Maintenance
Sometimes Automatic Maintenance can conflict with the Windows Modules Installer Worker service, so try to disable Automatic Maintenance using this guide and see if this fixes your issue.
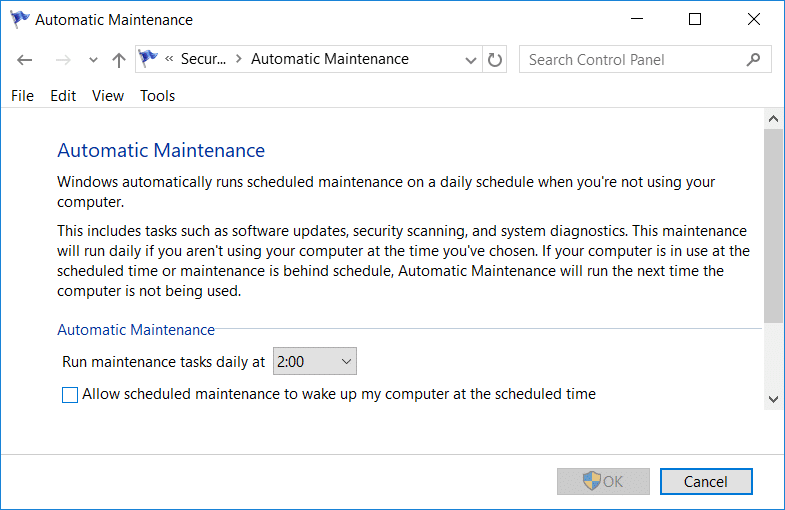
Although disabling Automatic Maintenance is not a good idea, but there might be some case where you need to actually disable it, for example, if your PC freezes during automatic maintenance or Windows Modules Installer Worker High CPU Usage issue then you should disable maintenance to troubleshoot the issue.
Method 6: Run System File Checker and DISM
1. Avage käsuviip. Kasutaja saab selle toimingu sooritada otsides 'cmd' Ja seejärel vajutage sisestusklahvi.
2. Nüüd tippige cmd-sse järgmine tekst ja vajutage sisestusklahvi:
Sfc /scannow sfc /scannow /offbootdir=c: /offwindir=c:windows (Kui ülaltoodud ei õnnestu, proovige seda)

3. Oodake, kuni ülaltoodud protsess on lõppenud, ja kui see on tehtud, taaskäivitage arvuti.
4. Avage uuesti cmd ja tippige järgmine käsk ning vajutage iga käsu järel sisestusklahvi:
Dism /Võrgus /Cleanup-Image /CheckHealth Dism /Võrgus /Cleanup-Image /ScanHealth Dism /Onlain /Cleanup-Image /RestoreHealth

5. Laske käsul DISM käivituda ja oodake, kuni see lõpeb.
6. Kui ülaltoodud käsk ei tööta, proovige allolevat:
Dism /Image:C:offline /Cleanup-Image /RestoreHealth /Source:c:testmountwindows Dism /Online /Cleanup-Image /RestoreHealth /Allikas:c:testmountwindows /LimitAccess
Märge: Asendage C:RepairSourceWindows oma parandusallikaga (Windowsi installi- või taasteketas).
7. Taaskäivitage arvuti, et muudatused salvestada ja kontrollida, kas saate seda teha Fix Windows Modules Installer Worker High CPU Usage.
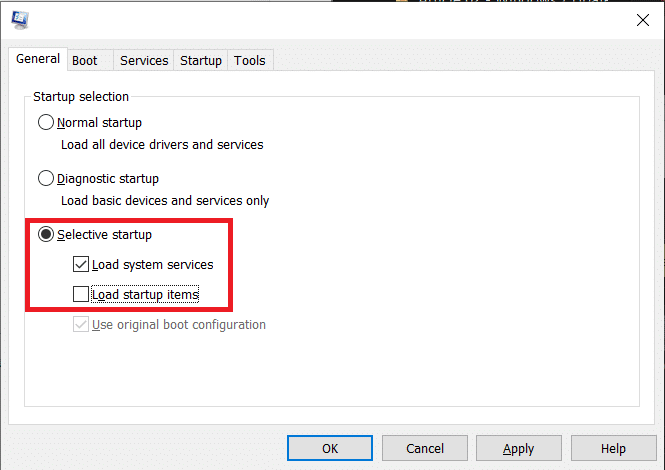
7. meetod: tehke puhas alglaadimine
Sometimes 3rd party software can conflict with Windows and can cause the issue. To Fix Windows Modules Installer Worker High CPU Usage issue, peate oma arvutis puhta alglaadimise ja probleemi samm-sammult diagnoosima.
Method 8: Set your WiFi as Metered Connection
Märge: This will stop Windows Automatic Update, and you will need to manually check for Updates.
1. Avamiseks vajutage klahvikombinatsiooni Windows Key + I Seaded siis klõpsake nuppu Võrk ja Internet.

2. Valige vasakpoolsest menüüst Wi-Fi.
3. Under Wi-Fi, klõps on your currently connected network (WiFi).
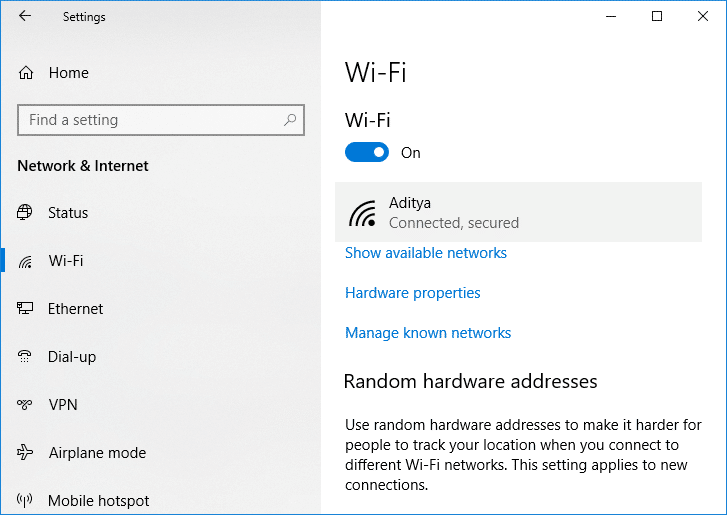
4. Scroll down to Metered connection and lülitage sisse allMäära mõõdetud ühendus".
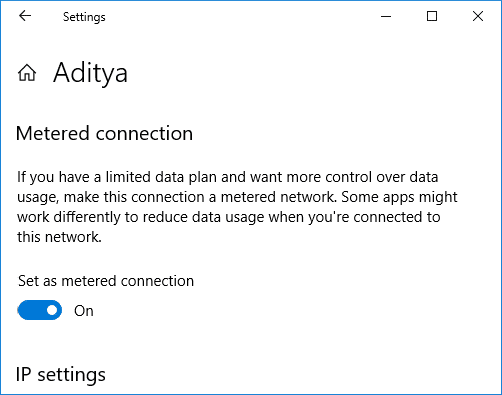
5. Close Settings and reboot your PC to save changes.
Soovitan:
See on kõik, olete edukalt hakkama saanud Fix Windows Modules Installer Worker High CPU Usage kuid kui teil on selle õpetuse kohta veel küsimusi, küsige neid kommentaaride jaotises.
