Fix Windows PC Won’t Connect to TV

The computer is connected to a Smart TV using an HDMI cable. Using HDMI, you can have a home theatre setup by connecting an HDTV or video projector to a computer. This cable will help in connecting to components for both audio and video. However, users have reported that sometimes computers do not recognize TV. If you are facing your PC won’t connect to TV issue, then you are in the right place. This article on how to fix computer won’t connect to TV issue will resolve the issue.
How to Fix Windows 10 PC Won’t Connect to TV HDMI
Whenever an external device is connected to the computer, Windows 10 sets the device ready to work with that device. For instance, when you connect a pen drive, you will see a prompt for File Explorer to run it. The process is similar when you connect a TV. If your computer fails to recognize the TV, then follow any of the methods below to resolve the issue.
Why Computer won’t Connect to TV?
Below are some of the reasons why your PC won’t connect to TV:
- Aegunud draiver
- Issues with the HDMI cable
- Issues with HDMI port
Põhilised veaotsingu näpunäited
Before trying advanced troubleshooting methods, let us try some of the basic troubleshooting methods:
- Loosen up the HDMI coil if it is coiled tightly.
- Since HDMI is sensitive, check whether the pins on the HDMI are damaged.
- Use another HDMI cable.
- Eemaldage muud ühendused of the TV using the HDMI hub or switch.
- Püüdke connect HDMI cable directly to the TV.
- Püüdke connect to another HDMI port if your TV has multiple ports.
- Discharge the computer by removing AC adapters, power cables, and peripheral devices.
- Disconnect all ports and restart your computer and TV. Then, reconnect them.
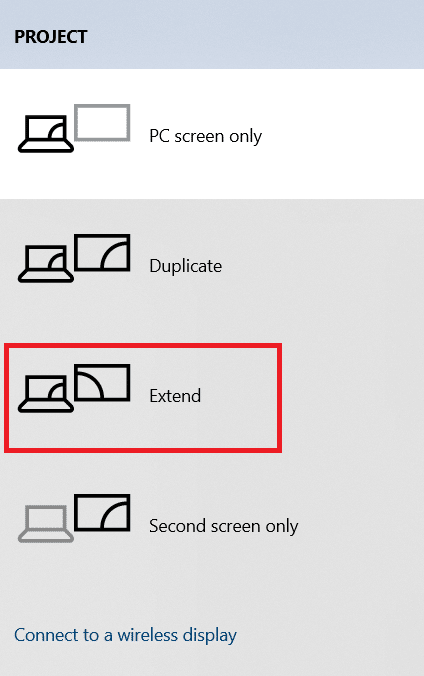
Method 1: Enable Projection Mode
If Windows 10 has failed to automatically detect the connection to the TV, then you can enable the projection mode:
1. press Windows + P võtmed simultaneously on the keyboard.
2. Vali Laiendama to display your computer screen on the TV.
Märge: Võite ka valida Duplikaat.
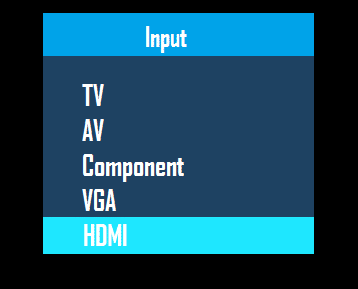
Method 2: Select Input Source on TV
If a TV has more than one display port, it might not detect the incoming video signal automatically and cause Windows 10 DisplayPort Not Working issue and cause Windows 10 DisplayPort Not Working issue. In this case, you can select input on the TV. Follow the steps below:
1. Vajutage nuppu Input Source menu nuppu Teleri pult.
2. Vali HDMI. This will display the screen of the computer.
Samuti loe: How to Convert Coaxial Cable to HDMI
3. meetod: käivitage riistvara ja seadmete tõrkeotsing
If there is any issue with the PC hardware, running the troubleshooter will automatically diagnose the problems and fix them. Follow the steps written below to run the Hardware and Devices Troubleshooter to fix Computer won’t Connect to TV issue.
1. Vajutage nuppu Windows võti, kirjuta Command Prompt ja kliki Käivita administraatorina.
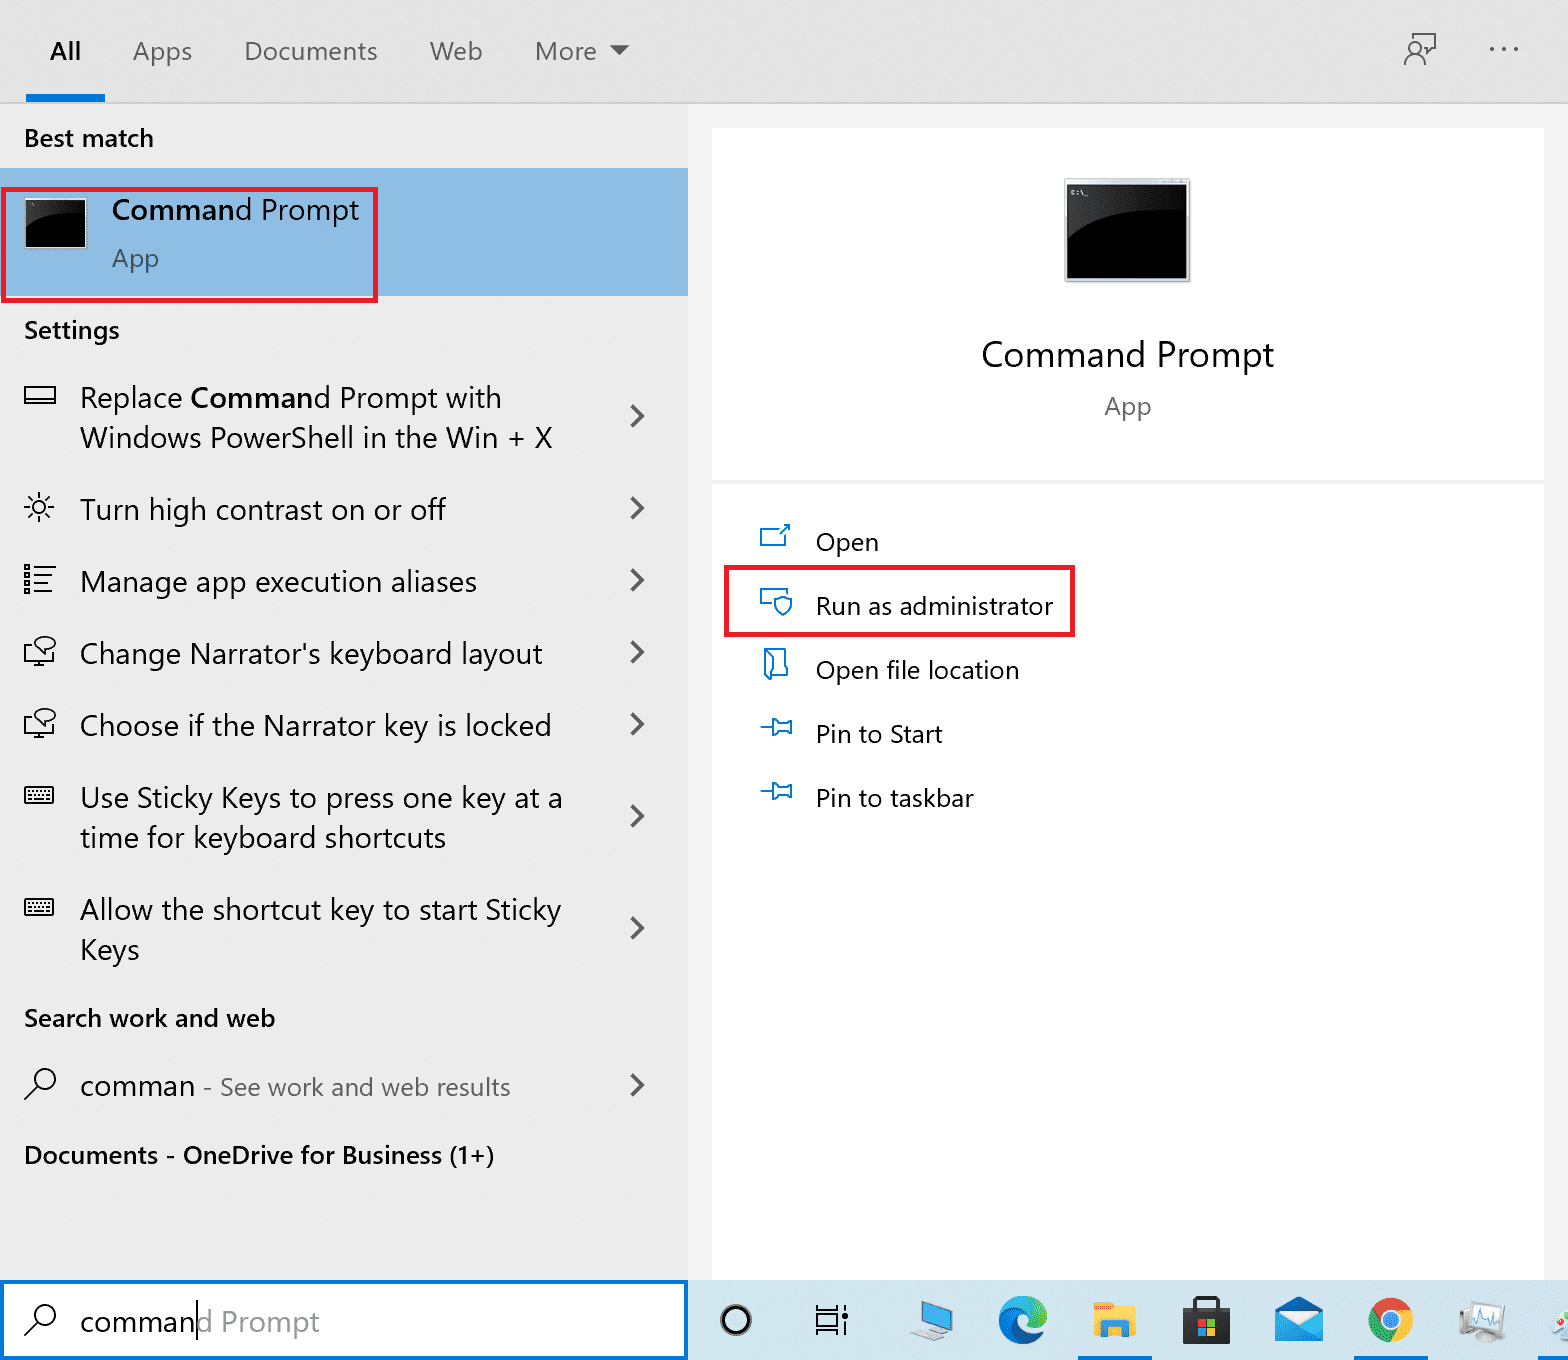
2. klõps Jah aasta Kasutajakonto kontroll kiire.
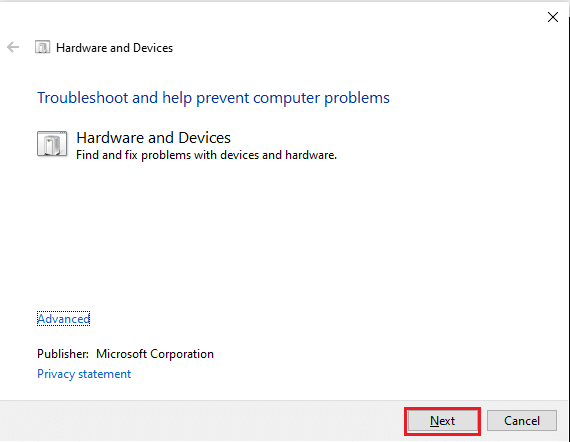
3. Tippige käsk msdt.exe -ID DeviceDiagnostic ja vajutage sisene.
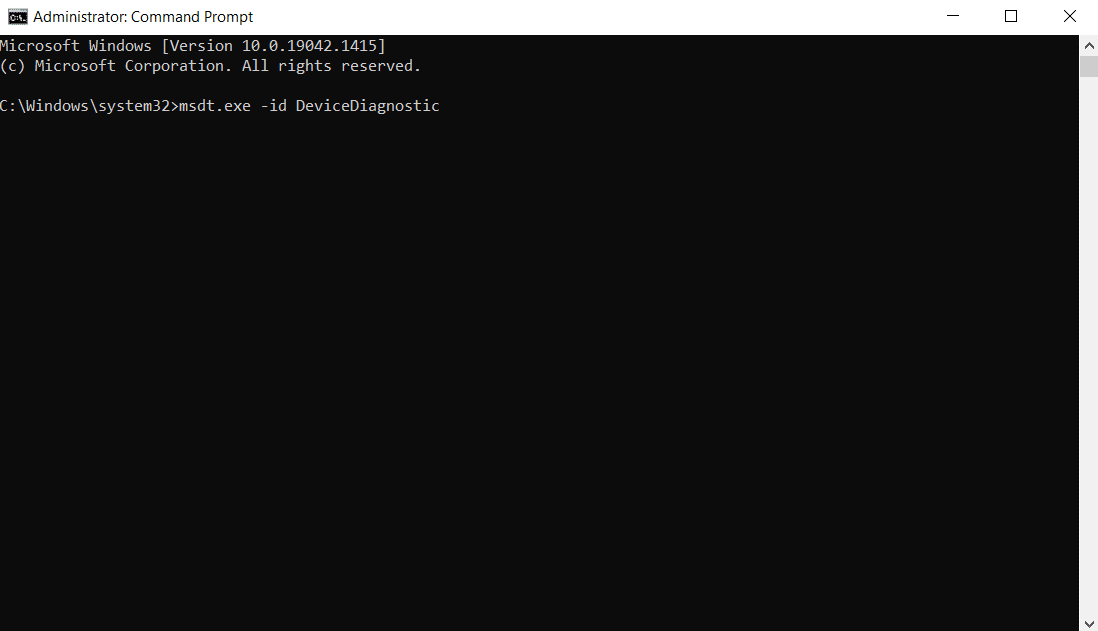
4. Klõpsake nupul edasijõudnud valik, nagu näidatud.

5. Kontrollige Rakenda remont automaatselt ja klõpsake nuppu järgmine.
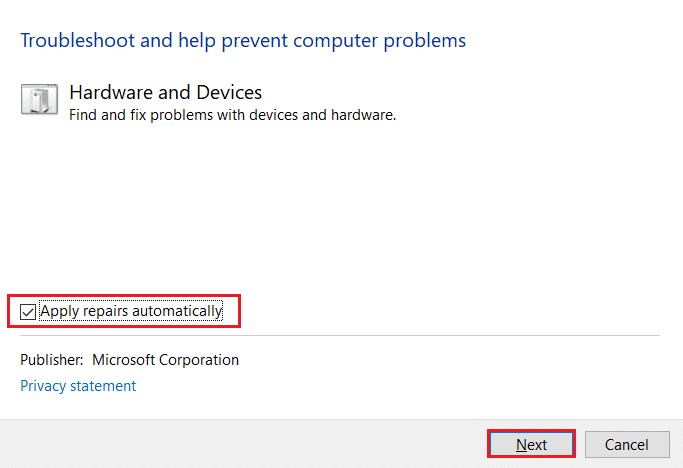
6. Kliki järgmine jätkama.
7. The troubleshooter will now run. If problems are detected, it will display two options:
- Rakenda see parandus
- Skip this fix
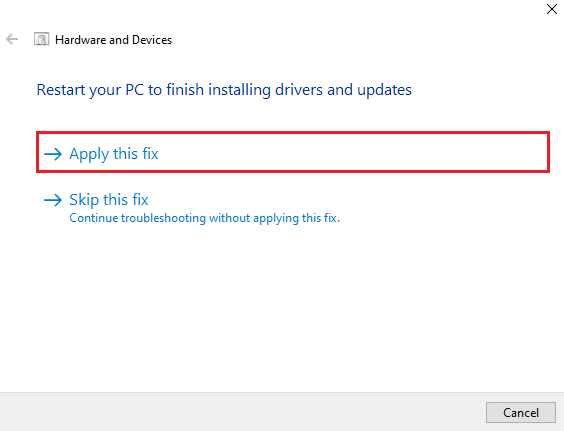
8. Siin klõpsake nuppu Rakenda see parandusja restart teie arvuti.
If the issue occurs on your PC even after running the troubleshooter, then you can try updating the video driver.
Method 4: Update Display Driver
Outdated or damaged video drivers can also be one of the reasons behind PC won’t connect to TV issues. Follow the steps below:
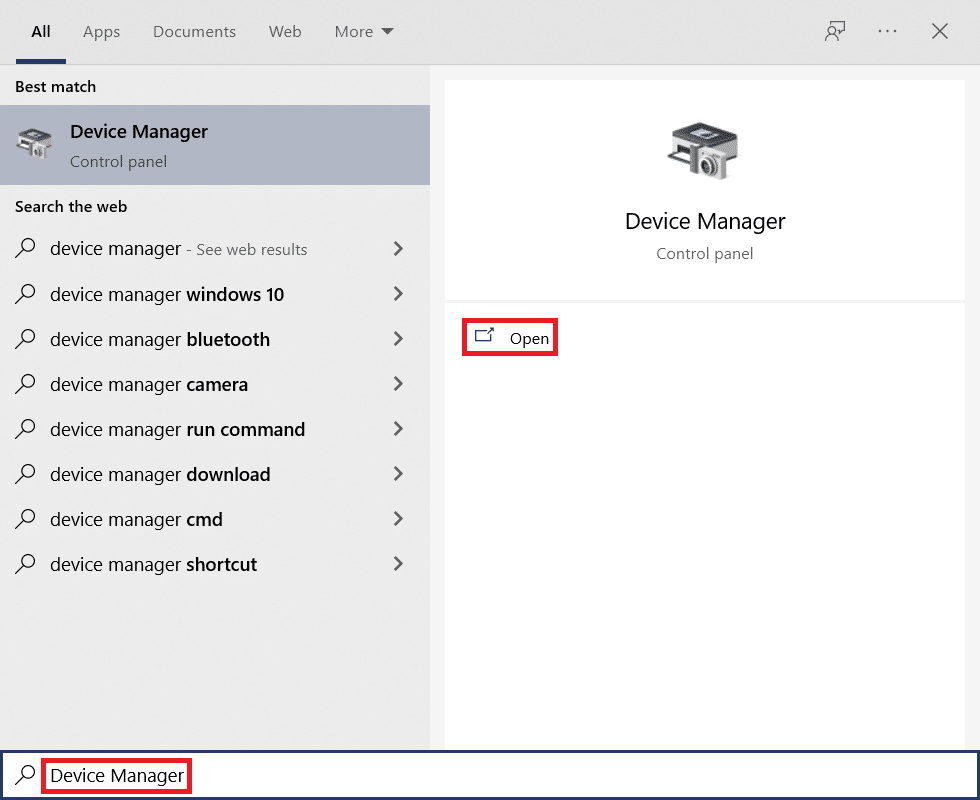
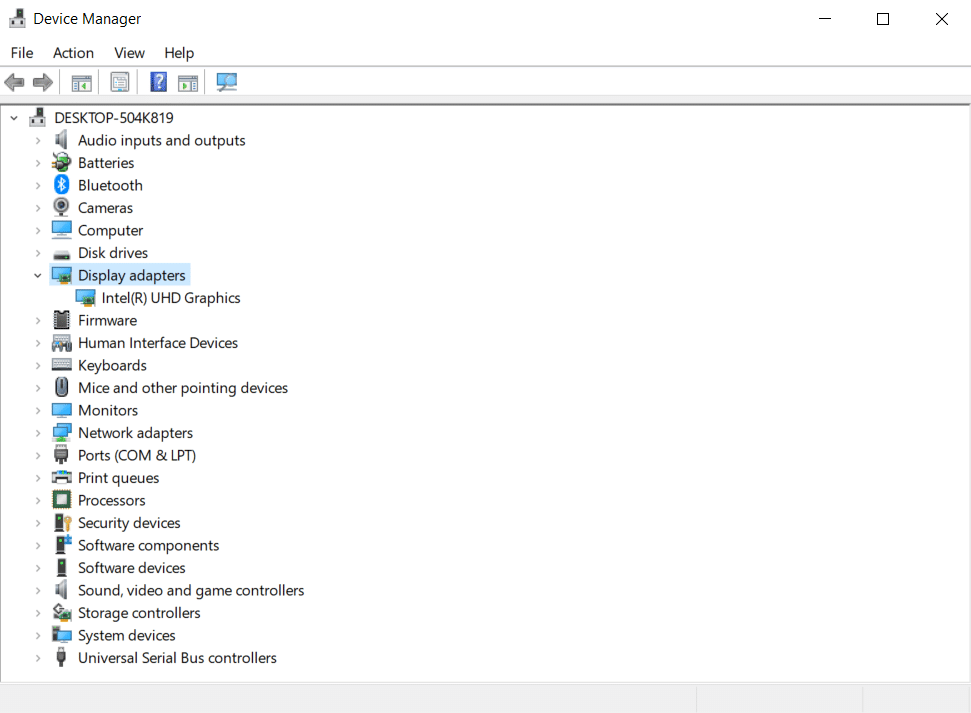
1. Kliki Avaleht ja tüüp Seadmehaldus. Klõpsake avatud.
2. Topeltklõpsake Ekraani adapterid selle laiendamiseks.
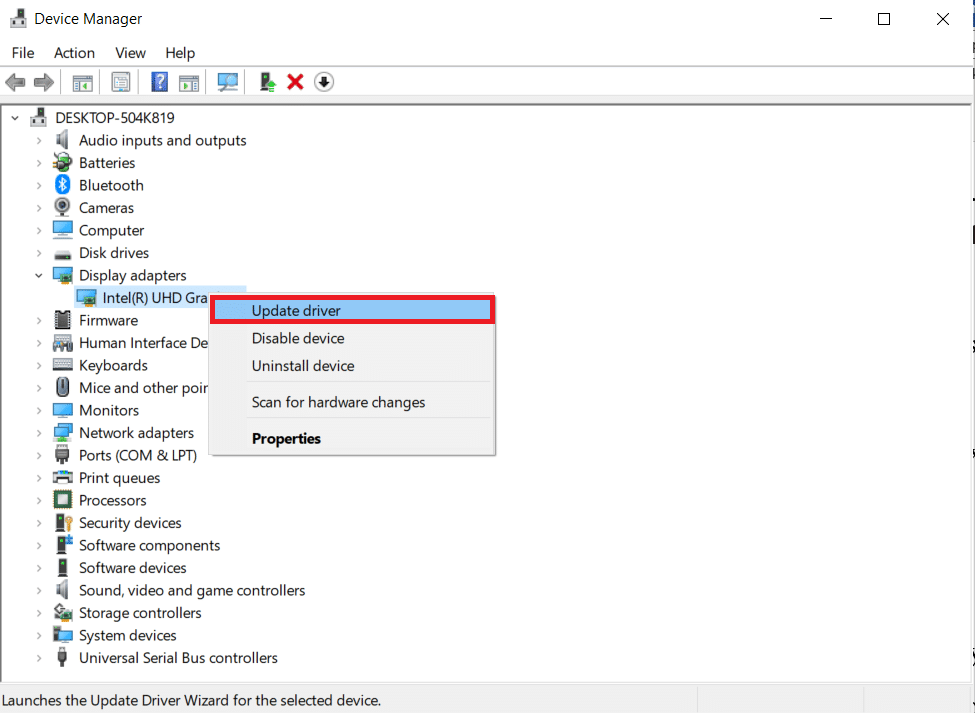
3. Paremklõpsake oma ekraani adapterid ja valige Värskenda draiverit.
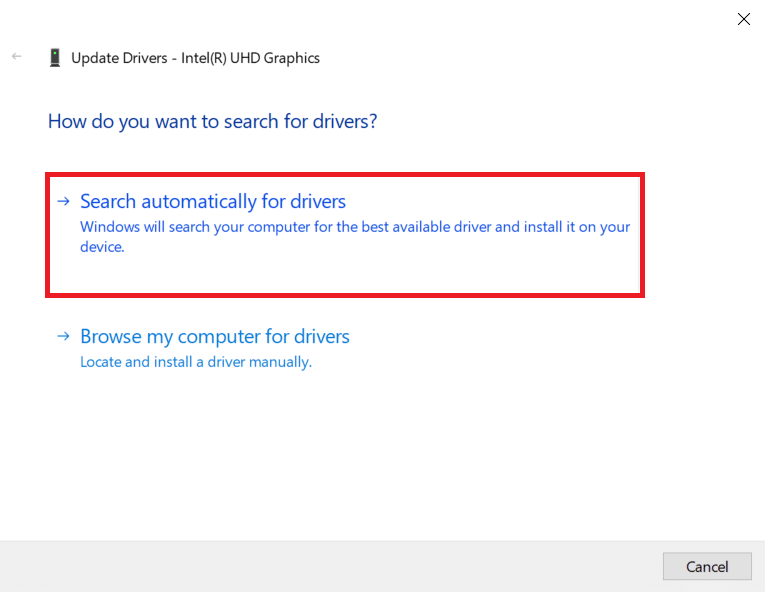
4. Järgmisena valige Otsige draivereid automaatselt.
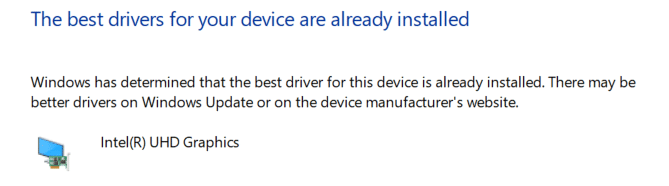
5A. Kui draivereid on juba värskendatud, kuvatakse see Teie seadme parimad draiverid on juba installitud.
5B. If any updates are available then, Windows will install them automatically.
6. After this process, restart sinu arvuti.
Samuti loe: Kuidas installida Kodi nutitelerisse
Method 5: Reinstall Driver in Compatibility Mode
If you face PC won’t connect to TV issue, then you have to use the driver in compatibility mode for a previous Windows version. Follow the steps below.
1. Avatud Device Manager ja mine Ekraani adapterid nagu on näidatud Meetod 4.
2. Paremklõpsake ikooni video device ja valige Seadme desinstallimine.

3. Kontrollige Selle draiveri tarkvara kustutamine selle seadme jaoks option. Then, click on Uninstall button in the confirmation prompt.
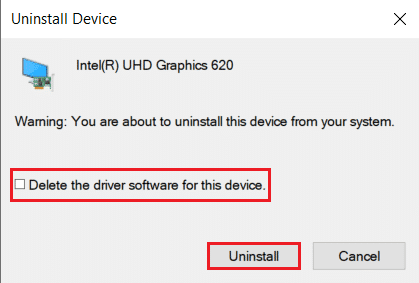
4. Taaskäivitage arvuti after uninstalling the driver.
5. Next, download the appropriate driver from the tootja veebileht.
Märge: Näiteks külastage Inteli ametlikul kodulehel to download the latest USB driver for Intel Graphics.
6. Once the file is downloaded, go to the download location and select the seadistusfail.
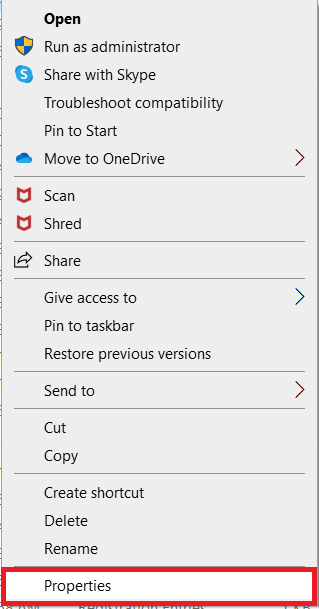
7. Paremklõpsake ikooni exe setup file and then select Kinnisvara menüüst.
8. Nüüd minge lehele Ühilduvus Tab.
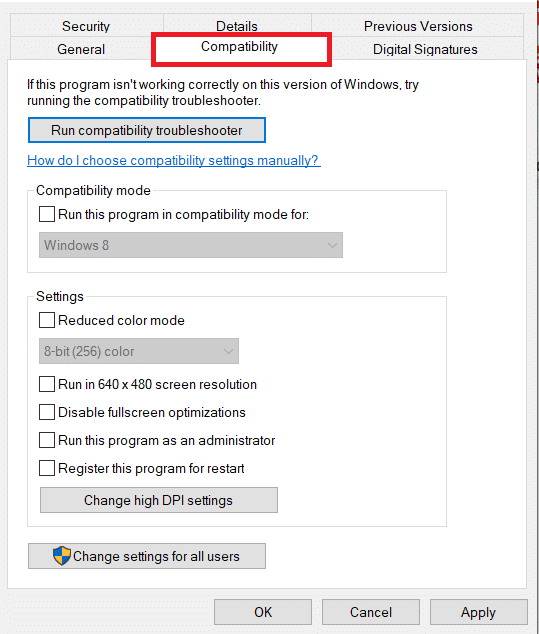
9. Next, check the box next to Käivitage see programm ühilduvuse režiimis.
10. From the drop-down menu, select a previous Windows OS version.
11. klõps kehtima ja siis OK muudatuste salvestamiseks.

12. Lõpuks taaskäivitage arvuti uuesti.
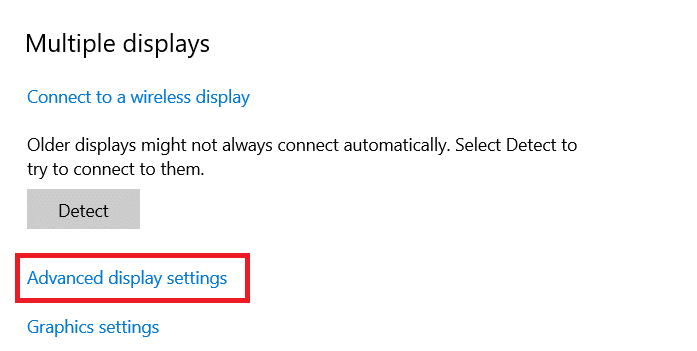
Method 6: Change Display Settings
Changing the display settings to the recommended settings will help resolve computer won’t connect to TV issue. Follow the steps below:
1. Avatud Seaded vajutades Klahvid Windows + I samaaegselt.
2. Valige süsteem seaded.
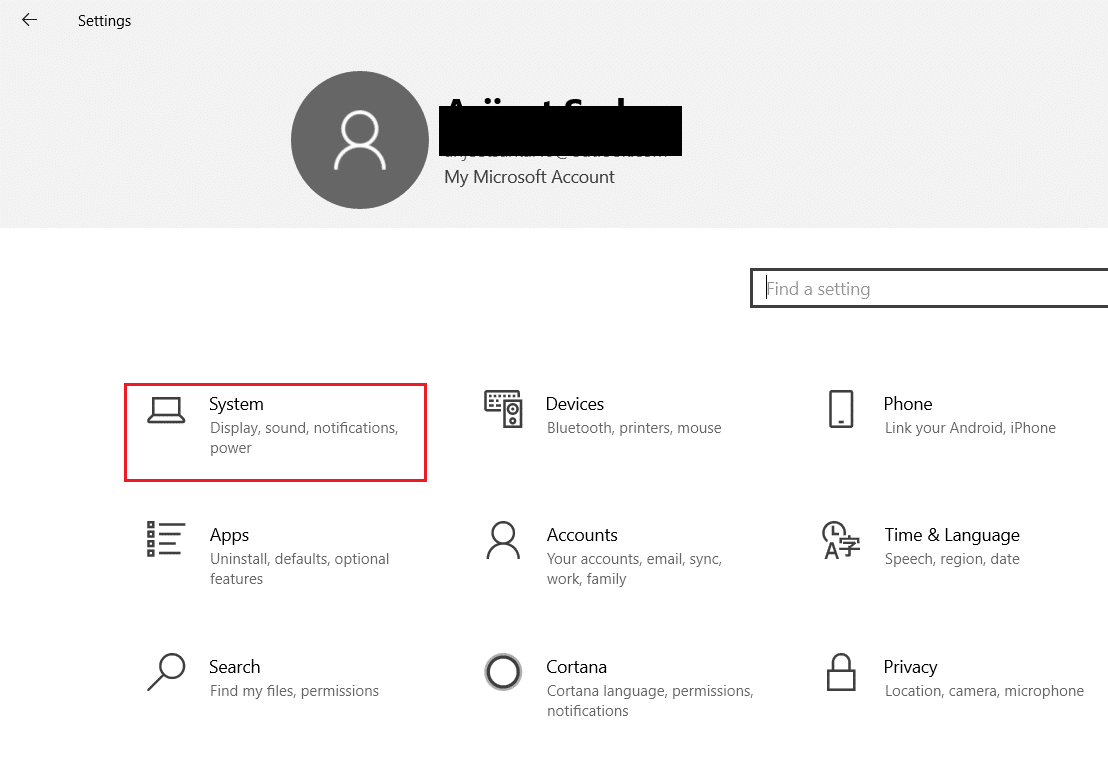
3. In the left-hand menu select Ekraan.
4. Siin määrake Soovitatav valikud Skaala ja paigutusja Ekraani resolutsioon.

5. Nüüd klõpsake Täpsemad kuva seaded.
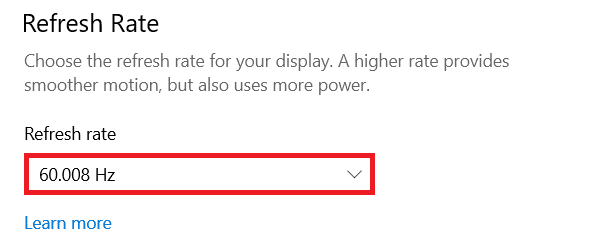
6. Valige recommended and required rate (nt 60.008 Hz) all Värskendamise määr.
Samuti loe: Perega jagamise YouTube TV ei tööta
Method 7: Perform Factory Reset on TV
If none of the methods above worked, then factory reset your TV to resolve your PC won’t connect to TV problem. Follow the given steps to perform factory reset on TV.
Märge: The settings may vary depending on the manufacturer of the TV. Below settings and methods are based on the Samsung R series.
1. Press the Home button on the TV remote.
2. Vali Seaded, Siis Toetus vasakul paanil.
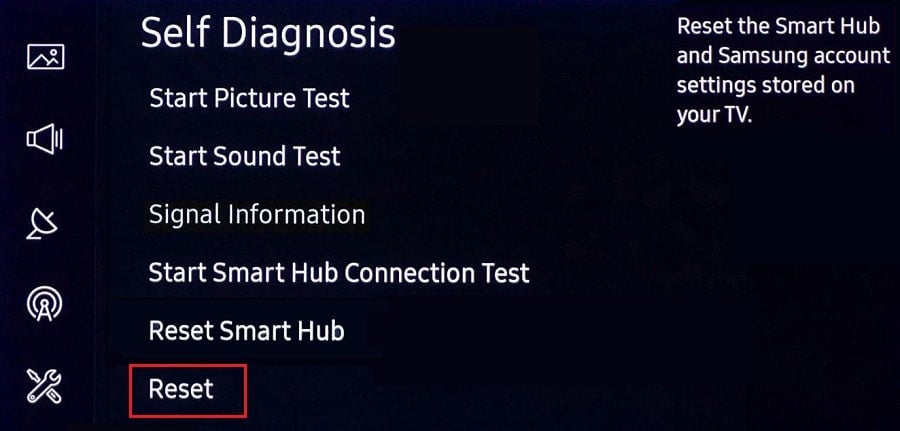
3. Siin valige Enesediagnostika valik.
4. Nüüd valige lähtestama valik ja sisestage PIN.
5. Lõpuks valige Jah kinnitada.
Korduma kippuvad küsimused (KKK)
Q1. How can I check whether my display output is working well?
Ans. Pärast ühendamist HDMI kaabel, paremklõpsake nuppu lauaarvuti ja valige isikupärastada. Here, you can see your Smart TV as a second monitor.
Q2. Do I have to reset my PC to resolve the computer that did not recognize the TV issue?
Ans. Ei, there is no need to factory reset your PC. If none of the troubleshooting methods worked, then you can reset your Smart TV as a last resort.
Q3. What are the different ways to connect a PC to a TV?
Ans. You can connect your computer to the TV using HDMI cable, DVI or VGA, or Wi-Fi. Using Wi-Fi to connect your computer to TV depends on the manufacturer & TV model.
Soovitan:
We hope our article was helpful and you were able to fix Windows PC won’t connect to TV issue was helpful to you. In case, you have any suggestions or queries regarding this article, feel free to reach out to us in the comment section below.