Kuidas Macis ekraanipilti kärpida

In 2007, the screenshot option was introduced to the iPhone. For the old versions of iOS, one was required to press the volume up and power buttons simultaneously to take a screenshot. The first computer screenshots were created in 1980, and the first mac screenshots were taken on the first mac computer in 1984. Since then, taking screenshots has only simplified. With just the click of a few buttons and a few milliseconds, one can screenshot anything present on the screen. If you want to learn how to crop a screenshot on Mac, stay tuned till the end of this article. You will get to learn how to crop a Mac screenshot with the detailed steps and illustrations to your aid.
Kuidas Macis ekraanipilti kärpida
You can crop any screenshot on Mac from the Rakenduse eelvaade. Keep reading to find out the detailed steps later in this article with the illustrations to understand the procedure better.
Is There a Snip Tool on Mac?
Jah, there is a snipping tool on moon. The flexibility and versatility of that snipping tool make it very user-friendly, even for beginners who have just started learning the features of their MacBook. It easily allows you to drag the crosshair and snip as per your wish. Just by pressing Shit + Command +4, you can drag and select the area of the screenshot, picture, or webpage you want to snip or crop.
What is Mac Screenshot Shortcut?
The mac screenshot shortcuts make it very convenient to take screenshots with the snap of a finger. There are basically three shortcuts sama eest:
- press vahetus+käsk+3 at the same time to take a screenshot of the whole screen.
- Puuduta vahetus+käsk+4 to take a screenshot of a small portion of the screen.
- valima Shift+Command+4+Space Bar simultaneously to take a screenshot of a window or menu.
Where Do Cropped Screenshots Go?
Screenshots are saved to your lauaarvuti as image files in the .png format. Those screenshots are saved as Screen Shot [date] at [time].png by default. Once they are edited and cropped, they can be saved anywhere. And like other files, be renamed as per your liking.
Can I Edit a Mac Screenshot?
Jah, you can edit a mac screenshot with great efficiency and very little time. You have to press vahetus+käsk+3 võtta a pilt. This screenshot will get saved to your desktop as Screen Shot [date] at [time].png, by default. You can open the file from there in Default Preview ja puudutage TÖÖRIISTAD to edit the screenshot.
Loe edasi: How to Take an iPhone Screenshot Without Buttons
How to Crop a Screenshot on Mac? How to Crop a Mac Screenshot on Macbook Pro & Macbook Air?
Cropping a screenshot is simple and time-efficient, irrespective of your Macbook Pro or Macbook Air. The steps to take and edit a screenshot remain the same. Follow the steps below to crop a full screenshot with a specific key combination.
1. To take a screenshot, press the vahetus+käsk+3 at the same time from the keyboard.
märkused: The screenshot will be saved on your lauaarvuti vaikimisi.
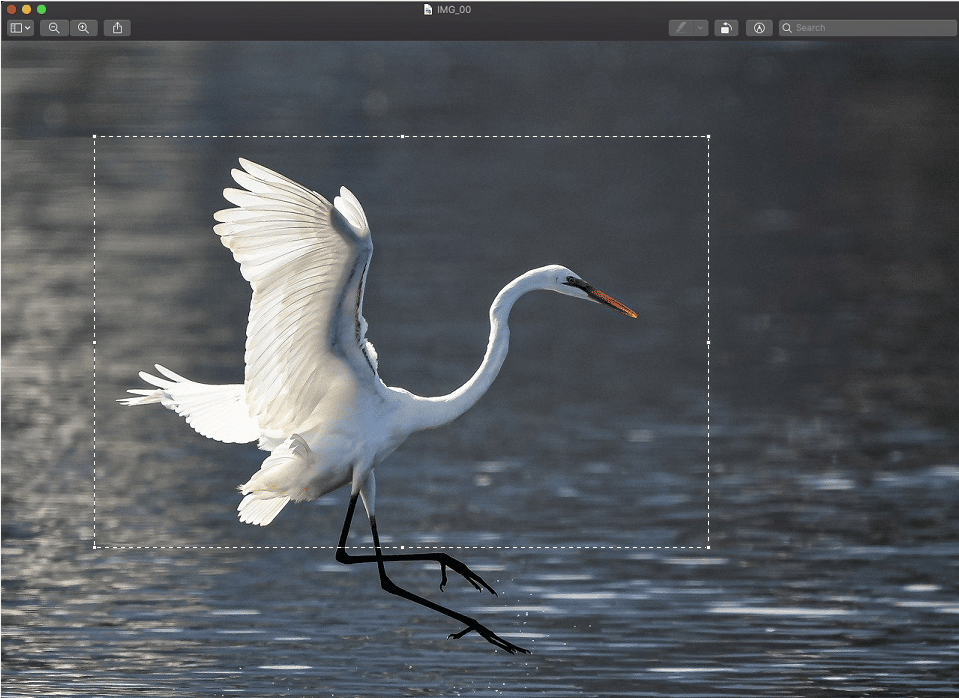
2. Once saved on your desktop, double click on the desired saved screenshot to open it in the Eelvaade app.

3. Now with the help of the Precision Pointer, select the soovitud ala to crop the screenshot.
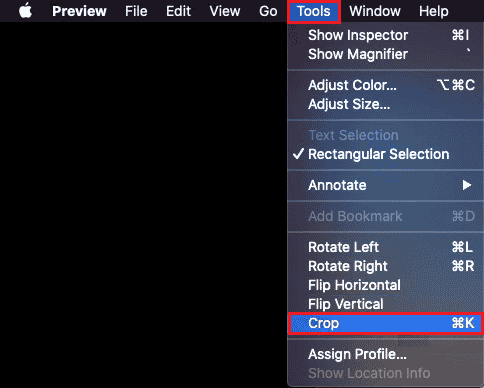
4. Klõpsake nupul TÖÖRIISTAD option from the top bar, as shown below.
5. From the drop-down menu, click on Põllukultuur.
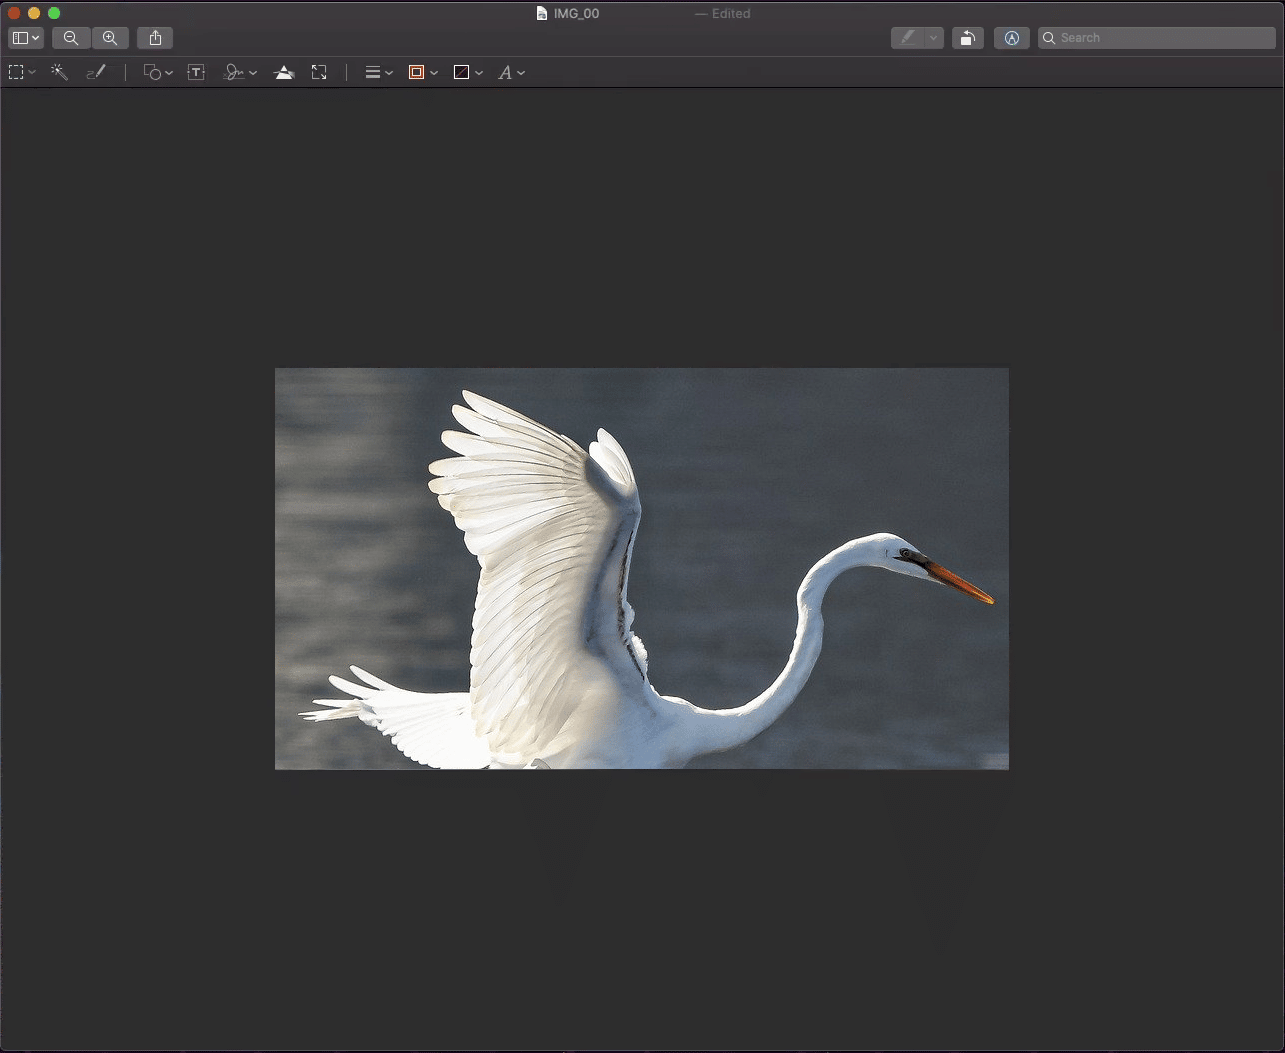
6. The screenshot will get cropped according to the selected area.
Loe edasi: How to Convert Image to Grayscale Paint
How Do I Crop a Screenshot on Mac After Saving It?
If you want to know how to crop a screenshot on Mac, follow our step-by-step guide underneath:
1. Vajutage nuppu vahetus+käsk+3 simultaneously from the keyboard to take a screenshot.
märkused: Võite kasutada ka vahetus+käsk+4 or Shift+Command+4+Space baar shortcuts to take different types of screenshots.
2. Topeltklõpsake ikooni desired screenshot töölaualt.
3. Aastal Eelvaade app, use the Precision Pointer to select the soovitud ala of the screenshot image.
4. Kliki Tools > Crop, nagu allpool näidatud.
You will get the cropped screenshot saved on your Mac desktop.
Loe edasi: kuidas kustutada Macis mitu iMessage'i
Why Can’t I Crop a Screenshot on Mac?
Below are some of the reasons why you can’t crop the screenshots on Mac:
How to Crop a Screenshot on iPhone?
Cropping a screenshot on the iPhone is child’s play. Follow the steps below to do that:
1. Vajutage nuppu Power + Home button samaaegselt ekraanipildi tegemiseks.
märkused: Vajutage nuppu Helitugevuse suurendamine + Power buttons together to take a screenshot that doesn’t have the home button.
2. Puudutage valikut Eelvaade of the screenshot immediately after taking it from the bottom left corner, as shown below.
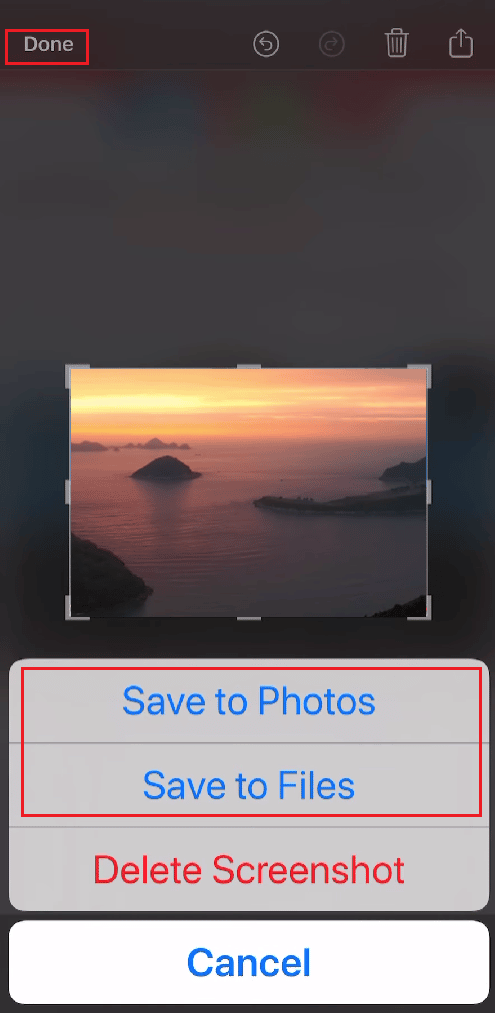
3. Select and adjust the soovitud ala you want to crop from that screenshot. Then, tap on Tehtud.
4. Puudutage Salvesta fotodesse or Salvesta failidesse to save the cropped screenshot in the Gallery.
Soovitatav:
Loodame, et sellest juhendist oli abi ja teil oli võimalik õppida how to crop a screenshot on Mac. Oma päringute ja ettepanekutega võtke meiega ühendust alloleva kommentaaride jaotise kaudu. Andke meile teada, millist teemat soovite meie järgmises artiklis õppida.