Xboxi mänguriba ekraani salvestamise lubamine opsüsteemis Windows 10

Screen recording is useful whether you are playing games on your PC or creating a tutorial for YouTube subscribers. But it can also be a task for some people. In this case, the Xbox Game Bar screen recording tool proves to be the most incredible savior. If you want to know how to record with Xbox Game Bar Windows 10 and how to enable xbox game bar recording, you have come to the right place. Continue reading further to know more about the same.
Xboxi mänguriba ekraani salvestamise lubamine opsüsteemis Windows 10
If you are into gaming, the Xbox Game Bar Screen recorder might be a perfect partner in your journey. It helps to record top-notch quality videos and take screenshots within seconds. The best part is that the Xbox Game Bar is already installed on Windows 10 devices.
How to Enable Xbox Game Bar Recording
If you are looking for how to enable Xbox Game Bar recording, you have come to the right place. Here are the steps you need to follow:
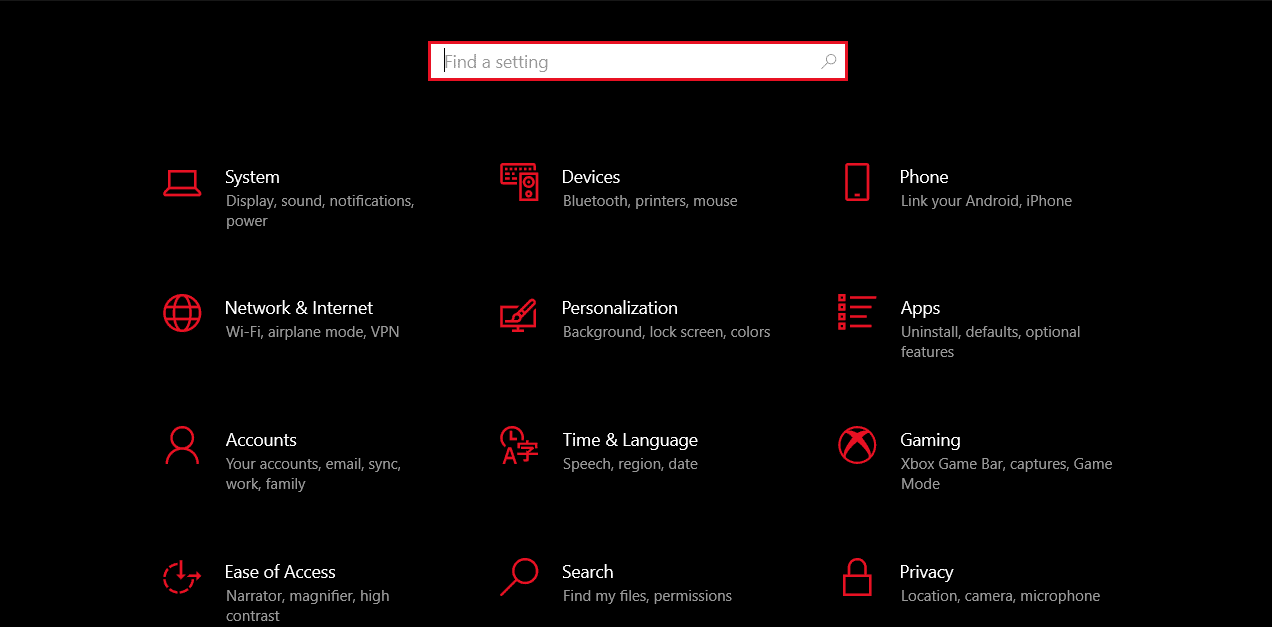
1. Vajutage nuppu Klahvid Windows + I üheaegselt käivitada Seaded.

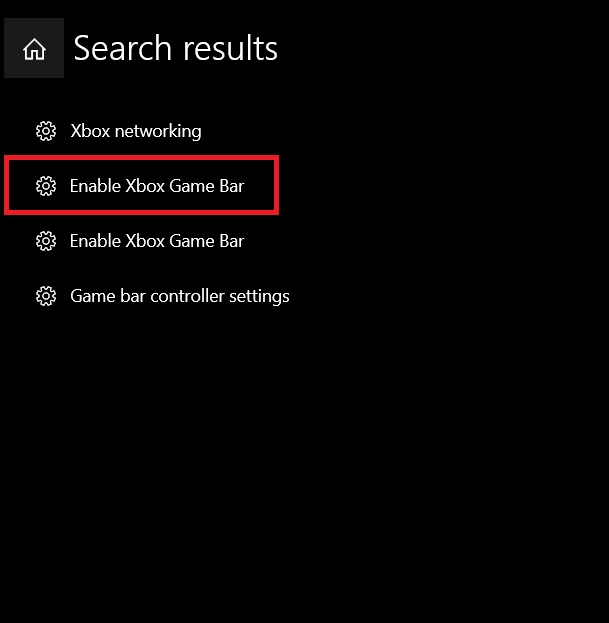
2. Otsi Xbox otsinguribal.
3. Seejärel klõpsake nuppu Luba Xboxi mänguriba.
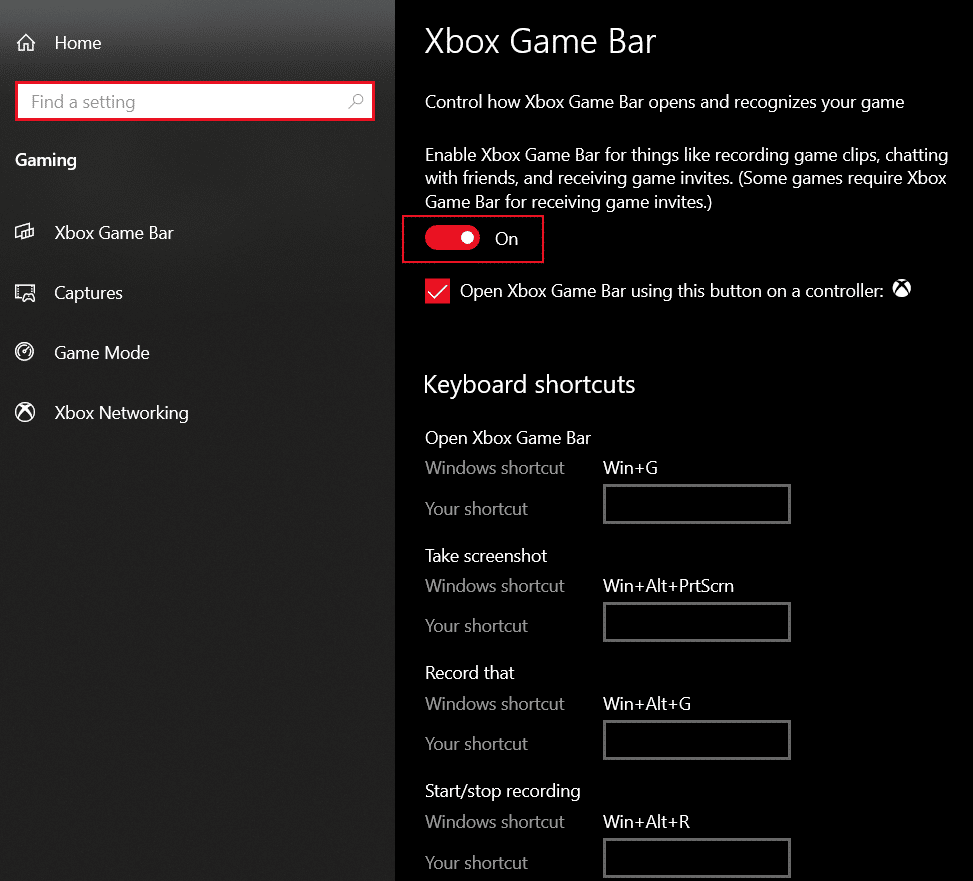
4. Click to toggle On Xbox Game Bar for things like recording game clips, chatting with friends, and receiving game invites.
Loe edasi: How to Disable Xbox Game Bar in Windows 11
How to Record with Xbox Game Bar Windows 10
Now that you know how to enable xbox game bar recording, let us move to recording stuff. Using Xbox Game Bar recorder to capture or record anything on Windows 10 is not a heavy cross to bear. Instead, it will be as easy as you can imagine once you get a hold of how to record with Xbox Game Bar Windows 10.
märkused: Ensure to enable Xbox Game Bar as explained above in the article before following the below-mentioned steps.
1. Esiteks launch the game or app that you wish to record on your Windows 10 laptop.
2. Vajutage nuppu Windows + Alt + R võtmed together to start recording everything on your screen. You might also hear the Narrator saying Recording is in progress at this stage.
3. Next, press Windows + Alt + M võtmed simultaneously to toggle on/off microphone while recording.
4. Once you are done with recording, press Windows + Alt + R to stop recording. At this stage, you might hear the Narrator saying Game clip recorded.
Apart from this, you can also take a screenshot instead of recording by pressing Windows + Alt+ Print Screen. Your device will save both screenshots and videos in the Captures folder.
Xbox Screen Recorder Windows 10 Shortcut
Keyboard shortcuts help you increase efficiency by saving time and doing things quickly. You can switch between things like a breeze and still maintain utmost precision. Here are the most common Xbox Screen Recorder Windows 10 shortcut you must know:
| Windowsi otseteed | Eesmärk |
| Windows + Alt + B keys | Turn on/off HDR |
| Windows + G | Launch Xbox Game Bar |
| Windows + Alt + G | Record the last 30 seconds |
| Windows + Alt + R | Salvestamise alustamine/peatamine |
| Windows + Alt + Prt Sc | Takes a screenshot |
You can use any of the above-mentioned xbox game bar recording shortcut and make things happen in the blink of an eye. Isn’t it amazing?
Loe edasi: 16 Best Free Screen Recorders for PC
How to Download Xbox Game Bar Screen Recording App
Follow the steps below to download:
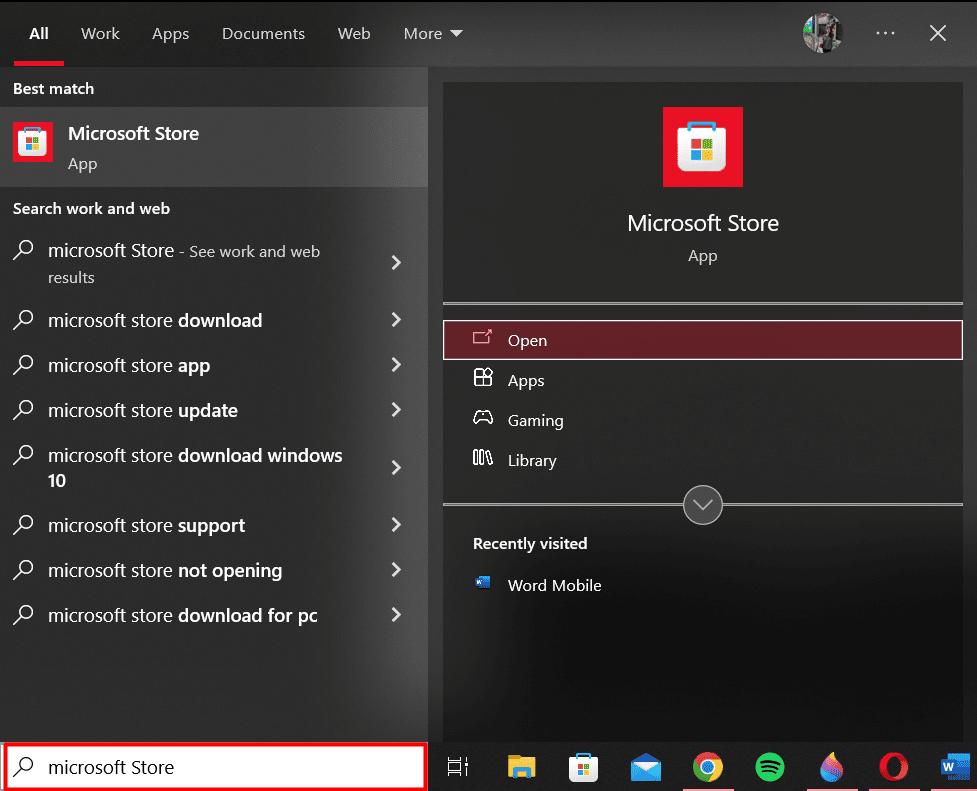
1. press Windows klahv ja otsing Microsoft Store otsinguribal. Kliki avatud.
2. Otsi Xboxi mänguriba ülaosas otsinguribal.
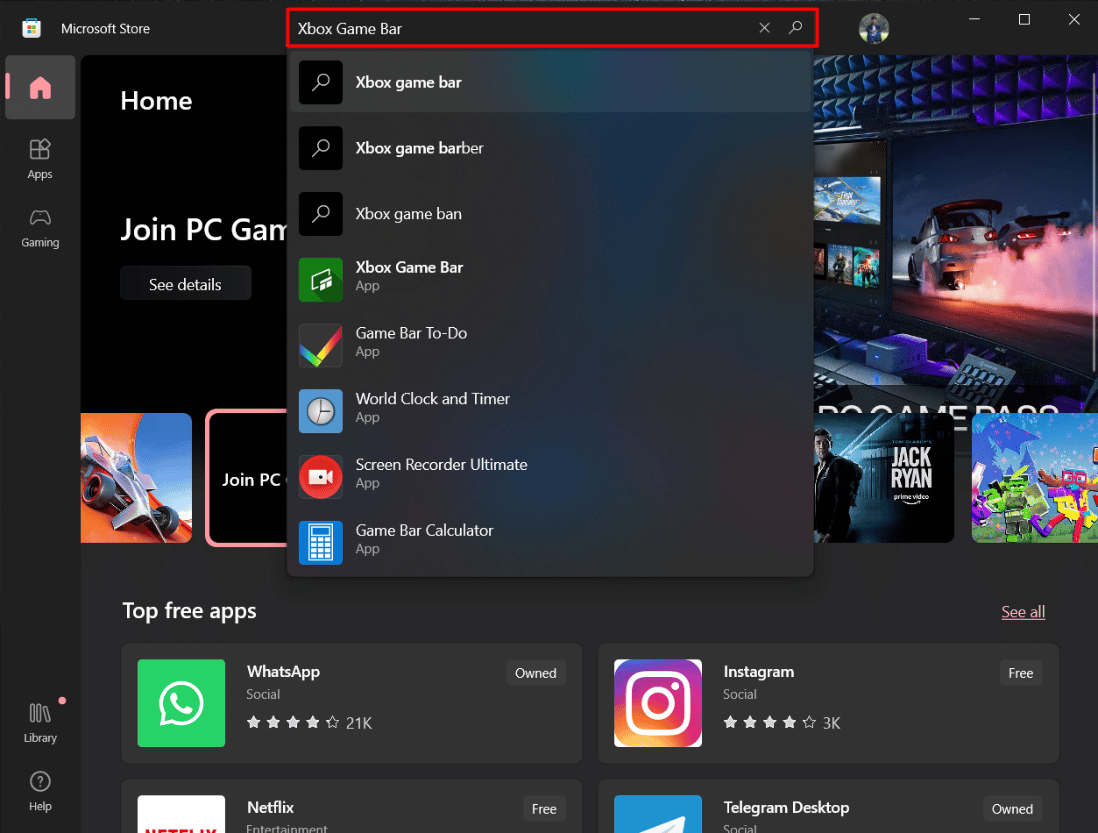
3. Seejärel klõpsake nuppu Saama and wait for the app to download.
Once the download is complete, you can launch it from the same page.
Where Do Game Bar Recordings Go?
Now that your basics are clear, let us move on to other crucial aspects. Imagine going through the hassle of putting your time and efforts into recording but you are unable to find the clip in your device. Isn’t it heart breaking? But worry not as you can find your Game Bar recordings in these simple steps:
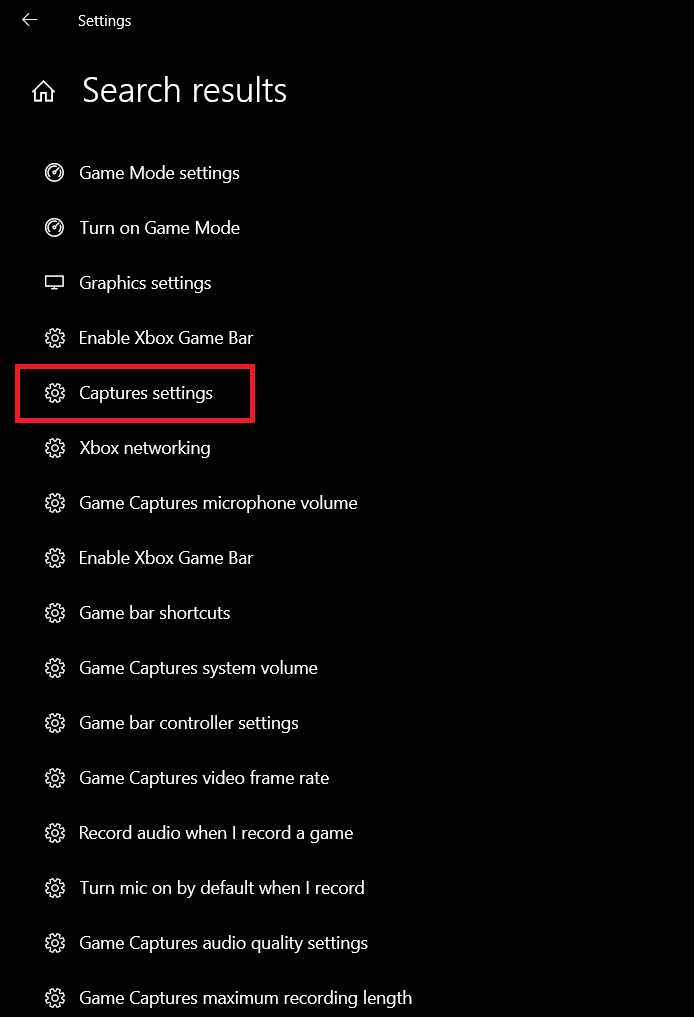
1. Käivita Seaded vajutades Windows + I võtmed samaaegselt.
2. Otsi mäng otsinguribal.
3. Seejärel klõpsake nuppu Captures settings vasakpoolsest menüüst.
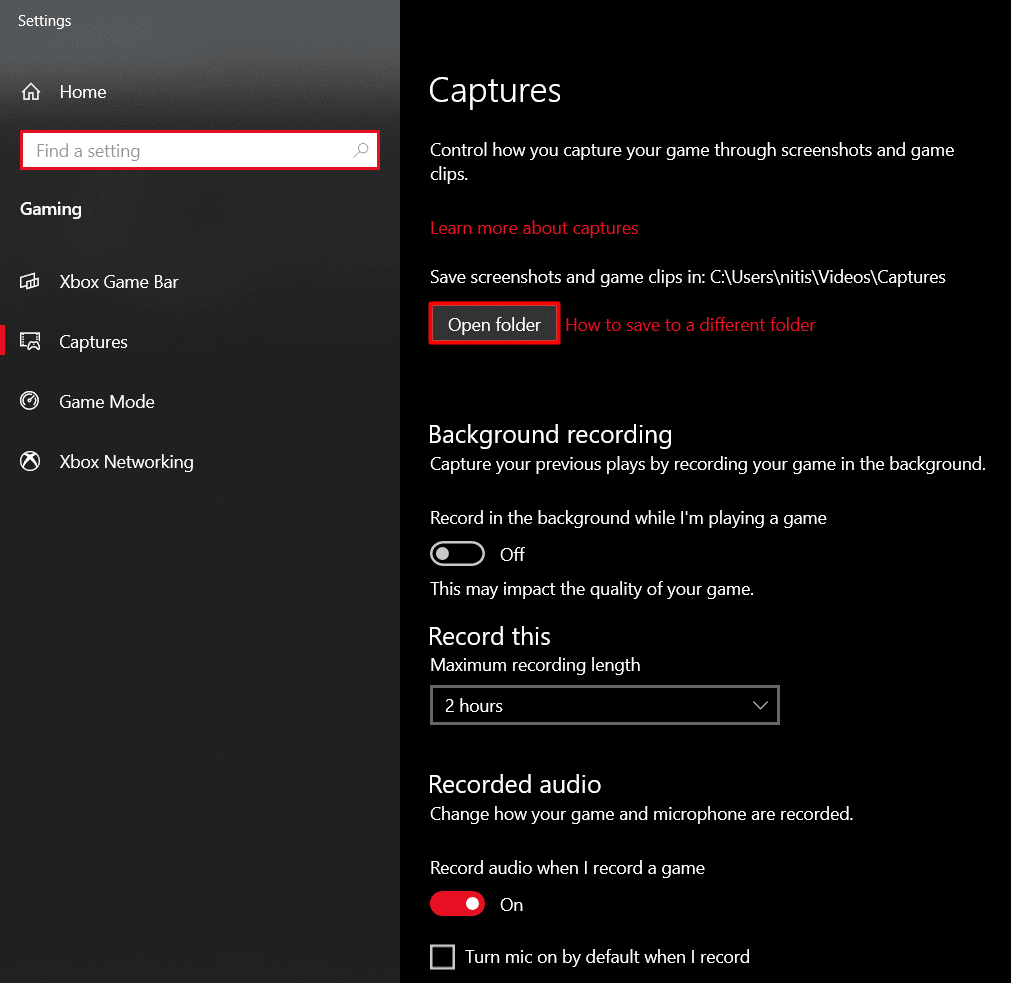
4. Kliki Ava kaust and now you can see everything you have recorded so far using Game Bar.
Samuti loe: Kuidas salvestada ekraani Windows 11-s
How Do I Make My Xbox Game Bar Record in Chrome
Apart from using Xbox Game Bar screen recording for gaming, you can also use it on the Google Chrome browser. This way you can create tech tutorials with just a few steps.
1. Käivita Google Chrome'i brauser on your Windows 10 laptop.
2. press Windows + G keys simultaneously to launch Xbox Game Bar.
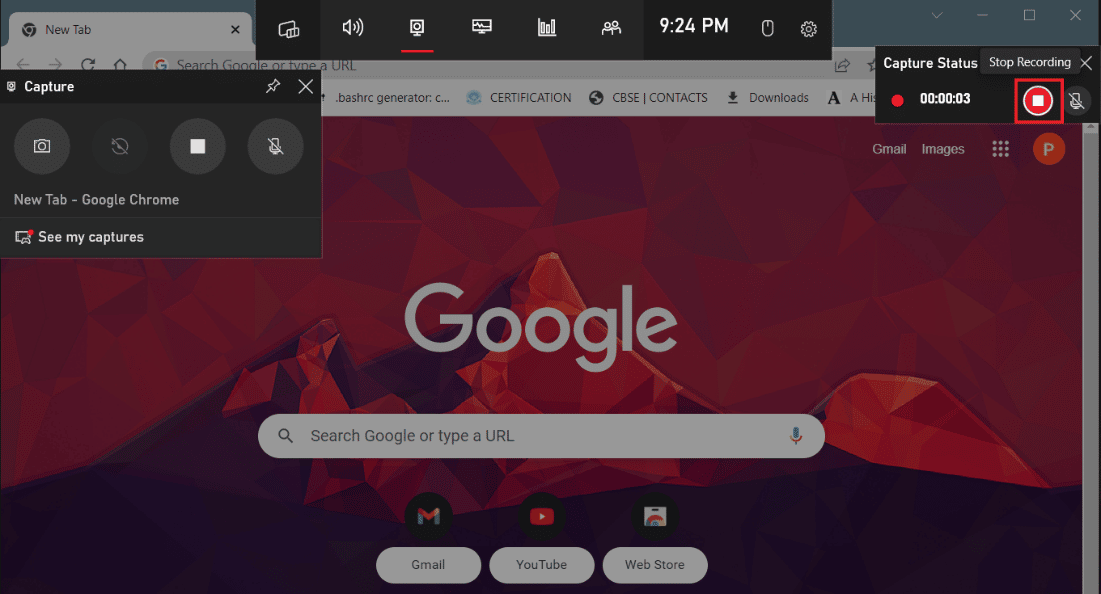
3. Järgmisena klõpsake nuppu Jäädvustuse ikoon ülaosas olevalt tööriistaribalt.
![]()
4. Valige nüüd Start recording icon from menu on the left and begin with your video.
![]()
5. Once you are happy, click on Lõpeta salvestamine.
Korduma kippuvad küsimused (KKK)
Q1. Is Xbox Game Bar good for recording?
Ans. Yes, Xbox Game Bar is a good option to record your screen.
Q2. How many hours can Xbox Game Bar record?
Ans. With Xbox Game Bar record, you can record for up to 30 minuti as it will automatically turn off at this point.
Q3. Why is Xbox Game bar not recording my audio?
Ans. It is possible that you might have disabled your microphone unintentionally. In this case, you can turn it on by using Windows + Alt + M keys shortcut.
Q4. How do I record my screen on Windows 10 with Xbox Game Bar?
Ans. You can learn how to record on Windows 10 using Xboxi mänguriba by using the above-mentioned methods.
Soovitan:
We hope this article helped you in understanding how Xbox Game Bar screen recording works. If so, leave your comments and suggestions in the comments down below and let us know what you would like to read next.