Fix Windows 10 install Fails With Error C1900101-4000D

Fix Windows 10 install Fails With Error C1900101-4000D: If you’re trying to upgrade to Windows 10 but the install fails with error code C1900101-4000D then don’t worry as it occurs because the Windows installer cannot access important files required for installation. Sometimes this error is also caused because of a conflict during installation but you can’t be sure as there is no error message accompanying this error.
0xC1900101-0x4000D
The installation failed in the SECOND_BOOT phase with an error during MIGRATE_DATA operation
While there is no definite fix for this issue but users seem to be recommending a clean installation of Windows 10 which should only be used as a last resort. So without wasting any time let’s see How to Fix Windows 10 install Fails With Error C1900101-4000D with the help of below-listed troubleshooting guide.
Fix Windows 10 install Fails With Error C1900101-4000D
Aurrebaldintzak
a)Make sure to Update all drivers, including graphic, sound, BIOS, USB devices, printers, etc before the installing Windows 10.
b)Remove all external USB devices such as pen drive, external hard disk, USB keyboard & mouse, USB printer and all peripherals.
c)Use an ethernet cable instead of WiFi and disable WiFi until the update is complete.
Method 1: Temporarily Disable Antivirus and Firewall before attempting Upgrade
1. Egin klik eskuineko botoiarekin Birusen aurkako programaren ikonoa sistemaren erretilutik eta hautatu Desgaitu.

2.Ondoren, hautatu zein denbora-tartea Antibirusak desgaituta jarraituko du.

Ohar: Aukeratu ahalik eta denborarik txikiena adibidez 15 minutu edo 30 minutu.
3.Once done, again try to upgrade your PC and check if the error resolves or not.
4.Type control in the Windows Search then click on Kontrol-panela. bilaketaren emaitzatik.

5.Ondoren, egin klik Sistema eta segurtasuna.
6.Ondoren, egin klik Windows Firewall.

7.Orain ezkerreko leihoaren paneletik egin klik Aktibatu edo desaktibatu Windows Firewall.

8.Hautatu Desaktibatu Windows Firewall eta berrabiarazi ordenagailua. Again try to upgrade your PC and see if you’re able to Fix Windows 10 install Fails With Error C1900101-4000D.
Goiko metodoak ez badu funtzionatzen, ziurtatu urrats berdinak jarraitzen dituzula zure Firewall berriro aktibatzeko.
Method 2: Remove any hyphens from your computer or machine name
1.Sakatu Windows tekla + R eta ondoren idatzi sysdm.cpl eta sakatu Sartu irekitzeko Sistemaren propietateak.

2.Make sure you’re under Ordenagailuaren izena fitxa ondoren egin klik Aldatu beheko botoia.
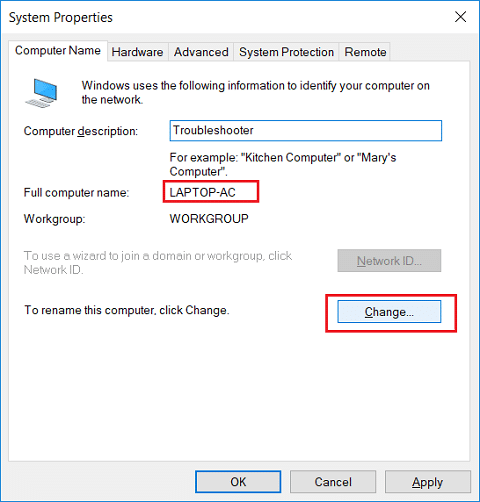
3.Make sure your machine name is simple no periods or hyphens or dashes.
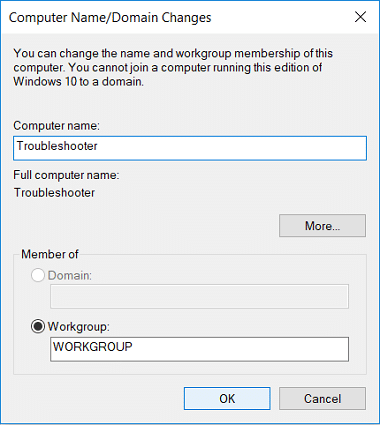
4.Click OK then Apply followed by OK.
5.Berrabiarazi ordenagailua aldaketak gordetzeko.
3. metodoa: Ziurtatu Windows eguneratuta dagoela
1.Sakatu Windows tekla + I eta gero hautatu Eguneratzea eta segurtasuna.

2.Ondoren, egin klik berriro Egiaztatu eguneratzeak eta ziurtatu zain dauden eguneratzeak instalatzen dituzula.

3. Eguneraketak instalatu ondoren, berrabiarazi ordenagailua eta ikusi gai zaren Fix Windows 10 install Fails With Error C1900101-4000D.
4. metodoa: Egin abio garbi bat
This would make sure that if any 3rd party application is conflicting with Windows update then you will be able to successfully install Windows Updates inside Clean Boot. Sometimes 3rd party software can conflict with Windows Update and therefore cause Windows Update to be Stuck. In order, Fix Windows 10 install Fails With Error C1900101-4000D, zure ordenagailuan abio garbi bat egin eta arazoa urratsez urrats diagnostikatu behar duzu.

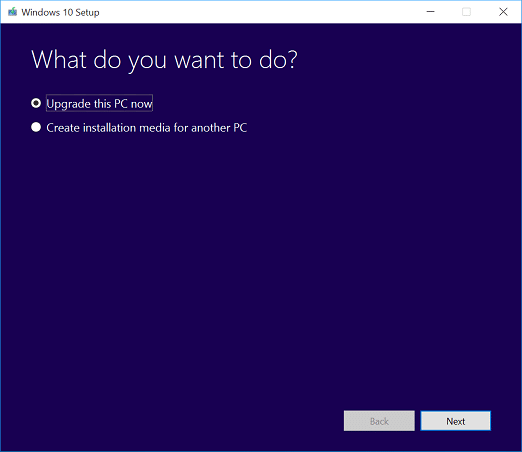
Method 5: Upgrade using Windows 10 Media Creation Tool
1.Download Media Creation Tool here.
2.Backup your data from system partition and save your license key.
3.Start the tool and choose to Upgrade this PC now.
4.Accept the license terms.
5.After the installer is ready, choose to Keep personal files and apps.
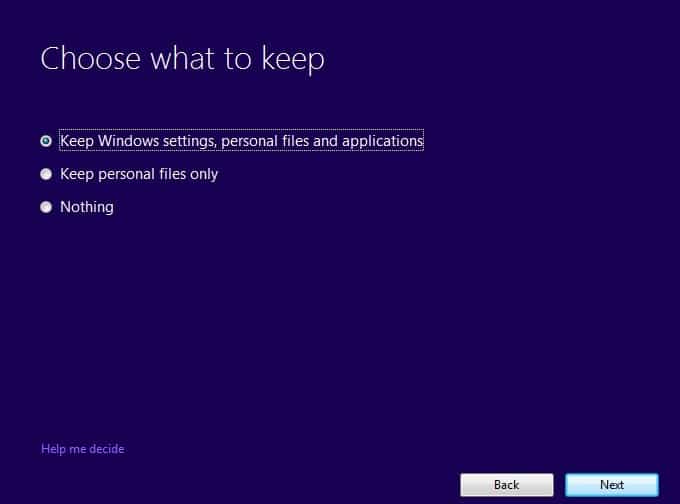
6.The PC will restart few times and your PC would be successfully upgraded.
6. metodoa: Exekutatu SFC eta DISM
1.Sakatu Windows tekla + X eta gero egin klik Komando-gonbita (administratzailea).

2.Orain idatzi hau cmd-en eta sakatu Sartu:
Sfc /scannow sfc /scannow /offbootdir=c: /offwindir=c:windows (Goian huts egiten badu, saiatu hau)

3.Itxaron goiko prozesua amaitu arte eta amaitutakoan zure ordenagailua berrabiarazi.
4.Ireki berriro cmd eta idatzi komando hau eta sakatu Sartu bakoitzaren ondoren:
a) Dism /Online /Cleanup-Image /CheckHealth b) Dism /Online /Cleanup-Image /ScanHealth c) Dism /Online /Cleanup-Image /RestoreHealth

5.Utzi DISM komandoa exekutatzen eta itxaron amaitu arte.
6. Goiko komandoak ez badu funtzionatzen, saiatu behean:
Dism /Image:C:offline /Cleanup-Image /RestoreHealth /Source:c:testmountwindows Dism /Online /Cleanup-Image /RestoreHealth /Source:c:testmountwindows /LimitAccess
Ohar: Ordeztu C:RepairSourceWindows zure konponketa-iturriaren kokapenarekin (Windows instalazioa edo berreskuratzeko diskoa).
7.Berrabiarazi ordenagailua aldaketak gordetzeko eta ikusteko gai zaren Fix Windows 10 install Fails With Error C1900101-4000D.
Method 7: Reset Windows Updates Components
1.Sakatu Windows tekla + X eta gero hautatu Agindua Galdetu (Admin).
2.Orain idatzi komando hauek Windows Update Zerbitzuak gelditzeko eta sakatu Sartu bakoitzaren ondoren:
net stop wuauerv
net stop cryptSvc
sare stop bits
net stop msiserver

3.Ondoren, idatzi komando hau SoftwareDistribution Folder izena aldatzeko eta sakatu Sartu:
ren C: WindowsSoftwareDistribution SoftwareDistribution.old
ren C: WindowsSystem32catroot2 catroot2.old

4.Azkenik, idatzi komando hau Windows Update Zerbitzuak abiarazteko eta sakatu Sartu bakoitzaren ondoren:
net start wuauserv
net start cryptSvc
Hasierako bitarteko sareak
net start msiserver

5.Berrabiarazi ordenagailua aldaketak gordetzeko eta egiaztatzeko gai zaren Fix Windows 10 install Fails With Error C1900101-4000D.
Method 8: Delete Registry for Mounted Images
1.Sakatu Windows tekla + R eta ondoren idatzi regedit eta sakatu Sartu Erregistro-editorea irekitzeko.

2.Nabigatu erregistro-gako honetara:
HKEY_LOCAL_MACHINESOFTWAREMicrosoftWIMMountMounted Images
3.Select Mounted Images then in the right window pane right-click on (Default) and select Delete.
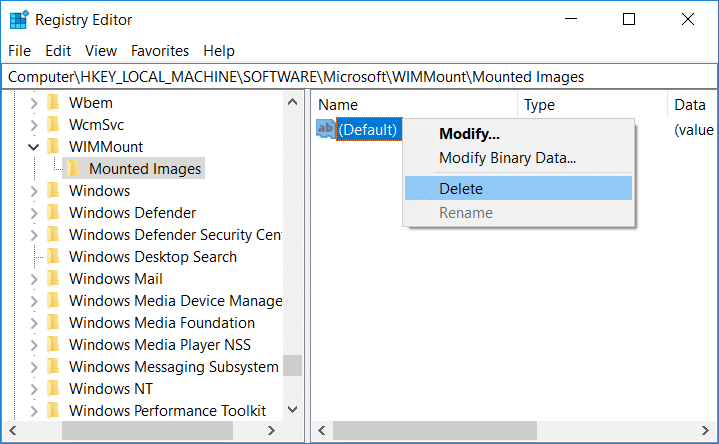
4.Irten Erregistro Editorea eta berrabiarazi ordenagailua aldaketak gordetzeko.
Method 9: Disable Wi-Fi Adapter and CD/DVD Drive
1.Sakatu Windows tekla + R eta ondoren idatzi devmgmt.msc eta sakatu Sartu Gailu-kudeatzailea irekitzeko.

2.Expand DVD/CD-ROM driveseta egin klik eskuineko botoiarekin zure gainean CD/DVD unitatea eta hautatu Desgaitu gailua.

3.Similarly, expand Network adapters then right-click on your WiFi egokitzailea eta hautatu Desgaitu gailua.
4.Again try to run Windows 10 setup and see if you’re able to Fix Windows 10 install Fails With Error C1900101-4000D.
Method 10: Run Malwarebytes and AdwCleaner
Malwarebytes eskaner eskaner indartsua da, arakatzaileen bahitzaileak, adwareak eta beste malware mota batzuk zure ordenagailutik kendu behar dituena. Garrantzitsua da Malwarebytes-ek birusen aurkako softwarearekin batera exekutatuko dela gatazkarik gabe. Malwarebytes Anti-Malware instalatzeko eta exekutatzeko, joan artikulu honetara eta jarraitu urrats guztiak.
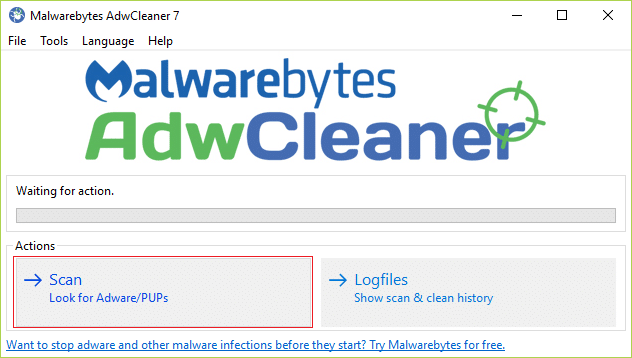
1.Download AdwCleaner from this link.
2.Once the download is complete, double-click on the adwcleaner.exe file programa exekutatzeko.
3. Egin klik "Nago ados”Botoia accept the license agreement.
4.On the next screen, click the Eskaneatu botoia under Actions.
5.Now, wait for the AdwCleaner to search for PUPs and other malicious programs.
6.Eskaneatzea amaitutakoan, egin klik Garbitu in order to clean your system of such files.
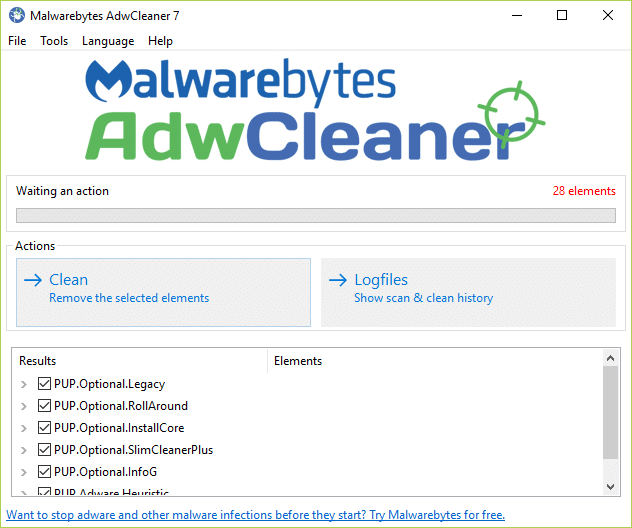
7.Save any work you might be doing as your PC will need to reboot, click OK to reboot your PC.
8.Once the computer reboots, a log file will open which will list all of the files, folders, registry keys, etc that were removed in the previous step.
Gomendatzen da:
Hori da arrakastaz lortu duzuna Fix Windows 10 install Fails With Error C1900101-4000D baina oraindik gida honi buruzko galderarik baduzu, galdetu lasai iruzkinen atalean.