Change Diagnostic and Usage Data Settings in Windows 10

Change Diagnostic and Usage Data Settings in Windows 10: You must be aware of the Diagnostic and Usage Data Settings which allows Microsoft to collect performance and usage information which helps Microsoft to troubleshoot issues with Windows and improve their product & services and resolve bugs as soon as possible. But the best part of this feature is that you can actually control the amount of diagnostic and usage data sent to Microsoft from your system.
You can select to only send basic diagnostic information which contains info about your device, its settings, and capabilities or you can select the Full diagnostic information which contains all the information about your system. You can also delete the Windows Diagnostic Data that Microsoft has collected from your device. Anyway, without wasting any time let’s see How to Change Diagnostic and Usage Data Settings in Windows 10 with the help of the below-listed tutorial.
Change Diagnostic and Usage Data Settings in Windows 10
مطمئن شوید که یک نقطه بازیابی را فقط در صورتی که مشکلی پیش بیاید ایجاد کنید.
The initial settings can be configured during the Windows Setup when you get to Choose privacy settings for your device simply enable the toggle for Diagnostics to select “Full” and leave it disabled if you want to set Diagnostic and usage data collection policy to “Basic”.
Method 1: Change Diagnostic and Usage Data Settings in Settings App
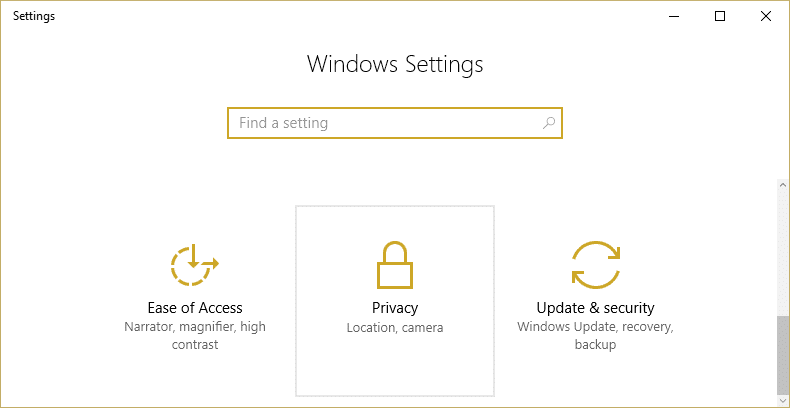
1. کلید Windows + I را فشار دهید تا باز شود تنظیمات سپس کلیک کنید نماد حریم خصوصی
2.از منوی سمت چپ انتخاب کنید تشخیص و بازخورد
3.Now either select Basic or Full for the Diagnostic and usage data.
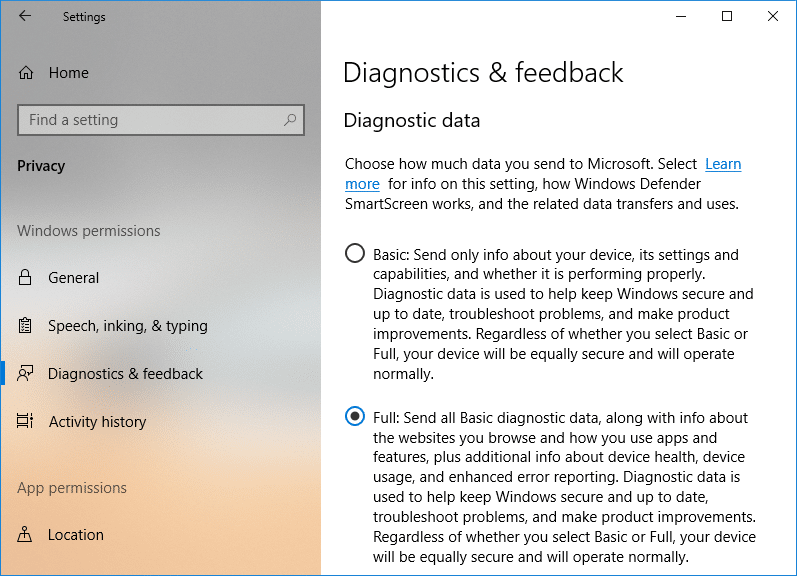
توجه داشته باشید: By default, the setting is set to “Full”.
4.Once finished, close the setting and reboot your PC.
همچنین خواندن: آیا Quest Diagnostics نیاز به پیادهروی دارد؟
Method 2: Change Diagnostic and Usage Data Settings in Registry Editor
1. Windows Key + R را فشار دهید و سپس تایپ کنید regedit را و Enter بزنید تا باز شود ویرایشگر رجیستری.

2. به کلید رجیستری زیر بروید:
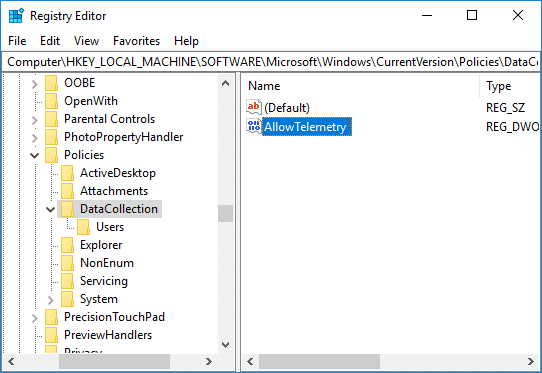
HKEY_LOCAL_MACHINESOFTWAREMicrosoftWindowsCurrentVersionPoliciesDataCollection
3. حتما انتخاب کنید DataCollection سپس در پنجره سمت راست روی آن دوبار کلیک کنید AllowTelemetry DWORD.
4.Now make sure to change the value of the AllowTelemetry DWORD according to:
0 = Security (Enterprise and Education editions only)
1 = Basic
2 = Enhanced
3 = Full (Recommended)
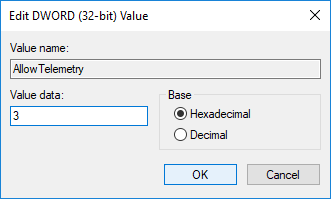
5.Once done, make sure to click OK and close registry editor.
Method 3: Change Diagnostic and Usage Data Settings in Group Policy Editor
1. Windows Key + R را فشار دهید و سپس تایپ کنید gpedit.msc را و Enter بزنید تا باز شود ویرایشگر خط مشی گروه
2- به مسیر زیر بروید:
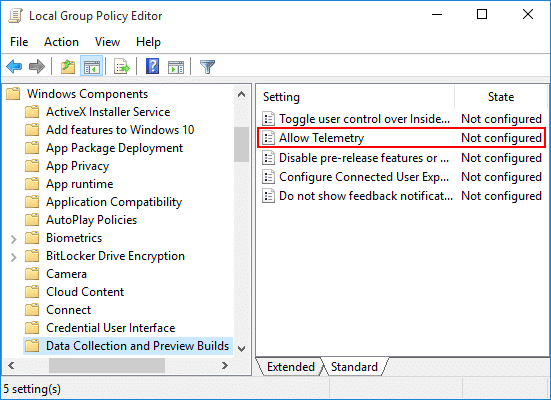
Computer ConfigurationAdministrative TemplatesWindows ComponentsData Collection and Preview Builds
3.Make sure to select Data Collection and Preview Builds then in right window pane double-click on Allow Telemetry Policy.
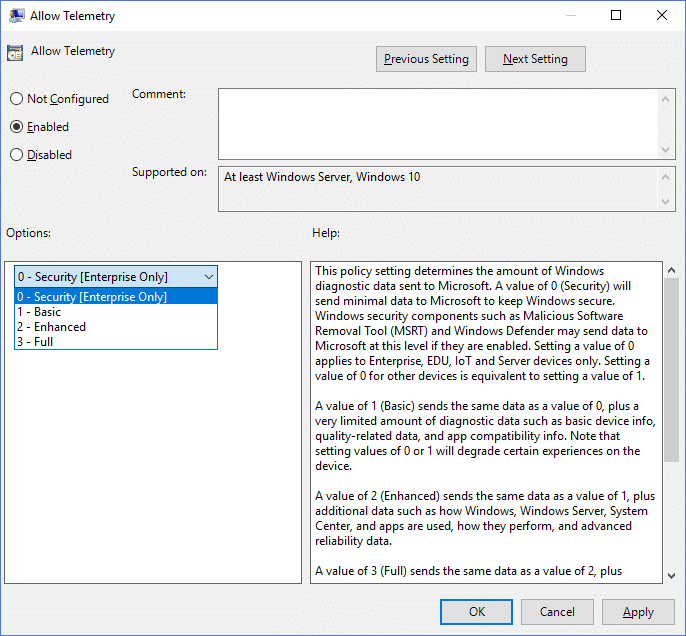
4.Now to restore default diagnostic and usage data collection setting simply select Not Configured or Disabled for Allow Telemetry policy and click OK.

5.If you want to force a diagnostic and usage data collection setting then گزینه Enabled را انتخاب کنید for Allow Telemetry policy and then under Options select Security (Enterprise Only), Basic, Enhanced, or Full.
6. روی Apply و سپس OK کلیک کنید.
7.When finished, reboot your PC to save changes.
توصیه می شود:
این همان چیزی است که شما با موفقیت یاد گرفته اید How to Change Diagnostic and Usage Data Settings in Windows 10 اما اگر هنوز سؤالی در مورد این آموزش دارید، در قسمت نظرات از آنها بپرسید.