Windows 10 has a serious bug since it’s inception which makes text blurred on users PC and the problem is faced system-wide by the user. So it doesn’t matter if you go to System Settings, Windows Explorer or Control Panel, all the text will be somewhat blurred because of the DPI Scaling Level for Displays feature in Windows 10. So today we are going to discuss How To Change DPI Scaling Level for Displays in Windows 10.
تغییر سطح مقیاس DPI برای نمایشگرها در ویندوز 10
مطمئن شوید که یک نقطه بازیابی را فقط در صورتی که مشکلی پیش بیاید ایجاد کنید.
Method 1: Change DPI Scaling Level for Displays Using Settings App
1. Press Windows Key + I to open Settings and then click on سیستم.

2. From the left-hand menu, make sure to select نمایش دادن.
3. If you have more than one display, then select your display at the top.
4. اکنون تحت اندازه متن، برنامه ها و موارد دیگر را تغییر دهید، را انتخاب کنید DPI percentage از کشویی
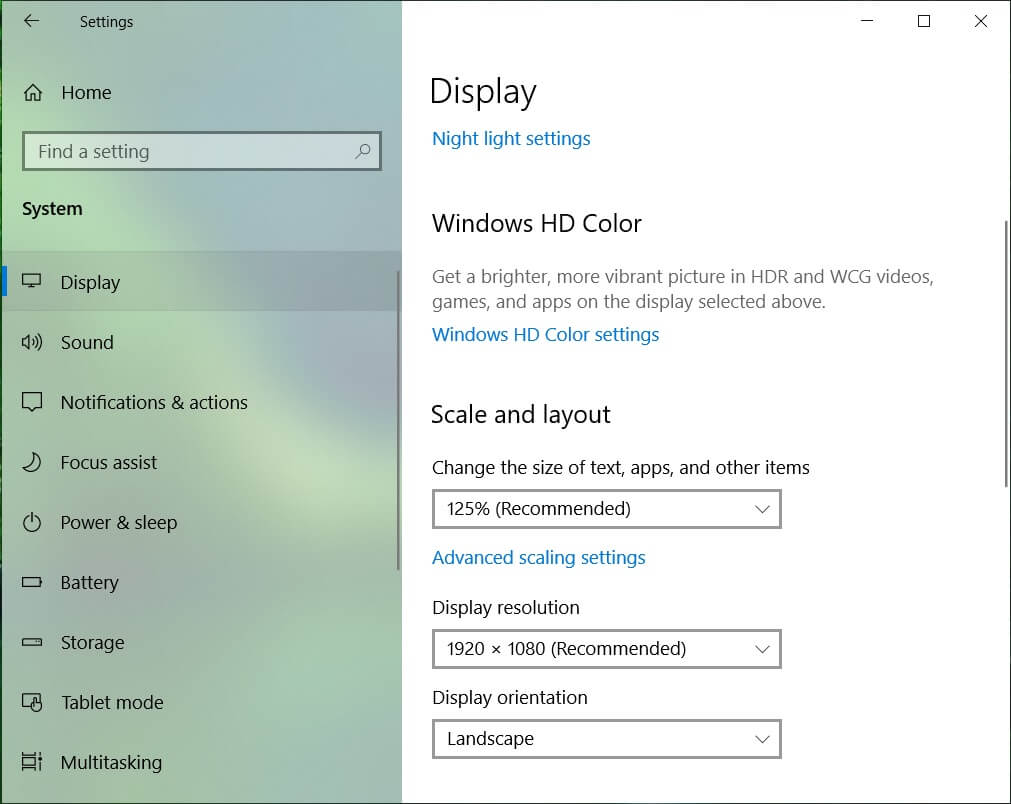
5. Click on the Sign out now link to save changes.
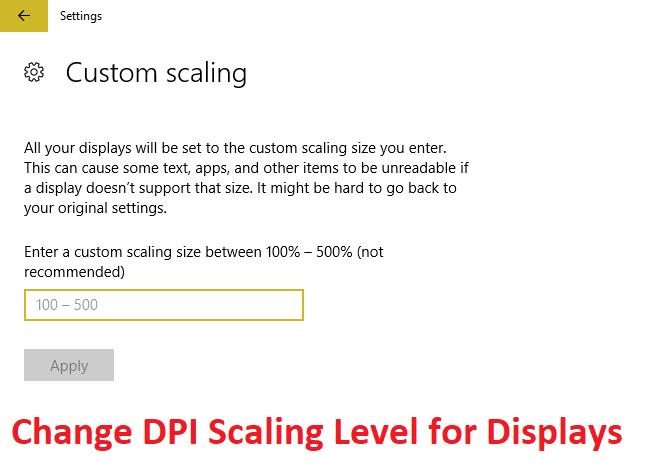
Method 2: Change Custom DPI Scaling Level for All Displays in Settings
1. Press Windows Key + I to open Settings and then click on سیستم.
2. From the left-hand menu, make sure to select نمایش دادن.
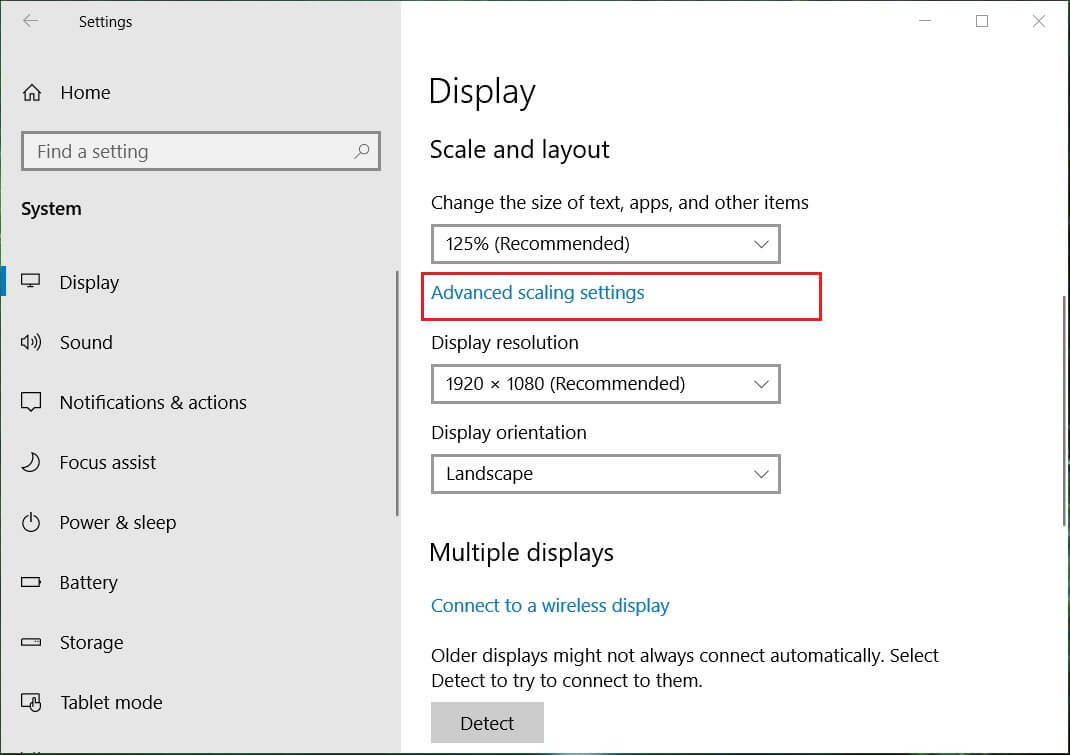
3. Now under Scale and layout click Custom scaling.
4. Enter a custom scaling size between 100 500٪ -٪ for all the displays and click on Apply.

5. Click on Sign out now to save changes.
Method 3: Change Custom DPI Scaling Level for All Displays in Registry Editor
1. Windows Key + R را فشار دهید و سپس تایپ کنید regedit را و وارد شوید

2. Navigate to the following Registry key:
HKEY_CURRENT_USERControl PanelDesktop
3. Make sure you have highlighted دسکتاپ in the left window pane and then in the right window pane double click on LogPixels DWORD.
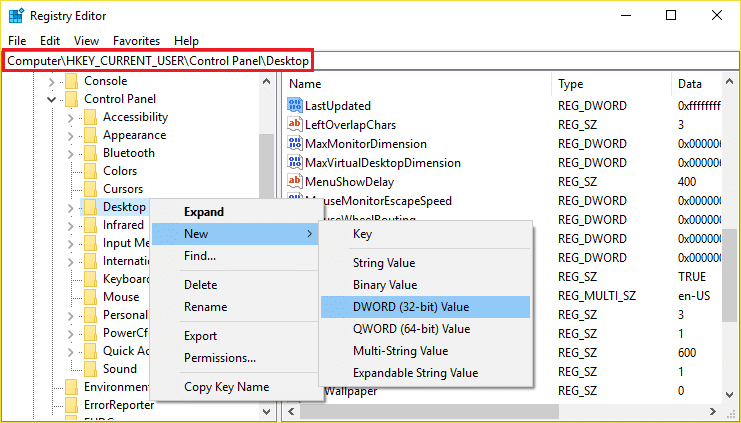
توجه داشته باشید: If the above DWORD doesn’t exist, you need to create one, right-click on Desktop and select New > DWORD (32-bit) value. Name this newly created DWORD as LogPixels.
4 انتخاب کنید اعشاری under Base then change its value to any of the following data and then click OK:
| DPI Scaling Level |
داده های ارزش |
| Smaller 100% (default) | 96 |
| متوسط 125% | 120 |
| Larger 150% | 144 |
| Extra Large 200% | 192 |
| Custom 250% | 240 |
| Custom 300% | 288 |
| Custom 400% | 384 |
| Custom 500% | 480 |
![]()
5. Again make sure Desktop is highlighted and in the right window pane double click on Win8DpiScaling.
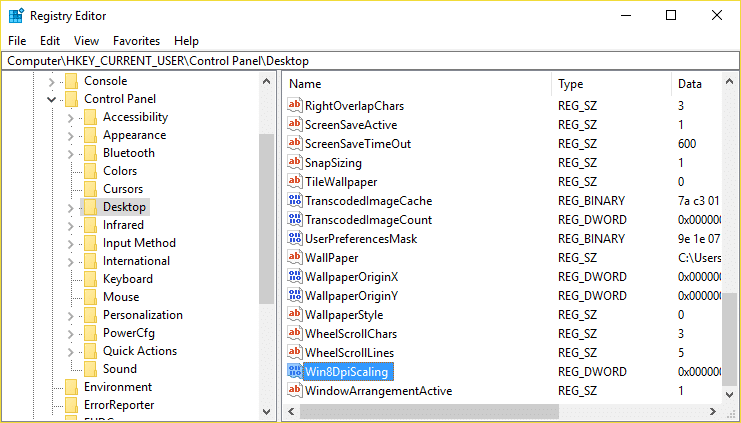
توجه داشته باشید: If the above DWORD doesn’t exist, you need to create one, right-click on Desktop and select New > DWORD (32-bit) value. Name this DWORD as Win8DpiScaling.
6. Now change its value to 0 if you have chosen 96 from the above table for LogPixels DWORD but if you have chosen any other value from the table then set its مقدار تا 1 است.
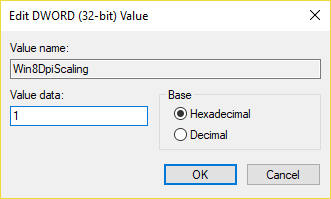
7. Click OK and close Registry Editor.
8. برای ذخیره تغییرات کامپیوتر خود را ریبوت کنید.
توصیه می شود:
این همان چیزی است که شما با موفقیت یاد گرفته اید How To Change DPI Scaling Level for Displays in Windows 10 اما اگر هنوز سوالی در مورد این پست دارید، در قسمت نظرات بپرسید.
")
