Skype is one of the most popular communication platforms. However, there has been a need that Skype has not addressed for some time i.e., sharing sound from our devices with others. We had to rely on third-party applications previously. Only the sound system sharing was available in Skype update 7.33. Later, this option vanished, and the only way to share a screen with sound was to share the entire screen, which too might face lag and other issues. In this article, we will guide you to fix Skype stereo mix not working problem in Windows 10.
How to Fix Skype Stereo Mix Not Working in Windows 10
Your PC microphone, whether it is an internal model or an external USB headset, becomes ineffective as a transmitting source when it is pushed against another speaker. Even if you do not detect a drop in sound quality, irritating audio feedback is always a possibility. Following are some precautions you should take when you are trying اسکایپ Stereo mix.
- When you are on a Skype discussion, it is more beneficial to change system sound input settings so that your Skype friends hear what you hear via your PC speakers.
- It is not straightforward to route audio on Windows 10, and the audio/sound driver that is installed is often the most difficult part. You will need to find out how to get applications to listen to a device once you have found out how to route audio and get programs to listen to it. This allows anybody you are contacting to hear both your voice and the audio from your PC, such as music or a video.
- By default, sound devices do not connect system audio to the mic feed. This may be accomplished using software and hardware. If your sound equipment permits it, you will need to utilize the stereo mix option یا چیزی شبیه آن
- If not, you will need to look for third-party virtual audio software that can perform the same thing.
Why is Skype Stereo Mix Not working?
There could be several reasons why you are having trouble with Stereo Mix.
- Damaged or loose cable connections for sound.
- Audio driver issue.
- Incorrect software settings.
Usually, this is a minor issue that can be readily resolved. To discover how to solve Stereo Mix not working, you do not need to be a tech whiz. Continue reading to learn about all possible options for resolving the problem of Skype stereo mix issue to get back to recording audio.
Method 1: Basic Troubleshooting
Before going through the methods to fix your Skype stereo mix not working problem, let us perform some basic hardware troubleshooting.
1. قطع شدن your microphone and speaker from the PC.
2. Now, check for any damaged wires or cables. If found, then آنها را جابجا کن or switch to a new device.
3. سرانجام ، connect your microphone and speaker to your PC properly.
Method 2: Reset Default Audio Device
For your Stereo mix to work properly, your sound has to go via sound card, and using HDMI audio device will bypass this. It might be possible that your HDMI device is selected as the default device which would prevent Stereo Mix from working. Follow the below steps to set your speakers as default:
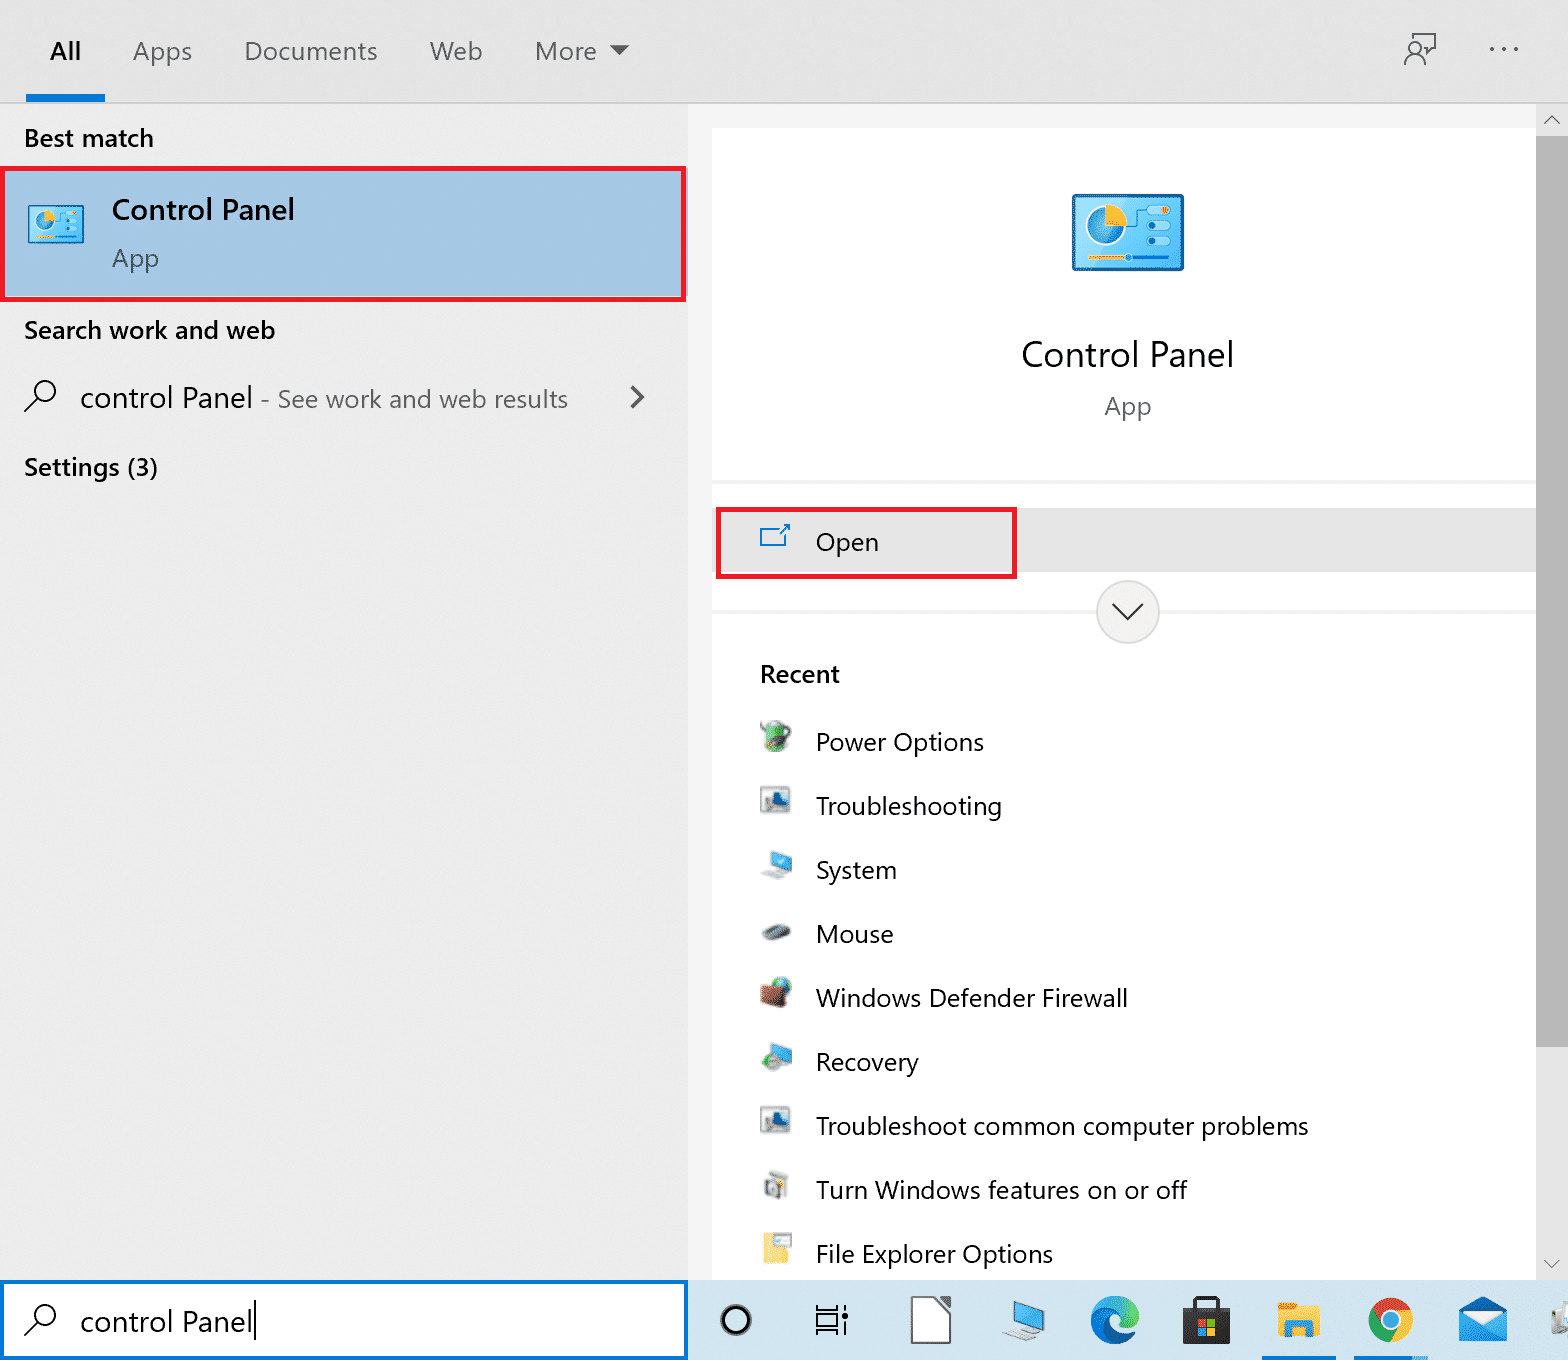
1 مطبوعات Windows + Q keys با هم برای باز کردن جستجوی ویندوز منو.
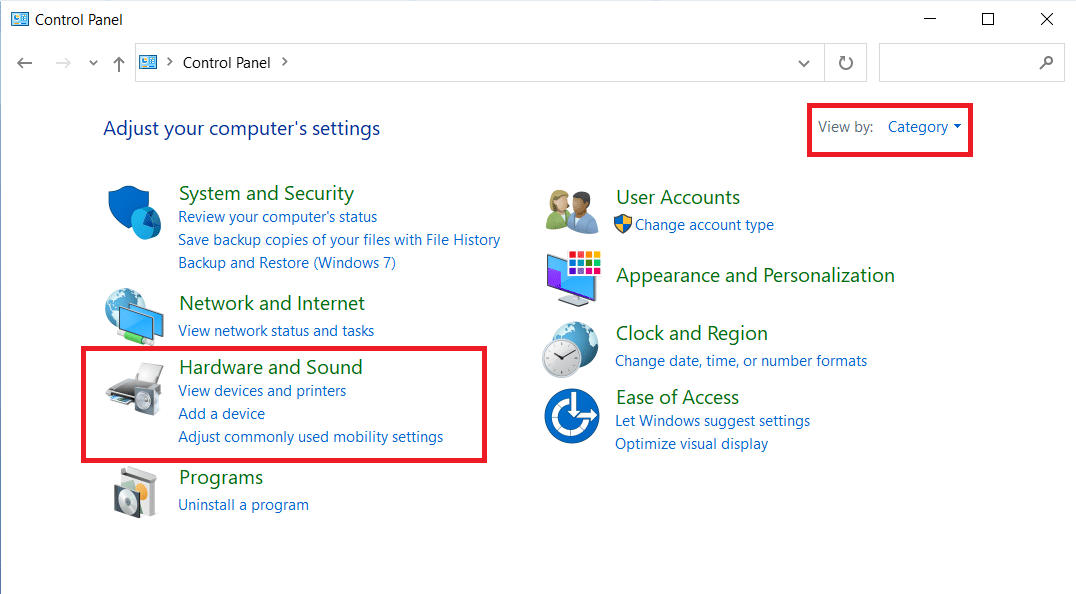
2. نوع صفحه کنترل in the search bar and click باز کن در صفحه سمت راست
3 تنظیم View by: > Category و کلیک بر روی سخت افزار و صدا، همانطور که نشان داده شده است.
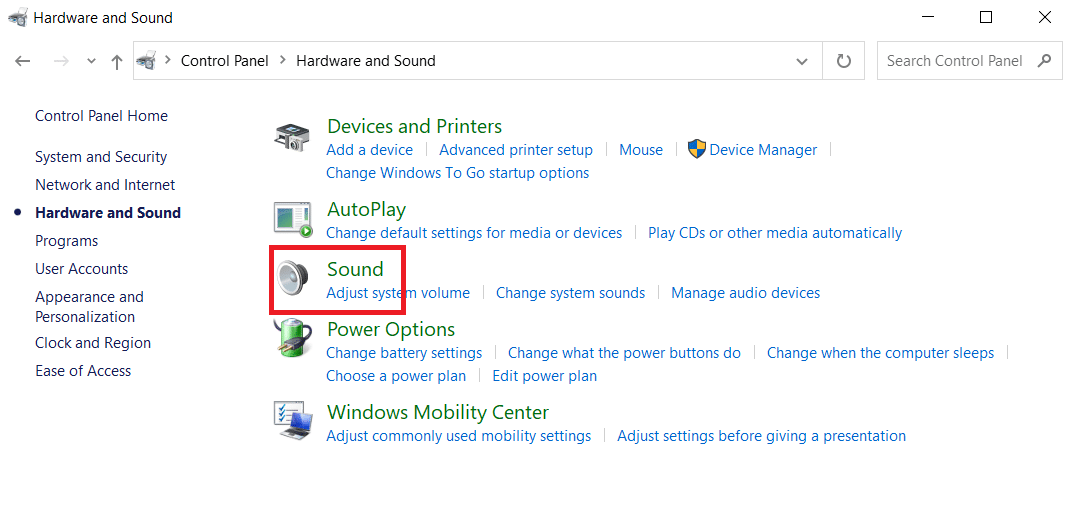
4 حالا روی کلیک کنید صدا.
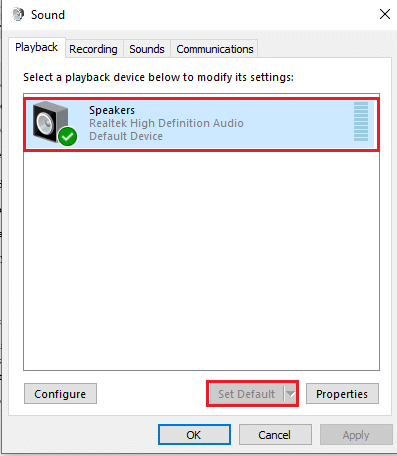
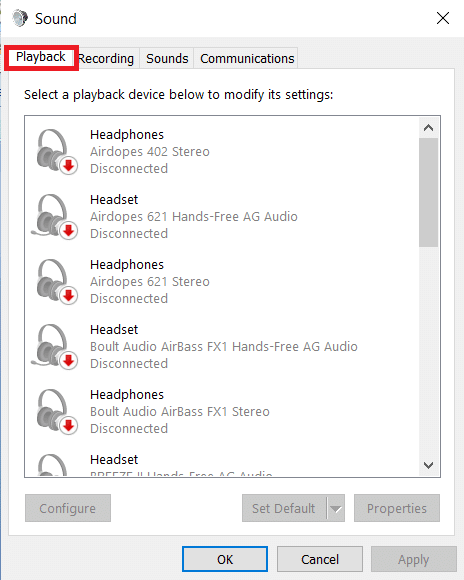
5. در پخش tab, choose the speaker you need to set as default and click the مجموعه پیش فرض را فشار دهید.
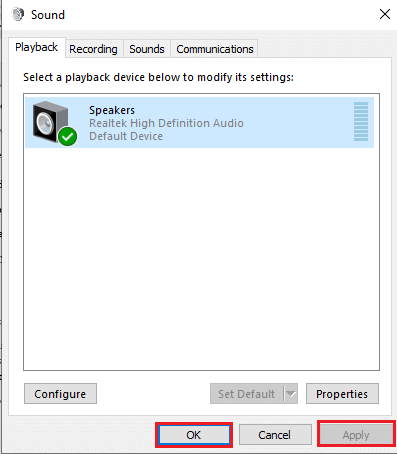
6. کلیک درخواست to save changes and then click OK.
همچنین خواندن: رفع عدم نصب دستگاه صوتی در ویندوز 10
Method 3: Unmute Mic or Speaker
It is possible that the problem of Skype stereo mix not working Windows 10 might be caused because microphone has been muted in your playback choices. This problem can be solved by unmuting your microphone, as follows:
1. بر روی کلیک راست کنید نماد بلندگو on the bottom-right corner in the نوار وظیفه.
2. را انتخاب کنید به نظر می رسد از منوی زمینه
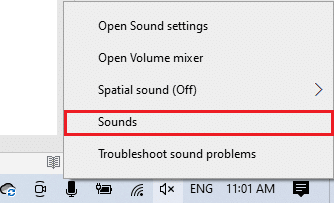
3 به سمت پخش تب.
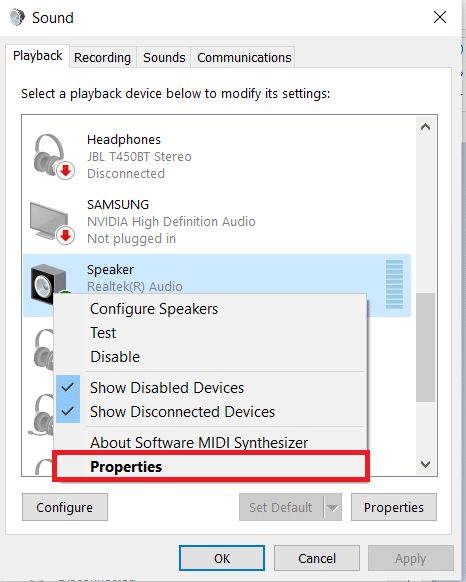
4. مکان خود را پیدا کنید دستگاه پخش پیش فرض and right-click it. Choose پروژه های ما، همانطور که نشان داده شده است.
5. تغییر وضعیت به سطح زبانه و بر روی کلیک کنید muted speaker icon to unmute the microphone.
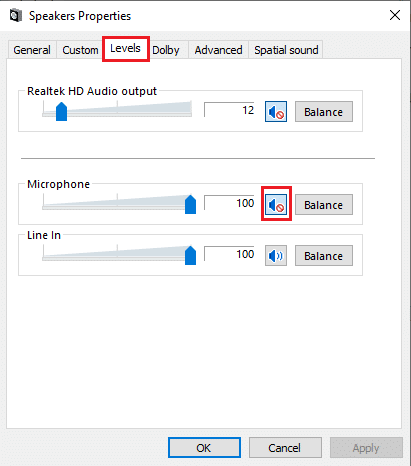
6. Also, click on the muted speaker دکمه برای Realtek HD Audio output to enable audio, as illustrated below.
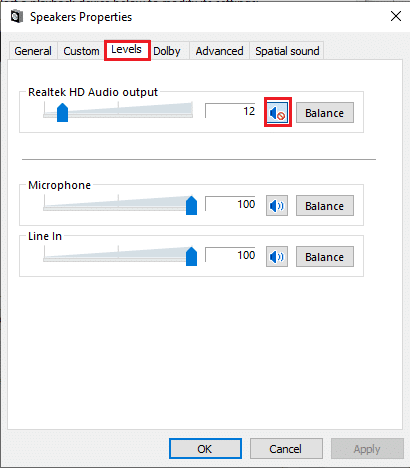
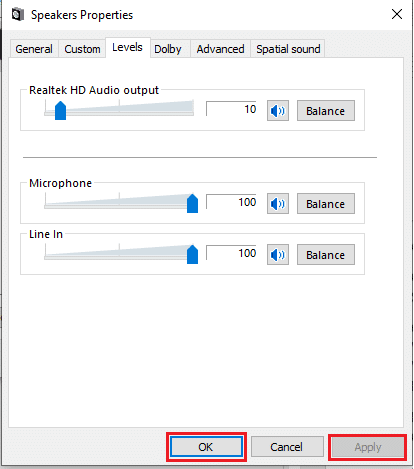
7. When you are finished, click on درخواست to save your changes and click the OK دکمه برای خروج
همچنین خواندن: نحوه رفع لکنت صوتی در ویندوز 10
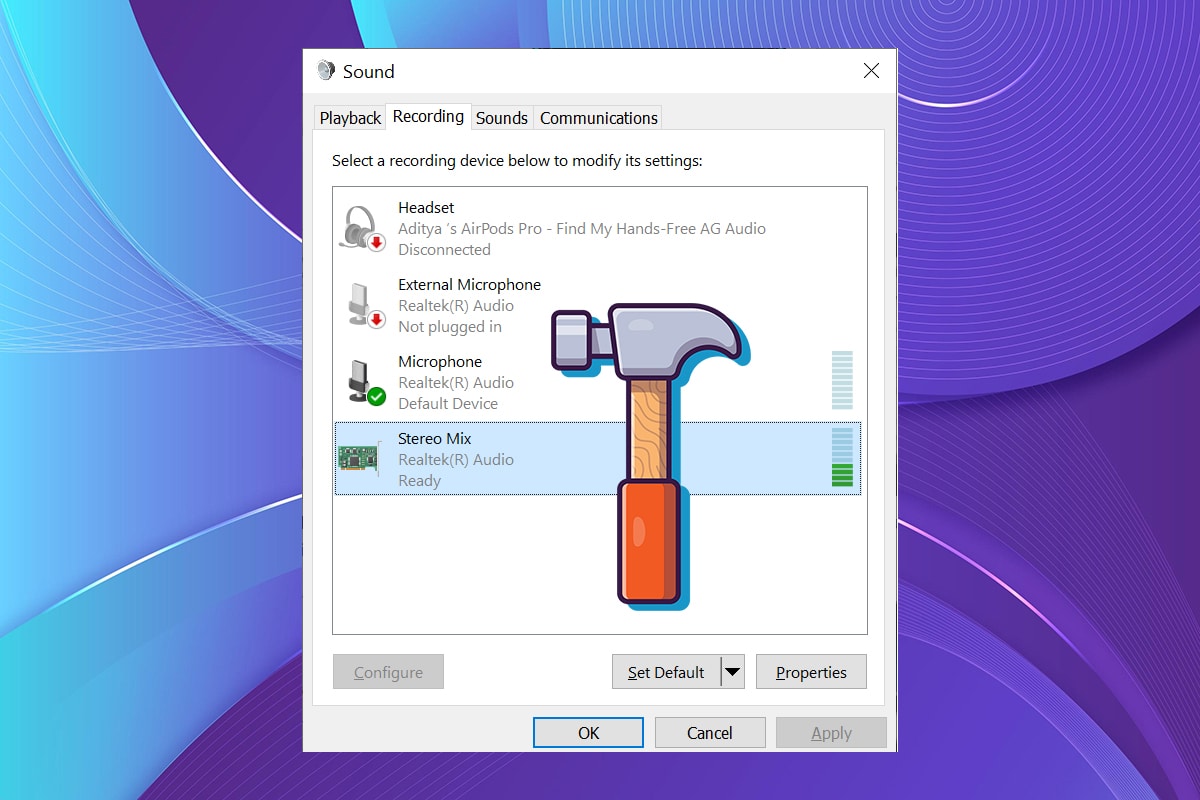
Method 4: Enable & Set up Stereo Mix
A setup error is nearly always the cause of Stereo Mix not functioning with headphones or speakers. It is possible that the software was never turned on, to begin with. As a result, the first remedy you should try is to revert that setting. You should also configure it as the default recording device to ensure that there are no problems when running the application.
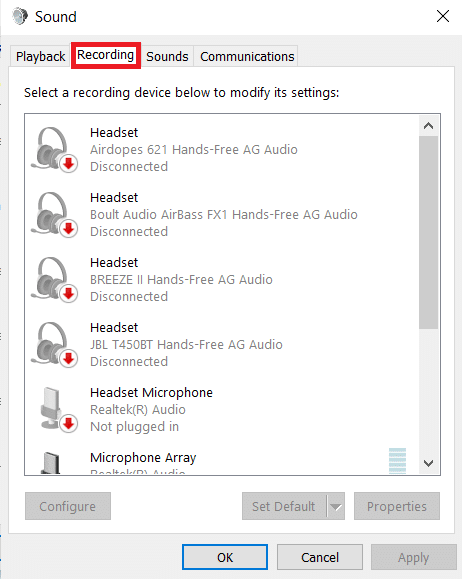
1 هدایت به کنترل پنل > سخت افزار و صدا > صدا as illustrated in روش 2.
2. تغییر وضعیت به برگه ضبط.
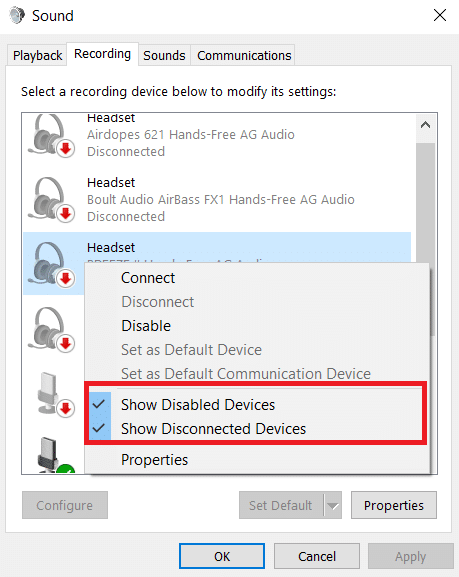
3A. Right-click on استریو میکس و کلیک بر روی فعال، همانطور که در زیر نشان داده شده است.

توجه داشته باشید: اگر نمی بینید استریو میکس, it must be hidden and you need to enable it as follows:
3B. Right-click an فضای خالی in the list and check the following گزینه های از منوی زمینه
- نمایش دستگاههای غیرفعال
- نمایش دستگاه های قطع شده
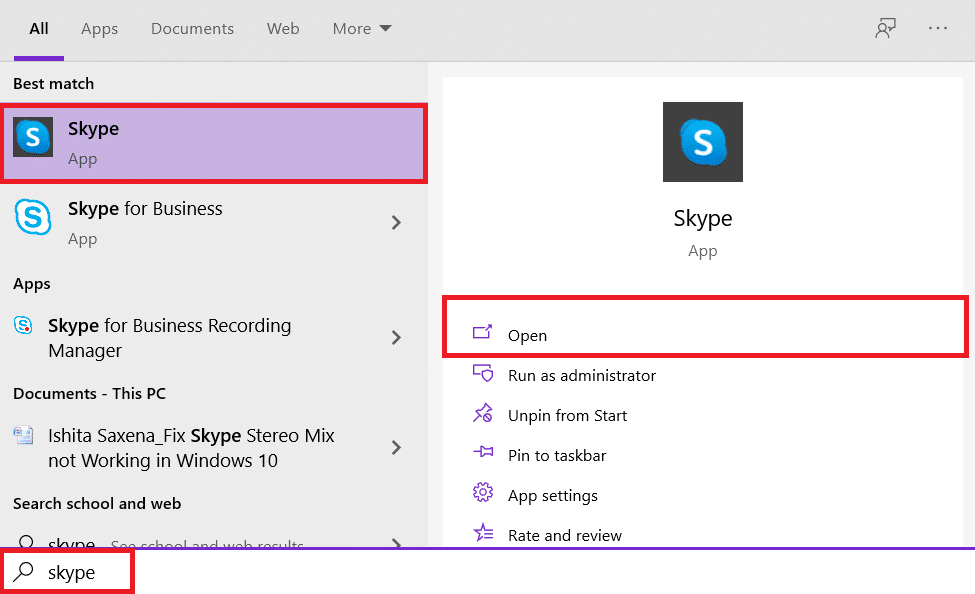
4. ضربه بزنید کلید ویندوز و نوع اسکایپ، سپس روی کلیک کنید باز کن.
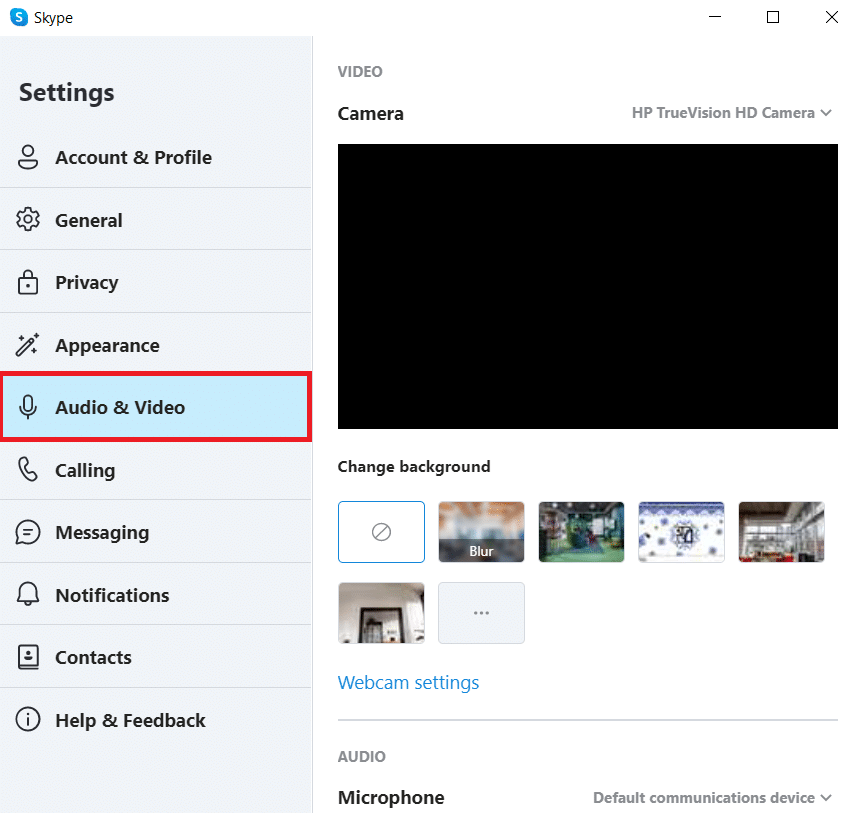
5. کلیک کنید بر روی نماد سه نقطه on the top-right corner and choose تنظیمات، همانطور که نشان داده شده است.

6. برو به صوتی و تصویری برگه زیر تنظیمات در سمت چپ
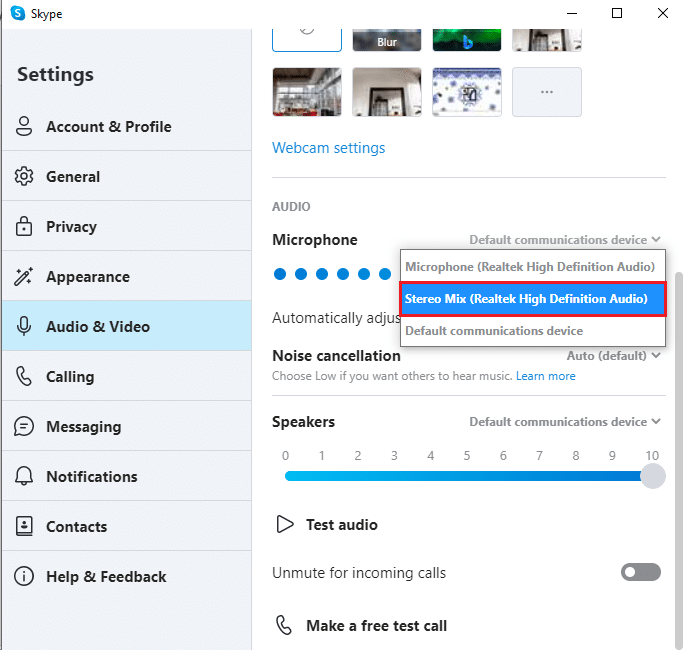
7. در را کلیک کنید Default communication device کشویی را انتخاب کنید Stereo Mix (Realtek(R) High Definition Audio) همانطور که در زیر نشان داده شده است.
همچنین خواندن: How to Use Skype Chat Text Effects
روش 5: درایور صوتی را به روز کنید
Another reason for this issue could be incompatible or out-of-date sound drivers. And, updating it to the most recent manufacturer-recommended version would be the best approach.
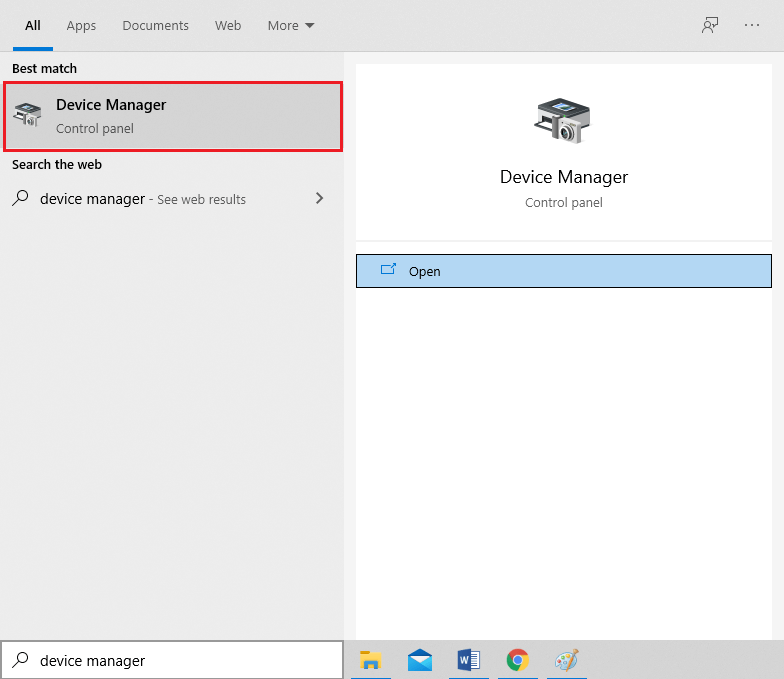
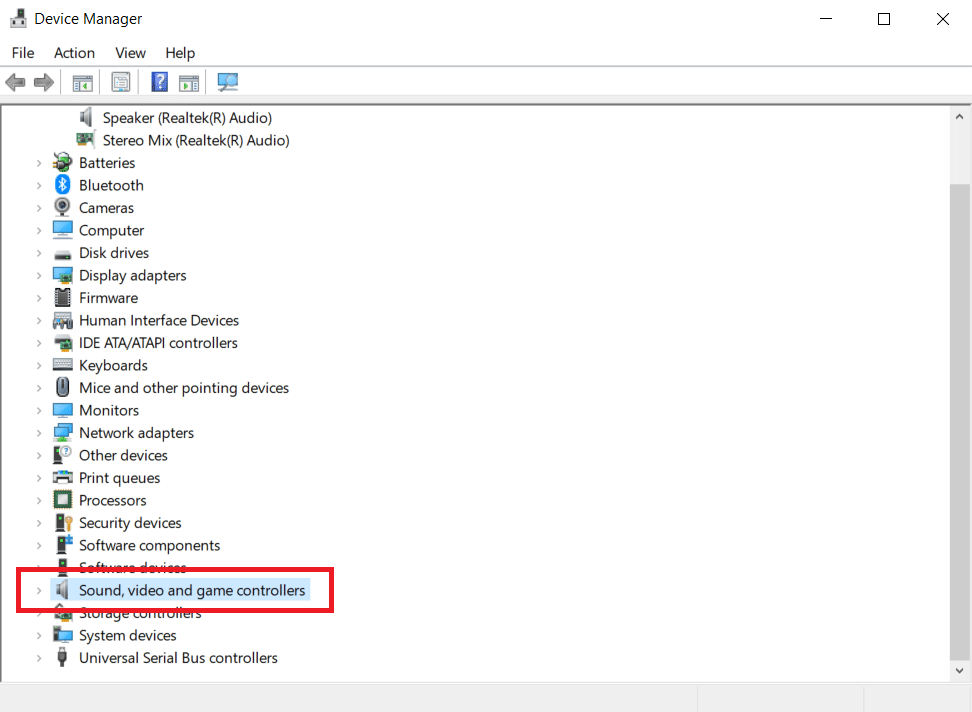
1. با کلیک بر روی آغازنوع مدیریت دستگاه، و ضربه بزنید کلید ورود.
2. بر روی دوبار کلیک کنید کنترل کننده های صدا ، فیلم و بازی برای گسترش آن.
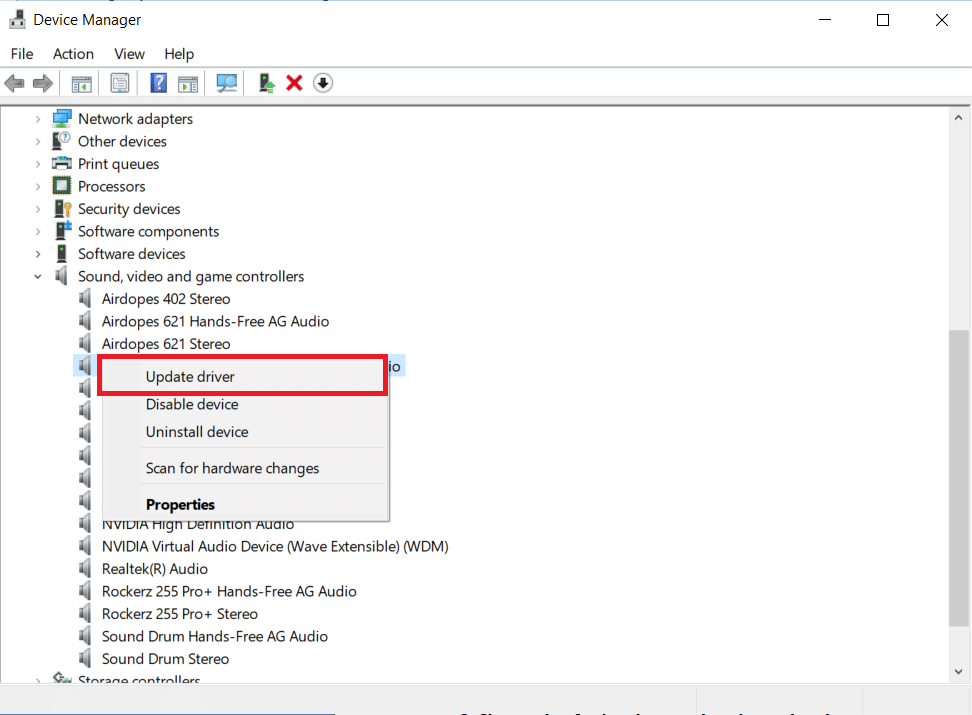
3. بر روی خود راست کلیک کنید درایور صوتی (به عنوان مثال Realtek(R) Audio) و انتخاب کنید به روزرسانی راننده از منوی زمینه
4. با کلیک بر روی به صورت خودکار درایورها را جستجو کنید، همانطور که نشان داده شده است.

5A.The drivers will be updated to the latest version. کامپیوتر خود را مجددا راه اندازی کنید to implement the changes.
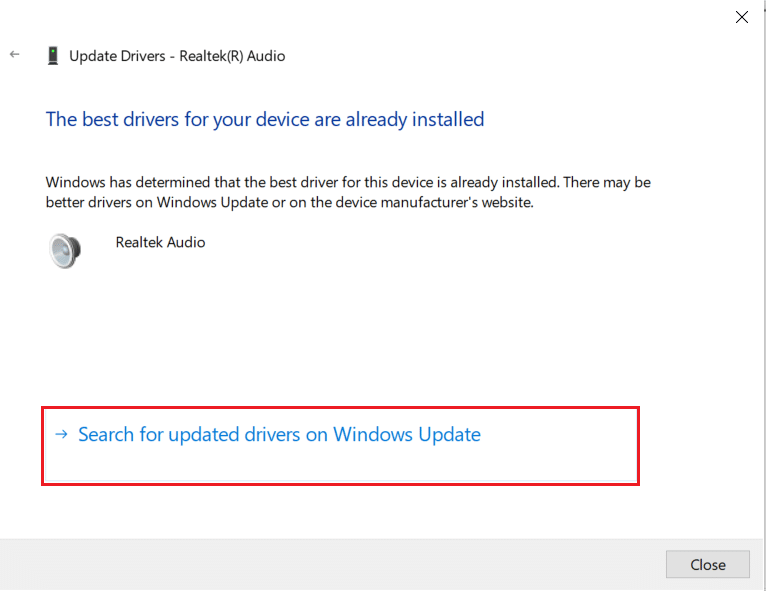
5B. If you see a notification claiming that بهترین درایورها برای دستگاه شما از قبل نصب شده اند، کلیک کنید روی درایورهای به روز شده را جستجو کنید on Windows Update در عوض گزینه
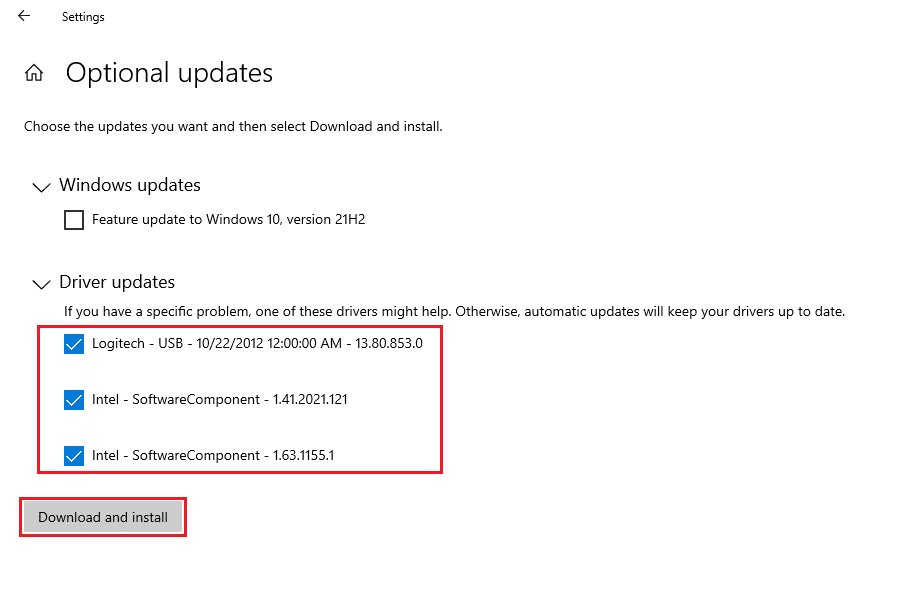
6. در به روز رسانی ویندوز برگه در تنظیماتکلیک کنید مشاهده به روزرسانی های اختیاری در صفحه سمت راست

7. Check the box pertaining to the drivers you want to install, and click the دانلود و نصب را فشار دهید.
همچنین خواندن: نحوه رفع عدم صدا در بازی های استیم
پرسش های متداول (پرسش و پاسخ)
Q1. What is the purpose of Skype taking over my sound?
پاسخ Incoming Skype calls are detected as communications activity by Windows. If you wish to preserve the true volume of your sound, you may need to change the settings on the ارتباطات tab of Windows Sound properties.
Q2. How do I adjust my Skype audio settings?
پاسخ From the Skype window, locate and click the آیکون چرخ دنده. To change the audio or video device settings, go to Tools > Audio Device Settings or Video Device Settings. You can choose the microphone or speaker you want to use from here.
Q3. What is system sound?
پاسخ The sound that comes from the speakers built into our PC is known as System sound. Sound from the headphones you have connected is the music on our PCs.
Q4. What are stereo mix alternative Windows 10?
پاسخ If Realtek Stereo Mix is not working and gives no sound in Windows 10, you may try other Stereo Mix alternative for Windows 10 like جسارت, WavePad, Adobe Audition, MixPad, Audio Highjack, etc.
توصیه می شود:
We hope that this information was useful in resolving Skype stereo mix not working problem in Windows 10. Let us know which technique was the most successful for you. Drop your queries/suggestions in the comments section below.

