Fix Windows 10 install Fails With Error C1900101-4000D

Fix Windows 10 install Fails With Error C1900101-4000D: If you’re trying to upgrade to Windows 10 but the install fails with error code C1900101-4000D then don’t worry as it occurs because the Windows installer cannot access important files required for installation. Sometimes this error is also caused because of a conflict during installation but you can’t be sure as there is no error message accompanying this error.
0xC1900101-0x4000D
The installation failed in the SECOND_BOOT phase with an error during MIGRATE_DATA operation
While there is no definite fix for this issue but users seem to be recommending a clean installation of Windows 10 which should only be used as a last resort. So without wasting any time let’s see How to Fix Windows 10 install Fails With Error C1900101-4000D with the help of below-listed troubleshooting guide.
Fix Windows 10 install Fails With Error C1900101-4000D
پیش نیازها
a)Make sure to Update all drivers, including graphic, sound, BIOS, USB devices, printers, etc before the installing Windows 10.
b)Remove all external USB devices such as pen drive, external hard disk, USB keyboard & mouse, USB printer and all peripherals.
c)Use an ethernet cable instead of WiFi and disable WiFi until the update is complete.
Method 1: Temporarily Disable Antivirus and Firewall before attempting Upgrade
1. بر روی آن کلیک راست کنید نماد برنامه آنتی ویروس از سینی سیستم و انتخاب کنید غیرفعال کردن

2.بعد، بازه زمانی را انتخاب کنید که برای آن آنتی ویروس غیر فعال باقی می ماند.

توجه داشته باشید: کمترین زمان ممکن را برای مثال 15 دقیقه یا 30 دقیقه انتخاب کنید.
3.Once done, again try to upgrade your PC and check if the error resolves or not.
4.Type control in the Windows Search then click on صفحه کنترل از نتیجه جستجو

5. Next، بر روی آن کلیک کنید سیستم و امنیت.
6.سپس بر روی آن کلیک کنید دیوار آتش ویندوز.

7. اکنون از پنجره سمت چپ بر روی آن کلیک کنید فایروال ویندوز را روشن یا خاموش کنید.

8.گزینه Turn off Windows Firewall و Restart PC خود را انتخاب کنید. Again try to upgrade your PC and see if you’re able to Fix Windows 10 install Fails With Error C1900101-4000D.
اگر روش بالا کار نمی کند، مطمئن شوید که دقیقاً همان مراحل را دنبال کنید تا دوباره فایروال خود را روشن کنید.
Method 2: Remove any hyphens from your computer or machine name
1. Windows Key + R را فشار دهید و سپس تایپ کنید sysdm.cpl و Enter بزنید تا باز شود خصوصیات سیستم.

2.Make sure you’re under تب نام کامپیوتر سپس کلیک کنید تغییر دادن دکمه در پایین.
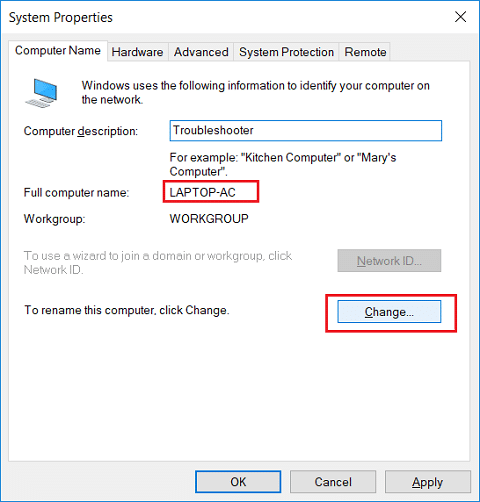
3.Make sure your machine name is simple no periods or hyphens or dashes.
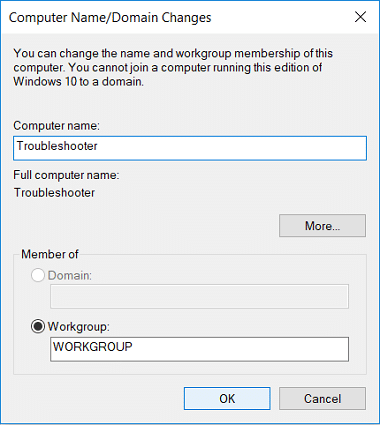
4.Click OK then Apply followed by OK.
5. برای ذخیره تغییرات، کامپیوتر خود را مجددا راه اندازی کنید.
روش 3: مطمئن شوید که ویندوز به روز است
1. Windows Key + I را فشار دهید و سپس انتخاب کنید بروزرسانی و امنیت

2.Next، دوباره کلیک کنید بررسی برای به روز رسانی و مطمئن شوید که بهروزرسانیهای معلق را نصب کنید.

3. پس از نصب به روز رسانی ها، کامپیوتر خود را مجددا راه اندازی کنید و ببینید آیا می توانید Fix Windows 10 install Fails With Error C1900101-4000D.
روش 4: یک بوت تمیز انجام دهید
This would make sure that if any 3rd party application is conflicting with Windows update then you will be able to successfully install Windows Updates inside Clean Boot. Sometimes 3rd party software can conflict with Windows Update and therefore cause Windows Update to be Stuck. In order, Fix Windows 10 install Fails With Error C1900101-4000D، باید یک بوت تمیز روی رایانه شخصی خود انجام دهید و گام به گام مشکل را تشخیص دهید.

Method 5: Upgrade using Windows 10 Media Creation Tool
1.Download Media Creation Tool here.
2.Backup your data from system partition and save your license key.
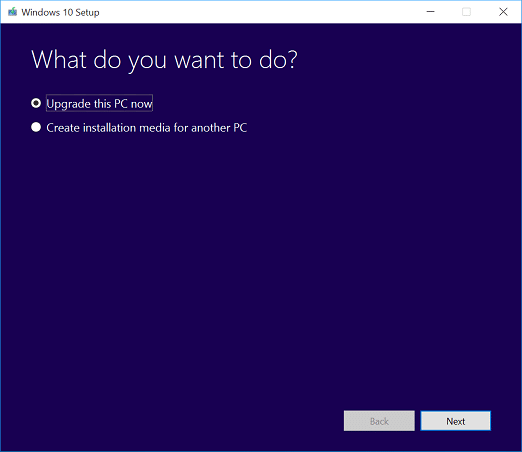
3.Start the tool and choose to Upgrade this PC now.
4.Accept the license terms.
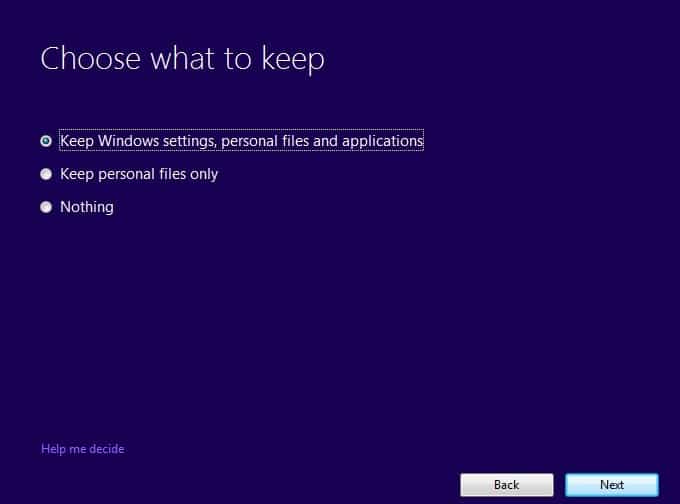
5.After the installer is ready, choose to Keep personal files and apps.
6.The PC will restart few times and your PC would be successfully upgraded.
روش 6: SFC و DISM را اجرا کنید
1. Windows Key + X را فشار دهید و سپس بر روی آن کلیک کنید خط فرمان (Admin).

2. حالا عبارت زیر را در cmd تایپ کنید و اینتر را بزنید:
Sfc /scannow sfc /scannow /offbootdir=c: /offwindir=c:windows (اگر بالا شکست خورد، این یکی را امتحان کنید)

3. منتظر بمانید تا فرآیند فوق به پایان برسد و پس از اتمام، کامپیوتر خود را مجددا راه اندازی کنید.
4. دوباره cmd را باز کنید و دستور زیر را تایپ کنید و بعد از هر کدام اینتر را بزنید.
الف) Dism /Online /Cleanup-Image /CheckHealth ب) Dism /Online /Cleanup-Image /ScanHealth ج) Dism /Online /Cleanup-Image /RestoreHealth

5. اجازه دهید دستور DISM اجرا شود و منتظر بمانید تا تمام شود.
6. اگر دستور بالا کار نکرد، دستور زیر را امتحان کنید:
Dism /Image:C:offline /Cleanup-Image /RestoreHealth /Source:c:testmountwindows Dism /Online /Cleanup-Image /RestoreHealth /منبع:c:testmountwindows /LimitAccess
توجه داشته باشید: C:RepairSourceWindows را با محل منبع تعمیر خود (نصب ویندوز یا دیسک بازیابی) جایگزین کنید.
7. برای ذخیره تغییرات کامپیوتر خود را مجددا راه اندازی کنید و ببینید آیا می توانید Fix Windows 10 install Fails With Error C1900101-4000D.
Method 7: Reset Windows Updates Components
1. Windows Key + X را فشار دهید و سپس انتخاب کنید Command Prompt (مدیر).
2. حالا دستورات زیر را برای توقف سرویس های Windows Update تایپ کنید و بعد از هر کدام Enter را بزنید:
توقف خاموش wuauserv
net stop cryptSvc
بیت های توقف خالص
net stop msiserver

3-بعد، دستور زیر را برای تغییر نام پوشه SoftwareDistribution تایپ کنید و سپس Enter را بزنید:
مجله C: WindowsSoftwareDistribution SoftwareDistribution.old
Ren C: WindowsSystem32catroot2 catroot2.old

4. در نهایت دستور زیر را برای راه اندازی Windows Update Services تایپ کنید و بعد از هر کدام Enter را بزنید:
net شروع wuauserv
net شروع cryptSvc
خالص شروع بیت
net start msiserver

5. برای ذخیره تغییرات کامپیوتر خود را مجددا راه اندازی کنید و بررسی کنید که آیا می توانید Fix Windows 10 install Fails With Error C1900101-4000D.
Method 8: Delete Registry for Mounted Images
1. Windows Key + R را فشار دهید و سپس تایپ کنید regedit را و Enter را بزنید تا ویرایشگر رجیستری باز شود.

2. به کلید رجیستری زیر بروید:
HKEY_LOCAL_MACHINESOFTWAREMicrosoftWIMMountMounted Images
3. انتخاب کنید Mounted Images then in the right window pane right-click on (Default) and select Delete.
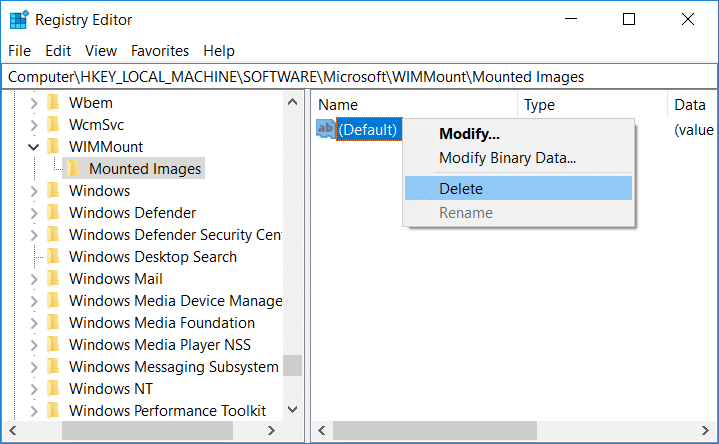
4.Exit Registry Editor and reboot your PC to save changes.
Method 9: Disable Wi-Fi Adapter and CD/DVD Drive
1. Windows Key + R را فشار دهید و سپس تایپ کنید devmgmt.msc و Enter را بزنید تا Device Manager باز شود.

2.Expand DVD/CD-ROM drives، سپس روی مورد خود راست کلیک کنید درایو CD/DVD را انتخاب کنید و دستگاه را غیرفعال کنید.

3.Similarly, expand Network adapters then right-click on your WiFi آداپتور و را انتخاب کنید دستگاه را غیرفعال کنید.
4.Again try to run Windows 10 setup and see if you’re able to Fix Windows 10 install Fails With Error C1900101-4000D.
Method 10: Run Malwarebytes and AdwCleaner
Malwarebytes is a powerful on-demand scanner which should remove browser hijackers, adware and other types of malware from your PC. It is important to note that Malwarebytes will run alongside antivirus software without conflicts. To install and run Malwarebytes Anti-Malware, go to this article and follow each and every step.
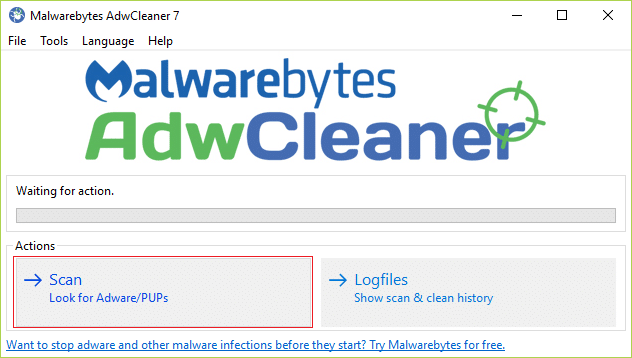
1.Download AdwCleaner from this link.
2.Once the download is complete, double-click on the adwcleaner.exe file برای اجرای برنامه
3-روی ” کلیک کنیدمن موافقت می کنم”را فشار دهید تا accept the license agreement.
4.On the next screen, click the دکمه اسکن تحت اقدامات.
5.Now, wait for the AdwCleaner to search for PUPs and other malicious programs.
6.Once the scan is complete, click تمیزکاری in order to clean your system of such files.
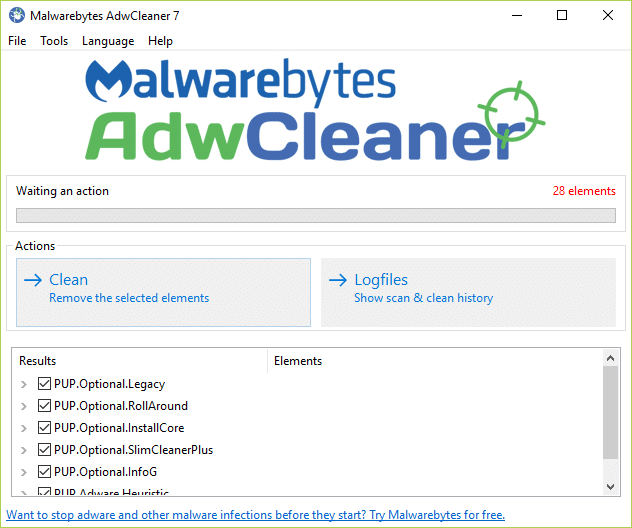
7.Save any work you might be doing as your PC will need to reboot, click OK to reboot your PC.
8.Once the computer reboots, a log file will open which will list all of the files, folders, registry keys, etc that were removed in the previous step.
توصیه می شود:
این چیزی است که شما با موفقیت انجام داده اید Fix Windows 10 install Fails With Error C1900101-4000D اما اگر هنوز در مورد این راهنما سؤالی دارید، در بخش نظرات از آنها بپرسید.