تعمیر ماژول های Windows Installer Worker High CPU Usage
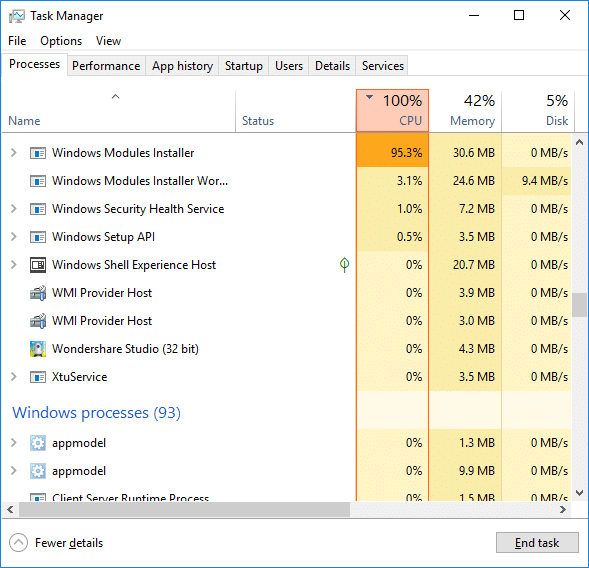
If you are facing the High CPU Usage by Windows Modules Installer Worker, then don’t worry as thousands of other users are also facing the similar problem and therefore, there are many working fixes which we will be discussing today in this article. To verify if you are facing this issue open Task Manager (Ctrl + Shift + Esc) and you will find that the Windows Modules Installer Worker is consuming High CPU or Disk Usage.

نکته نرم افزار: You may leave your PC overnight or for a few hours to see the issue rectify itself once the Windows is finished downloading and installing updates.
What is Windows Modules Installer worker (WMIW)?
Windows Modules Installer worker (WMIW) is a service which takes cares of automatically installing Windows Update. According to its service description, WMIW is a system process that enables automatic installation, modification, and removal of Windows updates and optional components.
This process is responsible for finding new Windows Update automatically and installing them. As you might be aware that Windows 10 automatically install newer builds (i.e. 1803 etc.) via Windows Updates, so this process is responsible for installing these updates in the background.
Although this process is called Windows Modules Installer worker (WMIW) and you will see the same name in the Processes tab in the Task Manager, but if you switch to Details tab, then you will find the name of the file as TiWorker.exe.
Why Is Windows Modules Installer worker Using So Much CPU?
As Windows Modules Installer worker (TiWorker.exe) runs continuously in the background, sometimes it might utilize high CPU or disk usage when installing or uninstalling Windows Updates. But if its constantly using high CPU then the Windows Modules Installer worker may have become unresponsive while checking new updates. As a result, you may be experiencing lags, or your system might hang or freeze completely.
The first thing users do when they experience freezing, or lagging issues on their system is to restart their PC, but I assure you that this strategy won’t work in this case. This is because the issue will not resolve by itself until and unless you fix the underlying cause.
تعمیر ماژول های Windows Installer Worker High CPU Usage
مطمئن شوید که یک نقطه بازیابی را فقط در صورتی که مشکلی پیش بیاید ایجاد کنید.
Windows Modules Installer Worker (WMIW) is an important service, and it should not be disabled. WMIW or TiWorker.exe is not a virus or malware, and you cannot just delete this service from your PC. So without wasting any time let’s see How to Fix Windows Modules Installer Worker High CPU Usage با کمک راهنمای عیب یابی لیست شده در زیر.
روش 1: Windows Update Troubleshooter را اجرا کنید
1. کلید Windows + I را فشار دهید تا باز شود تنظیمات سپس کلیک کنید نماد به روز رسانی و امنیت
![]()
2. از منوی سمت چپ، را انتخاب کنید عیب یابی زیر "بالا بردن و در حال اجرا” کلیک کنید به روز رسانی ویندوز.
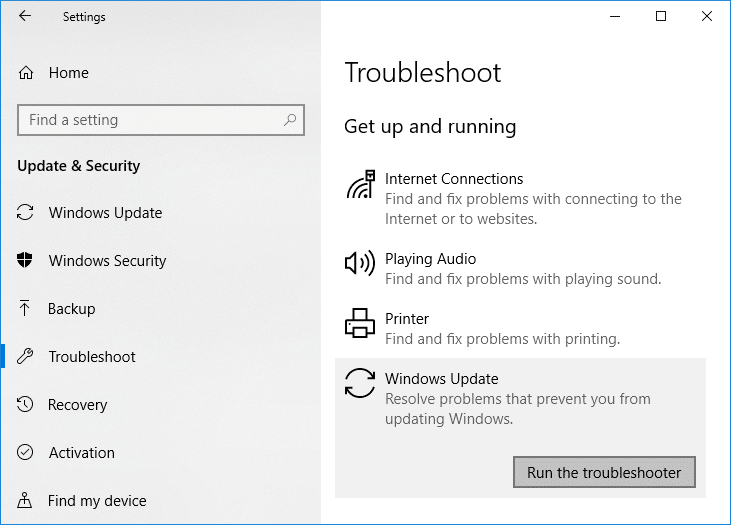
3. اکنون بر روی "مشکلی را اجرا کنید” در زیر Windows Update.
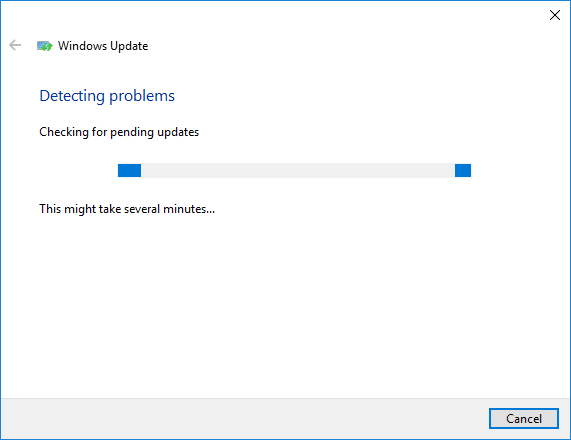
4. Let the troubleshooter run, and it will automatically fix any issues found with Windows Update taking forever.
Method 2: Manually Check for Windows Updates
1. Windows Key + I را فشار دهید و سپس انتخاب کنید بروزرسانی و امنیت
2. از سمت چپ، منو روی آن کلیک می کند به روز رسانی ویندوز.
3. حالا بر روی “بررسی برای به روز رسانیدکمه ” برای بررسی هر گونه به روز رسانی موجود.

4. اگر هر گونه به روز رسانی در انتظار است، سپس بر روی کلیک کنید دانلود و نصب به روز رسانی.

5. پس از دانلود آپدیت ها، آنها را نصب کنید و ویندوز شما به روز می شود.
Method 3: Configure Windows Update to Manual
تـذکــــر: This method will switch Windows Update from automatically installing the new updates to the manual. This means you have to manually check for Windows Update (weekly or monthly) to keep your PC secure. But follow this method, and you can again set the Updates to Automatic once the issue is resolved.
1. Windows Key + R را فشار دهید و سپس تایپ کنید services.msc را و وارد شوید

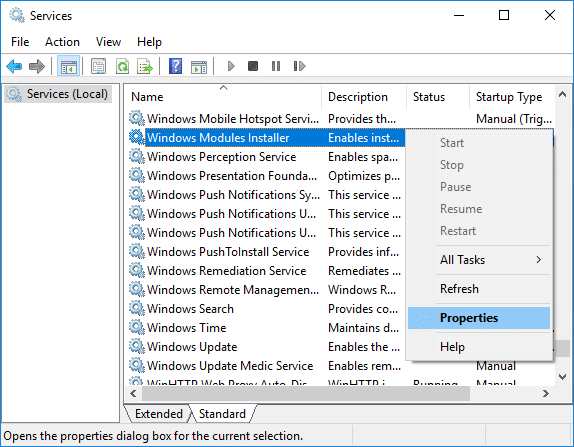
2. Scroll down and find نصب کننده ماژول های ویندوز service in the list.
3. بر روی آن کلیک راست کنید سرویس Windows Modules Installer را انتخاب کنید و خواص.
4 حالا روی کلیک کنید توقف then from the نوع راه اندازی drop-down select دستی.
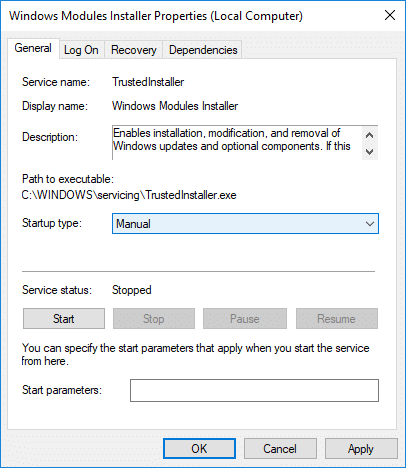
5. روی Apply و به دنبال آن کلیک کنید OK را بزنید.
6. Similarly, follow the same step for the Windows Update service.
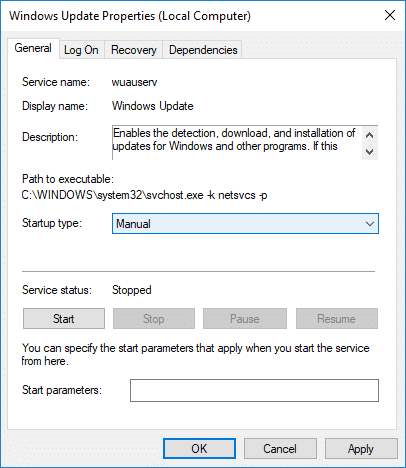
7. برای ذخیره تغییرات کامپیوتر خود را ریبوت کنید.
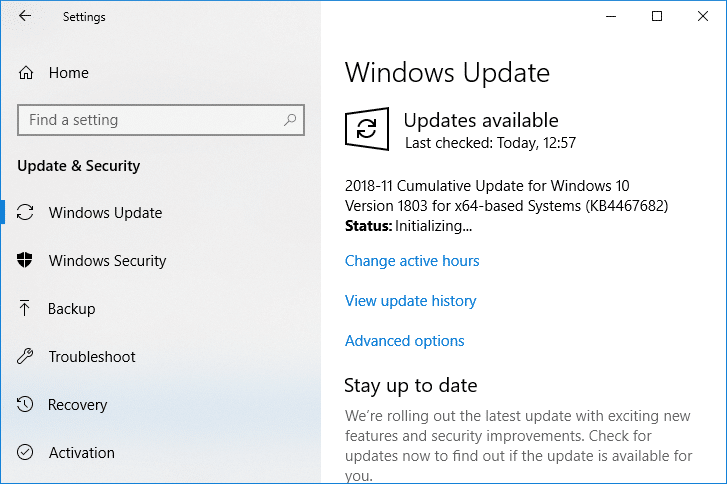
8. دوباره برای چک Windows Updates Manually و هر به روز رسانی معلق را نصب کنید.
9. Once is done, again go back to services.msc window and open the Windows Modules Installer & Windows Update Properties پنجره.
10. تنظیم کنید نوع راه اندازی به اتوماتیک کلیک کنید و آغاز. Then click Apply followed by OK.
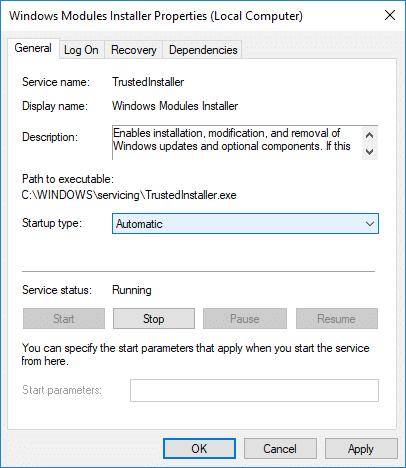
11. برای ذخیره تغییرات کامپیوتر خود را ریبوت کنید.
روش 4: عیب یاب تعمیر و نگهداری سیستم را اجرا کنید
1. Windows Key + R را فشار دهید سپس control را تایپ کرده و Enter را بزنید تا باز شود کنترل پنل.
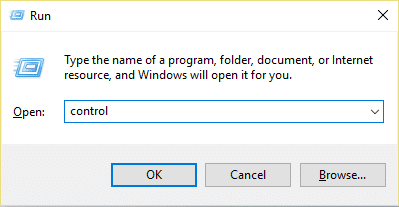
2. Search Troubleshoot و کلیک کنید عیب یابی.

3. بعد ، بر روی کلیک کنید مشاهده همه در سمت چپ
4. با کلیک بر روی “System Maintenance” برای اجرا System Maintenance Troubleshooter.

5. عیب یاب ممکن است بتواند Fix Windows Modules Installer Worker High CPU Usage, but if it didn’t, then you need to run System Performance Troubleshooter.
6. Command Prompt را باز کنید. کاربر می تواند این مرحله را با جستجو انجام دهد 'cmd' و سپس Enter را فشار دهید.

7. دستور زیر را در cmd تایپ کنید و Enter را بزنید:
msdt.exe / id PerformanceDiagnostic
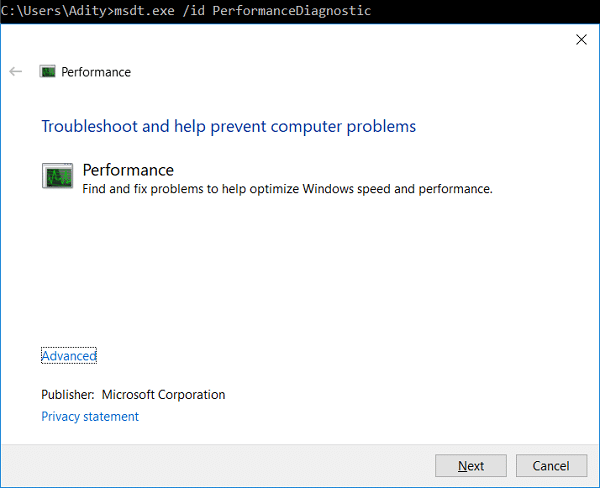
8. Follow the on-screen instruction to run the troubleshooter and fix any issues find the System.
9. Finally, exit the cmd and reboot your PC.
Method 5: Disable Automatic Maintenance
Sometimes Automatic Maintenance can conflict with the Windows Modules Installer Worker service, so try to disable Automatic Maintenance using this guide and see if this fixes your issue.
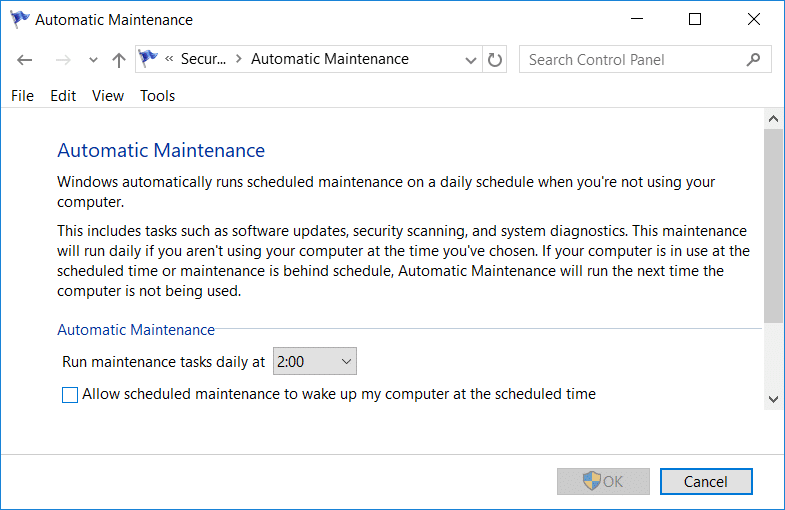
Although disabling Automatic Maintenance is not a good idea, but there might be some case where you need to actually disable it, for example, if your PC freezes during automatic maintenance or Windows Modules Installer Worker High CPU Usage issue then you should disable maintenance to troubleshoot the issue.
Method 6: Run System File Checker and DISM
1. Command Prompt را باز کنید. کاربر می تواند این مرحله را با جستجو انجام دهد 'cmd' و سپس Enter را فشار دهید.
2. حالا عبارت زیر را در cmd تایپ کنید و اینتر را بزنید:
Sfc /scannow sfc /scannow /offbootdir=c: /offwindir=c:windows (اگر بالا شکست خورد، این یکی را امتحان کنید)

3. منتظر بمانید تا فرآیند فوق به پایان برسد و پس از اتمام، کامپیوتر خود را مجددا راه اندازی کنید.
4. دوباره cmd را باز کنید و دستور زیر را تایپ کنید و بعد از هر کدام اینتر را بزنید.
Dism /آنلاین /Cleanup-Image /CheckHealth Dism /آنلاین /Cleanup-Image /ScanHealth Dism /آنلاین /Cleanup-Image /RestoreHealth

5. اجازه دهید دستور DISM اجرا شود و منتظر بمانید تا تمام شود.
6. اگر دستور بالا کار نکرد، دستور زیر را امتحان کنید:
Dism /Image:C:offline /Cleanup-Image /RestoreHealth /Source:c:testmountwindows Dism /Online /Cleanup-Image /RestoreHealth /منبع:c:testmountwindows /LimitAccess
توجه داشته باشید: C:RepairSourceWindows را با منبع تعمیر خود (نصب ویندوز یا دیسک بازیابی) جایگزین کنید.
7. کامپیوتر خود را مجددا راه اندازی کنید تا تغییرات را ذخیره کنید و ببینید آیا می توانید Fix Windows Modules Installer Worker High CPU Usage.
روش 7: یک بوت تمیز انجام دهید
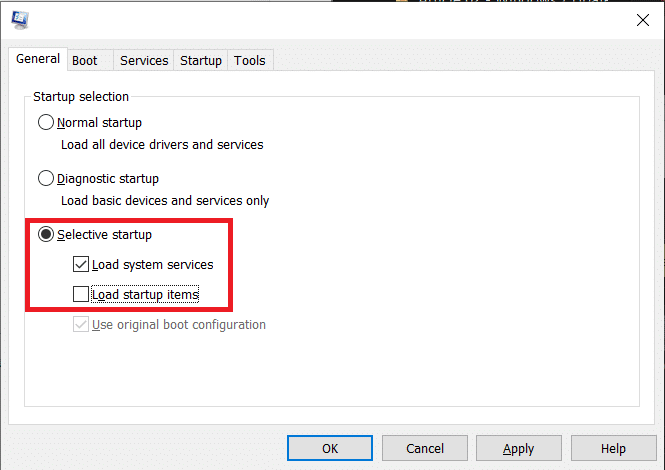
Sometimes 3rd party software can conflict with Windows and can cause the issue. To Fix Windows Modules Installer Worker High CPU Usage issue، باید یک بوت تمیز روی رایانه شخصی خود انجام دهید و گام به گام مشکل را تشخیص دهید.
Method 8: Set your WiFi as Metered Connection
توجه داشته باشید: This will stop Windows Automatic Update, and you will need to manually check for Updates.
1. کلید Windows + I را فشار دهید تا باز شود تنظیمات سپس کلیک کنید شبکه و اینترنت

2. از منوی سمت چپ، را انتخاب کنید از Wi-Fi.
3. Under Wi-Fi, کلیک on your currently connected network (WiFi).
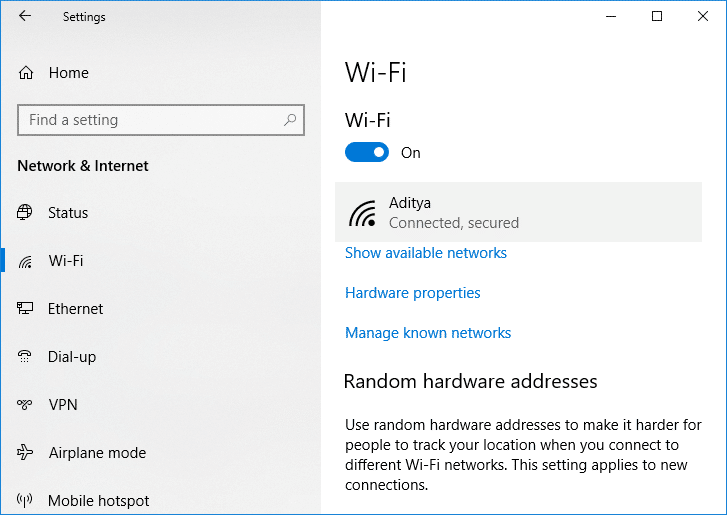
4. Scroll down to Metered connection and ضامن را فعال کنید زیر "تنظیم به عنوان اتصال معکوس".
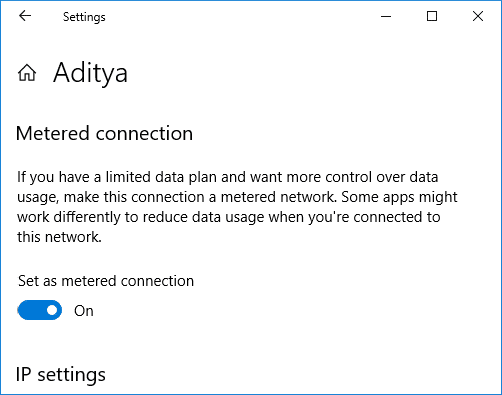
5. Close Settings and reboot your PC to save changes.
توصیه می شود:
همین است، شما موفق شده اید تعمیر ماژول های Windows Installer Worker High CPU Usage اما اگر هنوز سؤالی در مورد این آموزش دارید، در قسمت نظرات از آنها بپرسید.
