Remove Administrative Tools in Windows 10
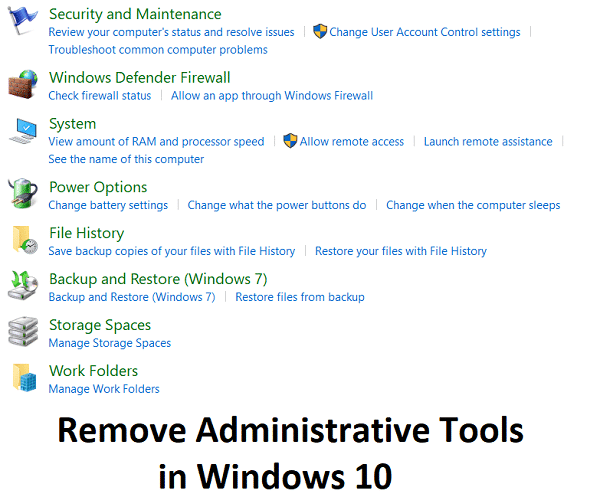
Remove Administrative Tools in Windows 10: Administrative Tool is a folder in Control Panel which contains tools for system administrators and advanced users. So it’s pretty safe to assume that the guest or novice Windows users should not have access to Administrative Tools and in this post, we will exactly see how to hide, remove or disable Administrative Tools in Windows 10. These tools are critical and messing with them can damage your system and that’s why restricting access to them is a good idea.

There are few ways via which you can easily disable or remove Administrative Tools for guest users but we are going to discuss each of them in detail. So without wasting any time let’s see how to Remove Administrative Tools in Windows 10 with the help of the below-listed guide.
Remove Administrative Tools in Windows 10
مطمئن شوید که یک نقطه بازیابی ایجاد کرده اید، فقط در صورتی که مشکلی پیش بیاید.
1. Windows Key + R را فشار دهید سپس عبارت زیر را تایپ کرده و Enter را بزنید:
C: ProgramDataMicrosoftWindowsStart MenuPrograms
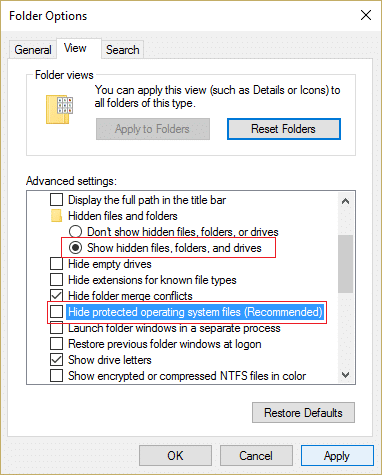
توجه داشته باشید: Make sure show hidden files and folders are enable in File Explorer.
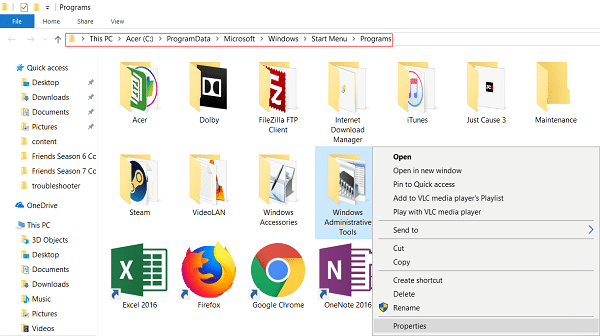
2. زیر برنامه ها folder search for Windows Administrative Tools, سپس روی آن کلیک راست کرده و انتخاب کنید خواص.
3. تغییر به زبانه امنیتی کلیک کنید و دکمه ویرایش
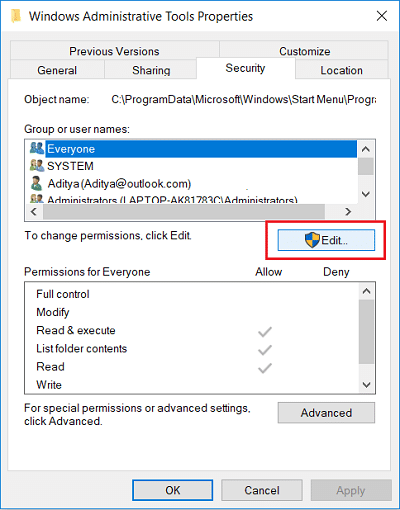
4. انتخاب کنید هر کس from Group or user name and checkmark Deny next to Full Control.
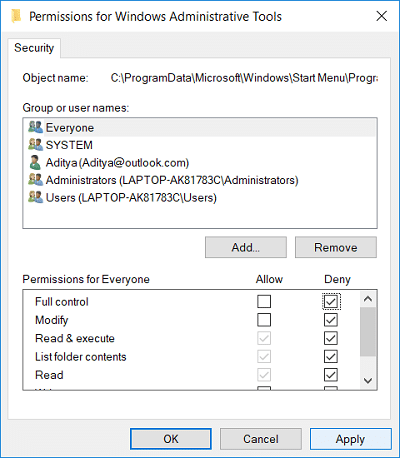
5.Do this for every account you want to restrict access to.
6.If this doesn’t work then you can simply select Everyone and select Remove.
7. برای ذخیره تغییرات، کامپیوتر خود را مجددا راه اندازی کنید.
Method 2: Remove Administrative Tools Using Group Policy Editor
توجه داشته باشید: این روش برای کاربران نسخه خانگی ویندوز 10 کار نخواهد کرد.
1. Windows Key + R را فشار دهید و سپس تایپ کنید gpedit.msc را و وارد شوید

2.Next, navigate to the following path:
User Configuration > Administrative Template > Control Panel
3.Make sure to select Control Panel then in the right window double click on Hide Specified Control Panel Items.
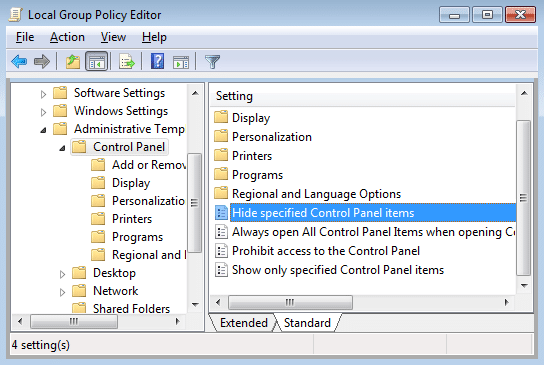
4. انتخاب کنید فعال و با کلیک بر روی Show button در زیر گزینه ها
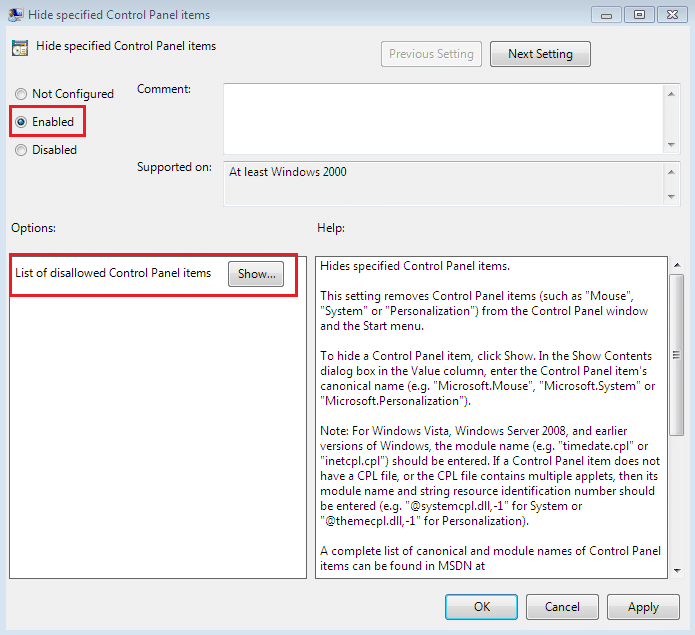
5.In the Show context box type the following value and click OK:
Microsoft.AdministrativeTools
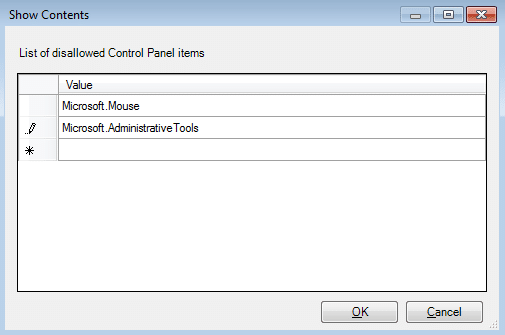
6. روی Apply و سپس OK کلیک کنید.
7. برای ذخیره تغییرات، کامپیوتر خود را مجددا راه اندازی کنید.
Method 3: Remove Administrative Tools Using Registry Editor
1. Windows Key + R را فشار دهید و سپس تایپ کنید regedit را و وارد شوید

2. به کلید رجیستری زیر بروید:
HKEY_CURRENT_USERSoftwareMicrosoftWindowsCurrentVersionExplorerAdvanced
3. انتخاب کنید فناوری then from the right window pane double-click on StartMenuAdminTools.
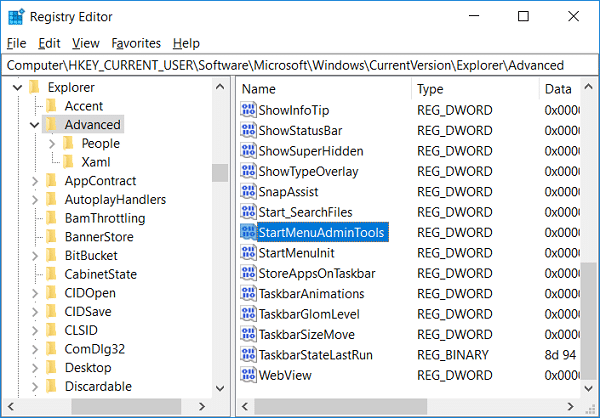
4.Set the value to 0 in the value data field in order to disable it.
To disable Administrative Tools: 0
To enable Administrative Tools: 1
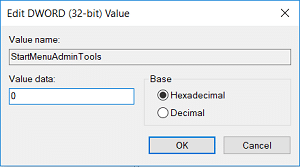
5.Click OK and close Registry Editor.
توصیه می شود:
این چیزی است که شما با موفقیت انجام داده اید Remove Administrative Tools in Windows 10 but if you still have any questions regarding this post then feel free to ask them in the comment’s section.