Change Diagnostic and Usage Data Settings in Windows 10

Change Diagnostic and Usage Data Settings in Windows 10: You must be aware of the Diagnostic and Usage Data Settings which allows Microsoft to collect performance and usage information which helps Microsoft to troubleshoot issues with Windows and improve their product & services and resolve bugs as soon as possible. But the best part of this feature is that you can actually control the amount of diagnostic and usage data sent to Microsoft from your system.
You can select to only send basic diagnostic information which contains info about your device, its settings, and capabilities or you can select the Full diagnostic information which contains all the information about your system. You can also delete the Windows Diagnostic Data that Microsoft has collected from your device. Anyway, without wasting any time let’s see How to Change Diagnostic and Usage Data Settings in Windows 10 with the help of the below-listed tutorial.
Change Diagnostic and Usage Data Settings in Windows 10
Muista luoda palautuspiste siltä varalta, että jokin menee pieleen.
The initial settings can be configured during the Windows Setup when you get to Choose privacy settings for your device simply enable the toggle for Diagnostics to select “Full” and leave it disabled if you want to set Diagnostic and usage data collection policy to “Basic”.
Method 1: Change Diagnostic and Usage Data Settings in Settings App
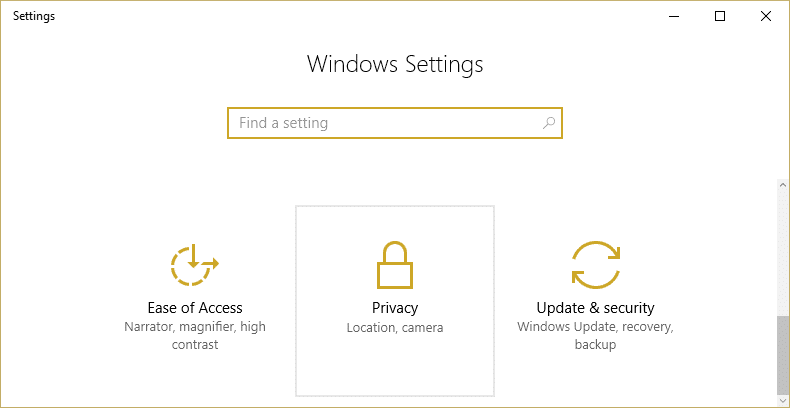
1. Avaa painamalla Windows Key + I Asetukset napsauta Privacy icon.
2. Valitse vasemmasta valikosta Diagnostiikka ja palaute.
3.Now either select Basic or Full for the Diagnostic and usage data.
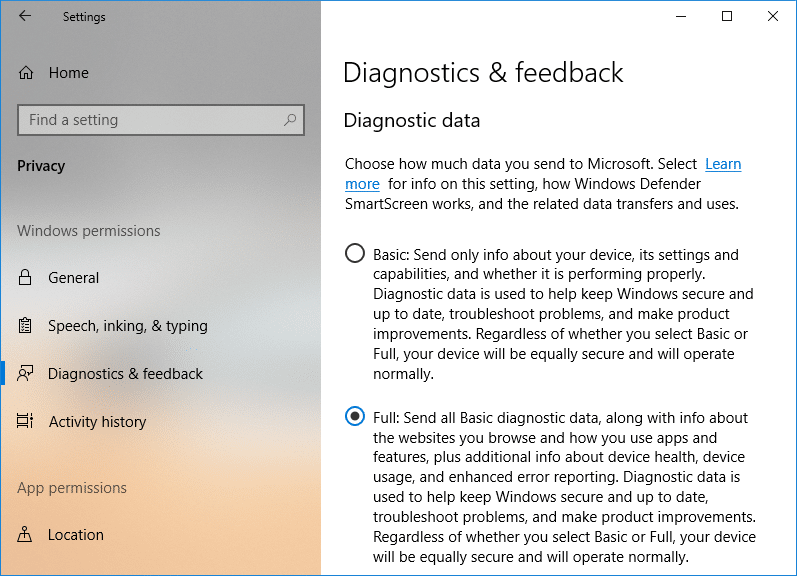
Huomautus: By default, the setting is set to “Full”.
4.Once finished, close the setting and reboot your PC.
Lue myös: Käveleekö Quest Diagnostics sisään?
Method 2: Change Diagnostic and Usage Data Settings in Registry Editor
1.Paina Windows Key + R ja kirjoita regedit ja paina Enter avataksesi Registry Editor.

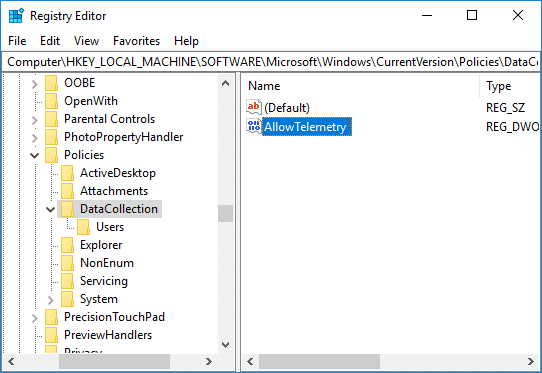
2.Siirry seuraavaan rekisteriavaimeen:
HKEY_LOCAL_MACHINESOFTWAREMicrosoftWindowsCurrentVersionPoliciesDataCollection
3. Varmista, että valitset Tiedonkeruu kaksoisnapsauta sitten oikeanpuoleisessa ikkunaruudussa AllowTelemetry DWORD.
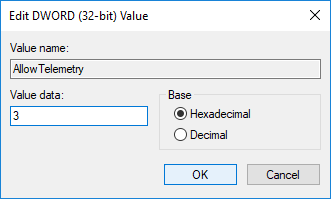
4.Now make sure to change the value of the AllowTelemetry DWORD according to:
0 = Security (Enterprise and Education editions only)
1 = Basic
2 = Enhanced
3 = Full (Recommended)
5.Once done, make sure to click OK and close registry editor.
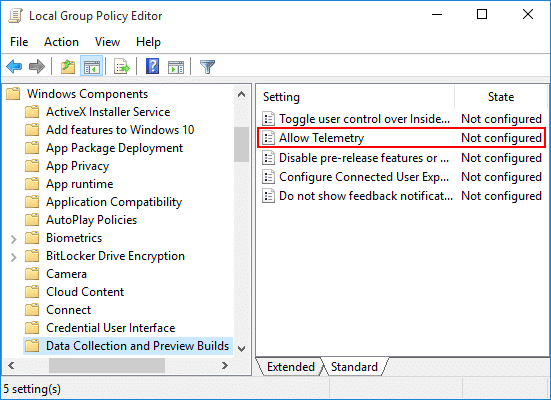
Method 3: Change Diagnostic and Usage Data Settings in Group Policy Editor
1.Paina Windows Key + R ja kirjoita gpedit.msc ja paina Enter avataksesi Ryhmäkäytäntöeditori.
2.Siirry seuraavaan polkuun:
Computer ConfigurationAdministrative TemplatesWindows ComponentsData Collection and Preview Builds
3.Make sure to select Data Collection and Preview Builds then in right window pane double-click on Allow Telemetry Policy.
4.Now to restore default diagnostic and usage data collection setting simply select Ei määritetty tai poistettu käytöstä for Allow Telemetry policy and click OK.

5.If you want to force a diagnostic and usage data collection setting then valitse Käytössä for Allow Telemetry policy and then under Options select Security (Enterprise Only), Basic, Enhanced, or Full.
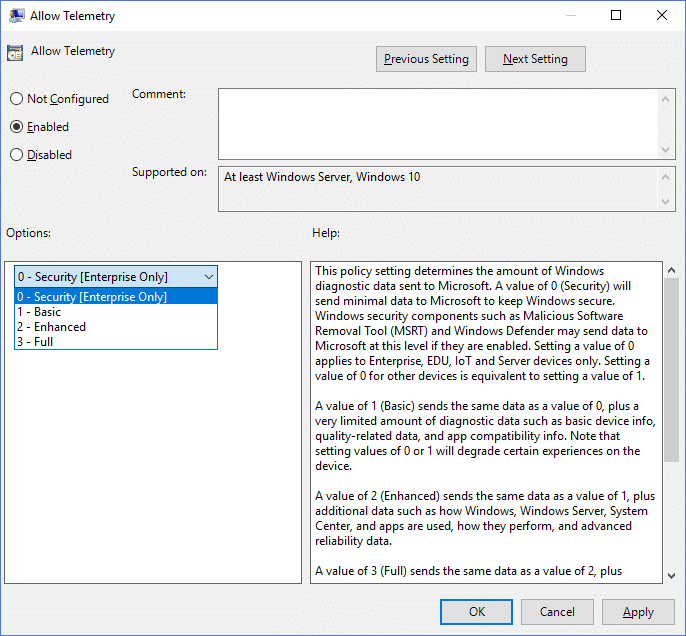
6. Napsauta Käytä ja sitten OK.
7.When finished, reboot your PC to save changes.
Suositus:
Sen olet onnistuneesti oppinut How to Change Diagnostic and Usage Data Settings in Windows 10 mutta jos sinulla on vielä kysyttävää tästä opetusohjelmasta, kysy heiltä kommenttiosiossa.