Windows 10 has a serious bug since it’s inception which makes text blurred on users PC and the problem is faced system-wide by the user. So it doesn’t matter if you go to System Settings, Windows Explorer or Control Panel, all the text will be somewhat blurred because of the DPI Scaling Level for Displays feature in Windows 10. So today we are going to discuss How To Change DPI Scaling Level for Displays in Windows 10.
Modifier le niveau de mise à l'échelle DPI pour les écrans dans Windows 10
Assurez-vous de créer un point de restauration au cas où quelque chose se passerait mal.
Method 1: Change DPI Scaling Level for Displays Using Settings App
1. Press Windows Key + I to open Settings and then click on Système.

2. From the left-hand menu, make sure to select Afficher.
3. If you have more than one display, then select your display at the top.
4. Maintenant sous Modifier la taille du texte, des applications et d'autres éléments, Sélectionnez l' DPI percentage depuis le menu déroulant.
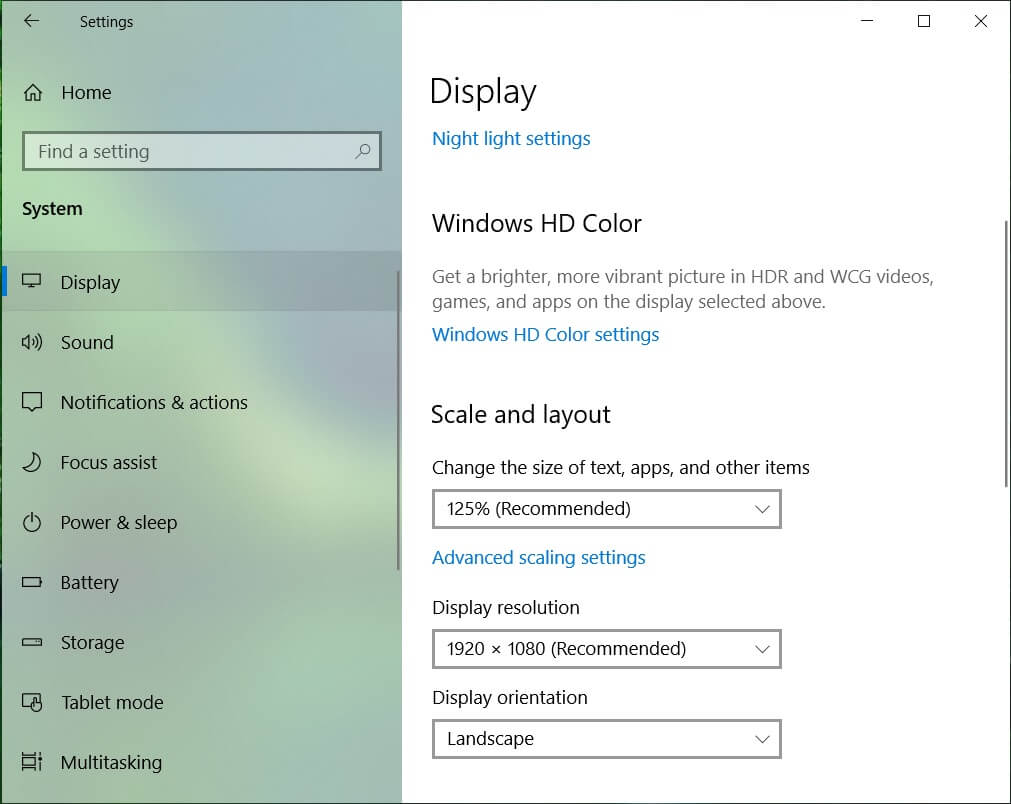
5. Click on the Sign out now link to save changes.
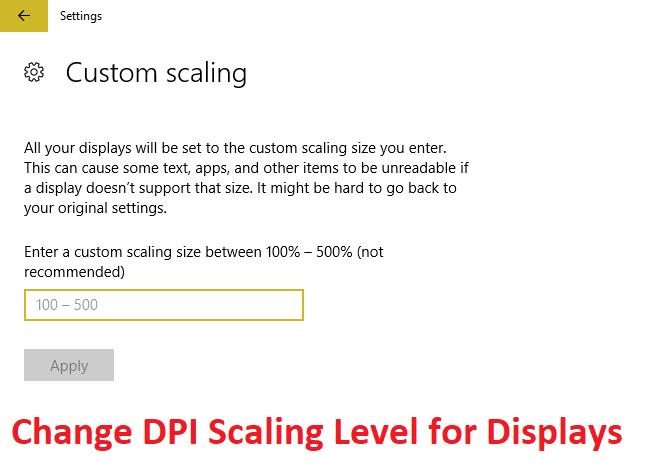
Method 2: Change Custom DPI Scaling Level for All Displays in Settings
1. Press Windows Key + I to open Settings and then click on Système.
2. From the left-hand menu, make sure to select Afficher.
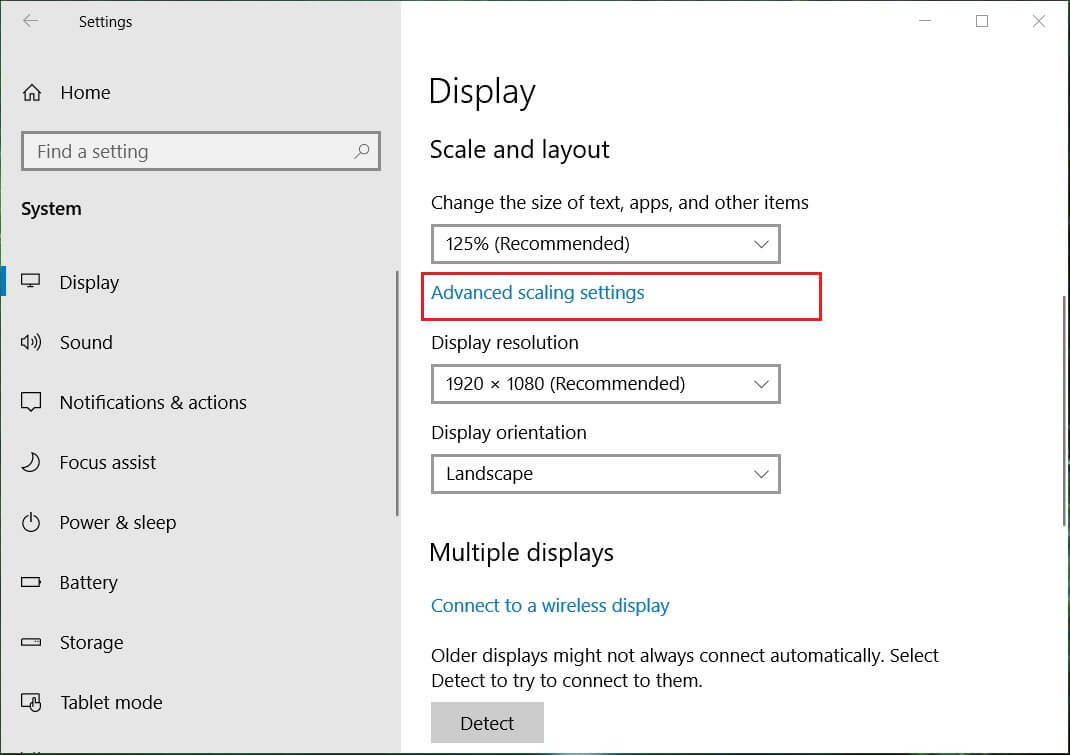
3. Now under Scale and layout click Custom scaling.
4. Enter a custom scaling size between 100% - 500% for all the displays and click on Apply.

5. Click on Sign out now to save changes.
Method 3: Change Custom DPI Scaling Level for All Displays in Registry Editor
1. Appuyez sur la touche Windows + R puis tapez regedit et appuyez sur Entrée.

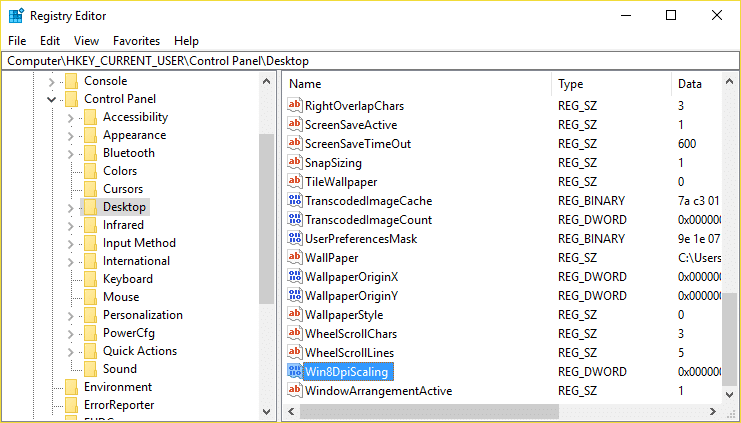
2. Navigate to the following Registry key:
PanelDesktop HKEY_CURRENT_USERControl
3. Make sure you have highlighted Desktop in the left window pane and then in the right window pane double click on LogPixels DWORD.
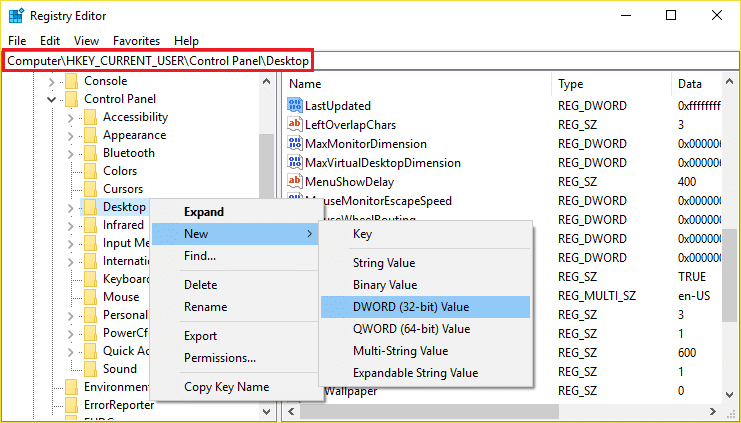
Remarque: If the above DWORD doesn’t exist, you need to create one, right-click on Desktop and select Nouveau > Valeur DWORD (32 bits). Nommez ce DWORD nouvellement créé comme LogPixels.
4 Sélectionner Décimal under Base then change its value to any of the following data and then click OK:
| DPI Scaling Level |
Données de valeur |
| Smaller 100% (default) | 96 |
| Moyen 125% | 120 |
| Larger 150% | 144 |
| Extra Large 200% | 192 |
| 250% personnalisé | 240 |
| 300% personnalisé | 288 |
| 400% personnalisé | 384 |
| 500% personnalisé | 480 |
![]()
5. Again make sure Desktop is highlighted and in the right window pane double click on Win8DpiScaling.
Remarque: If the above DWORD doesn’t exist, you need to create one, right-click on Desktop and select Nouveau > Valeur DWORD (32 bits). Name this DWORD as Win8DpiScaling.
6. Now change its value to 0 if you have chosen 96 from the above table for LogPixels DWORD but if you have chosen any other value from the table then set its valeur à 1.
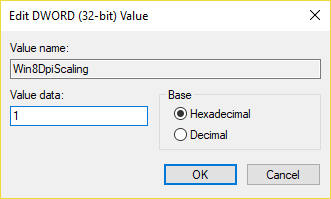
7. Click OK and close Registry Editor.
8. Redémarrez votre PC pour enregistrer les modifications.
Recommandée:
Voilà, vous avez appris avec succès How To Change DPI Scaling Level for Displays in Windows 10 mais si vous avez encore des questions concernant cet article, n'hésitez pas à les poser dans la section commentaires.
")
