- in fenêtres by Administrateur
Fix Windows 10 install Fails With Error C1900101-4000D

Fix Windows 10 install Fails With Error C1900101-4000D: If you’re trying to upgrade to Windows 10 but the install fails with error code C1900101-4000D then don’t worry as it occurs because the Windows installer cannot access important files required for installation. Sometimes this error is also caused because of a conflict during installation but you can’t be sure as there is no error message accompanying this error.
0xC1900101-0x4000D
The installation failed in the SECOND_BOOT phase with an error during MIGRATE_DATA operation
While there is no definite fix for this issue but users seem to be recommending a clean installation of Windows 10 which should only be used as a last resort. So without wasting any time let’s see How to Fix Windows 10 install Fails With Error C1900101-4000D with the help of below-listed troubleshooting guide.
Fix Windows 10 install Fails With Error C1900101-4000D
Pré-requis
a)Make sure to Update all drivers, including graphic, sound, BIOS, USB devices, printers, etc before the installing Windows 10.
b)Remove all external USB devices such as pen drive, external hard disk, USB keyboard & mouse, USB printer and all peripherals.
c)Use an ethernet cable instead of WiFi and disable WiFi until the update is complete.
Method 1: Temporarily Disable Antivirus and Firewall before attempting Upgrade
1.Cliquez avec le bouton droit sur Icône du programme antivirus dans la barre d'état système et sélectionnez Désactiver

2. Ensuite, sélectionnez la période pour laquelle le L'antivirus restera désactivé.

Remarque: Choisissez la plus petite durée possible, par exemple 15 minutes ou 30 minutes.
3.Once done, again try to upgrade your PC and check if the error resolves or not.
4.Type control in the Windows Search then click on Panneau de configuration à partir du résultat de la recherche.

5. Ensuite, cliquez sur Système et sécurité.
6. Cliquez ensuite sur Fenêtre pare-feu.

7.Maintenant, dans le volet de gauche de la fenêtre, cliquez sur Activez ou désactivez le pare-feu Windows.

8.Sélectionnez Désactiver le pare-feu Windows et redémarrez votre PC. Again try to upgrade your PC and see if you’re able to Fix Windows 10 install Fails With Error C1900101-4000D.
Si la méthode ci-dessus ne fonctionne pas, assurez-vous de suivre exactement les mêmes étapes pour réactiver votre pare-feu.
Method 2: Remove any hyphens from your computer or machine name
1.Appuyez sur la touche Windows + R puis tapez sysdm.cpl et appuyez sur Entrée pour ouvrir Propriétés du système.

2.Make sure you’re under Onglet Nom de l'ordinateur puis cliquez sur Modifier bouton en bas.
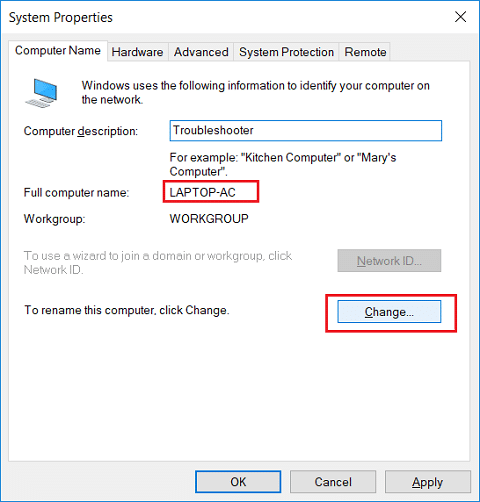
3.Make sure your machine name is simple no periods or hyphens or dashes.
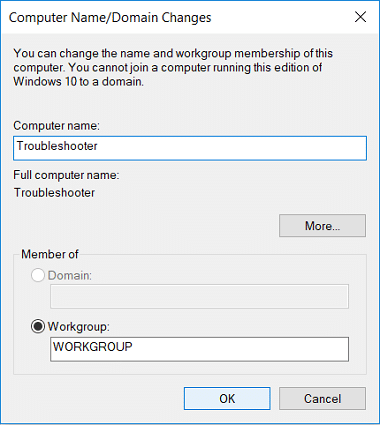
4.Click OK then Apply followed by OK.
5.Redémarrez votre PC pour enregistrer les modifications.
Méthode 3 : assurez-vous que Windows est à jour
1.Appuyez sur la touche Windows + I puis sélectionnez Mise à jour et sécurité.

2. Ensuite, cliquez à nouveau Vérifiez les mises à jour et assurez-vous d'installer toutes les mises à jour en attente.

3.Une fois les mises à jour installées, redémarrez votre PC et voyez si vous pouvez Fix Windows 10 install Fails With Error C1900101-4000D.
Méthode 4: effectuer un démarrage propre
This would make sure that if any 3rd party application is conflicting with Windows update then you will be able to successfully install Windows Updates inside Clean Boot. Sometimes 3rd party software can conflict with Windows Update and therefore cause Windows Update to be Stuck. In order, Fix Windows 10 install Fails With Error C1900101-4000D, vous devez effectuer un démarrage minimal sur votre PC et diagnostiquer le problème étape par étape.

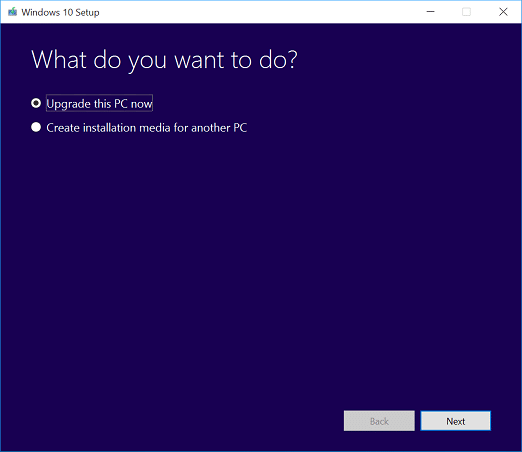
Méthode 5 : mise à niveau à l'aide de l'outil de création de support Windows 10
1.Download Media Creation Tool here.
2.Backup your data from system partition and save your license key.
3.Start the tool and choose to Upgrade this PC now.
4.Accept the license terms.
5.After the installer is ready, choose to Conservez vos fichiers personnels et vos applications.
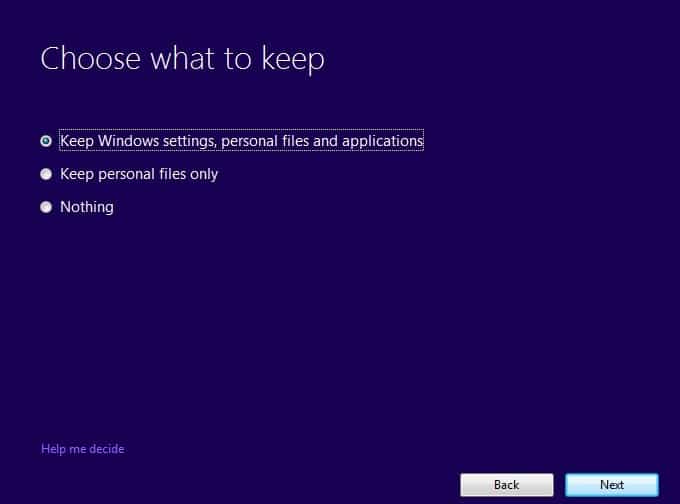
6.The PC will restart few times and your PC would be successfully upgraded.
Méthode 6 : Exécuter SFC et DISM
1.Appuyez sur la touche Windows + X puis cliquez sur Invite de commandes (administrateur).

2. Tapez maintenant ce qui suit dans le cmd et appuyez sur Entrée :
Sfc /scannow sfc /scannow /offbootdir=c: /offwindir=c:windows (Si ci-dessus échoue, essayez celui-ci)

3. Attendez la fin du processus ci-dessus et une fois terminé, redémarrez votre PC.
4. Ouvrez à nouveau cmd et tapez la commande suivante et appuyez sur Entrée après chacune :
a) Dism /Online /Cleanup-Image /CheckHealth b) Dism /Online /Cleanup-Image /ScanHealth c) Dism /Online /Cleanup-Image /RestoreHealth

5.Laissez la commande DISM s'exécuter et attendez qu'elle se termine.
6. Si la commande ci-dessus ne fonctionne pas, essayez ce qui suit :
Dism /Image:C:hors ligne /Cleanup-Image /RestoreHealth /Source:c:testmountwindows Dism /Online /Cleanup-Image /RestoreHealth /Source:c:testmountwindows /LimitAccess
Remarque: Remplacez C:RepairSourceWindows par l'emplacement de votre source de réparation (disque d'installation ou de récupération Windows).
7.Redémarrez votre PC pour enregistrer les modifications et voir si vous pouvez Fix Windows 10 install Fails With Error C1900101-4000D.
Method 7: Reset Windows Updates Components
1.Appuyez sur la touche Windows + X puis sélectionnez Invite de commande (Admin).
2. Tapez maintenant les commandes suivantes pour arrêter les services Windows Update, puis appuyez sur Entrée après chacune d'elles :
arrêt net wuauserv
net stop cryptSvc
bits d'arrêt net
net stop msiserver

3. Ensuite, tapez la commande suivante pour renommer le dossier SoftwareDistribution, puis appuyez sur Entrée :
ren C: WindowsSoftwareDistribution SoftwareDistribution.old
ren C: WindowsSystem32catroot2 catroot2.old

4. Enfin, tapez la commande suivante pour démarrer les services Windows Update et appuyez sur Entrée après chacune d'elles :
net start wuauserv
net start cryptSvc
bits de départ net
net start msiserver

5. Redémarrez votre PC pour enregistrer les modifications et vérifiez si vous pouvez Fix Windows 10 install Fails With Error C1900101-4000D.
Method 8: Delete Registry for Mounted Images
1.Appuyez sur la touche Windows + R puis tapez regedit et appuyez sur Entrée pour ouvrir l'Éditeur du Registre.

2. Accédez à la clé de registre suivante :
HKEY_LOCAL_MACHINESOFTWAREMicrosoftWIMMountMounted Images
3.Select Mounted Images then in the right window pane right-click on (Default) and select Delete.
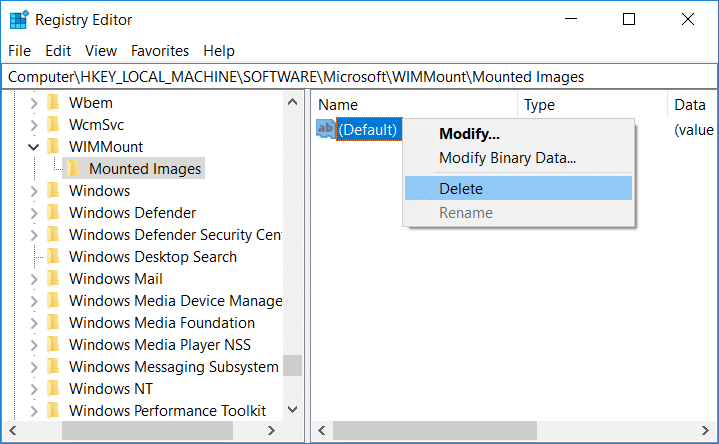
4.Exit Registry Editor and reboot your PC to save changes.
Method 9: Disable Wi-Fi Adapter and CD/DVD Drive
1.Appuyez sur la touche Windows + R puis tapez devmgmt.msc et appuyez sur Entrée pour ouvrir le Gestionnaire de périphériques.

2.Expand DVD/CD-ROM drives, puis faites un clic droit sur votre Lecteur CD / DVD et sélectionnez Désactiver l'appareil.

3.Similarly, expand Network adapters then right-click on your WiFi adaptateur et sélectionnez Désactiver l'appareil.
4.Again try to run Windows 10 setup and see if you’re able to Fix Windows 10 install Fails With Error C1900101-4000D.
Method 10: Run Malwarebytes and AdwCleaner
Malwarebytes is a powerful on-demand scanner which should remove browser hijackers, adware and other types of malware from your PC. It is important to note that Malwarebytes will run alongside antivirus software without conflicts. To install and run Malwarebytes Anti-Malware, go to this article and follow each and every step.
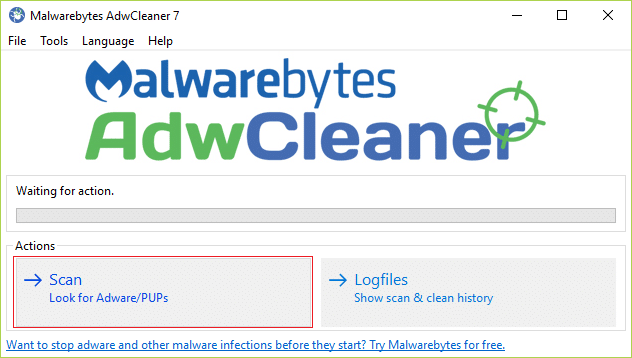
1.Téléchargez AdwCleaner à partir de ce lien.
2.Once the download is complete, double-click on the fichier adwcleaner.exe pour exécuter le programme.
3.Cliquez sur "J'accepteBouton "pour acceptez le contrat de licence.
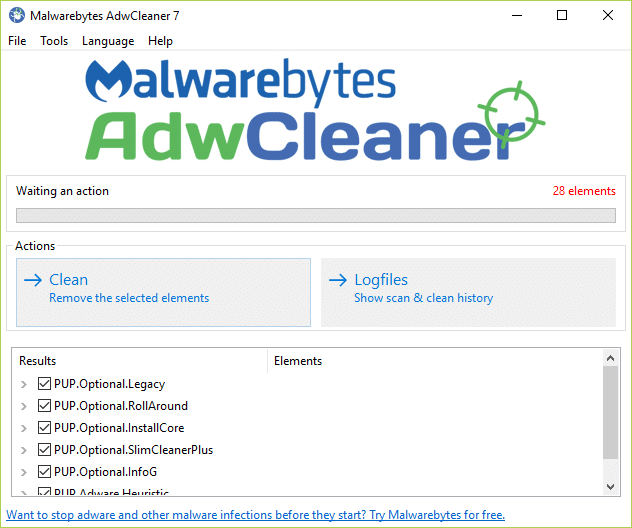
4.On the next screen, click the Bouton de numérisation sous Actions.
5.Now, wait for the AdwCleaner to search for PUP et autres programmes malveillants.
6.Once the scan is complete, click Propres in order to clean your system of such files.
7.Save any work you might be doing as your PC will need to reboot, click OK to reboot your PC.
8.Once the computer reboots, a log file will open which will list all of the files, folders, registry keys, etc that were removed in the previous step.
Recommandée:
Voilà, vous avez réussi Fix Windows 10 install Fails With Error C1900101-4000D mais si vous avez encore des questions concernant ce guide, n'hésitez pas à les poser dans la section commentaires.