15 Ways to Speed Up a Slow Windows 10 PC

If your PC running Windows 10 is becoming slow or constantly lags, you’re at the right place as today we will fix the issue altogether. Although Windows 10 is one of the best-operating systems out there, with time it has become slow and now your PC lags a lot, worse of all it freezes suddenly. You will notice that when you installed a new copy of Windows, the system was a lot faster as compared to the current state.
Now the lagging or slow PC issue is generally caused by performance issues under Windows 10, but sometimes it can also be caused by bad memory (RAM), damaged hard disk, virus or malware etc. So without wasting any time let’s see how to actually Seed Up a Slow Windows 10 PC with the help of below-listed methods.
15 Ways to Speed Up a Slow Windows 10 PC
Bí cinnte pointe athchóirithe a chruthú ar eagla go n-imíonn rud éigin mícheart.
Method 1: Disable Animation and adjust for best performance
1. Brúigh Windows Key + R ansin clóscríobh sysdm.cpl agus brúigh Iontráil chun Airíonna an Chórais a oscailt.

2. Téigh go Cluaisín Advanced ansin cliceáil ar Socruithe faoi Feidhmíocht.
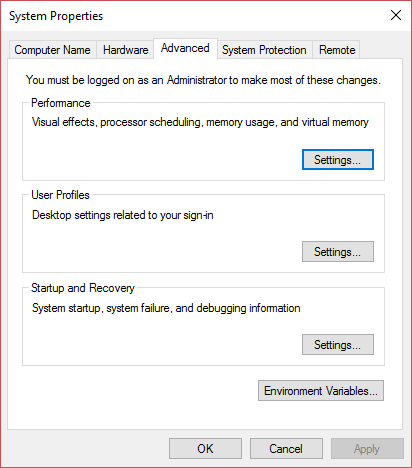
3. Under Visual Effects checkmark “Coigeartaigh do fheidhmíocht is fearr” would automatically díchumasaigh na beochana go léir.
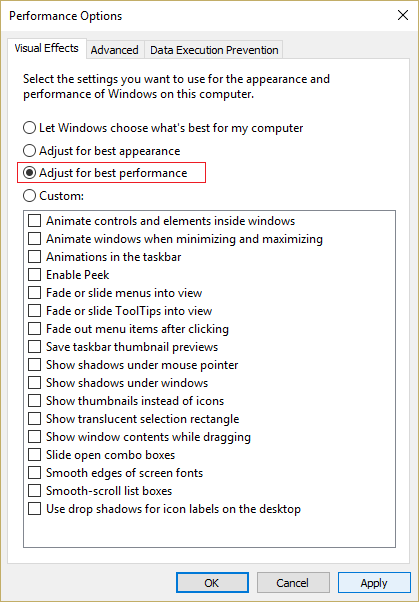
4. Cliceáil Iarratas a dhéanamh, agus OK ina dhiaidh sin.
5. Atosaigh do ríomhaire chun athruithe a shábháil agus féach an bhfuil tú in ann Luasghéarú mall Windows 10 PC.
Method 2: Disable Unnecessary Startup Programs
1. Press Ctrl + Shift + Esc keys together to open Task Manager and then switch to Tosaithe.
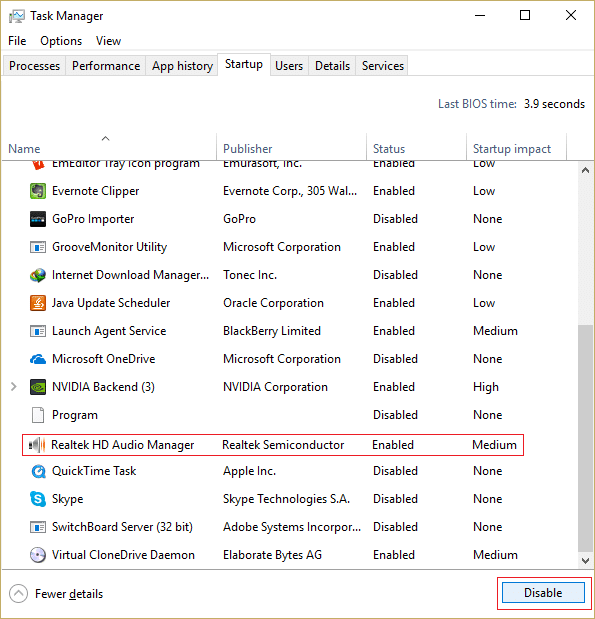
2. From the list, select the programs you don’t use and then click on the Cnaipe a dhíchumasú.
3. Do this for every unnecessary program, as you will only be able to disable one program at a time.

4. Close Task Manager and reboot your PC to save changes.
Modh 3: Rith CCleaner agus Malwarebytes
1. Íoslódáil agus suiteáil CCleaner & Malwarebytes.
2. Rith Malwarebytes agus lig dó do chóras a scanadh le haghaidh comhad díobhálach. Má aimsítear malware, bainfidh sé iad go huathoibríoch.

3. Anois reáchtáil CCleaner agus roghnaigh Glan Saincheaptha.
4. Faoi Chustaim Glan, roghnaigh an Cluaisín Windows agus mainneachtainí checkmark agus cliceáil Analyze.

5. Nuair a bheidh Anailís críochnaithe, déan cinnte go bhfuil tú cinnte go mbainfidh tú na comhaid atá le scriosadh.

6. Faoi dheireadh, cliceáil ar an Rith Glantóir cnaipe agus lig do CCleaner a chúrsa a rith.
7. Chun do chóras a ghlanadh tuilleadh, roghnaigh an cluaisín Chlárlann, agus a chinntiú go ndéantar na nithe seo a leanas a sheiceáil:

8. Cliceáil ar an Scan le haghaidh Ceisteanna cnaipe agus lig do CCleaner scanadh, ansin cliceáil ar an Deisigh Saincheisteanna Roghnaithe cnaipe.

9. Nuair a fhiafraíonn CCleaner “Ar mhaith leat athruithe cúltaca ar an gclárlann?" roghnaigh Sea.
10. Nuair a bheidh do cúltaca críochnaithe, cliceáil ar an Deisigh Gach Saincheist Roghnaithe cnaipe.
11. Atosaigh do ríomhaire chun athruithe a shábháil.
Method 4: Run Disk Cleanup and Error Checking
1. Go to This PC or My PC and right-click on the C: drive to select Airíonna.
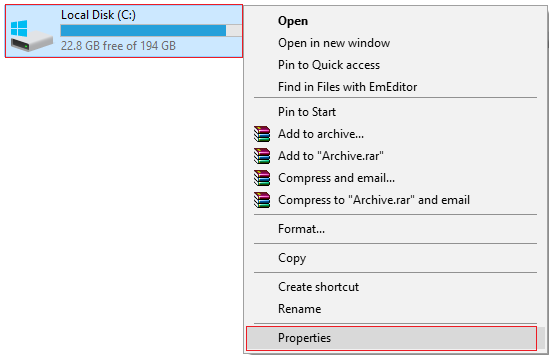
2. Anois ó na Airíonna fuinneog, cliceáil ar glanta diosca under capacity.
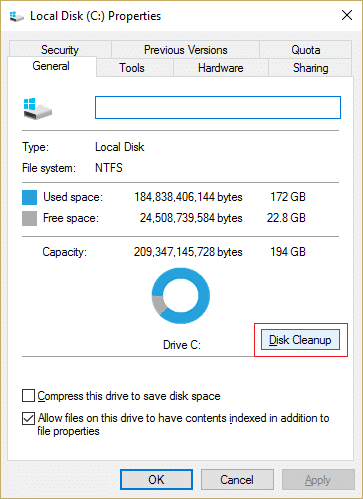
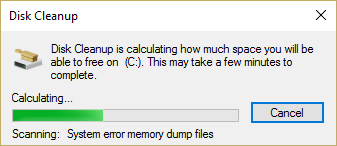
3. It will take some time to calculate how much space Disk Cleanup will free.
4. Anois cliceáil Glan suas comhaid córas in the bottom under Description.
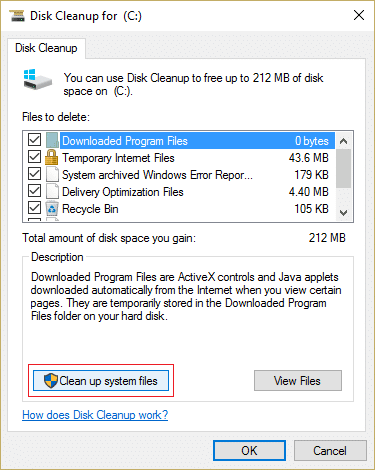
5. In the next window, make sure to select everything under Comhaid le scriosadh and then click OK to run Disk Cleanup. Nóta: We are looking for “Previous Windows Installation(s)"Agus"Comhaid Shealadacha Suiteáil Windows” if available, make sure they are checked.
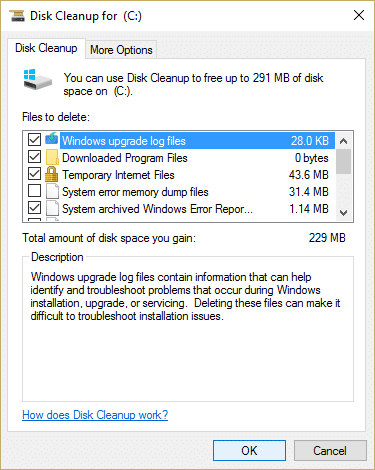
6. Wait for Disk Cleanup to complete and see if you can Speed Up a Slow Windows 10 PC, mura bhfuil ansin lean ar aghaidh.
7. Oscail Ordú Pras. Is féidir leis an úsáideoir an chéim seo a dhéanamh trí chuardach a dhéanamh 'cmd' agus ansin brúigh Iontráil.

8. In the cmd window type the following command and hit Enter:
chkdsk C: / f / r / x

Nóta: In the above command C: is the drive on which we want to check disk, /f stands for a flag which chkdsk the permission to fix any errors associated with the drive, /r let chkdsk search for bad sectors and perform recovery and /x instructs the check disk to dismount the drive before beginning the process.
9. It will ask to schedule the scan in the next system reboot, type Y agus buail isteach.
Please keep in mind that CHKDSK process can take up a lot of time as it has to perform many system-level functions, so be patient while it fixes system errors and once the process is finished it will show you the results.
Modh 5: Díchumasaigh Tosaithe Tapa
1. Brúigh Windows Key + R ansin cineál rialaithe agus brúigh Iontráil a oscailt Painéal rialú.

2. Cliceáil ar Crua-earraí agus Fuaim ansin cliceáil ar Roghanna Power.
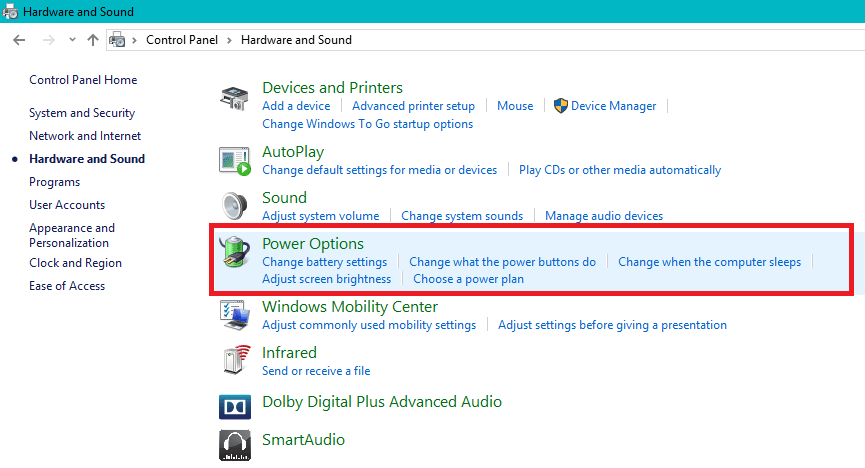
3. Then from the left window pane select "Roghnaigh cad a dhéanann na cnaipí cumhachta."

4. Anois cliceáil ar "Athraigh na socruithe nach bhfuil ar fáil faoi láthair."

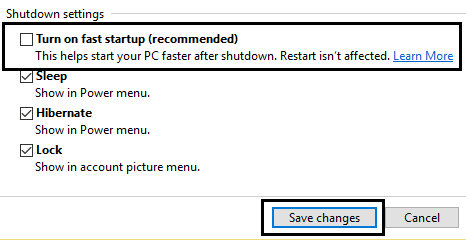
5. Díthiceáil “Cas ar thosú tapa” agus cliceáil ar Sábháil athruithe.
6. Atosaigh do ríomhaire chun athruithe a shábháil agus féach an bhfuil tú in ann Luasghéarú mall Windows 10 PC.
Modh 6: Tiománaithe a Nuashonrú
1. Brúigh Windows Key + R ansin clóscríobh devmgmt.msc agus brúigh Iontráil chun Bainisteoir Gléas a oscailt.

2. Next, make sure to right-click on any device with a yellow exclamation mark next to it.
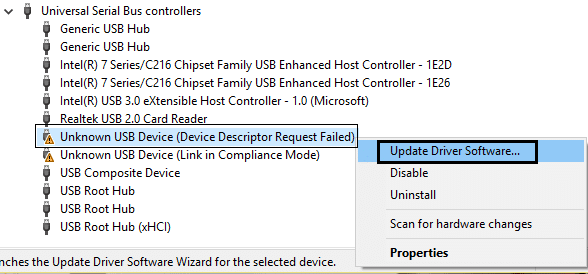
3. Roghnaigh Nuashonrú Tiománaí agus ansin cliceáil ar Cuardaigh go huathoibríoch le haghaidh bogearraí tiománaí nuashonraithe.

4. After the update, restart your PC and see if you’re able to fix the issue.
5. If not, then again right-click and select Nuashonraigh an Tiománaí.
6. This time, select “Brabhsáil mo ríomhaire le haghaidh bogearraí tiománaí."

7. Ansin cliceáil ar “Lig dom roghnú ó liosta de na tiománaithe atá ar fáil ar mo ríomhaire."

8. Roghnaigh an tiománaí cuí ón liosta agus cliceáil Ar Aghaidh.
Nóta: It’s recommended you try the above process with each listed device driver.
9. Atosaigh do ríomhaire agus féach an bhfuil tú in ann Luasghéarú mall Windows 10 PC.
Method 7: Run System Maintenance
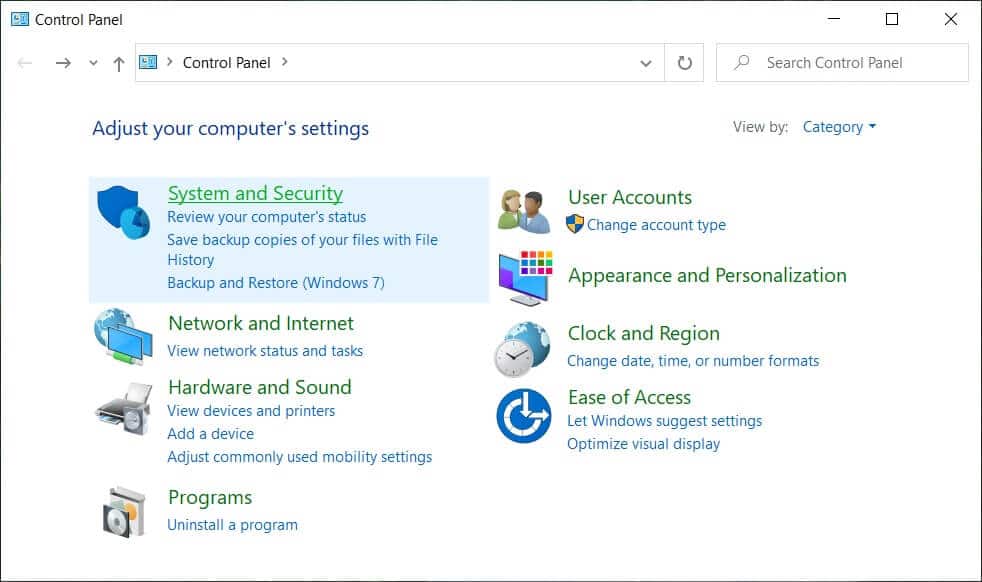
1. Cuardaigh le haghaidh an painéal rialú from the Start Menu search bar and click on it to open the Control Panel.

2. Anois cliceáil ar Córas agus Slándáil.
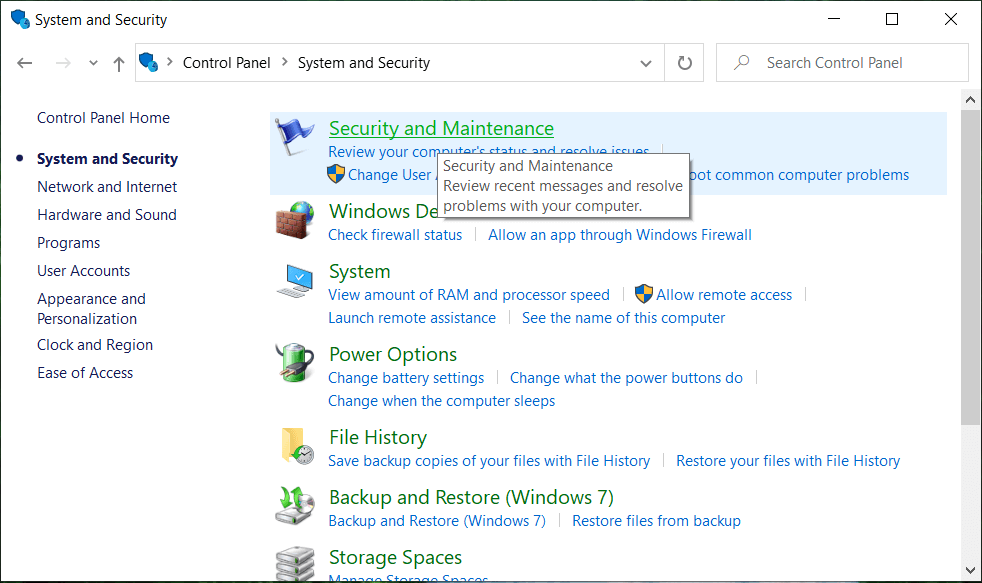
3. Ar Aghaidh, cliceáil ar Security and Maintenance.
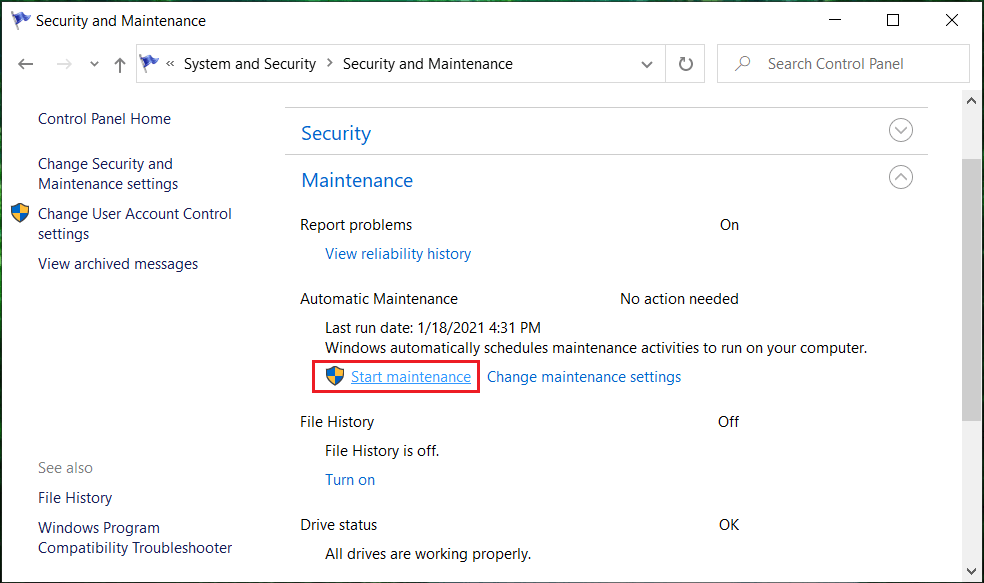
4. Expand Maintenance and under Automatic Maintenance click on “Start maintenance".
5. Let System Maintenace runs and sees if you’re able to Luasghéarú mall Windows 10 PC, mura bhfuil ansin lean ar aghaidh.
Method 8: Defragment Your Hard Disk
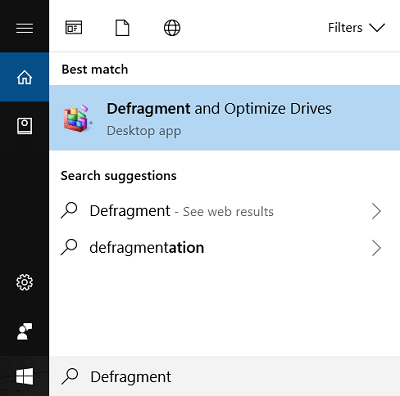
1. cineál Defragment sa bhosca Cuardaigh Windows ansin cliceáil ar Tiomántáin Defragment agus a bharrfheabhsú.
2. Roghnaigh an thiomáineann one by one and click Déan anailís.
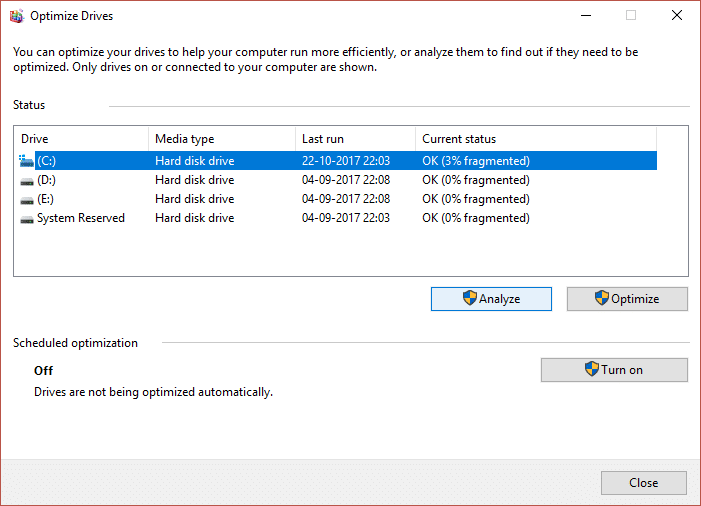
3. Similarly, for all the listed drives click Optamaigh.
Nóta: Ná Defrag SSD Drive mar d'fhéadfadh sé a shaol a laghdú.
4. Atosaigh do ríomhaire chun athruithe a shábháil agus féach an bhfuil tú in ann Luasghéarú mall Windows 10 PC, mura bhfuil ansin lean ar aghaidh.
Modh 9: Rith Fabhtcheartú Cothabhála Córais
1. Cuardaigh le haghaidh an painéal rialú from the Start Menu search bar and click on it to open the Control Panel.
2. Cuardaigh Troubleshoot agus cliceáil ar Fabhtcheartú.

3. Ansin, cliceáil ar an amharc ar fad sa phána chlé.
4. Cliceáil agus rith an Fabhtcheartú maidir le Cothabháil Córas.

5. The Troubleshooter may be able to Speed Up a Slow Windows 10 PC.
Method 10: Disable Unwanted Extensions (Web Browser)
Extensions are a handy feature in chrome to extend its functionality, but you should know that these extensions take up system resources while they run in the background. In short, even though the particular extension is not in use, it will still use your system resources. So it’s a good idea to remove all the unwanted/junk extensions you might have installed earlier.
1. Oscail Google Chrome ansin cineál chrome: // síntí sa seoladh agus brúigh Iontráil.
2. Anois dhíchumasú ar dtús go léir na síntí nach dteastaíonn agus ansin iad a scriosadh trí chliceáil ar an deilbhín scriosadh.
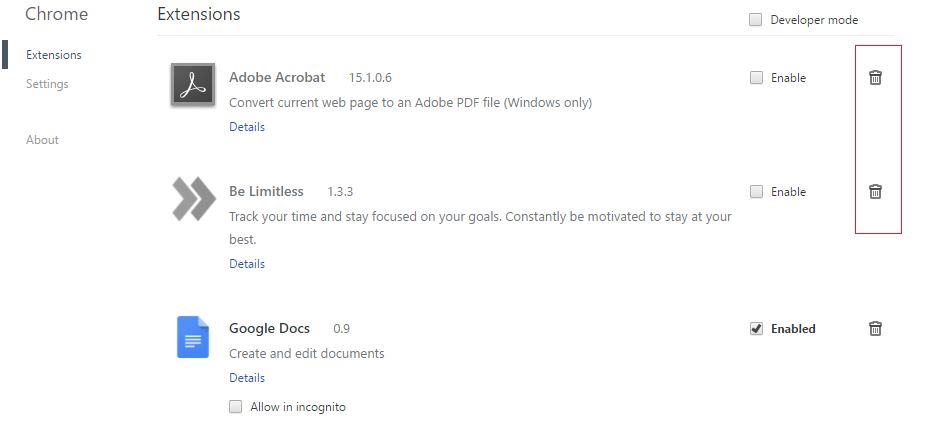
3. Restart Chrome and see if this help in making your PC faster.
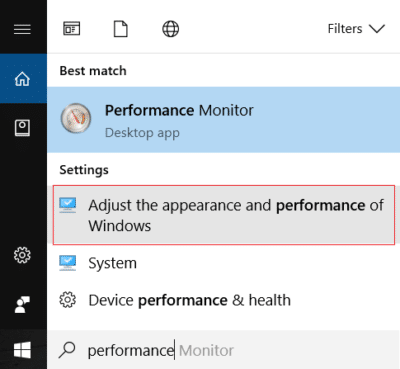
Method 11: Change PageFile Size
1. cineál feidhmíocht in the Windows Search box and then click on “Coigeartaigh cuma agus feidhmíocht Windows."
2. Switch to the Advanced tab and then click the Athrú cnaipe faoi Cuimhne Fíorúil.

3. Díthiceáil "Automatically manage paging file size for all drivers. "
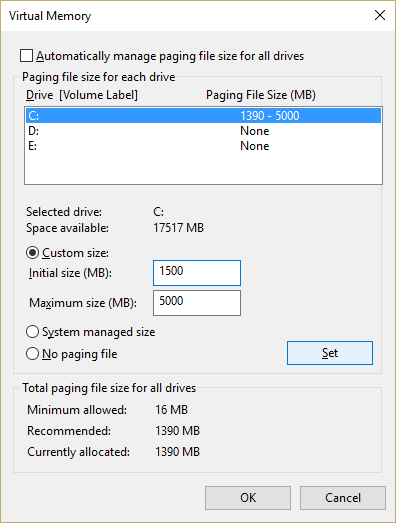
4. Highlight the drive on which Windows 10 is installed and then select the Méid saincheaptha.
5. Socraigh an Recommended values for fields: Initial size (MB) and Maximum size (MB).
6. Click OK, then click Apply followed by OK
7.Restart your PC and see if you’re able to Luasghéarú mall Windows 10 PC.
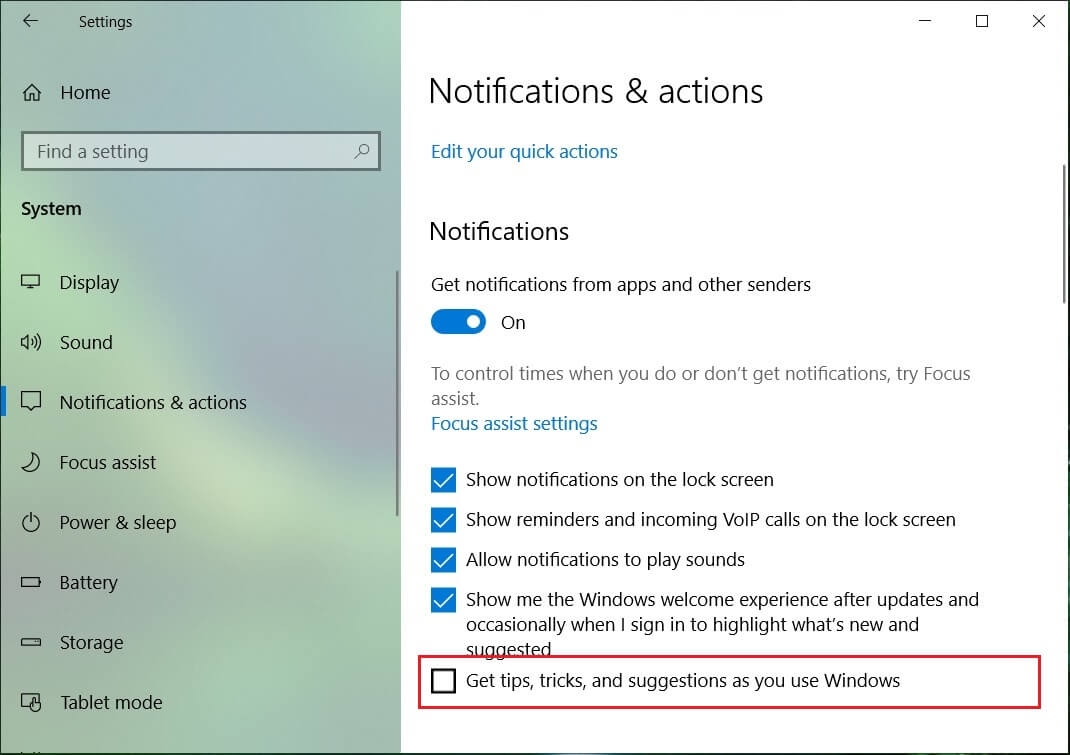
Method 12: Disable Windows 10 Tips
1. Brúigh Windows Key + I chun Socruithe a oscailt ansin cliceáil ar Córas.

2. Ón roghchlár ar chlé, roghnaigh Fógraí & gníomhartha.
3. Múch an scoránaigh le haghaidh “Get tips, tricks, and suggestions as you use Windows. "
4. Atosaigh do ríomhaire.
Method 13: Set your Power Plan to High Performance
1. Deaschliceáil ar Deilbhín cumhachta roghnaíonn ansin Roghanna Cumhachta.

2. Cliceáil ar Show additionals plans agus roghnaigh Ardfheidhmíocht.
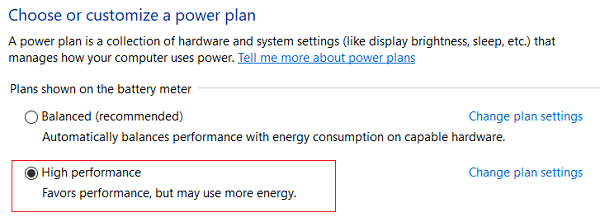
3. Close Settings and restart your PC.
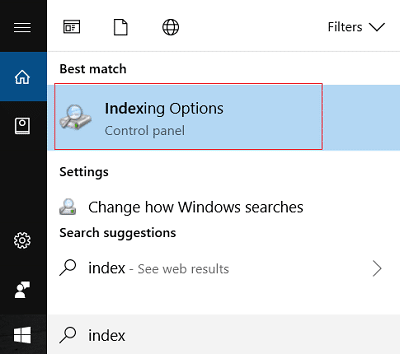
Modh 14: Múch Innéacsú Cuardaigh
1. cineál innéacs in Windows Search then clicks on Roghanna Innéacsaithe.
2. Cliceáil ar Athraigh agus cliceáil ar Show all locations.
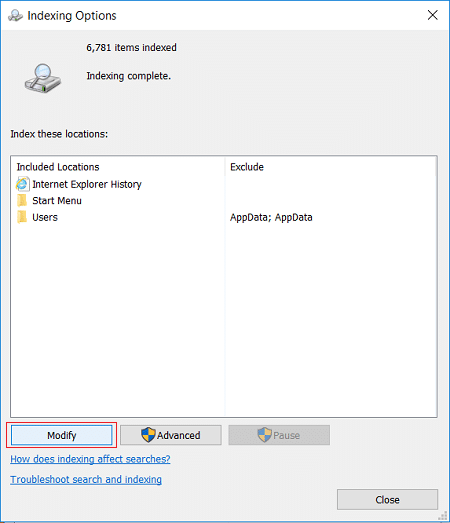
3. Déan cinnte de uncheck all of your disk drives and click OK.

4. Then click Close and reboot your PC. Also, see if you’re able to Luasghéarú mall Windows 10 PC, mura bhfuil ansin lean ar aghaidh.
Method 15: Add more RAM and SSD
If your PC is still running slow and have tried all other options, you may need to consider adding more RAM. Please remove the old RAM and then install the new RAM’s to increase your system performance.
But if you are still facing the occasional lags or system freezes, then you may also consider adding an external SSD to speed up your PC.
Molta:
Sin é atá agat go rathúil Seed Up a Slow Windows 10 PC ach má tá aon cheist agat fós maidir leis an bpost seo ansin bíodh leisce ort iad a chur sa chuid tuairimí.