Deisigh Ceamara In Úsáid ag Aip Eile i Windows 10

Several users have faced camera used by another app issue when they are trying to access camera in Skype or other similar applications. This issue occurs both in inbuilt and external camera devices and it is reported on versions of Windows 7, 8.1, 10, and 11. To be more precise, this issue is faced after the 20H2 update of the Windows Operating System. The camera in use issue is not specific to any particular application on your device but it occurs on your PC for many reasons. In this guide, you will learn effective troubleshooting methods that will help you fix camera is being used by another application issue.

How to Fix Camera In Use by Another App in Windows 10
Here are some valid reasons that contribute to the camera used by another app problem. You are advised to analyze the reasons deeply so that you could follow appropriate troubleshooting methods to resolve the problem so easily.
- Tiománaithe ceamara in easnamh, as dáta nó nach bhfuil comhoiriúnach.
- The files and cache in-camera application are corrupt or incompatible with your Operating System.
- Camera access is not granted in your Windows 10 PC.
- Antivirus programs may restrict camera access.
- App ceamara truaillithe.
- Some other programs on PC are using your camera.
- Níl socruithe ceamara oiriúnach.
- Windows Defender Firewall is blocking Camera access.
- Webcam security features are contributing to the error.
We have investigated several technical forums regarding the camera used by another app issue and thereby analyzed the troubleshooting hacks to fix the problem.
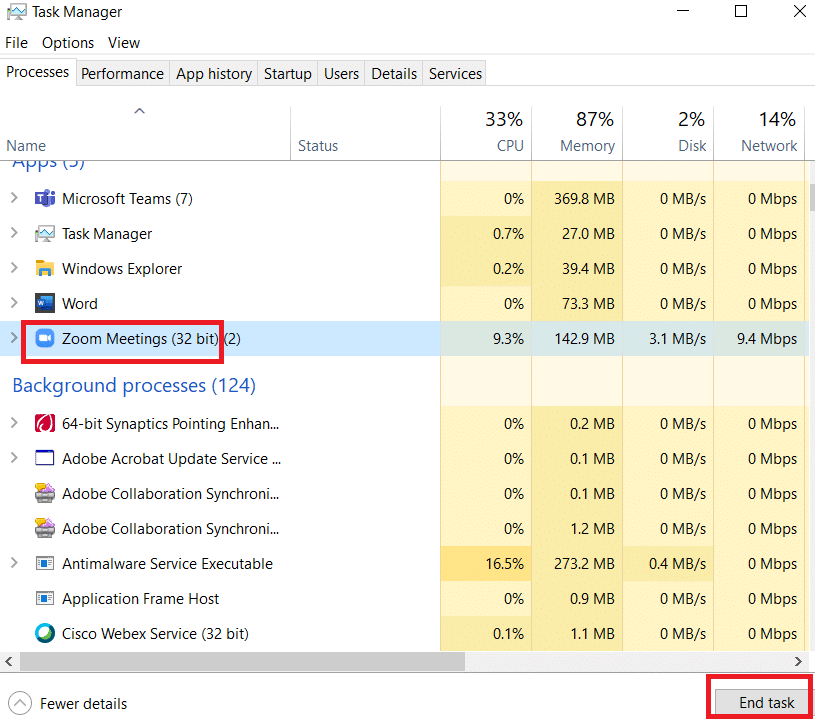
Method 1: Close Programs that Use Camera
The camera in your device can only be used by one application at a time. If you guess that other applications are using the camera, you are advised to close all background applications that are active on your device. You can either exit from all programs by closing all of them one by one or by Task Manager. To do so, follow our guide on How to End Task in Windows 10.
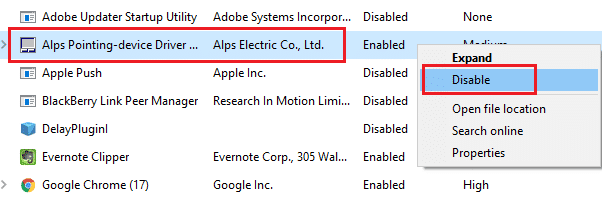
In addition, you are advised to disable start-up programs on your Windows 10 PC. To implement the task, follow our guide on 4 Ways to Disable Startup Programs in Windows 10
Modh 2: Ceadaigh Rochtain Ceamara
If you are experiencing a camera used by another app issue in your Windows 10 computer, there are some chances that access to the camera is not granted appropriately. Also, you can easily fix this issue by allowing access to the camera in Windows Settings. Here are a few steps to grant permission.
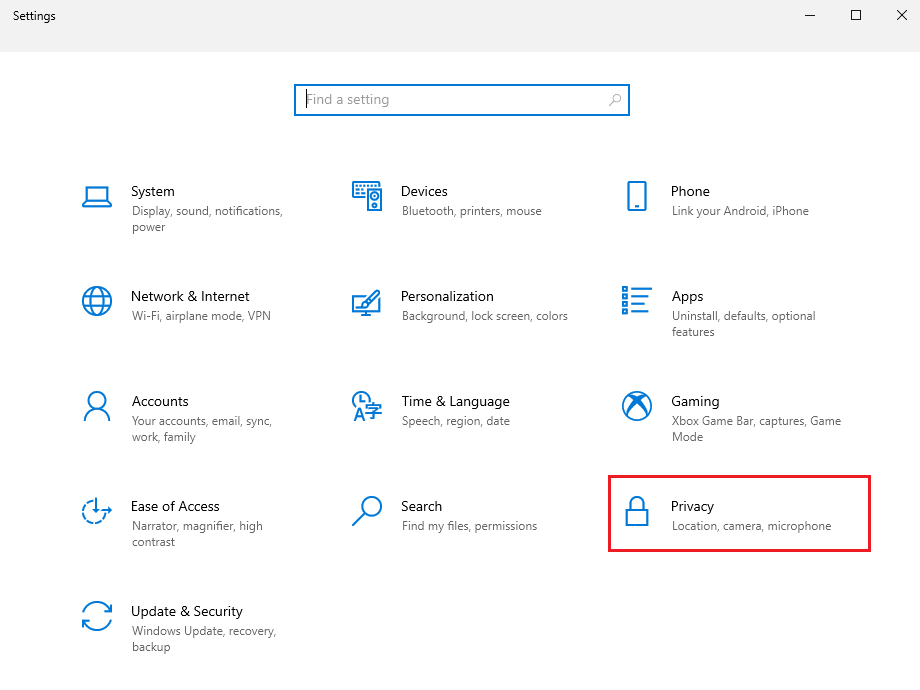
1. You can launch Socruithe Windows trí bhrú Eochracha Windows + I ag an am céanna.
2. Ansin, roghnaigh an Príobháideacht rogha mar a thaispeántar.
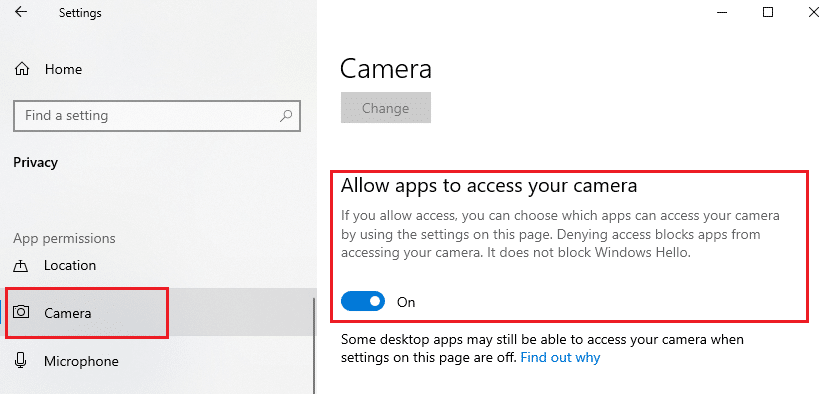
3. Ansin, sa phána chlé, cuardaigh agus roghnaigh an ceamara rogha.
Nóta: Bí cinnte go Lig do na apps teacht ar do cheamara Tá an rogha cumasaithe mar a léirítear.
Chomh maith leis sin Léigh: Conas Ceamara Omegle nach bhfuil ag obair a dheisiú
Modh 3: Rith Fabhtcheartú Crua-earraí & Gléasanna
If you find your Windows 10 computer is facing any hardware-related issues, it can be easily sorted by running Fabhtcheartóir Crua-earraí agus Feistí. All the issues identified by the troubleshooter will be automatically resolved by the troubleshooter itself. For instance, if there are any corrupt settings in your PC and if there are any specific changes intended to be done, the troubleshooter helps you a lot. Follow our guide to Run Hardware and Devices Troubleshooter to fix issues and implement the steps as instructed.
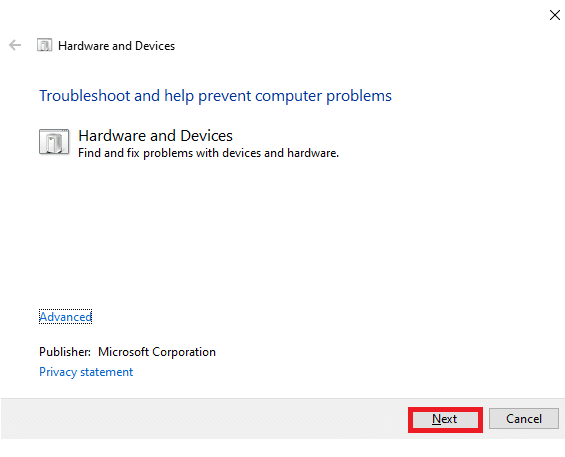
Once you have fixed all the suggestions mentioned at the end of the troubleshooting process, check if you have fixed camera used by another app issue.
Modh 4: Cumasaigh Tiománaí Gléas Ceamara
If you have accidentally disabled the webcam or camera in your device settings, you will face camera in use issue. So, if you have disabled the webcam in your device, enable it on your computer as instructed below.
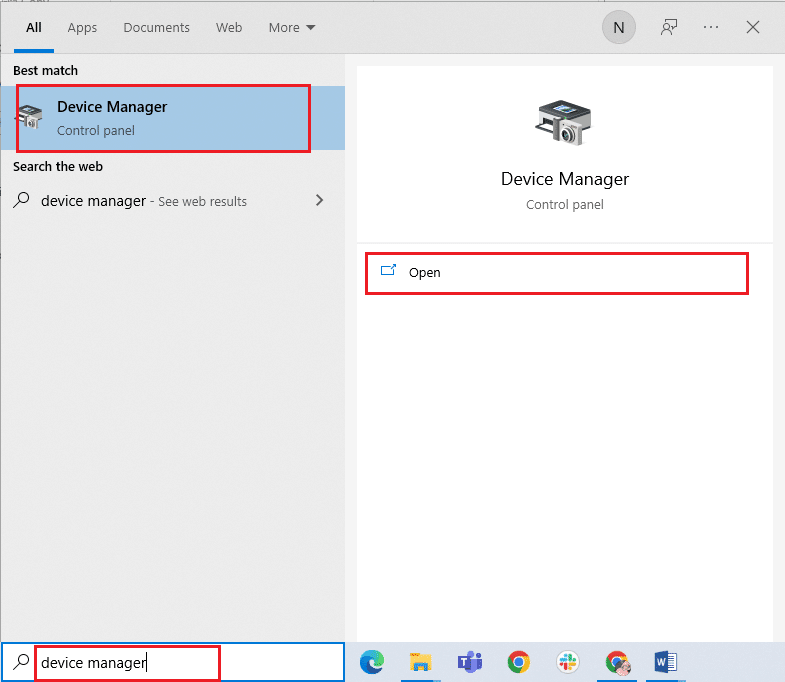
1. Buail an Windows eochair agus cineál Bainisteoir gléas. Ansin, cliceáil ar Oscail.
2. Chomh luath agus Bainisteoir gléas osclaíonn an fhuinneog, cliceáil faoi dhó ar ceamaraí alt chun é a leathnú.
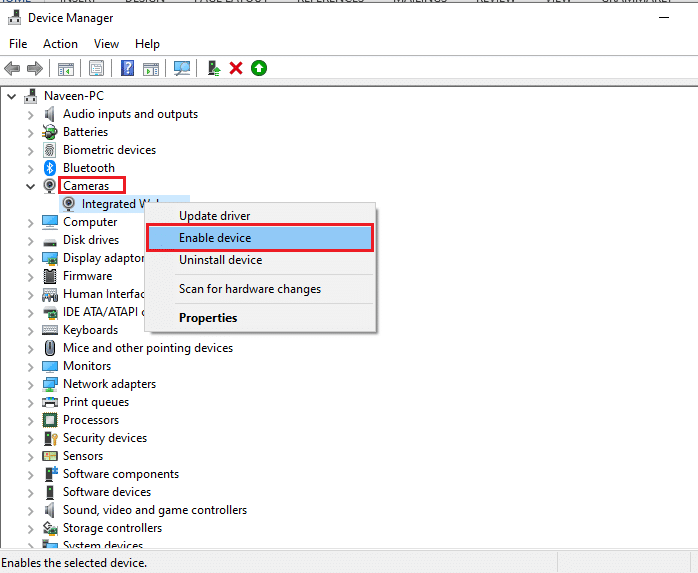
3. Anois, deaschliceáil ar do gléas ceamara agus roghnaigh an Cumasaigh an gléas rogha.
Chomh maith leis sin Léigh: 8 Best Webcam for Streaming in India (2022)
Modh 5: Rith Scan Malware
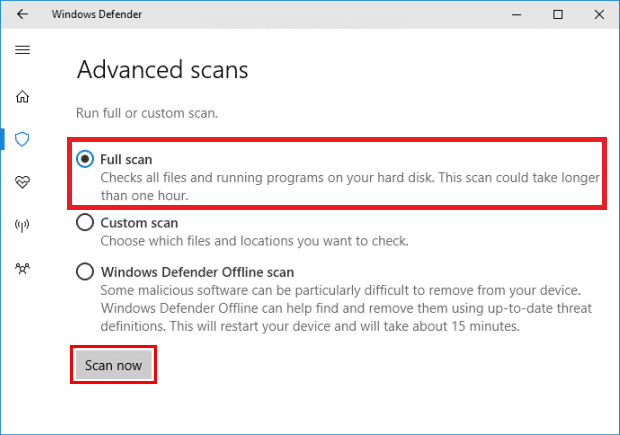
Several Microsoft experts suggest that, scanning PC will help you maintain your computer threat free. If there are any virus or malware intrusions in your PC, you cannot use external and internal hardware devices. Hence, you are advised to scan your computer as instructed in our guide on How do I Run a Virus Scan on my Computer?
Chomh maith leis sin, más mian leat malware a bhaint as do ríomhaire, seiceáil ár dtreoir Conas Malware a bhaint ó do ríomhaire i Windows 10.
Modh 6: Nuashonraigh Windows
Also, if there are any bugs in your PC, they can only be fixed after a Windows update. Microsoft releases regular updates to fix all these bugs thereby sorting camera is being used by another application issue. Hence, ensure if you have updated your Windows Operating System and if there are any updates pending in action, use our guide to Download and Install Windows 10 Latest Update.
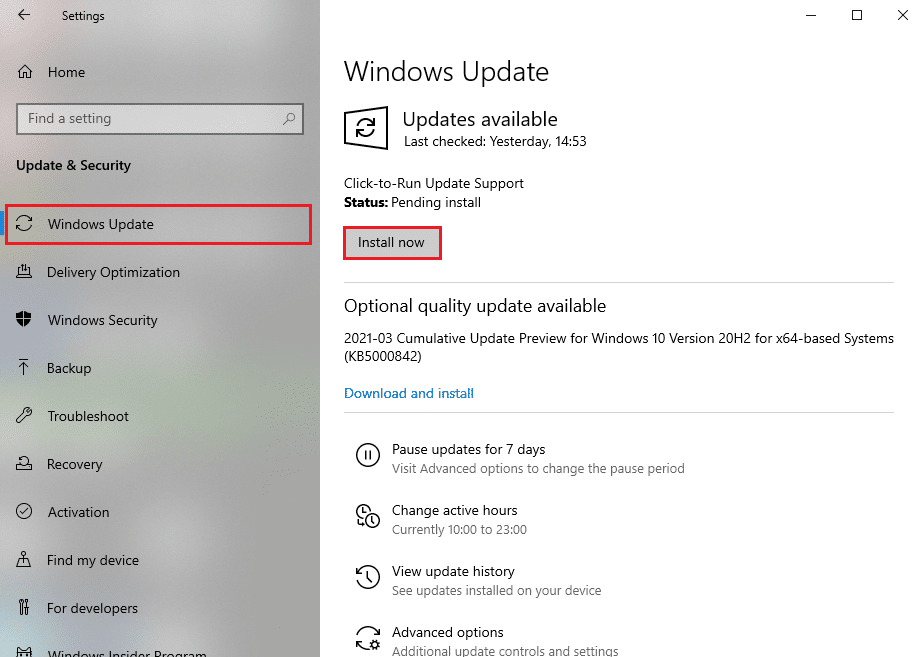
Tar éis do Chóras Oibriúcháin Windows a nuashonrú, seiceáil an féidir leat rochtain a fháil ar do cheamara.
Chomh maith leis sin Léigh: How To Fix No Camera Found In Google Meet
Method 7: Disable Windows Firewall
Sometimes, Windows Defender Firewall in your computer might prevent camera access, for some security reasons. If in case, camera has been blocked by Windows Defender Firewall, you have to enable it or disable the Firewall securities temporarily from your computer. If you do not know how to disable Windows Defender Firewall, our guide to Disable Windows 10 Firewall will help you do so.
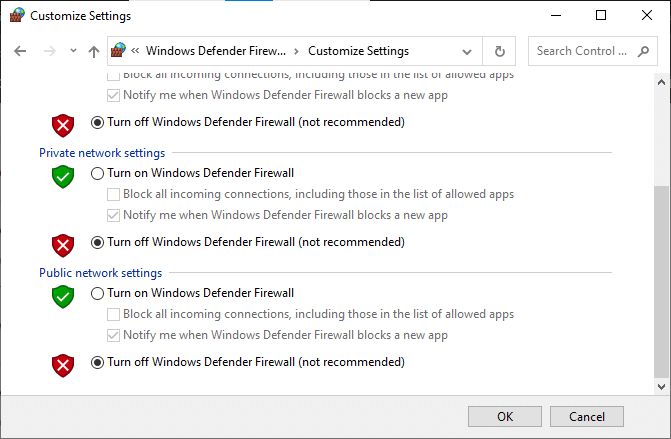
Tar éis duit do cheamara a rochtain, déan cinnte go gcumasaíonn tú an tsraith Balla Dóiteáin arís, ós rud é go mbíonn ríomhaire gan clár slándála ina bhagairt i gcónaí.
Method 8: Update or Rollback Camera Drivers
If there are any incompatible or outdated camera drivers in your computer, you will face camera in use issue. To fix the problem, either update the camera drivers or roll back them if necessary.
Rogha I: Nuashonraigh Tiománaithe
1. cineál Bainisteoir gléas in the Windows 10 search menu and click on Oscail.
2. Ansin, cliceáil faoi dhó ar ceamaraí chun é a leathnú.
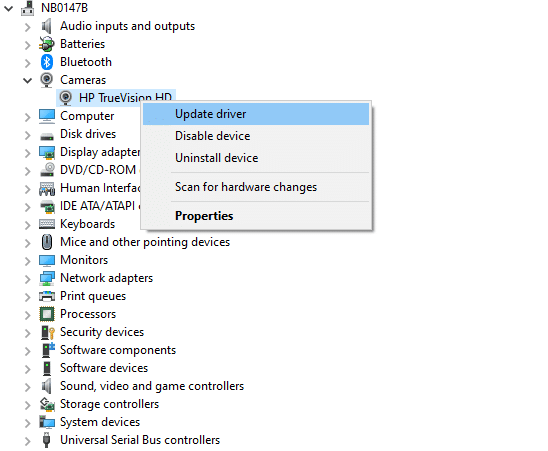
3. Anois, deaschliceáil ar do thiománaí (say HP TrueVision HD) and then select Tiománaí nuashonraithe.
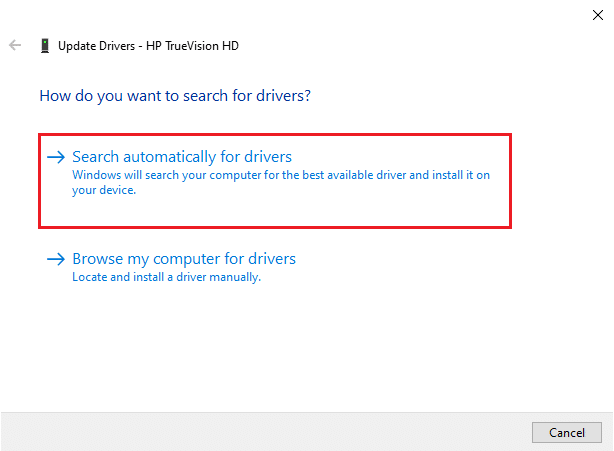
4. Anois, cliceáil ar Cuardaigh tiománaithe go huathoibríoch. This will identify and install the apt drivers automatically.
5A. If there are updates pending to be installed, the update will be successful.
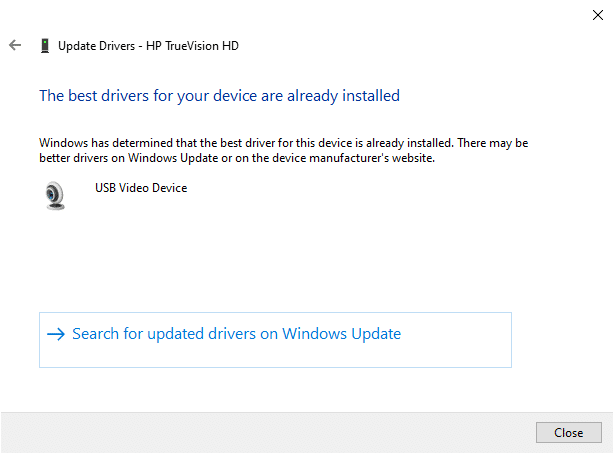
5B. You will get Tá na tiománaithe is fearr do do ghléas suiteáilte cheana féin message if the drivers are already updated.
6. Exit the window and Atosaigh do ríomhaire.
Chomh maith leis sin Léigh: Deisigh Tá an Gléas seo á Úsáid ag Earráid Fuaime Feidhmchláir Eile
Option II: Rollback Drivers
1. As you did earlier, open Bainisteoir gléas agus an ceamaraí alt seo.
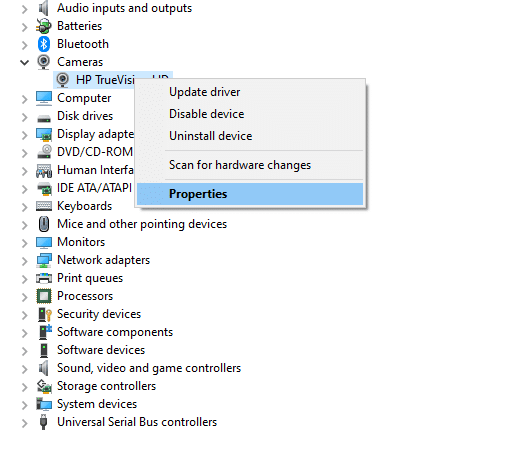
2. Deaschliceáil ar an tiománaí agus roghnaigh an Airíonna rogha.
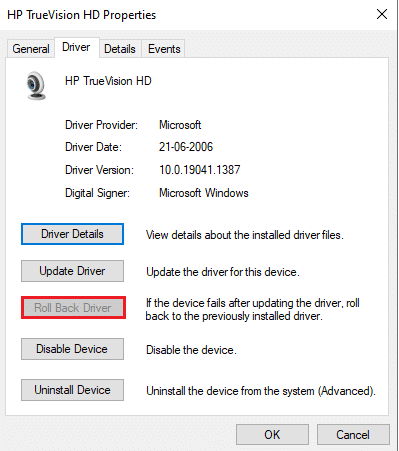
3. Athraigh go dtí an Cluaisín tiománaí agus cliceáil ar Tiománaí Roll Back.
4. Cliceáil ar OK na hathruithe a shábháil.
5. Ar deireadh, cliceáil ar Is ea in the prompt and atosú your computer. Now, you can access your camera.
Chomh maith leis sin Léigh: Cad is Tiománaí Gléas ann? Conas a Oibríonn Sé?
Modh 9: Apps Nuashonraigh
You must make sure whether all the applications associated with the Microsoft Store are updated to its latest version. This will ensure if all the inter related apps are up to its latest version thereby fixing camera used by another app problem. Follow the steps as instructed.
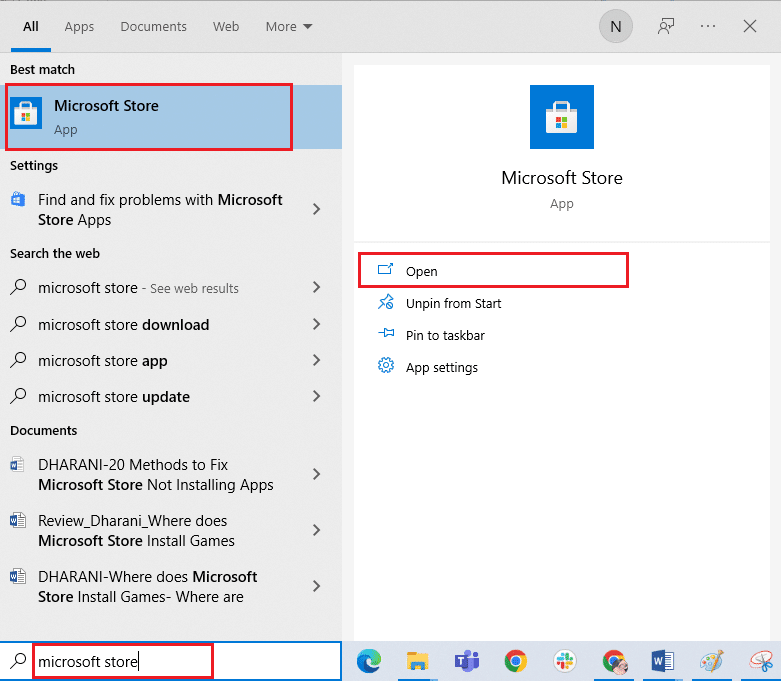
1. cineál Microsoft Store sa roghchlár cuardaigh agus cliceáil ar Oscail.
2. Ar aghaidh sa Microsoft Store fuinneog, cliceáil ar an Leabharlann deilbhín mar a thaispeántar.
![]()
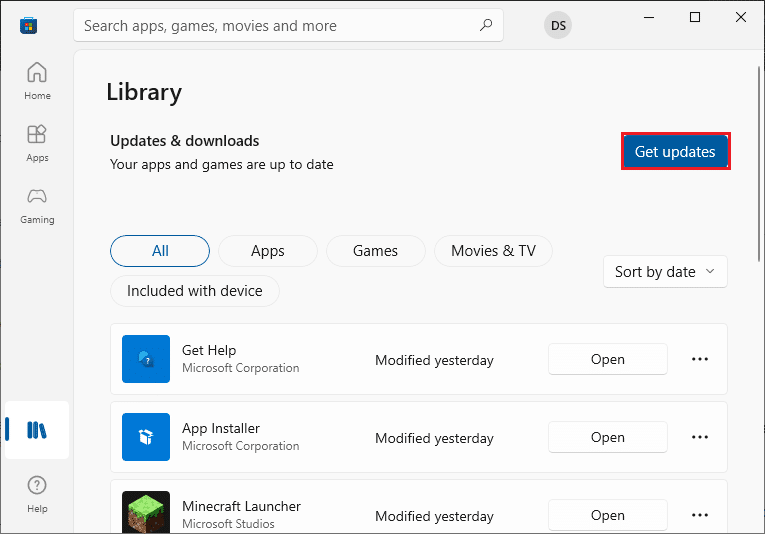
3. Anois, cliceáil ar Faigh nuashonruithe cnaipe mar a thaispeántar.
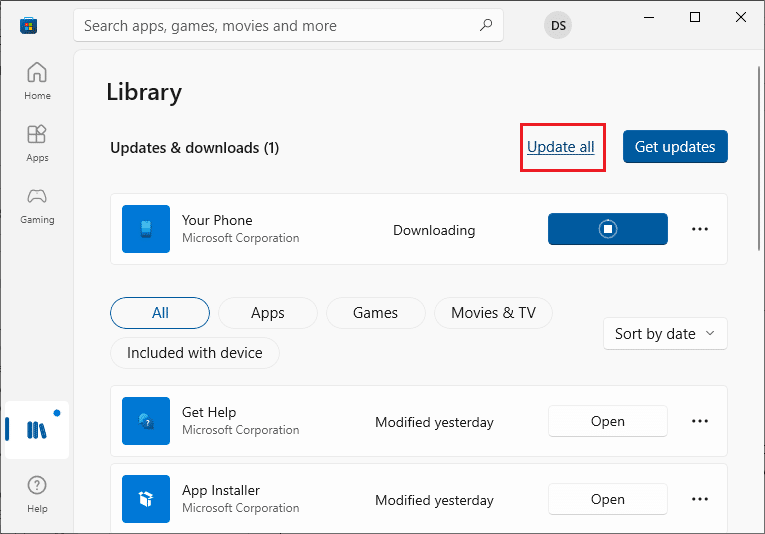
4. Ar Aghaidh, cliceáil ar Nuashonraigh gach cnaipe.
5. Fan go bhfaighidh tú Tá do chuid aipeanna agus cluichí cothrom le dáta go pras.
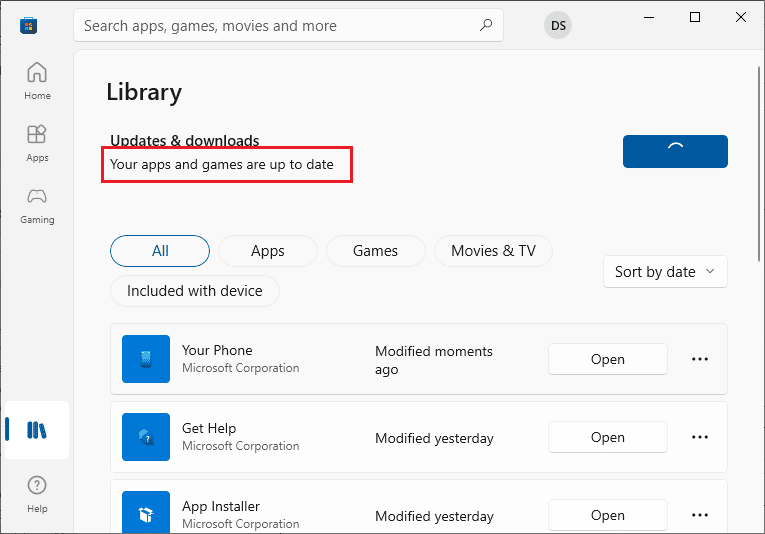
After updating the apps, check if you have fixed the problem.
Modh 10: Athshuiteáil Aipeanna Fadhbacha
For app related problems that are causing you camera is being used by another application issue, you have no other options than to reinstall them. Here are few instructions to reinstall problematic applications in Microsoft Store.
Nóta: Sa treoir seo, Zúmáil a ghlacadh mar shampla.
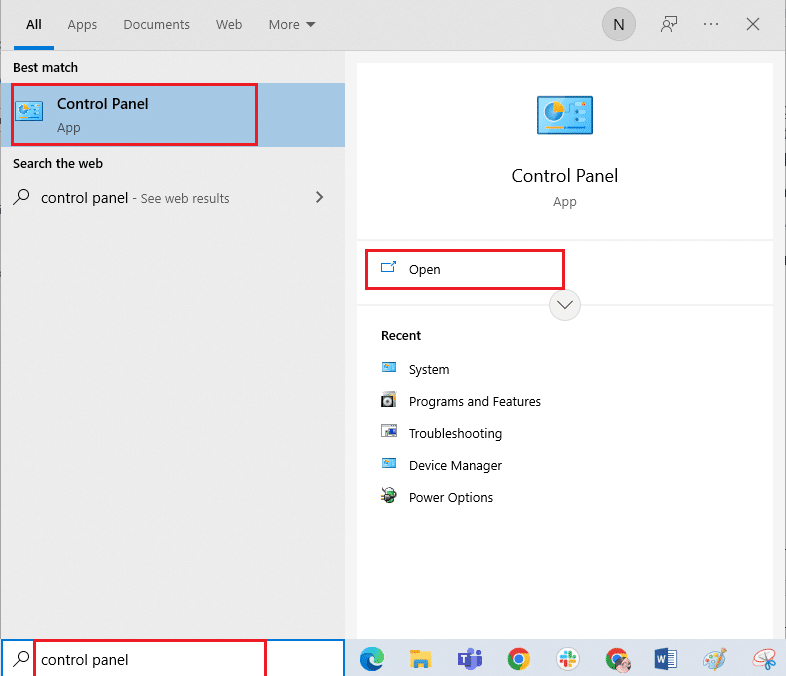
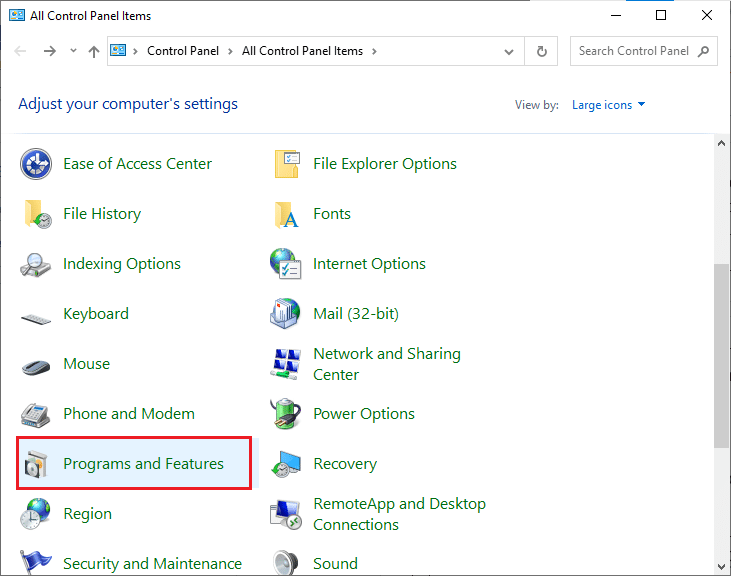
1. cineál Painéal rialú sa roghchlár cuardaigh agus cliceáil ar Oscail.
2. Socraigh Amharc le > Deilbhíní móra, ansin cliceáil ar Cláir agus Gnéithe rogha.
3. Anois, cliceáil ar Zúmáil agus roghnaigh an Díshuiteáil rogha.
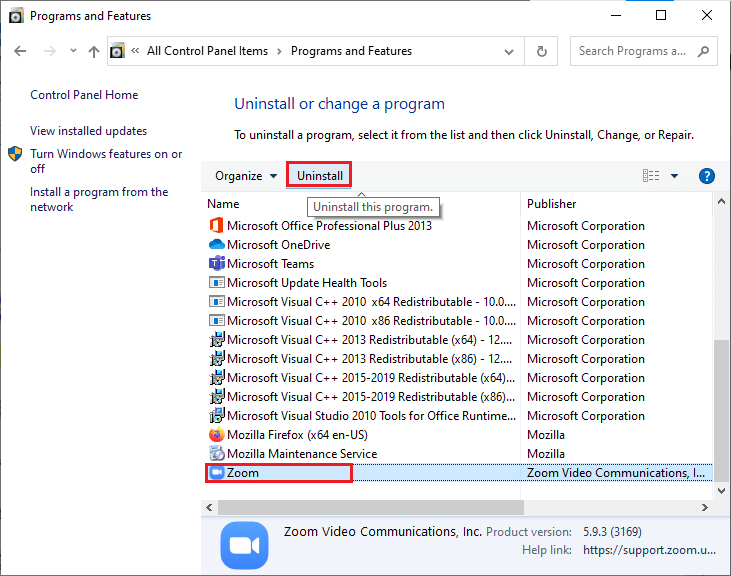
4. Deimhnigh an leid más ann dó agus Atosaigh do ríomhaire tar éis an app a bheith díshuiteáilte go hiomlán.
5. Download Zoom from the suíomh oifigiúil.

6. Anois, nascleanúint chuig Mo íoslódáil agus reáchtáil an Suiteálaí Zoom setup file. Wait until the app gets installed on your PC. Now, you can access the camera in the newly installed app.
Chomh maith leis sin Léigh: Deisigh Ceamara Nach bhfuil ag Obair ar Fhoirne
Modh 11: Ceamara a athchlárú
If none of the above-discussed methods have helped you, then have a try to re-register your camera as instructed below. There are two methods to implement the task.
Rogha I: Trí Windows PowerShell
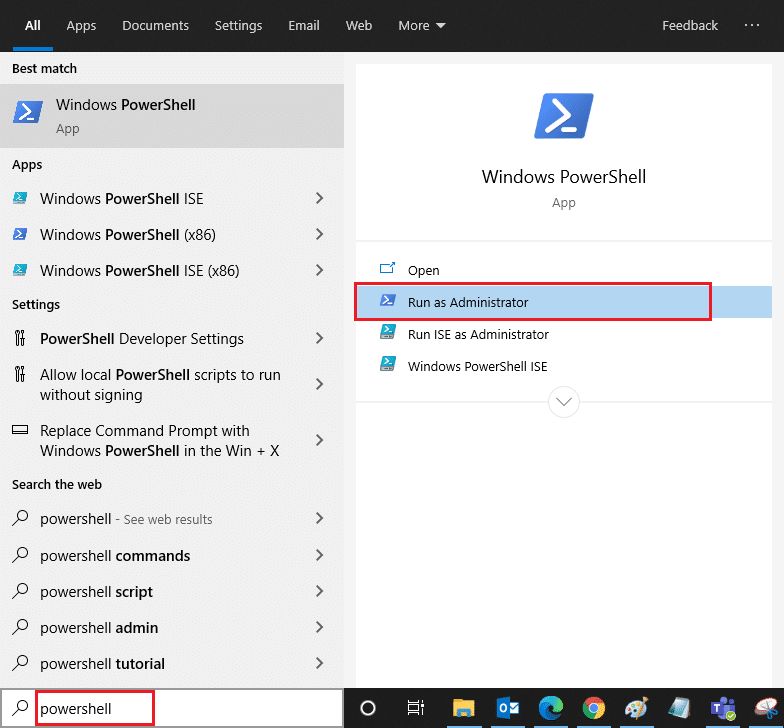
1. cineál Powershell sa bharra cuardaigh agus cliceáil ar Rith mar Riarthóir mar a thaispeántar.
2. Then, type the following command and hit Iontráil eochair.
Get-AppxPackage -allusers Microsoft.WindowsCamera | Foreach {Add-AppxPackage -DisableDevelopmentMode -Cláraigh "$($_.InstallLocation)AppXManifest.xml"}
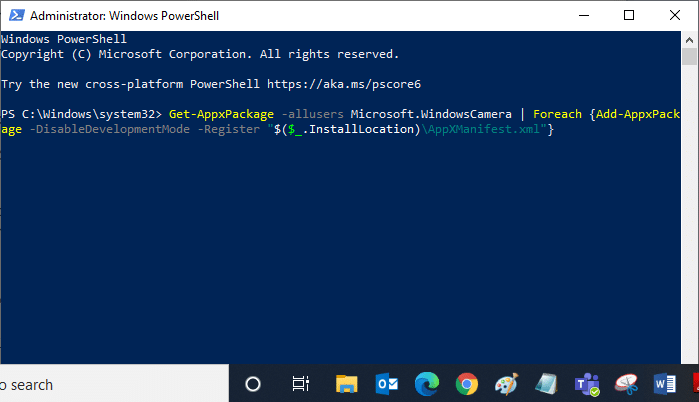
3. Wait until the common execution is successful and check if you have fixed camera in use issue .
Rogha II: Trí Bhainisteoir Gléas
1. Oscail Bainisteoir gléas ón mbarra Cuardaigh Windows.
2. Anois, leathnaigh an ceamaraí alt trí chliceáil faoi dhó air.
3. Then, right-click on the camera driver (e.g. HP TrueVision HD) agus roghnaigh an Feiste dhíshuiteáil rogha.

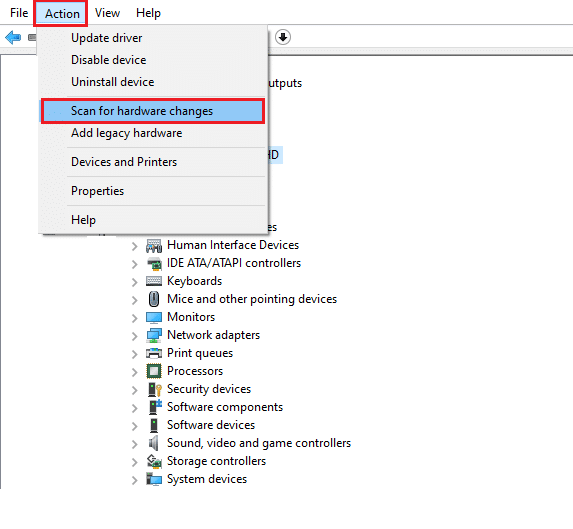
4. Anois, aistrigh go dtí an gníomh tab agus roghnaigh an Scanadh le haghaidh athruithe crua-earraí rogha.
Modh 12: App Ceamara Athshocraigh
You can also try resetting your camera application to fix camera used by another app issue. Follow as instructed below
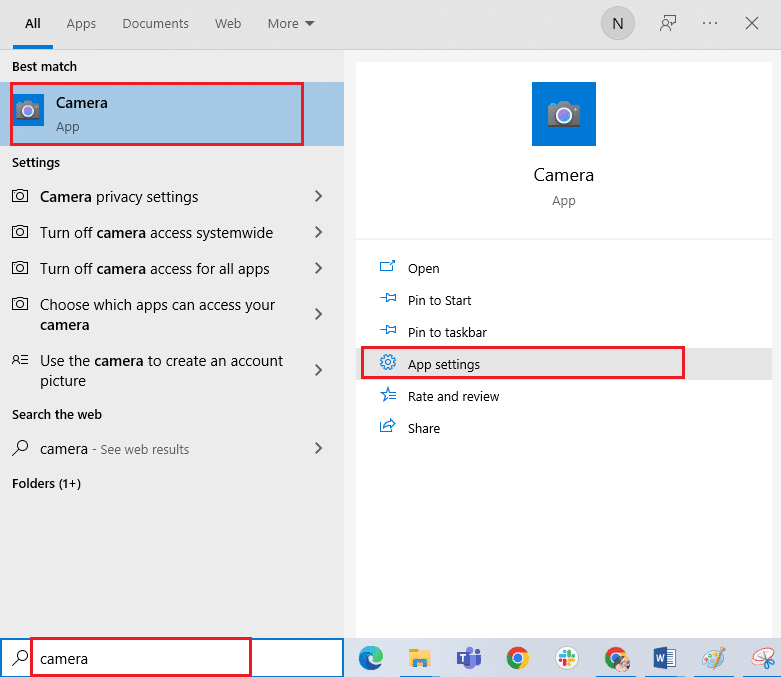
1. Buail an Windows eochair, cineál ceamara, agus cliceáil ar socruithe app.
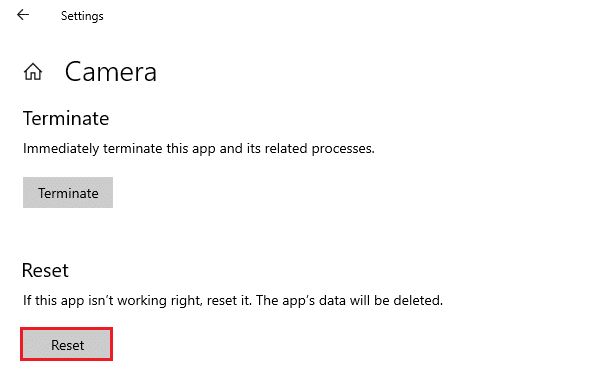
2. Ansin, cliceáil ar an athshocrú rogha mar atá aibhsithe.
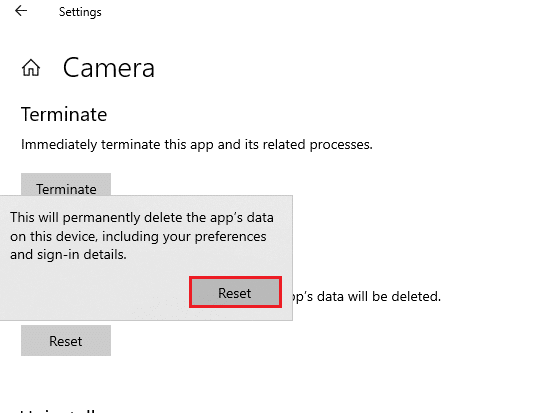
3. Ar Aghaidh, deimhnigh aon leid trí chliceáil ar athshocrú.
Chomh maith leis sin Léigh: Deisigh Ceamara Glúine Gan Braitheadh ar Windows 10
Modh 13: Athchóirigh an Chórais a Fheidhmiú
If there are any incompatible Windows updates on your computer, your PC will not work as usual it does. So, restore your computer to a state whether everything was working fine. Here are some instructions to restore your PC. To do so, follow our guide on How to use System Restore on Windows 10 and implement the instructions as demonstrated.
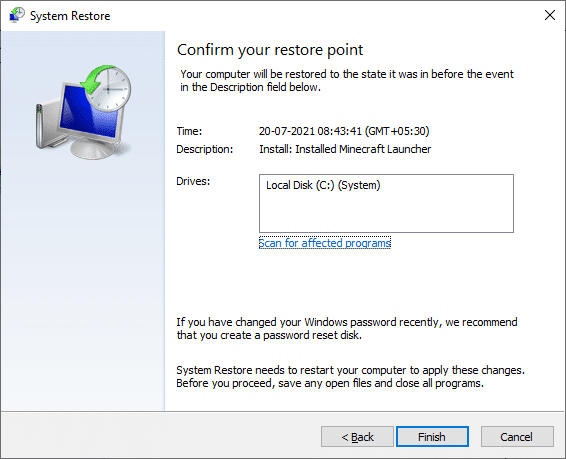
Tar éis do Windows 10 PC a athchóiriú, seiceáil an féidir do cheamara a úsáid.
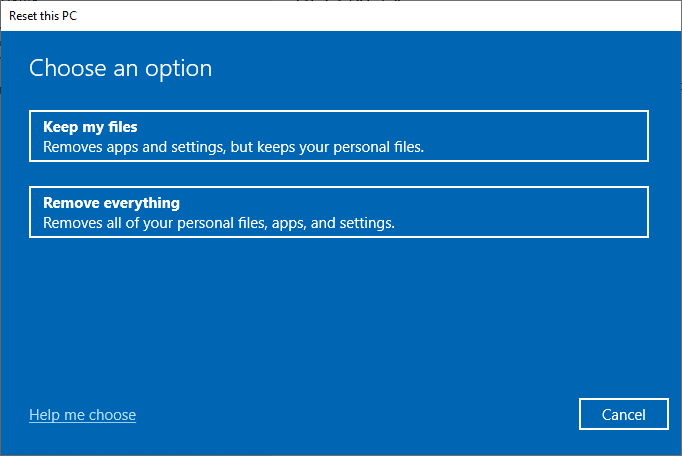
Method 14: Clean Install Windows 10
If none of the methods have helped you fix the said issue, then you have to clean install your Windows Operating System. To clean boot your computer, implement the steps as instructed in our guide to do a Clean Install of Windows 10
Molta:
It would be really frustrating not being able to access your camera in the middle of the meetings, but now you would have fixed ceamara in úsáid by another app issue in Windows 10. Keep visiting our page for more cool tips & tricks and leave your comments below. Also, if you have any queries/suggestions regarding this article, then feel free to drop them in the comments section.