Fix MultiVersus Not Launching in Windows 10

MultiVersus is a famous online multiplayer fighting game that is rocking today’s gaming world. Yet, few users complain about the MultiVersus not launching issue when the game is launched on their Windows 10 PC. If you are in the same boat, the troubleshooting hacks discussed in this article will help you sail the problem.
How to Fix MultiVersus Not Launching in Windows 10
If you are vexed by MultiVersus won’t launch issue in your Windows 10 computer, here are a few possible reasons why you must analyze them carefully to sort out the problem.
- Ní chomhlíonann PC bunriachtanais an chluiche.
- Tá clár cúlra éigin eile ag cur isteach ar an gcluiche.
- Tá tú ag baint úsáide as leagan neamhfhíoraithe de na tiománaithe.
- Tá socruithe grafaicí an chluiche míchumraithe.
- Láithreacht malware agus víris.
- Níl an creat .NET agus an córas oibriúcháin nuashonraithe go dtí an leagan is déanaí acu.
- Níl an leagan DirectX cothrom le dáta.
- Overclocking.
- Aon chomhaid suiteála míchumraithe nó truaillithe den chluiche is cúis leis an bhfadhb freisin.
- Níl na comhaid in-athdháilte Microsoft C++ comhoiriúnach leis an gcluiche agus leis an ríomhaire.
Seo roinnt modhanna fabhtcheartaithe féideartha a chabhróidh leat an cheist a pléadh a réiteach.
Modh 1: Modhanna Bunúsacha um Fhabhtcheartú
Lean na modhanna bunúsacha fabhtcheartaithe seo chun an cheist sin a réiteach.
1A. Seiceáil Riachtanais an Chórais
Il-aghaidh Ceanglais Chórais Íosta
- LAP: Intel Core i5-2300 nó AMD FX-8350
- RAM: 4GB
- CÁRTA VIDEO: Nvidia GeForce GTX 550 Ti nó AMD Radeon HD 5850 | Tiománaí Intel UHD 750
- Scáthóir picteilín: 5.0
- SHADER VERTEX: 5.0
- SPÁS Diosca SAOR IN AISCE: 6GB
- RAM VIDEO Tiomnaithe: 1024 MB
Il-aghaidh Riachtanais Molta
- LAP: Intel Core i5-3470 nó AMD Ryzen 3 1200
- RAM: 8GB
- CÁRTA VIDEO: Nvidia GeForce GTX 660 nó AMD Radeon R9 270
- Scáthóir picteilín: 5.0
- SHADER VERTEX: 5.0
- SPÁS Diosca SAOR IN AISCE: 6GB
- RAM VIDEO Tiomnaithe: 2048 MB
1B. Check your internet connection
Unstable internet connection leads to MultiVersus is not working issue, also if there are any obstacles between your router and your computer, they may interfere with the wireless signal and will cause intermittent connection problems.
Is féidir leat a rith a tástáil luais a bheith eolach ar an leibhéal luais líonra is fearr is gá don nasc cuí.
Cinntigh go sásaíonn do ghléas na critéir thíos.
- Faigh neart comhartha do líonra agus má tá sé an-íseal, soiléir na constaicí ar fad idir an bealach.
- Seachain an iomarca gléasanna atá nasctha leis an líonra céanna.
- Ceannaigh móideim/ródaire atá fíoraithe ag do Sholáthraí Seirbhíse Idirlín (ISP) i gcónaí agus tá siad saor ó choinbhleachtaí.
- Ná húsáid cáblaí d'aois, briste, nó damáiste. Cuir na cáblaí in ionad más gá.
- Bí cinnte go bhfuil na sreanga ón móideim go dtí an ródaire agus an móideim go dtí an balla cobhsaí agus nach bhfuil aon suaitheadh ann.
Má tá aon cheisteanna nascachta idirlín ann, seiceáil ár dtreoir Conas Fabhtcheartú a Dhéanamh ar Fhadhbanna Nascachta Líonra ar Windows 10 chun an rud céanna a réiteach.
1C. Stop Overclocking
- Tógtar gach ríomhaire ardleibhéil leis an rogha Overclocking a chabhraíonn le níos mó sú a aschur ná na sonraíochtaí atá agat cheana féin. Tagraíonn rith an chárta grafaicí nó an próiseálaí níos tapúla ná an luas réamhshocraithe do overclocking.
- Nuair a tharlaíonn sé seo, sroichfidh do ríomhaire an teocht uasta tar éis am ar leith. Aimsíonn an ríomhaire é seo agus coigeartaíonn sé an luas clog go dtí an gnáthluas go dtí go fhuaraítear é. Méadaítear luas an chloig arís tar éis dóibh fuarú.
- Méadaíonn sé seo feidhmíocht do ríomhaire agus is mór an chabhair é mura bhfuil ríomhaire cumhachtach agat.
- Ní mór a thabhairt faoi deara nach dtacaíonn na cluichí go léir le overclocking. Baineann an rud céanna le MultiVersus. Mar sin, ní mór duit iarracht a dhéanamh gach overclocking ar do ríomhaire a dhíchumasú agus iarracht a dhéanamh an cluiche a sheoladh. Má sheolann sé go maith, tá an cheist socraithe.
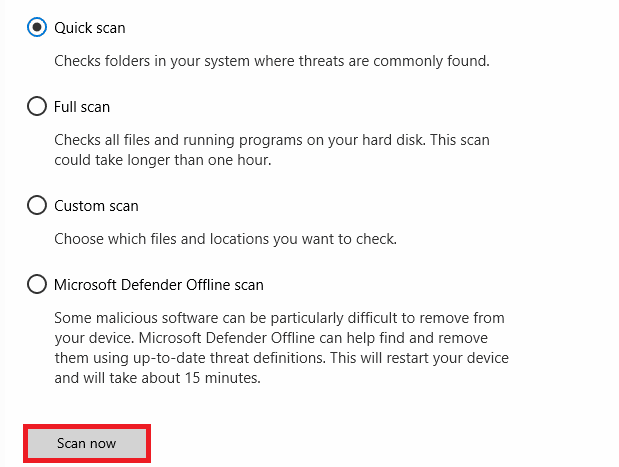
1D. Rith Malware Scan
Beidh fadhbanna cearrbhachais ar do ríomhaire mar thoradh ar ionsaí víreas nó malware. Más rud é i gcás go bhfuil an ionsaí víreas an-dian, ní féidir leat ceangal le haon chluiche ar líne go leanúnach ar chor ar bith. Chun an fhadhb a réiteach, caithfidh tú an víreas nó an malware a bhaint go hiomlán ó do ríomhaire Windows 10.
Moltar duit do ríomhaire a scanadh de réir mar a ordaítear inár dtreoir Conas a Dhéanaim Scanadh Víreas ar mo Ríomhaire?
Chomh maith leis sin, más mian leat malware a bhaint as do ríomhaire, seiceáil ár dtreoir Conas Malware a bhaint ó do ríomhaire i Windows 10.
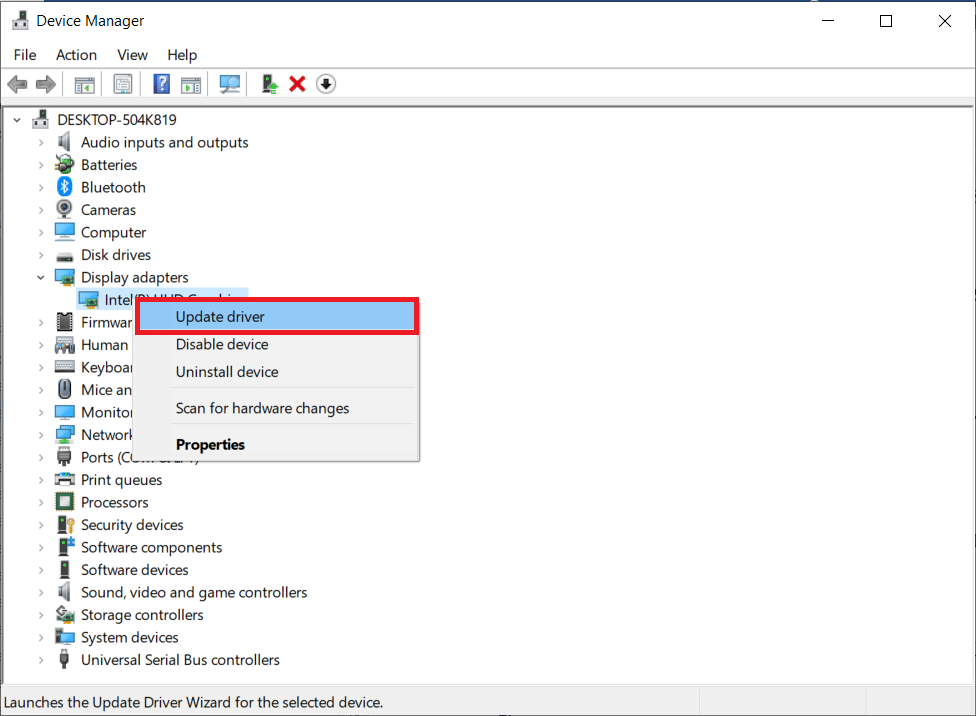
1E. Thabhairt cothrom le dáta tiománaithe GPU
Graphical drivers are responsible for heavy graphical images and video processing games. If you face any launching conflicts in the MultiVersus game, make sure you use an updated version of device drivers, as they serve as a link between the hardware and Operating System of your PC. Many users have suggested that updating drivers have fixed MultiVersus not working issue. Read and implement the steps instructed in our guide 4 Ways to Update Graphics Drivers in Windows 10 to do so.
Chomh maith leis sin Léigh: Deisigh Windows Tiománaithe Aimsithe do Do Ghléas ach Tháinig Earráid i dTrácht
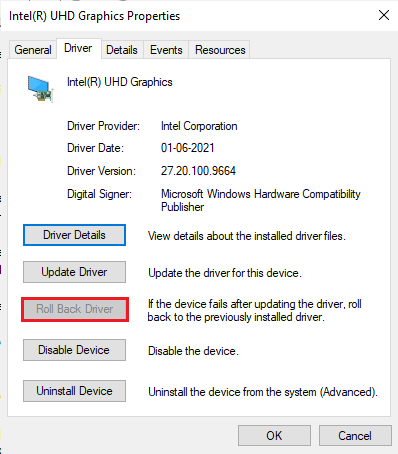
1F. Roll Ar ais Tiománaithe GPU
Sometimes, the current version of GPU drivers may cause the discussed launching issue in MultiVersus, and in this case, you have to restore previous versions of installed drivers. This process is called Tiománaithe ar ais agus is féidir leat do thiománaithe ríomhaire a rolladh ar ais go dtí a staid roimhe seo go héasca trínár dtreoir a leanúint Conas Tiománaithe ar ais ar Windows 10.
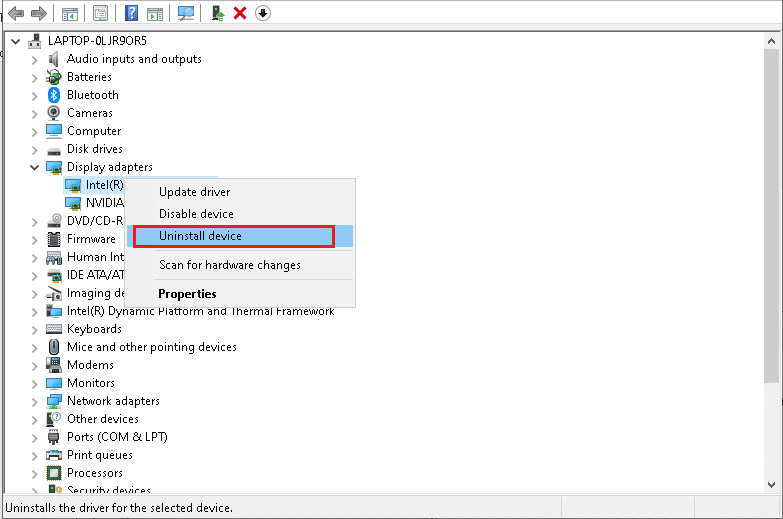
1G. Athshuiteáil tiománaí GPU
If you still face MultiVersus not starting issue after updating your GPU drivers, then reinstall device drivers to fix any incompatibility issues. There are several ways to reinstall drivers on your computer. Yet, you can easily reinstall Graphical drivers as instructed in our guide How to Uninstall and Reinstall Drivers on Windows 10.
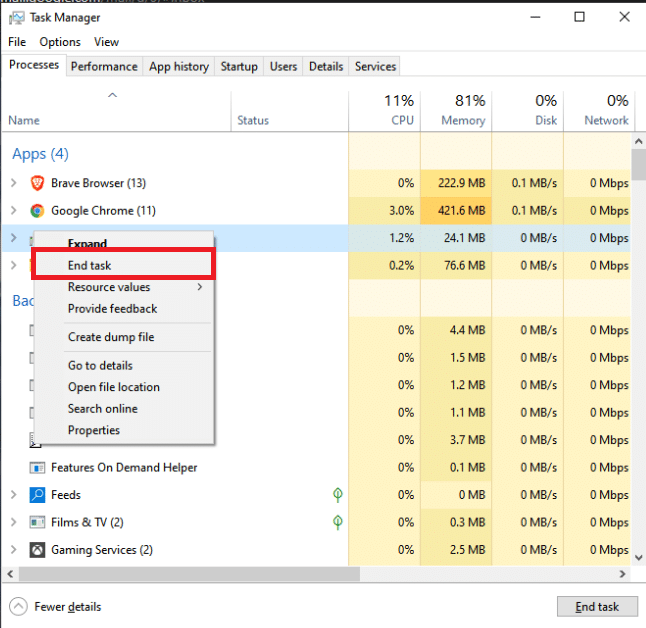
1H. End Background Processes
Several users have confirmed that MultiVersus not starting on PC can be resolved by closing all the background tasks running on your PC. To implement the task, follow our guide How to End Task in Windows 10, and proceed as instructed.
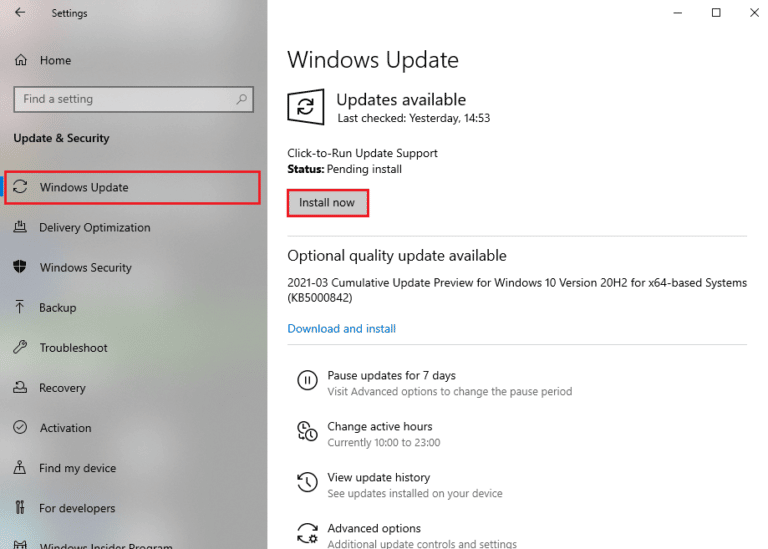
1I. Update Windows
You can also eradicate bugs in your computer and game by updating your Operating System. Always ensure if you have updated your Windows Operating System and if any updates are pending in action, use our guide How to Download and Install Windows 10 Latest Update
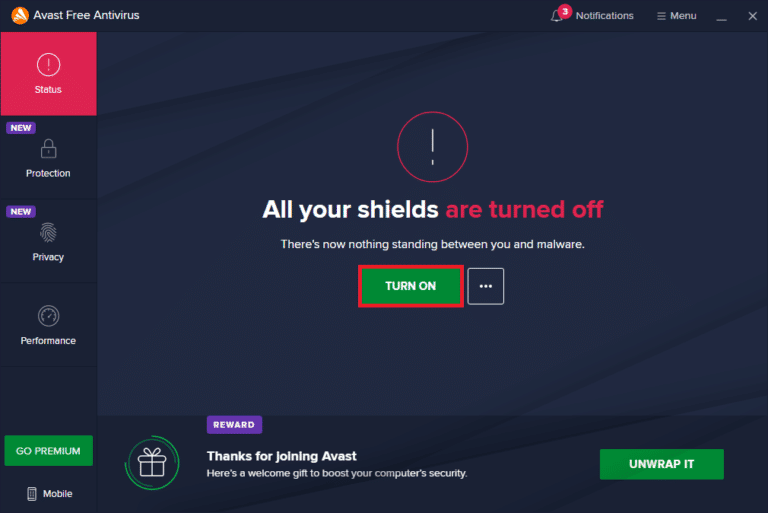
1J. Disable Antivirus Temporarily (If Applicable)
Some incompatible antivirus programs installed on your computer will cause MultiVersus launching problem. To avoid conflicts, you must ensure the security settings of your Windows 10 computer and check if they are stable or not. To find whether the antivirus suite is the reason for the discussed issue, disable it once and try connecting to a network.
Léigh ár dtreoir ar Conas Frithvíreas a Dhíchumasú go Sealadach ar Windows 10 agus lean na treoracha chun do chlár Antivirus a dhíchumasú go sealadach ar do ríomhaire.
Má tá d’fhadhb réitithe agat tar éis duit an clár frithvíreas a dhíchumasú ar do ríomhaire, moltar duit an clár a dhíshuiteáil go hiomlán ó do ríomhaire.
Read our guide Force Uninstall Programs which won’t Uninstall in Windows 10 to uninstall your antivirus program on your computer.
Chomh maith leis sin Léigh: Conas McAfee LiveSafe a dhíshuiteáil i Windows 10
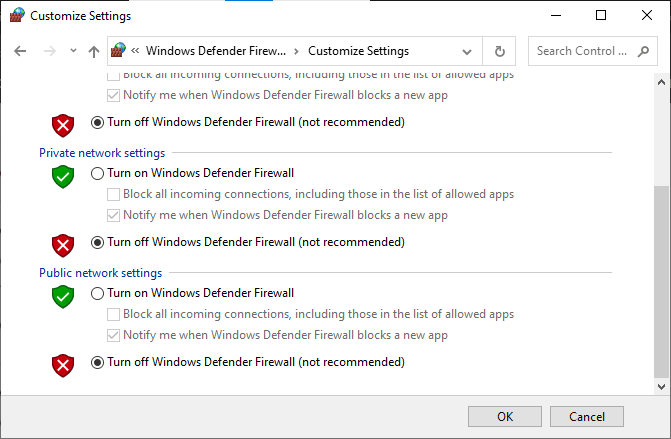
1K. Turn Off Windows Defender Firewall (Not Recommended)
Your computer will face MultiVersus is not working issue, due to an over-protective firewall suite in the Windows 10 PC. To resolve the problem, you can either add a new rule for your game, whitelist the game or as the last fix, disable the firewall temporarily.
Our guide on How to Disable Windows 10 Firewall will help you.
1L. Deisiúchán Comhaid Chórais
If there are any missing or damaged files on your Windows 10 PC, you will face MultiVersus takes forever to launch issue. Yet, you are repairing these corrupt files by using inbuilt utilities namely, Córas Comhad Checker agus Seirbhísiú agus Bainistiú Íomhá Imlonnaithe.
Léigh ár dtreoir ar Conas Comhaid Chórais a Deisiúchán ar Windows 10 agus lean na céimeanna mar a ordaítear chun do chuid comhad truaillithe go léir a dheisiú.
Modh 2: Rith Cluiche MultiVersus mar Riarthóir
If MultiVersus does not have required administrative privileges, a few essential features of the game will be limited causing you MultiVersus not launching issue whenever you open the game or install any updates. Follow the below-mentioned instructions to run the game as an administrator.
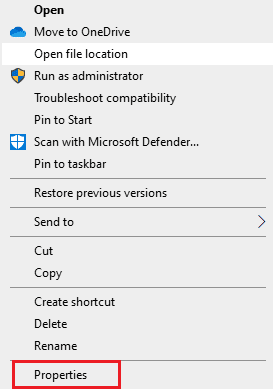
1. Deaschliceáil ar an aicearra MultiVersus ar an Deasc.
Nóta: Is féidir leat dul chuig an eolaire suiteála agus deaschliceáil air.
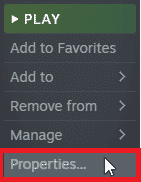
2. Ansin, roghnaigh an Airíonna rogha.
3. Anois, bogadh go dtí an comhoiriúnacht tab agus cliceáil ar Rith an clár seo mar Riarthóir.
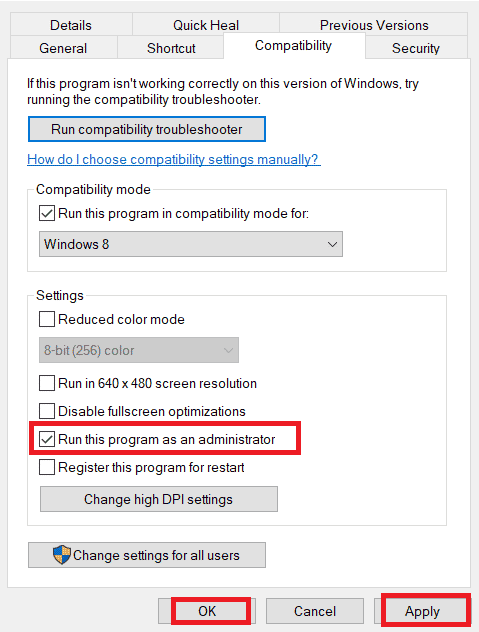
4. Ar deireadh, cliceáil ar Cuir iarratas isteach> Ceart go leor na hathruithe a shábháil.
Check if you have fixed MultiVersus launching issues.
Chomh maith leis sin Léigh: Fix WoW Tógann sé go deo le seoladh i Windows 10
Modh 3: Athrú Tosaíocht Próiseas Cluiche
The preference of an application or process tells the computer the importance and if it should be given preference over the others while allocating the resources. The priority of every application is normal except the system processes, by default. MultiVersus might crash if it didn’t get enough resources.
1. Brúigh an Eochracha Ctrl + Shift + Esc le chéile a oscailt tascbharra.
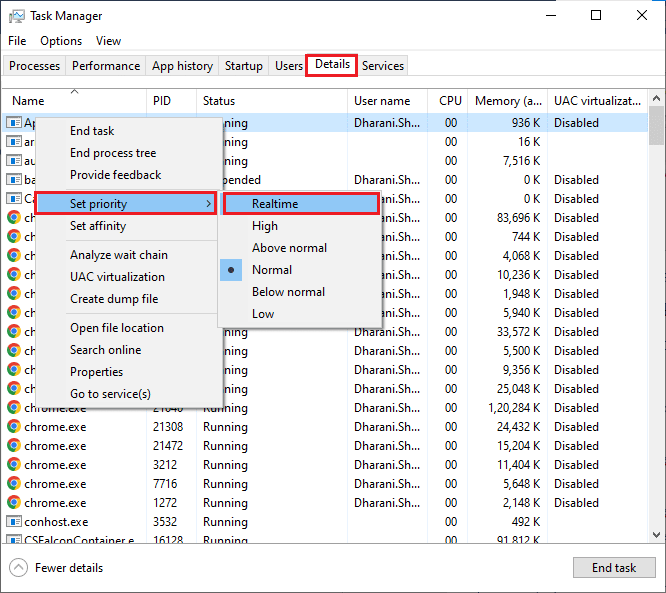
2. Anois, cuardach le haghaidh Próiseas MultiVersus.
3. Ansin athraigh an tosaíocht go Ardtosaíocht agus seiceáil an n-oibríonn sé seo.
Nóta: Athraigh an tosaíocht le cúram mór mar d'fhéadfadh do chóras a bheith mall nó éagobhsaí de bharr athrú tosaíochta an phróisis go míchúramach.
4. Dún an Bainisteoir tasc agus Atosaigh do ríomhaire.
Modh 4: Socraigh Ardfheidhmíocht
Is féidir leat do chluiche a bharrfheabhsú freisin agus socruithe do phlean cumhachta ardfheidhmíochta á socrú agat. Forbraítear na pleananna cumhachta seo chun na socruithe cumhachta ar shuíomhanna iniompartha a bhainistiú. Lean na treoracha thíos chun socruithe plean cumhachta ardfheidhmíochta a úsáid i do chóras.
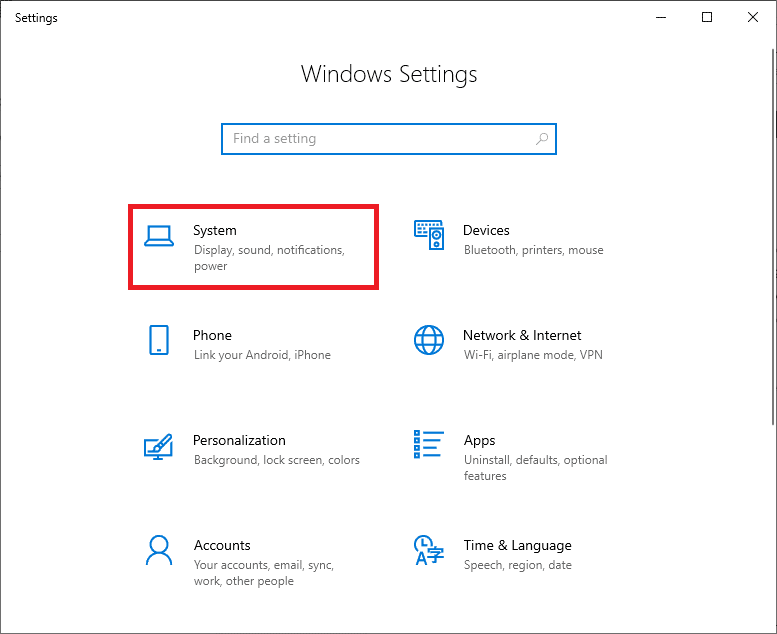
1. Brúigh an Eochracha Windows + I ag an am céanna a oscailt Socruithe Windows.
2. Anois, cliceáil ar córas suíomh.
3. Anois, roghnaigh an Cumhacht & codladh rogha agus cliceáil ar suímh cumhachta breise faoi Suíomhanna gaolmhara.
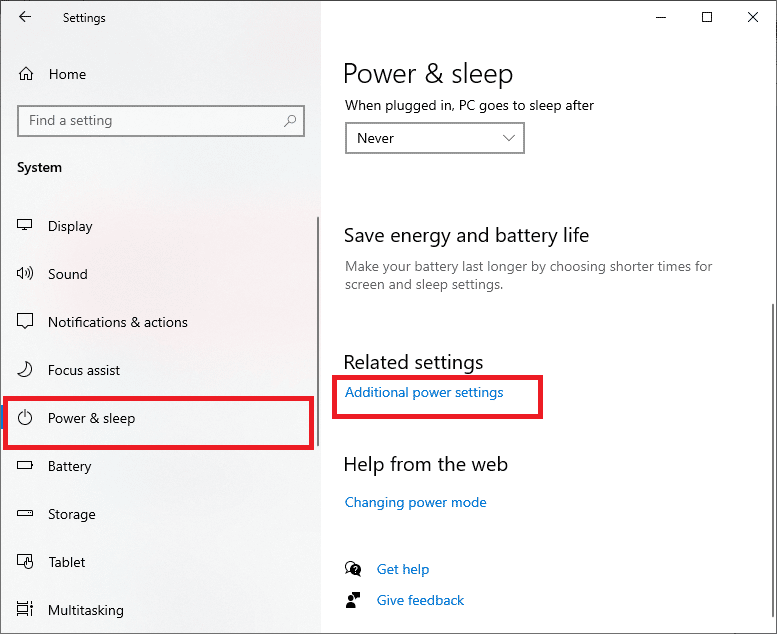
4. Anois, roghnaigh an Ardfheidhmíocht rogha faoi Pleananna breise ard mar a thaispeántar sa phictiúr thíos.
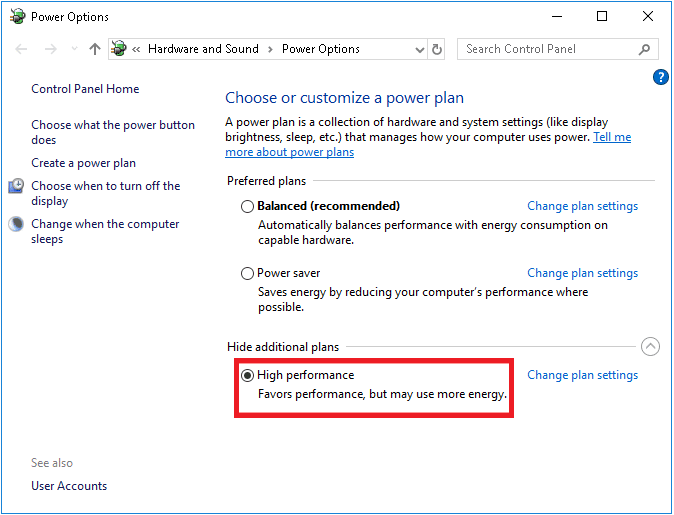
Now you have optimized your system, check if you have fixed MultiVersus won’t launch on startup issue.
Chomh maith leis sin Léigh: Deisigh Earráid Comhaid Íoslódála ar Iarraidh ar Steam
Method 5: Update Steam App & MultiVersus Game
Má úsáideann tú feidhmchlár Steam atá as dáta, ní féidir leat rochtain a fháil ar aon chluiche gan stró. Mar sin déan cinnte i gcónaí go n-úsáideann tú leagan nuashonraithe den chluiche Steam agus MultiVersus sula seolann tú é.
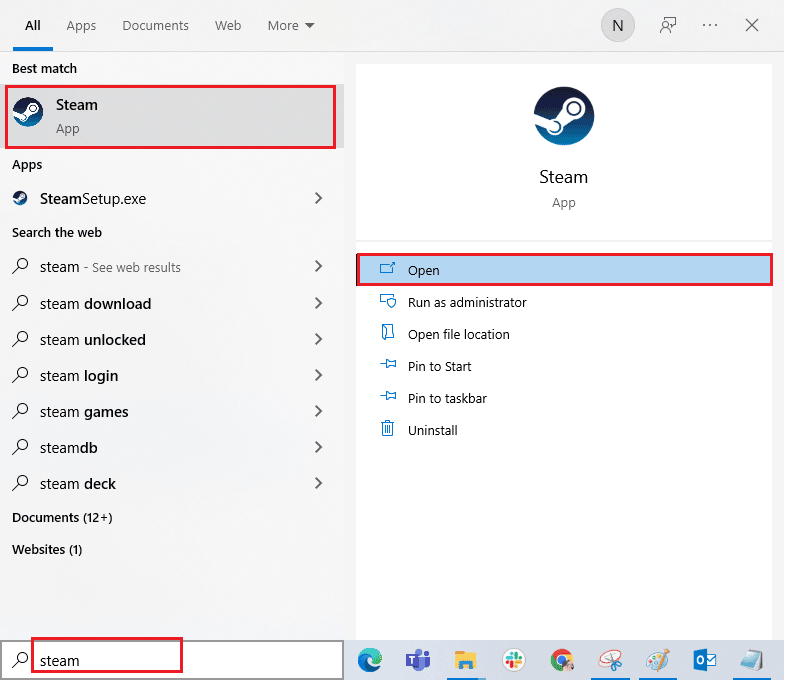
1. Buail Windows eochair agus cineál Gaile, ansin cliceáil ar Oscailte.
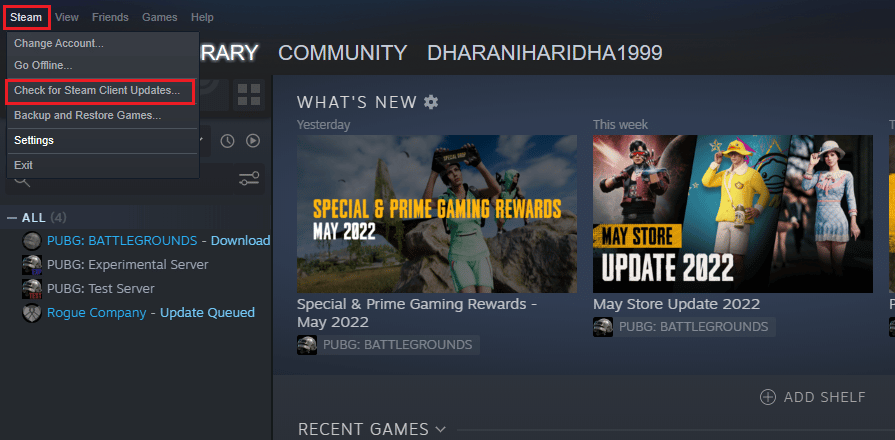
2. Anois, cliceáil ar Gaile sa chúinne uachtarach ar chlé den scáileán ina dhiaidh sin Seiceáil le haghaidh Nuashonruithe Cliant Gaile… mar atá aibhsithe thíos.
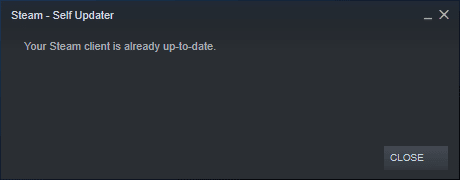
3. Má tá aon nuashonruithe nua le híoslódáil agat, suiteáil iad agus cinntigh tá do chliant Steam cothrom le dáta.
4. Anois, athsheoladh Gaile agus seiceáil an bhfuil an cheist réitithe anois.
Likewise, it is always essential that your game run at its latest version to avoid any conflicts. Until your game is updated, you cannot log in to MultiVersus servers successfully.
Chun nuashonraigh do chluiche, follow the below-mentioned steps.
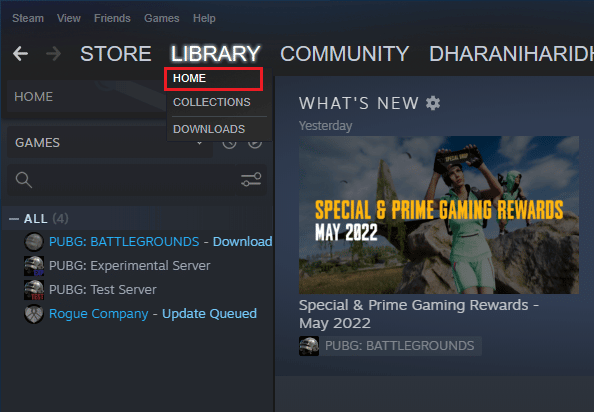
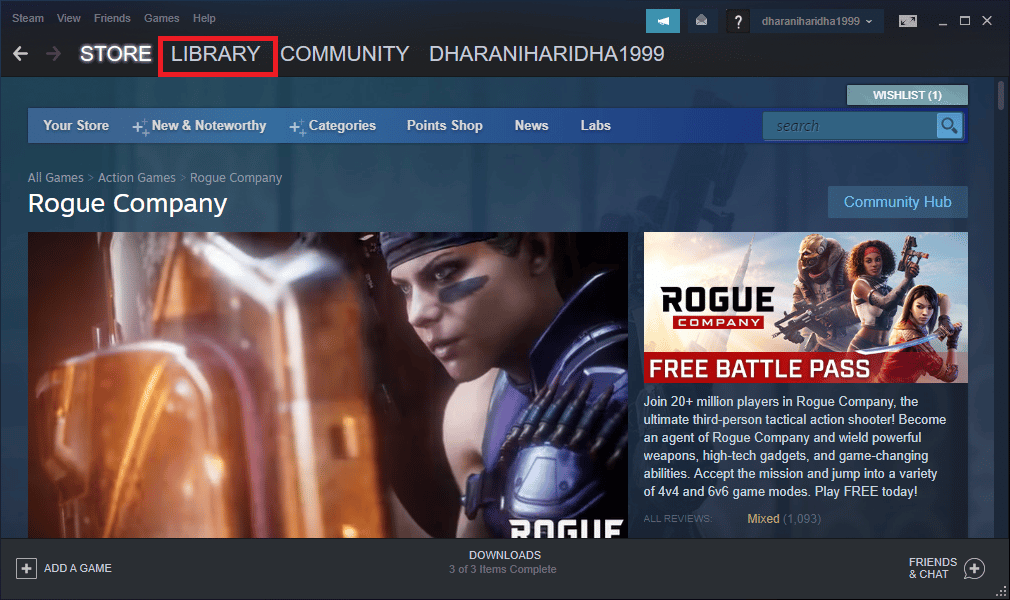
1. Seoladh Gaile agus nascleanúint a dhéanamh LEABHARLANN.
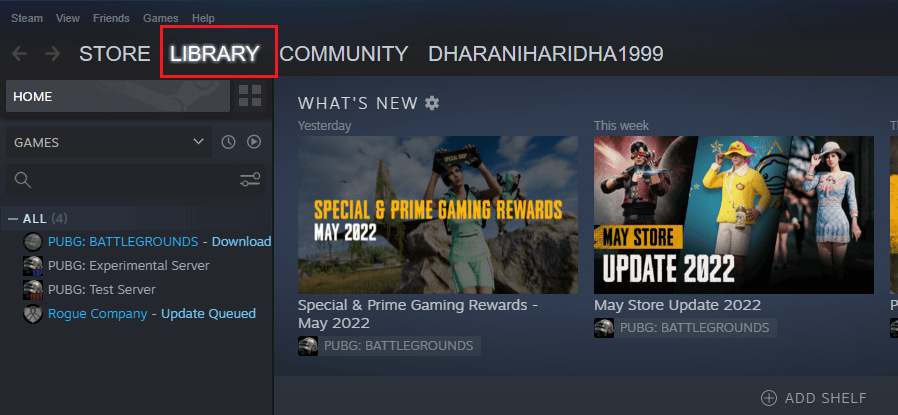
2. Anois, cliceáil ar HOME agus cuardach le haghaidh MultiVersus.
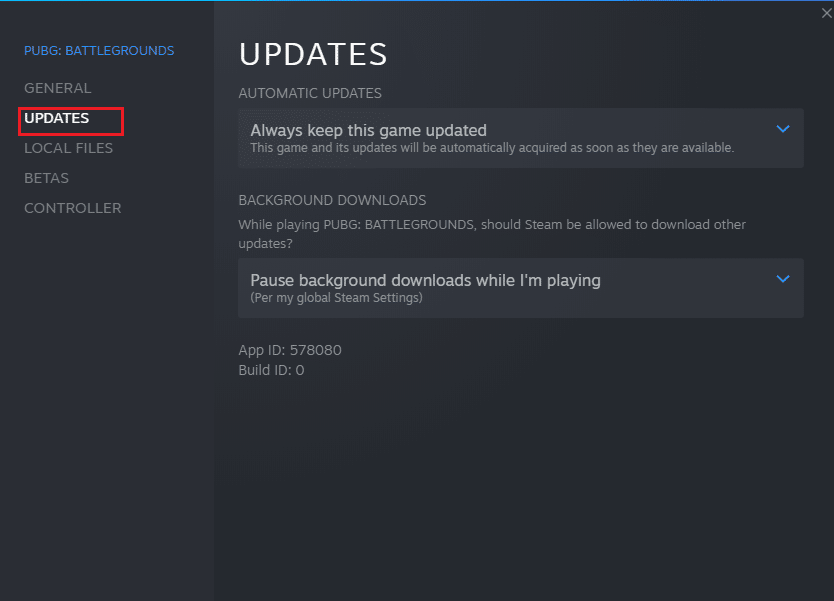
3. Ansin, deaschliceáil ar an gcluiche agus roghnaigh an Airíonna… rogha.

4. Anois, aistrigh go dtí an Nuashonruithe tab agus seiceáil an bhfuil aon nuashonruithe ar feitheamh i ngníomh. Más amhlaidh atá, lean na treoracha ar an scáileán chun na nuashonruithe is déanaí a íoslódáil.
After an update, check if MultiVersus not launching issue is fixed.
Modh 6: Díchumasaigh Optamaithe Lánscáileáin
Few users have suggested that disabling full-screen optimizations on PC has helped them fix MultiVersus is not launching issue. Follow as instructed.
1. Déan nascleanúint go dtí an Gaile LEABHARLANN roghchlár.
2. Now, right-click on the MultiVersus game and click on Airíonna…
3. Anois, aistrigh go dtí an GINEARÁLTA tab agus cliceáil ar Shocraigh ROGHANNA SEIRBHÍSÍ… mar a léirítear.
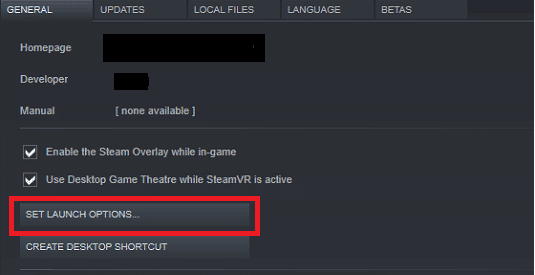
4. Anois, beidh fuinneog nua a oscailt le rabhadh úsáideora chun cinn. Chun an cluiche a oscailt i mód fuinneog, clóscríobh an -fuinneog paraiméadar.
5. Anois, shábháil ar na hathruithe trí chliceáil OK agus scoir ón fhuinneog Properties.
6. Anois, athsheoladh an cluiche and ensure that it runs in windowed mode.
Nóta: You can also navigate to SOCRUITHE ROGHANNA SEOLTA… arís agus clóscríobh na paraiméadair seo a leanas in ionad an pharaiméadar deiridh.
–fuinneog -w 1024
7. Anois, shábháil ar na hathruithe trí chliceáil ar OK.
Socróidh an paraiméadar seo an cluiche a sheolfar i mód fuinneoige.
Chomh maith leis sin Léigh: Deisigh Cumraíocht App Gaile Níl ar fáil i Windows 10
Modh 7: Díchumasaigh Forleagan I-Chluiche
The Steam Overlay is a piece of Steam that allows the users to access friends list, and web browser and allows in-game purchasing. It is a significant tool, yet it sometimes triggers MultiVersus not launching on startup issue. If you want to solve this problem, then turn off the Steam game overlay.
1. oscail an Gaile aip agus cliceáil ar LEABHARLANN.
2. Anois, deaschliceáil ar Il-aghaidh agus cliceáil ar Airíonna…

3. Anois, aistrigh go dtí an GINEARÁLTA tab and uncheck the box containing Cumasaigh an Forleagan Gaile agus tú sa chluiche.
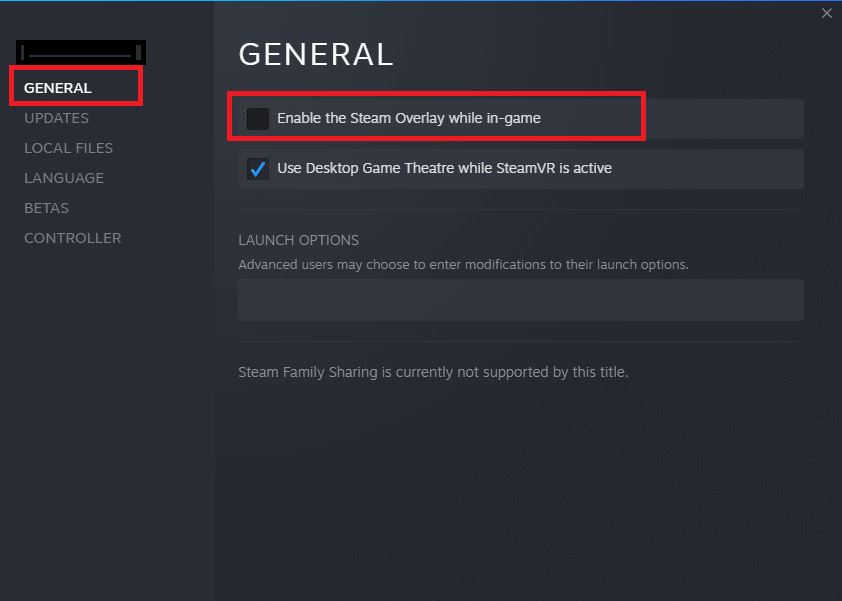
4. Faoi dheireadh, athsheoladh an cluiche and check if the MultiVersus launching issue is solved.
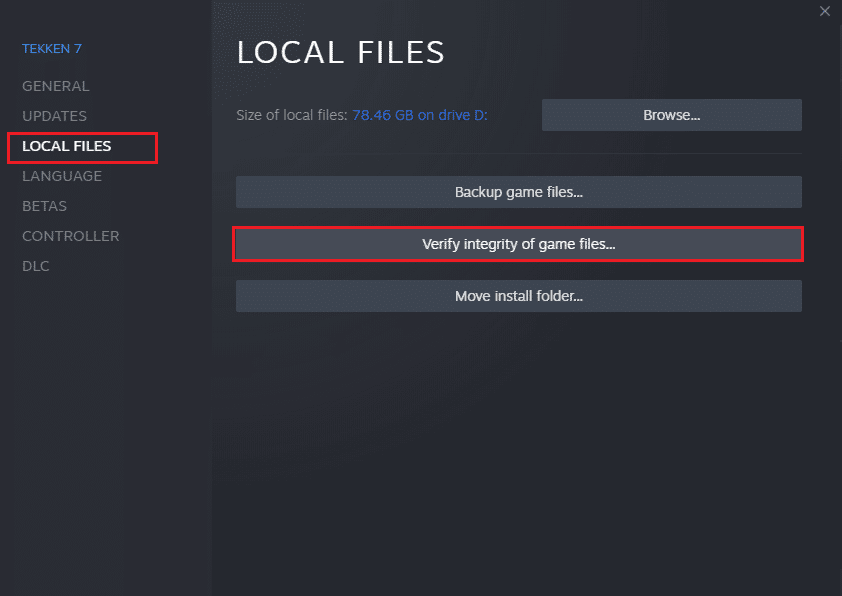
Modh 8: Fíoraigh Sláine na gcomhad Cluiche
We have seen many cases in which the game files are either missing or corrupt or it had incomplete installations. Users could also experience MultiVersus not starting on PC issue if they are interrupted by the update process or if the game files are being moved. In this method, you will be opening Steam and using the built-in function for verifying the integrity of the game. It will be replaced if the application finds something. Read our guide on how to verify integrity of game files on Steam.
Chomh maith leis sin Léigh: Deisigh Steam Cliant Bootstrapper Gan Freagra i Windows 10
Modh 9: Nuashonraigh .NET Framework
.NET framework in Windows 10 computer is essential for uninterrupted service of modern apps and games. Many games have an auto-update feature for the .NET framework, and thus it will be updated automatically whenever an update is available. In another case, if an update prompts in your PC, you can manually install the latest version of the .NET framework, as discussed below, to fix MultiVersus not launching issue.
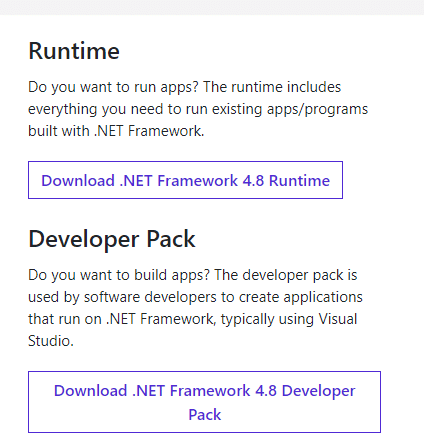
1. Seiceáil le haghaidh nuashonruithe nua don creat GLAN ó na suíomh Gréasáin oifigiúil Microsoft.
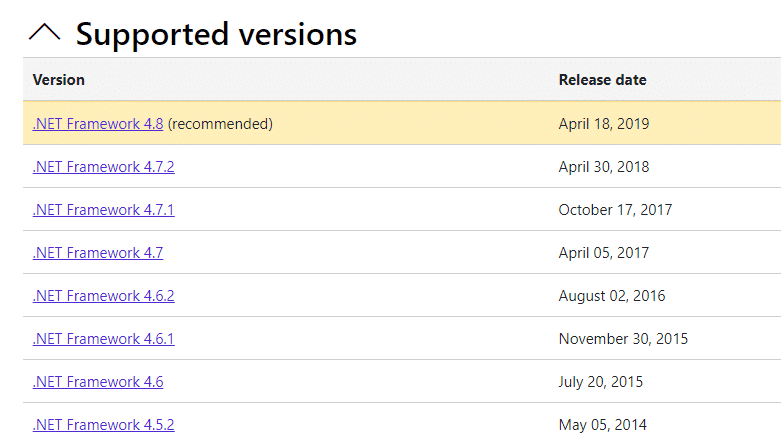
2. Má tá aon nuashonruithe, cliceáil ar an comhfhreagrach /Mhol nasc agus cliceáil Íoslódáil .NET Framework 4.8 Runtime rogha.
Nóta: Ná cliceáil ar Íoslódáil .NET Framework 4.8 Pacáiste Forbróir mar a úsáideann forbróirí bogearraí é.
3. Téigh Mo íoslódálacha, double-click on the setup file to run the downloaded file and follow the treoracha ar an scáileán chun an creat .NET a shuiteáil go rathúil ar do Windows PC. Nuair a bheidh sé déanta, seiceáil an bhfuil an cheist a pléadh socraithe agat nó nach bhfuil.
Modh 10: Nuashonraigh DirectX
To enjoy a seamless multimedia experience on MultiVersus, you have to make sure whether DirectX is installed, and it is updated to its latest version. DirectX helps you improve the visual media experience for graphical games and applications especially. It is worth updating DirectX needed for this game.
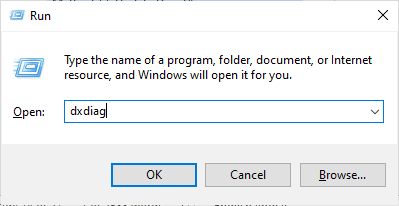
1. Buail an Eochracha Windows + R ag an am céanna a sheoladh ar an Rith dialóg.
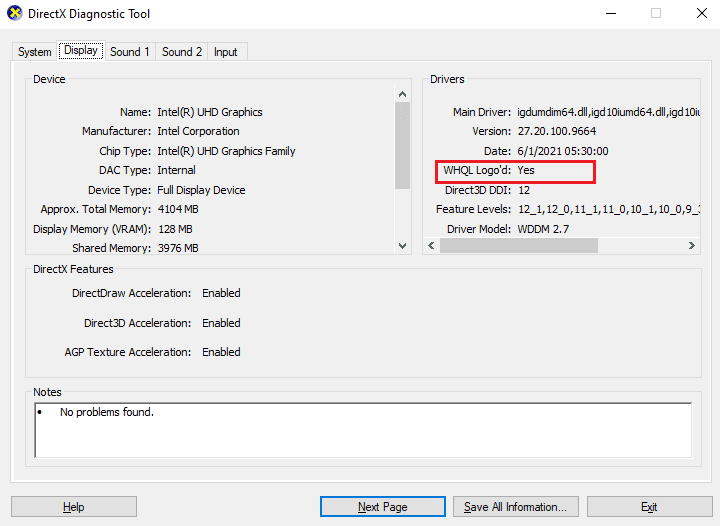
2. cineál dxdiag agus brúigh an Iontráil eochair a oscailt DirectX Diagnóiseacha Tool.
3. Seiceáil an Leagan DirectX, if it contains DirectX 12 nó nach bhfuil.
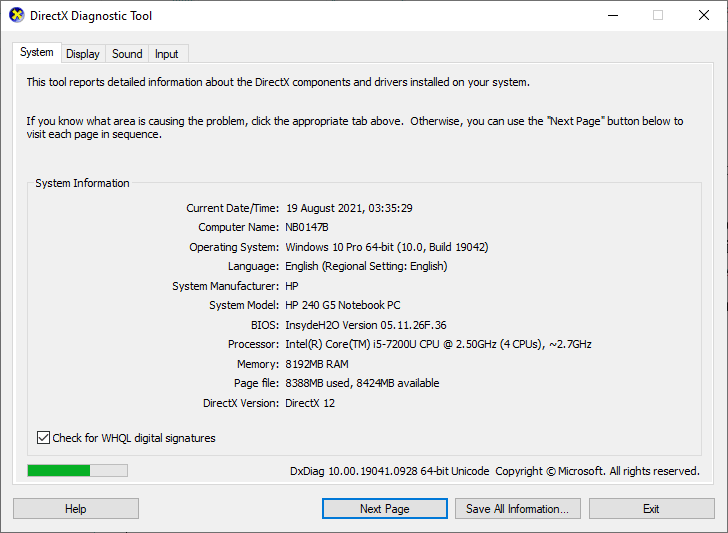
4. If you do not have DirectX 12 in your system, download and install it from the Íosluchtaigh DirectX leathanach trí na treoracha ar an scáileán a leanúint.
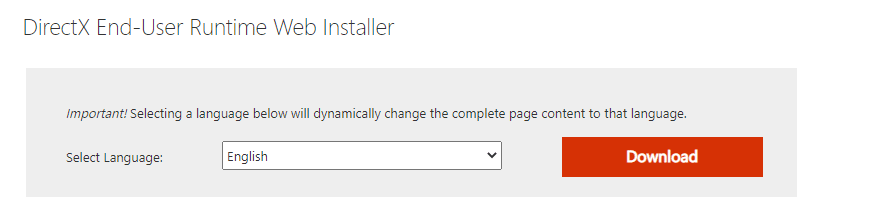
After installing DirectX, check if the issue occurs again.
Nóta: Cinntigh Seiceáil le haghaidh sínithe digiteacha WHQL tictear sa bhosca córas tab and in all tabs, check whether WHQL Logo'd a shocrú go Is ea.
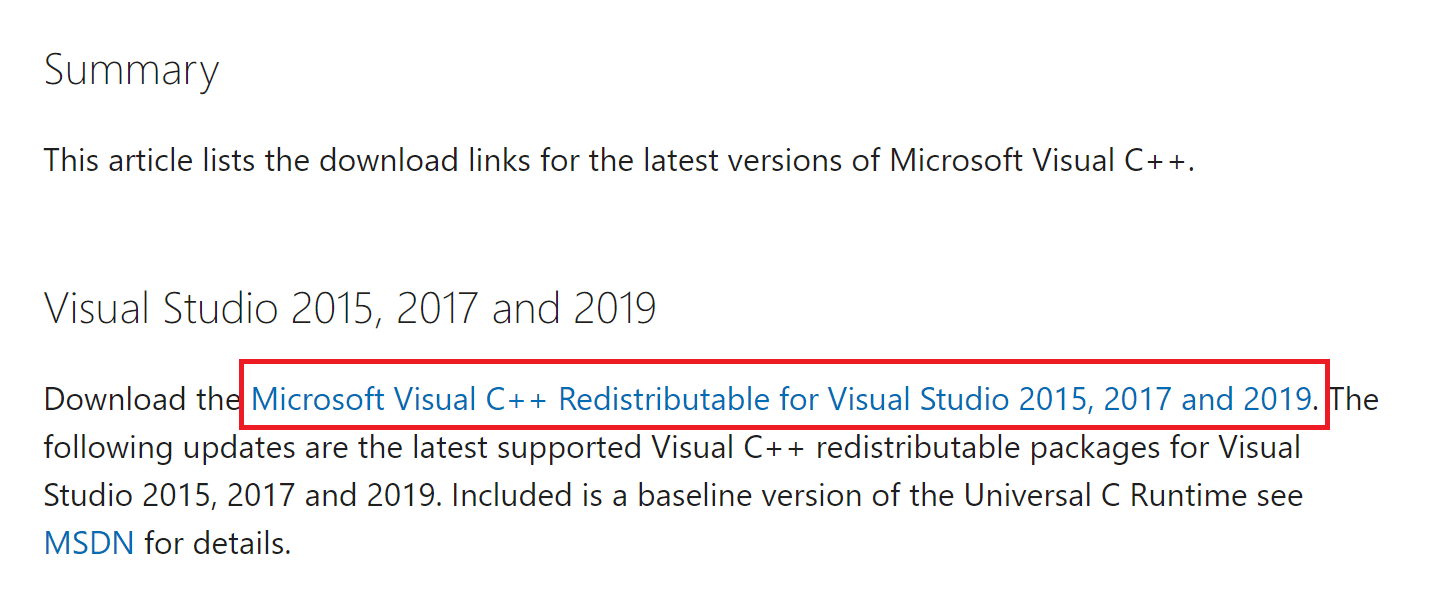
Modh 11: Deisiúchán Microsoft Visual C++ Athdháilte
Alternately, you can try to repair the Microsoft Visual C++ Redistributable packages to fix MultiVersus not launching issue as follows:
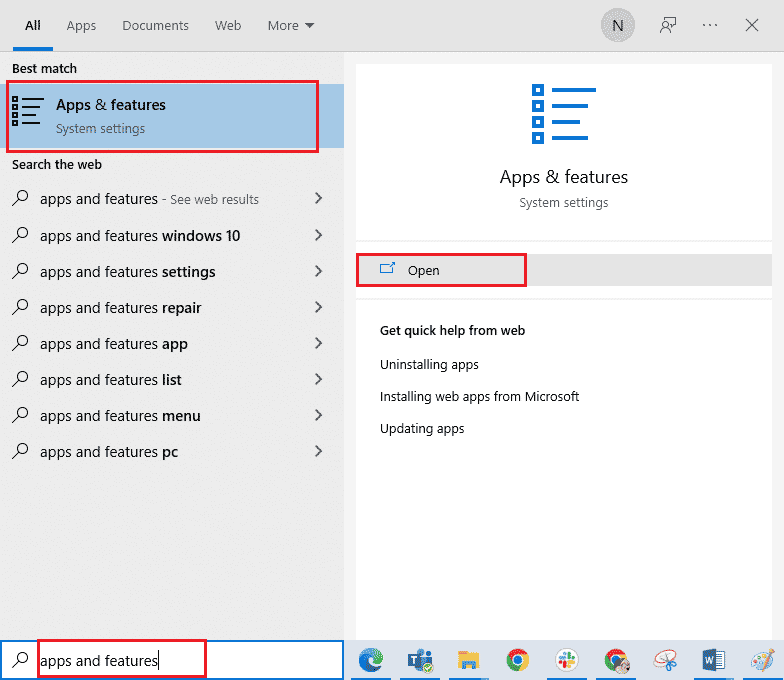
1. Buail an Windows eochair, cineál Aipeanna & gnéithe, ansin cliceáil ar Oscail.
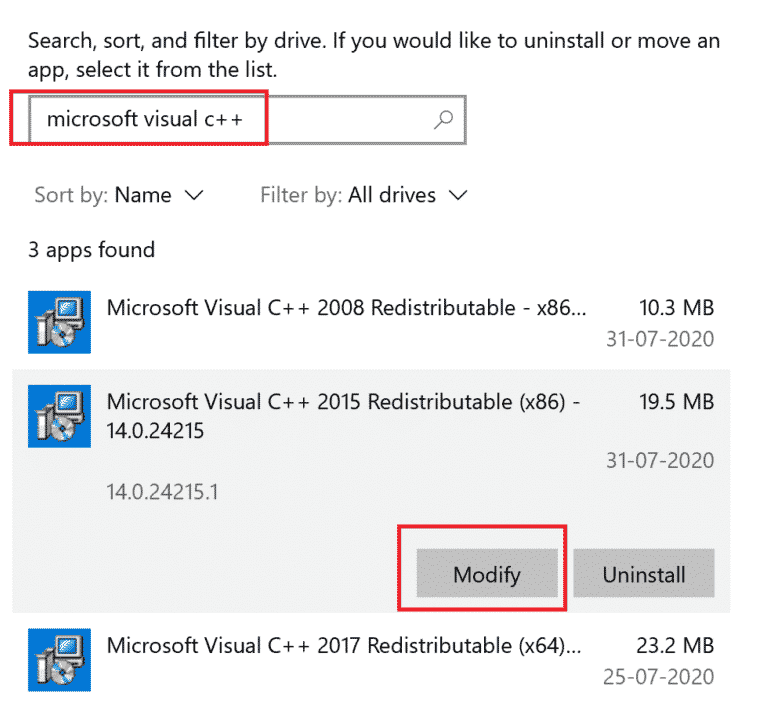
2. Cuardaigh le haghaidh Microsoft Visual C ++ In-athdháilte pacáiste.
3. Then, select the package, and click on Athraigh rogha.
4. Ansin, cliceáil Is ea ar an Úsáideoir Cuntas Rialaithe dialóg.
5. In the pop-up window that appears, click on Deisiúchán. Fan ar an bpróiseas a chríochnú.
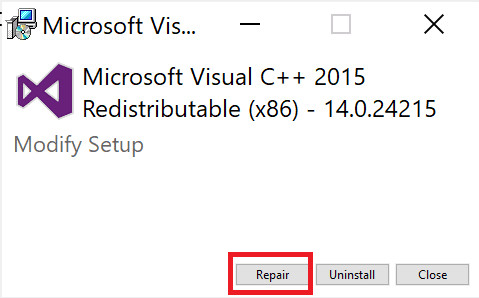
6. Repeat the above steps to modify all the Microsoft Visual C++ Redistributable packages.
7. Faoi dheireadh, atosú an ríomhaire.
Oscail an feidhmchlár nach raibh tú in ann a oscailt roimhe seo. Mura n-oibrigh sé seo, déan iarracht an C++ in-athdháilte a athshuiteáil ina ionad.
Chomh maith leis sin Léigh: Theipeann ar Shocrú Athdháilte Microsoft Visual C++ 2015 a dheisiú Earráid 0x80240017
Modh 12: Athshuiteáil Microsoft Visual C++ Athdháilte
If the previous method of repairing the Microsoft C++ Visual Redistributable did not fix MultiVersus won’t launch issue, then you will have to reinstall the redistributable. Follow the given steps to uninstall & then install these again.
1. oscail an Aipeanna & gnéithe socruithe an chórais.
2. Roghnaigh an Microsoft Visual C ++ In-athdháilte package, then click on Díshuiteáil rogha.
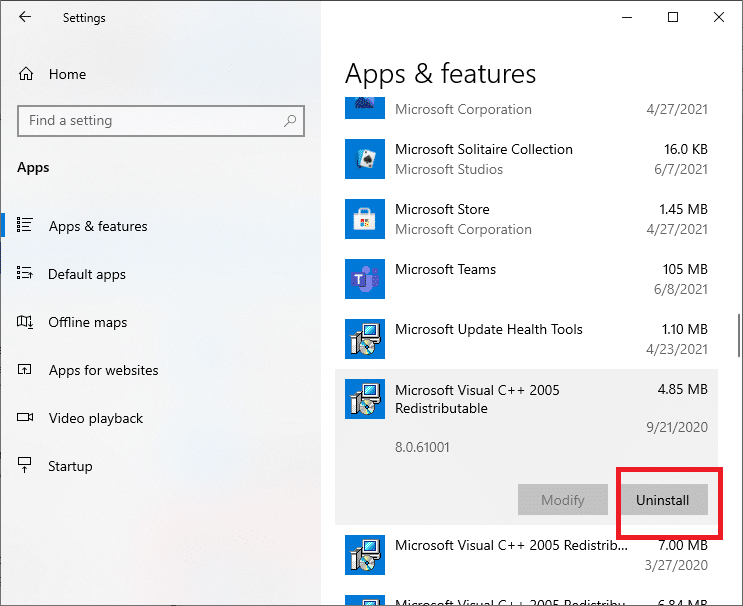
3. Cliceáil ar Díshuiteáil option again to confirm and remove the package.
Nóta: Make sure to uninstall all the Microsoft Visual C++ Redistributable packages.
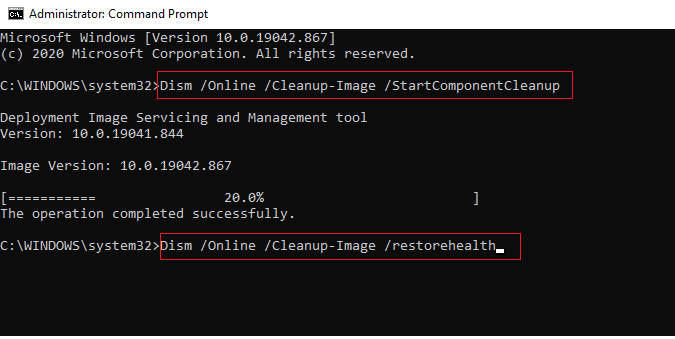
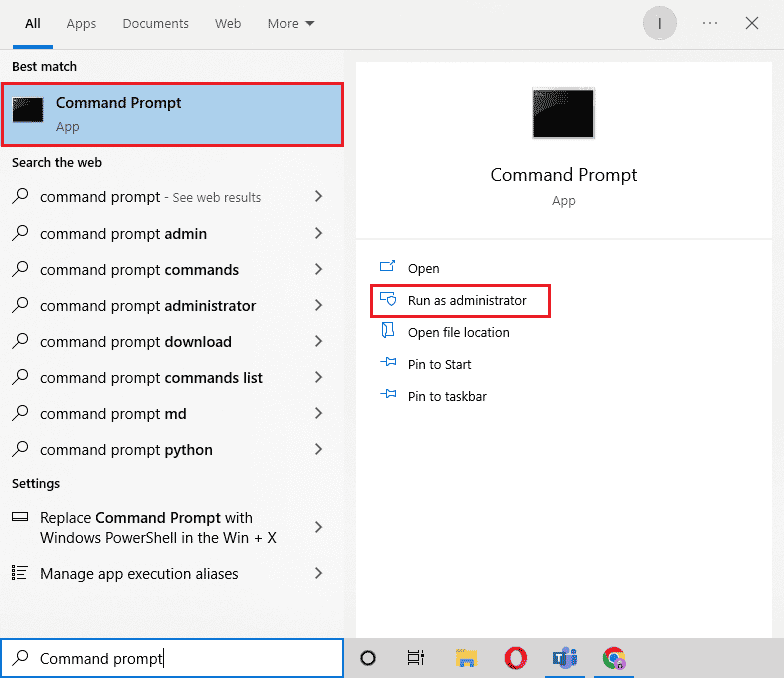
4. Buail an Windows eochair, cineál Ordú Pras, ansin cliceáil ar Rith mar riarthóir.
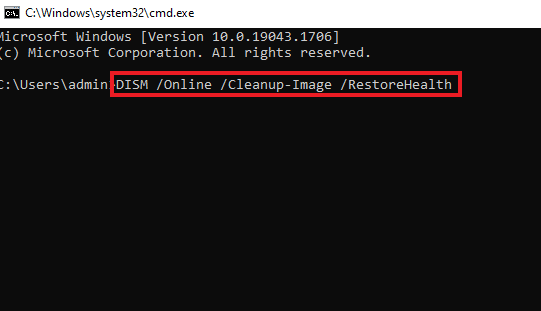
5. Clóscríobh an méid seo a leanas orduithe agus brúigh Iontráil eochair i ndiaidh gach ceann:
DISM /online /Cleanup-Image /StartComponentCleanup
DISM /online /Cleanup-Image /RestoreHealth
6. Nuair a bheidh an próiseas críochnaithe, atosaigh an ríomhaire.
7. Ar aghaidh, tabhair cuairt ar an Microsoft Visual C++ Redistributable webpage to download the latest C++ package as shown here.
8. Once downloaded, open the comhad íoslódáilte by double-clicking on it in Mo íoslódáil. shuiteáil the package by following the on-screen instructions.
9. Once the installation is complete, finally atosú an ríomhaire.
Molta:
Tá súil againn go raibh an treoir seo cabhrach agus d'fhéadfá a shocrú MultiVersus not launching issue on your Windows 10 PC. Let us know which method worked for you the best. Feel free to reach out to us with your queries and suggestions via the comments section below.