DNS Probe Finished No Internet: How to Fix

I started to get confronted with a really annoying problem lately, one that almost made me uninstall my Chrome web browser and smash my laptop: I kept getting the DNS Probe Finished No Internet error message.
Here is what happened, in deail:
While browsing the internet normally – on my laptop, using the Chrome browser, a black dinosaur type of icon appeared in the upper left corner, while my web browser’s window was green and read:
“This webpage is not available.” DNS_PROBE_FINISHED_NO_INTERNET was written below as the error code and I had the option to Reload the page, but it didn’t work.
Now, it’s pretty obvious that we love dinosaurs here at Techosaurus Rex, but having them mess up our work or browsing isn’t fun. Fortunately, it was just a minor problem that had to do with a minor misconfiguration on our end – which is most likely the cause for your problem as well.
So we’re here to tell you how to easily fix the Dns_Probe_Finished_No_Internet error and continue enjoying the websites you love to check out online.
DNS Probe Finished No Internet Fix
Before getting to our recommended fix below, just make sure that your internet is actually working properly. Try to reset your router – if it’s router related, the problem will disappear with a simple restart! Easy!
But most likely, the problem is caused by the fact that you are not using a specific DNS server address in your network’s settings. And this is what you have to change in order to get rid of this annoying error.
Here is the step by step info on how to do it:
1. Right click on your network icon in the lower right side of the screen (which might have a red X on it right now) and select “Open Network and Sharing Center” or “Open Network & Internet Settings” (depending on your operating system)
2. Click on your internet connection (the Local Area Connection or Wireless Network Connection – the latter appears, obviously, if you’re on a laptop and connected wirelessly to the internet). Click the “Properties” tab.
Alternately, depending on the OS you’re using, scroll down and click “Network and Sharing Center” as seen below:
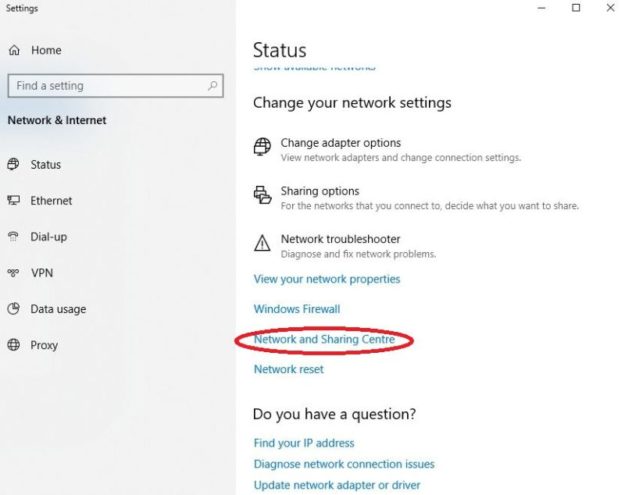
3. On the left side of the new window, click on “Change adapter settings”. Right click the network adapter and select Properties.
4. Find “Internet Protocol Version 4 (TCP/IPv4)” in the new window, click it (make sure not to uncheck the box!) and click Properties below it.
4. In the new window, you will most likely have the “Obtain DNS server address automatically” ticked under the area that relates directly to the IP. Tick the “Use the following DNS Server” option.
5. You will need to manually enter the OpenDNS values automatically:
In the first field (Preferred DNS Server) type: 208.67.222.222
In the second field (Alternate DNS Server) type: 208.67.220.220
6. Tick the box that says “Validate settings upon exit” and hit the OK button.
This is it! This should fix your problem and the DNS Probe Finished No Internet should not bug you anymore!
Please note: if you have the Internet Protocol Version 6 in your network settings as well, you should also change the DNS values there as well, following the same steps as above, with the note that at step #4 you should select to see the properties for Internet Protocol Version 6 (TCP/IPv6).
Do you still have problems after trying our suggested fix? Let us know by commenting below and we’ll do our best to help you out!