વિન્ડોઝ અપડેટ 0x8007000d ભૂલને ઠીક કરો

It is advised to regularly update your Windows PC to safeguard it from cyber-attacks. But sometimes when you try to update your Windows 10 computer, you get prompted with Windows update 0x8007000d error. 0x8007000d Windows update error stops the update process and often occurs due to damaged files, corrupt programs etc. Few users encounter that upgrading to Windows 11 cause setup cannot continue due to a corrupted installation file error. Nevertheless, you are lucky to have found this article. This guide will help you understand how to fix 0x8007000d Windows 10 errors. Keep reading the article for solutions.
How to Fix Windows Update 0x8007000d Error
You may encounter several error codes while updating your PC. Apart from Windows 7, it happens on Windows 10 PC too. Many users have reported that they cannot install KB3124200, KB4586853, KB4592438 versions of Windows 10 specifically. Here are some reasons that cause 0x8007000d Windows update error. Analyze the reason behind your problem so you can quickly resolve it by picking the right method.
- Missing or damaged files in PC.
- ભ્રષ્ટ કાર્યક્રમો
- વાયરસ અથવા મ malલવેર attack in PC.
- Incomplete or Outdated Windows Update Components in PC.
- અન્ય background programs interfere with the updating process.
- એન્ટિવાયરસ program interference and અસ્થિર ઇન્ટરનેટ કનેક્શન તેમજ.
In this section, we have compiled a list of effective troubleshooting methods that will help you fix 0x8007000d or setup cannot continue due to a corrupted installation file error. Follow the methods in the same order to attain perfect results.
પદ્ધતિ 1: ડિસ્ક સ્પેસ સાફ કરો
Windows PC might not install updates if your computer does not have enough space. Removing large junk files can free up your PC memory and fix general issues. It can be done by cleaning disk space which deletes all temporary files, installation logs, cache, etc. It might fix setup cannot continue due to a corrupted installation prompt Error. You can begin clearing up your disk by following the below-mentioned steps.
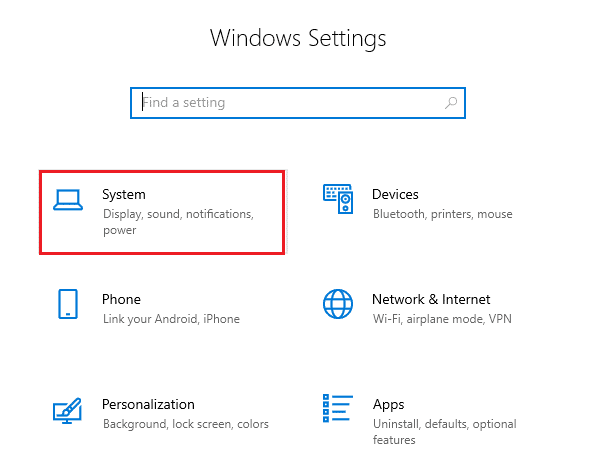
1. દબાવો અને પકડી રાખો વિન્ડોઝ + I કી એકસાથે ખોલવા માટે વિન્ડોઝ સેટિંગ્સ.
2. હવે, ક્લિક કરો સિસ્ટમ નીચે દર્શાવ્યા મુજબ.
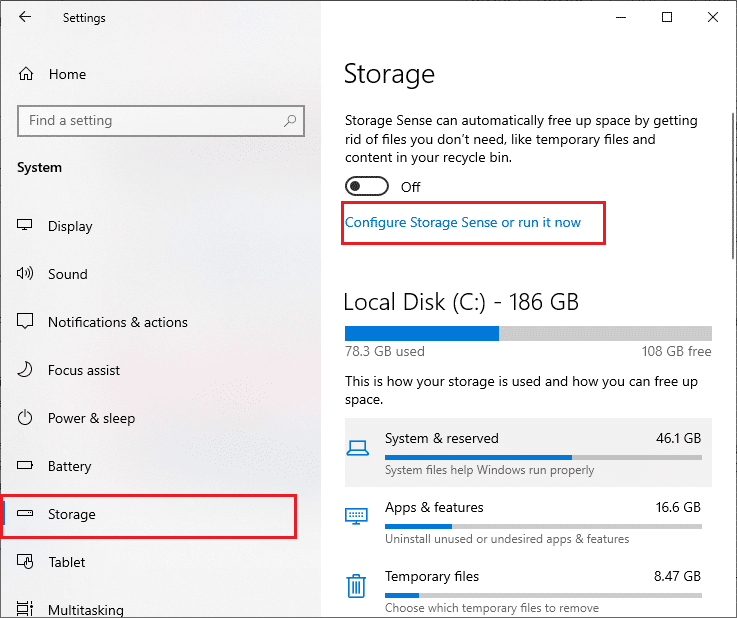
3. ડાબી તકતીમાં, પર ક્લિક કરો સંગ્રહ tab and in the right pane, select the સ્ટોરેજ સેન્સને ગોઠવો અથવા તેને હવે ચલાવો link as highlighted.
4. In the next window, scroll down to હવે જગ્યા ખાલી કરો વિભાગ અને પસંદ કરો હવે સાફ કરો બતાવ્યા પ્રમાણે વિકલ્પ.
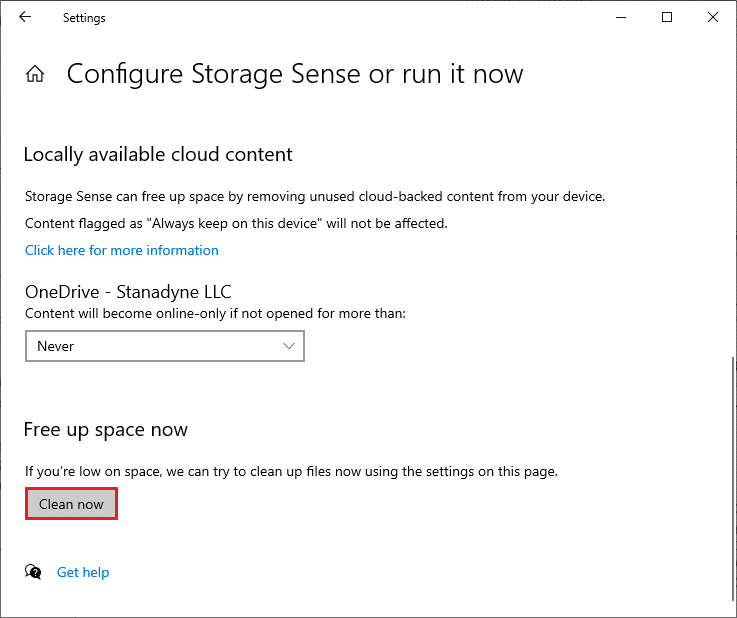
Now with all unnecessary files removed, try updating the Windows and check if the issue is fixed.
નૉૅધ: This method can be removed from this article. I didn’t find it anywhere pertaining to the issue.
પદ્ધતિ 2: માલવેર સ્કેન ચલાવો
Many times errors like setup cannot continue due to a corrupted installation file are caused by Viruses and Malware. Check that your PC is periodically scanned to avoid getting attacked by them. Here are the steps to run an antivirus scan on your PC.
1. દબાવો વિન્ડોઝ + I કી એકસાથે ખોલવા માટે સેટિંગ્સ.
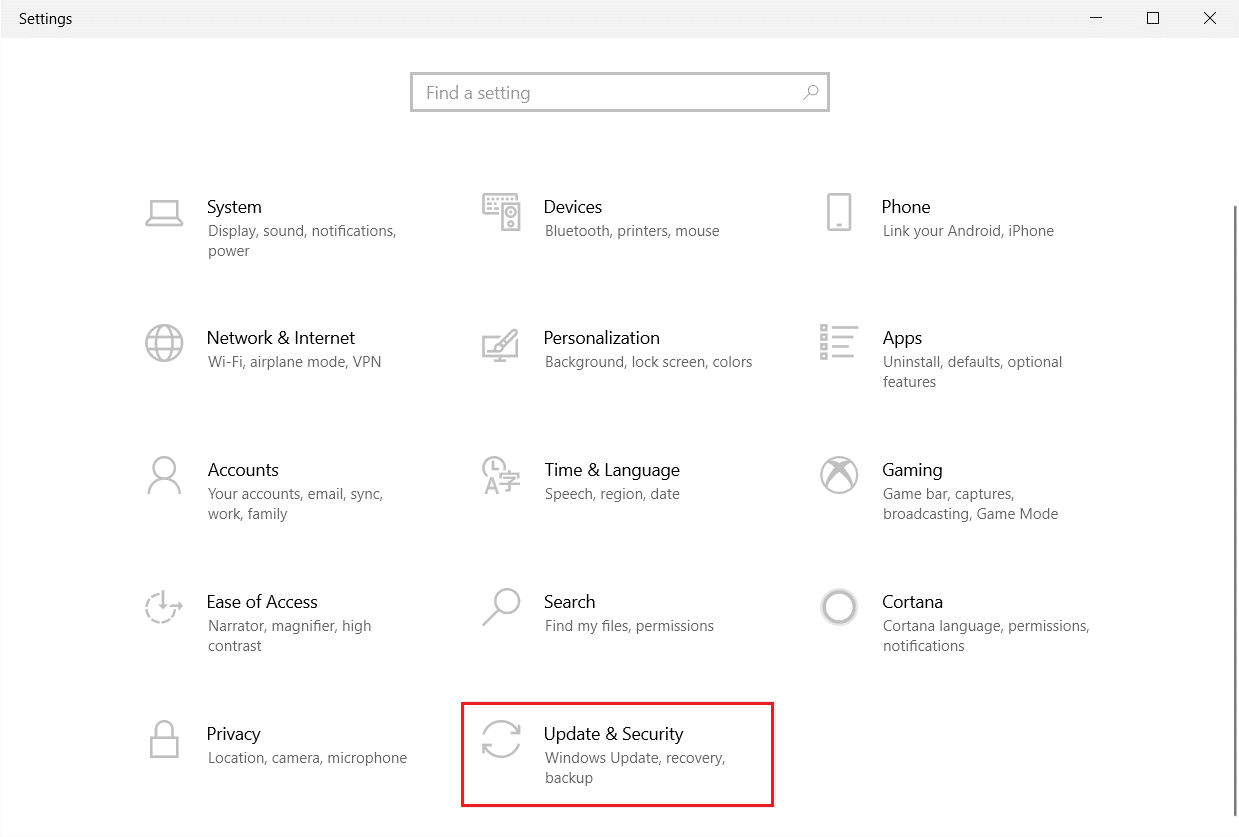
2. પર ક્લિક કરો અપડેટ અને સુરક્ષા, બતાવ્યા પ્રમાણે.
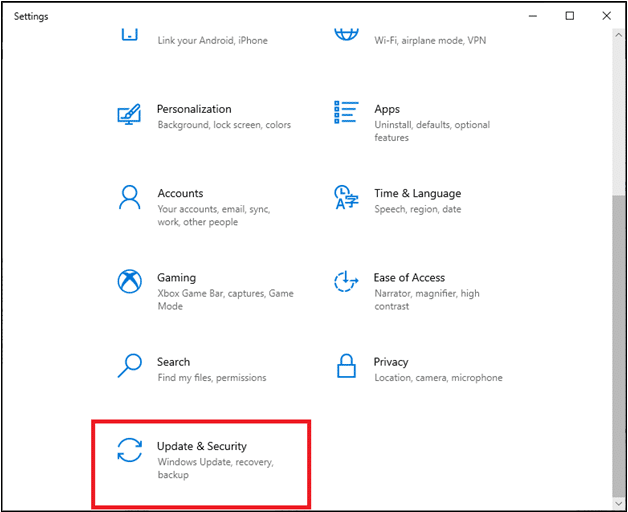
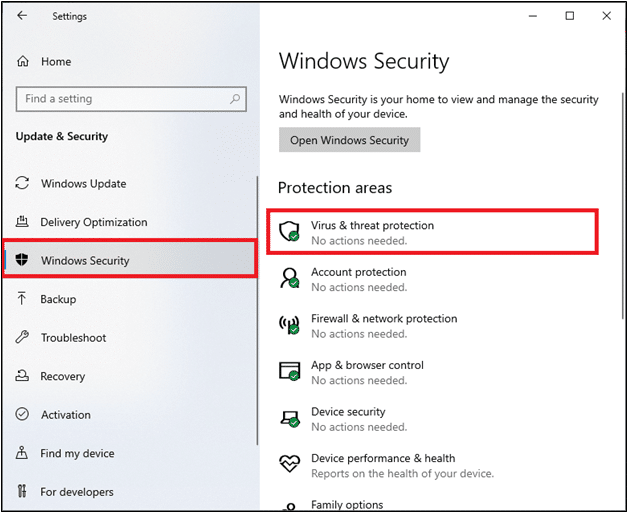
3. પર ક્લિક કરો વિન્ડોઝ સુરક્ષા ડાબા ફલકમાં.
4. આગળ, પસંદ કરો વાયરસ અને ધમકી સુરક્ષા વિકલ્પ હેઠળ સંરક્ષણ વિસ્તારો.
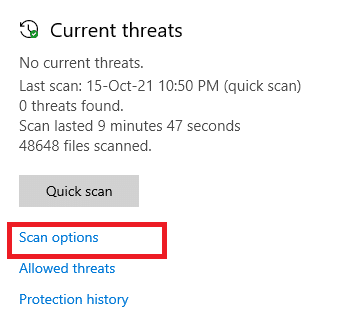
5. પર ક્લિક કરો વિકલ્પો સ્કેન કરો, બતાવ્યા પ્રમાણે.
6. પસંદ કરો ઝડપી સ્કેન or સંપૂર્ણ સ્કેન option as per your preference and click on હવે સ્કેન કરો.
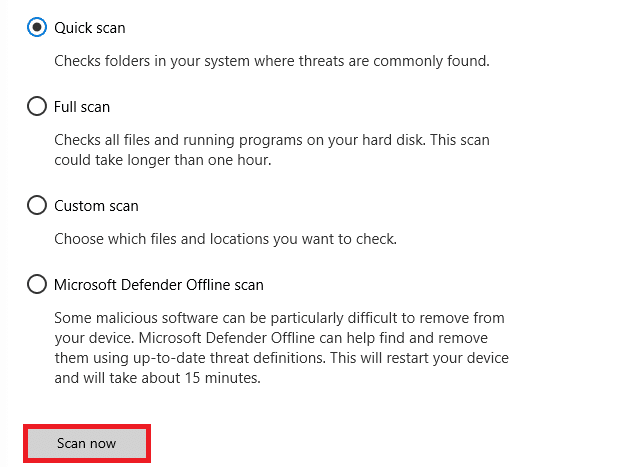
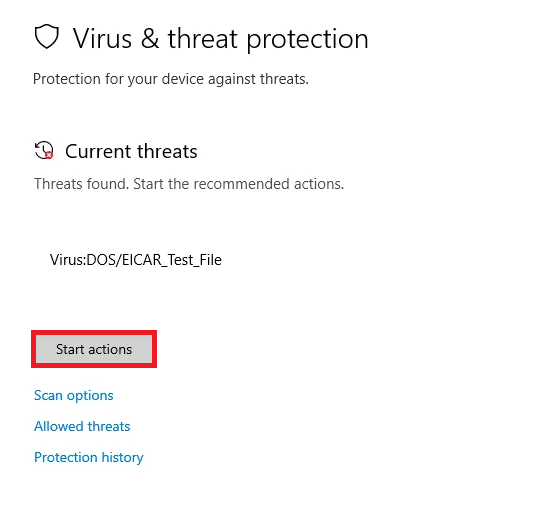
7A. After the scan is completed. All the threats will be enlisted. Click on ક્રિયાઓ શરૂ કરો હેઠળ વર્તમાન ધમકીઓ to remove or repair threats.
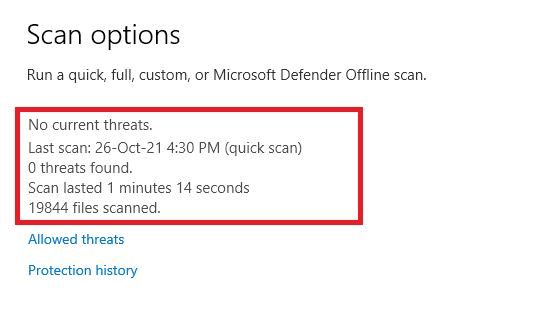
7B. If you do not have any threats on your system, કોઈ વર્તમાન ધમકીઓ નથી will be shown as highlighted below.
Windows Defender Firewall will fix all the virus and malware related issues.
આ પણ વાંચો: વિન્ડોઝ અપડેટ ભૂલ 0x800704c7 ઠીક કરો
પદ્ધતિ 3: વિન્ડોઝ અપડેટ ટ્રબલશૂટર ચલાવો
You can also run the Windows Update Troubleshooter. It is a built-in feature made to fix all update errors. It will repair Windows Update-related temporary files and services and reset Windows Update components. Here are the instructions to run Windows Update troubleshooter.
1. પ્રેસ વિન્ડોઝ + I કી એક સાથે લોન્ચ કરવા માટે સેટિંગ્સ.
2. પર ક્લિક કરો અપડેટ અને સુરક્ષા ટાઇલ, બતાવ્યા પ્રમાણે.
3. પર જાઓ મુશ્કેલીનિવારણ ડાબી તકતીમાં મેનુ.
4. પસંદ કરો વિન્ડોઝ સુધારા મુશ્કેલીનિવારક અને પર ક્લિક કરો મુશ્કેલીનિવારક ચલાવો નીચે દર્શાવેલ બટન.

5. Wait for the troubleshooter to detect and fix the problem. Once the process is complete, પુનઃપ્રારંભ તમારા પીસી.
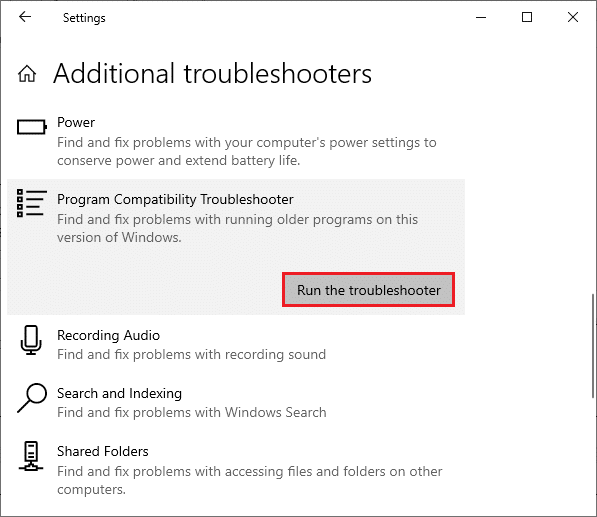
નૉૅધ: તમે પણ ચલાવી શકો છો પ્રોગ્રામ સુસંગતતા મુશ્કેલીનિવારણ listed under Find and fix other problems. This will find and fix problems related with compatibility of older programs on the version of Windows.
પદ્ધતિ 4: દૂષિત ફાઇલોનું સમારકામ
If Windows update 0x8007000d is showing up then it might be because of corrupt files on your computer. You can use features like SFC (System File Checker) and DISM (Deployment Image Servicing and Management) to scan and remove the harmful corrupt files. Here is how you can use them:
1. હિટ કરો વિન્ડોઝ કી, પ્રકાર કમાંડ પ્રોમ્પ્ટ અને પર ક્લિક કરો સંચાલક તરીકે ચલાવો.
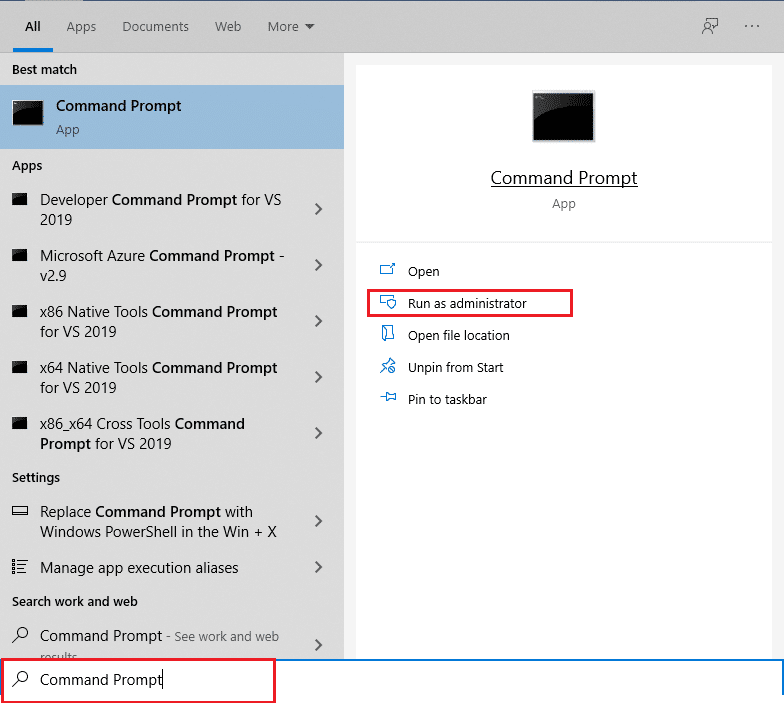
2. પર ક્લિક કરો હા માં વપરાશકર્તા ખાતું નિયંત્રણ પ્રોમ્પ્ટ.
3. પ્રકાર એસસીસી / સ્કેનૉ અને દબાવો કી દાખલ કરો ચલાવવા માટે સિસ્ટમ ફાઇલ તપાસનાર સ્કેન.
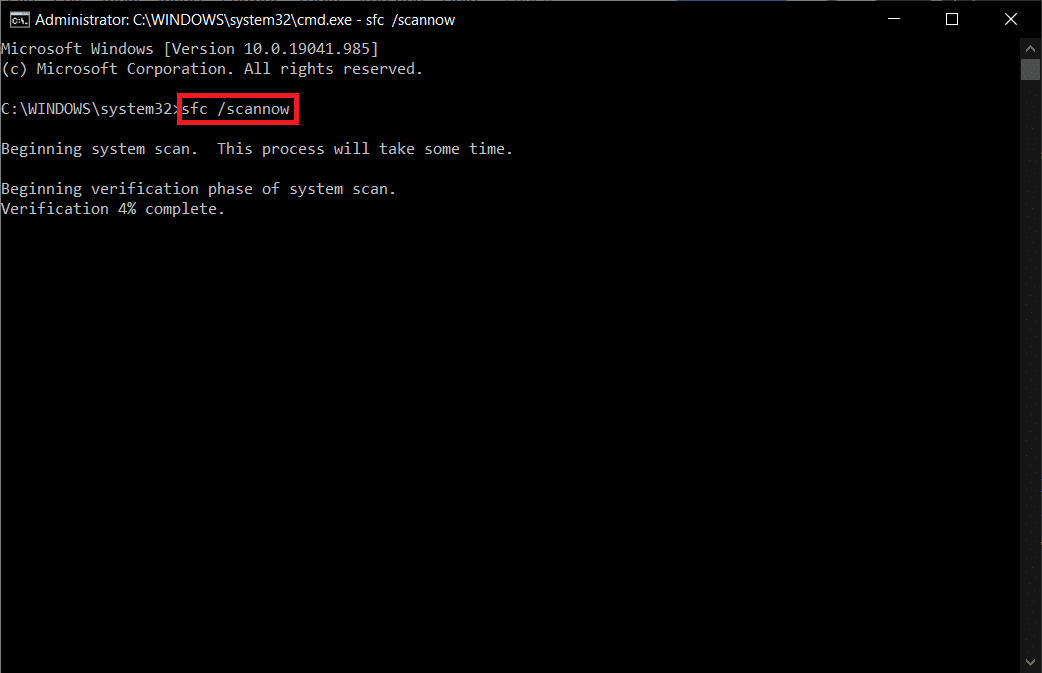
નૉૅધ: સિસ્ટમ સ્કેન શરૂ કરવામાં આવશે અને તેને સમાપ્ત થવામાં થોડી મિનિટો લાગશે. દરમિયાન, તમે અન્ય પ્રવૃત્તિઓ કરવાનું ચાલુ રાખી શકો છો પરંતુ આકસ્મિક રીતે વિન્ડો બંધ ન કરવાનું ધ્યાન રાખો.
સ્કેન પૂર્ણ કર્યા પછી, તે આમાંથી કોઈપણ સંદેશા બતાવશે:
- વિન્ડોઝ રિસોર્સ પ્રોટેક્શનને કોઈ અખંડિતતાનું ઉલ્લંઘન મળ્યું નથી.
- વિન્ડોઝ રિસોર્સ પ્રોટેક્શન વિનંતી કરેલ ઑપરેશન કરી શક્યું નથી.
- વિન્ડોઝ રિસોર્સ પ્રોટેક્શનને દૂષિત ફાઇલો મળી અને તેને સફળતાપૂર્વક રિપેર કરી.
- વિન્ડોઝ રિસોર્સ પ્રોટેક્શનને દૂષિત ફાઇલો મળી પરંતુ તેમાંથી કેટલીકને ઠીક કરવામાં અસમર્થ હતી.
4. એકવાર સ્કેન પૂર્ણ થઈ જાય, પુનઃપ્રારંભ તમારા પીસી.
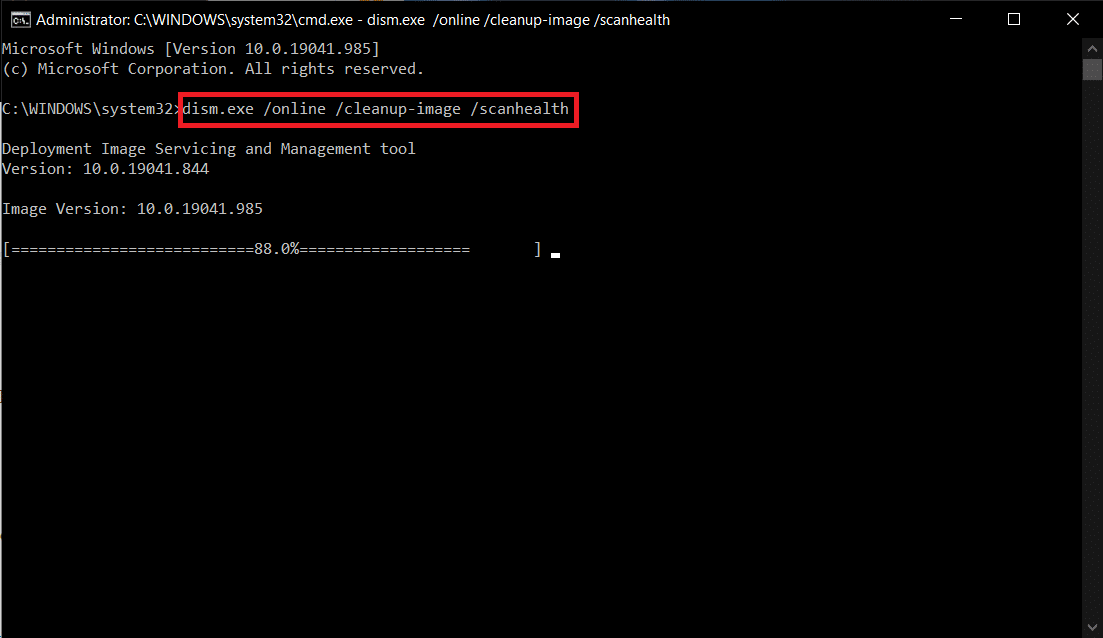
5. ફરીથી, લોંચ કરો સંચાલક તરીકે આદેશ પ્રોમ્પ્ટ અને આપેલ આદેશો એક પછી એક ચલાવો:
dism.exe /Online /cleanup-image /scanhealth
dism.exe /Online /cleanup-image /restorehealth
dism.exe /Online /cleanup-image /startcomponentcleanup
નૉૅધ: DISM આદેશોને યોગ્ય રીતે ચલાવવા માટે તમારી પાસે કાર્યરત ઇન્ટરનેટ કનેક્શન હોવું આવશ્યક છે.
આ પણ વાંચો: વિન્ડોઝ અપડેટ ભૂલ 80072ee2 કેવી રીતે ઠીક કરવી
પદ્ધતિ 5: કમાન્ડ પ્રોમ્પ્ટનો ઉપયોગ કરો
You can also fix 0x8007000d Windows error by using Command Prompt. It is an effective troubleshooting method, you can resolve the error with the given codes.
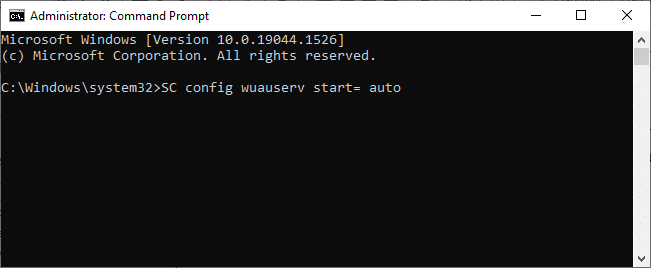
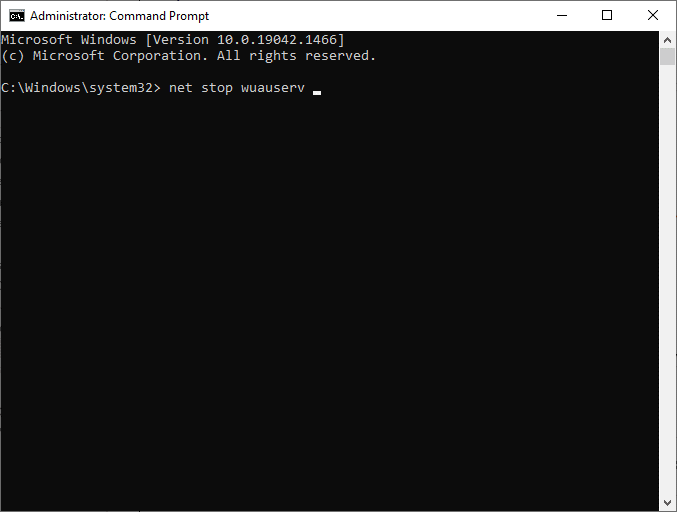
1. લોંચ કરો કમાંડ પ્રોમ્પ્ટ સંચાલક તરીકે.
2. Type the command the following commands એક પછી એક and hit દાખલ.
એસસી રૂપરેખા વ્યુઉઝરવ પ્રારંભ = autoટો
એસસી રૂપરેખા બીટ્સ પ્રારંભ = ઓટો
એસસી રૂપરેખા ક્રિપ્ટ્સવીસી પ્રારંભ = .ટો
એસસી રૂપરેખા વિશ્વસનીય સ્થાપક પ્રારંભ = સ્વત.
3. Once the commands are executed, તમારા પીસી ફરીથી શરૂ કરો
Method 6: Enable Windows Update Service
To fix 0x8007000d error, check if Windows Update services are running. They manage the distribution of updates released by Microsoft. Here is how to do it.
Option I: Through Services
Follow these steps to start Windows update services through Services program.
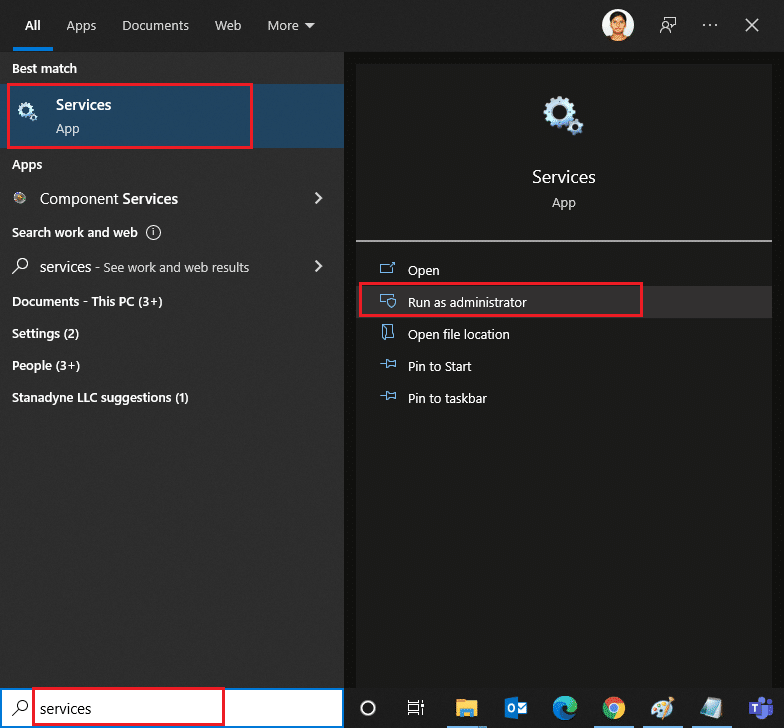
1. હિટ કરો વિન્ડોઝ કી અને પ્રકાર સેવાઓ અને પર ક્લિક કરો સંચાલક તરીકે ચલાવો.
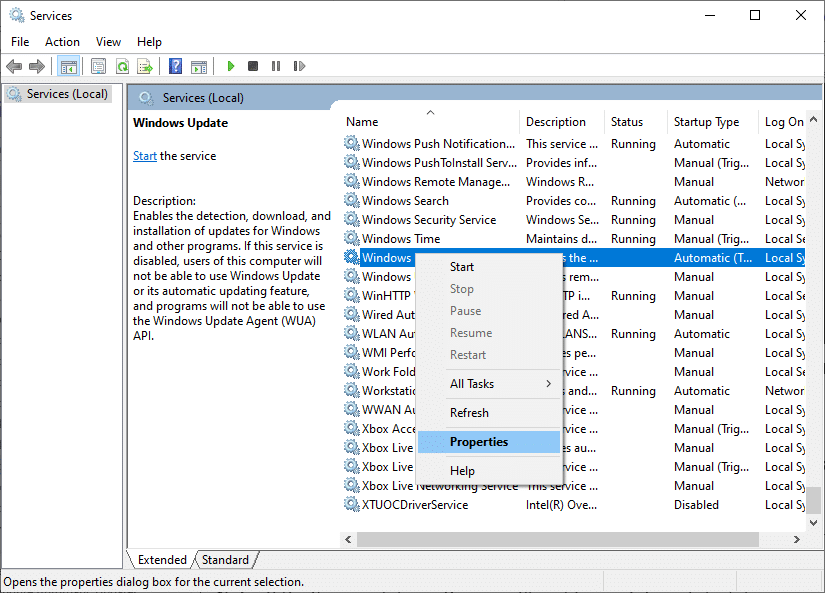
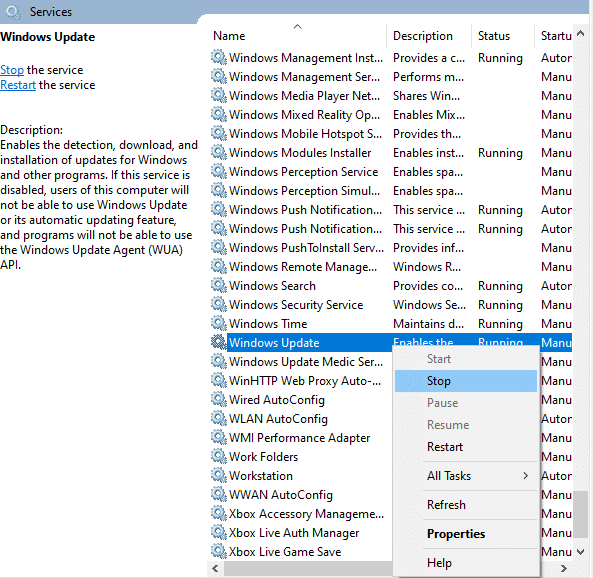
2. નીચે સ્ક્રોલ કરો અને પસંદ કરો વિન્ડોઝ સુધારા સેવા.
3. રાઇટ-ક્લિક કરો ગુણધર્મો નીચેના ચિત્રમાં દર્શાવ્યા મુજબ.
નૉૅધ: You can also double-click on વિન્ડોઝ અપડેટ સેવાઓ ખોલવા માટે ગુણધર્મો વિન્ડો.
4. સેટ કરો સ્ટાર્ટઅપ પ્રકાર થી સ્વચાલિત, નીચે દર્શાવ્યા મુજબ.
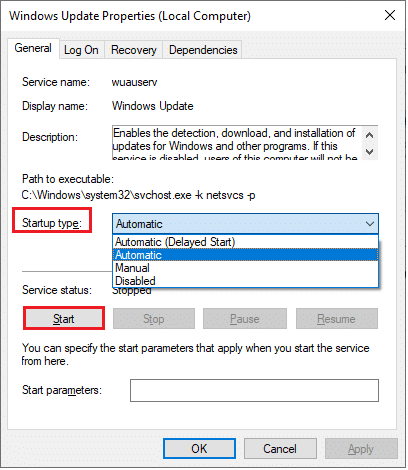
5. પર ક્લિક કરો લાગુ કરો> ઠીક છે ફેરફારો સંગ્રહવા.
આ પણ વાંચો: વિન્ડોઝ 10 નકારેલ એક્સેસને કેવી રીતે ઠીક કરવું
Option II: Through Local Group Policy Editor
When the Windows update components are disabled in your PC, you will face problems like setup cannot continue due to a corrupted installation file prompt accompanied by Windows update 0x8007000d error. Firstly check if you have enabled Windows Update components, if not you can enable it by following the below-mentioned steps.
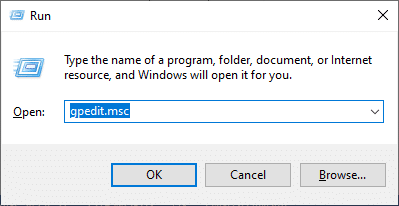
1. હિટ કરો વિન્ડોઝ કી અને પ્રકાર gpedit.msc as shown. Then, hit દાખલ કરો.
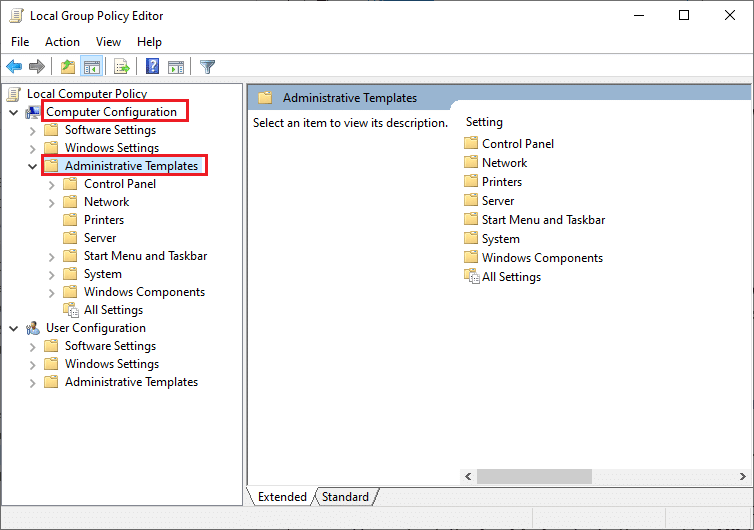
2. હવે, પર ડબલ-ક્લિક કરો કમ્પ્યુટર ગોઠવણી> વહીવટી નમૂનાઓ દર્શાવ્યા પ્રમાણે.
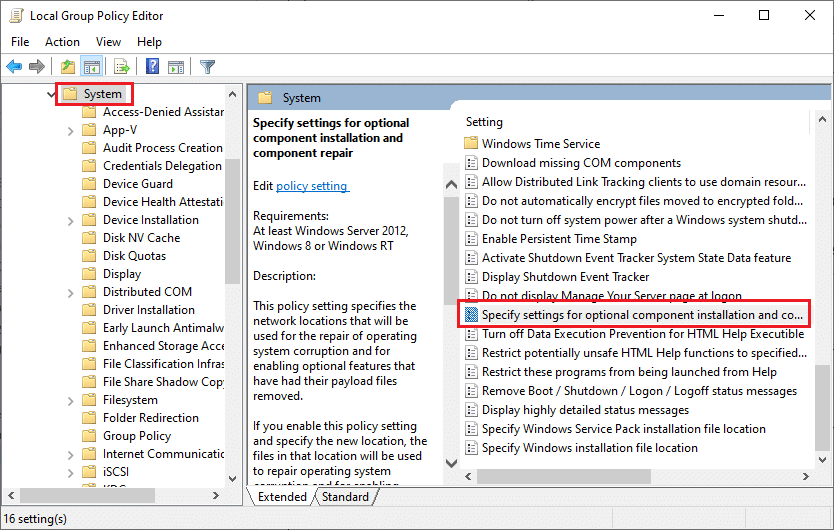
3. પર ડબલ-ક્લિક કરો સિસ્ટમ and in the right pane, scroll down and double-click on વૈકલ્પિક ઘટક ઇન્સ્ટોલેશન અને ઘટક સમારકામ માટે સેટિંગ્સનો ઉલ્લેખ કરો દર્શાવ્યા પ્રમાણે.
4. In the next pop-up window, Select સક્ષમ કરેલું દર્શાવ્યા પ્રમાણે.
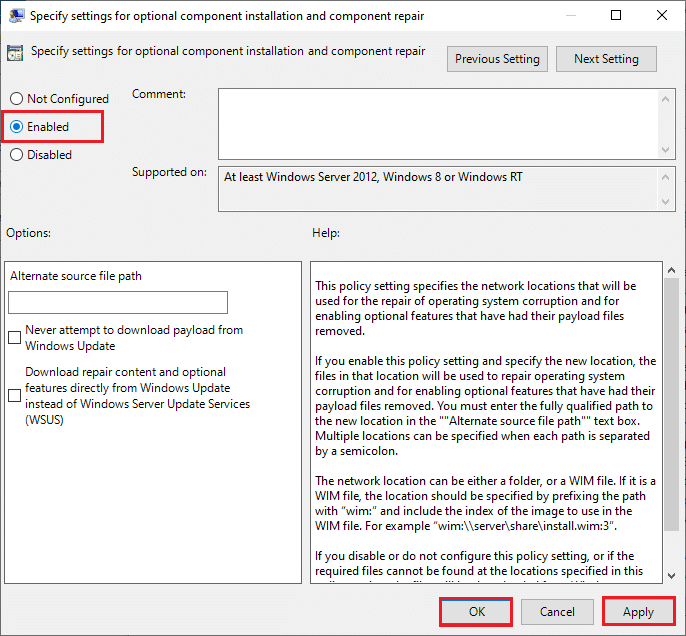
5. અંતે, ક્લિક કરો લાગુ કરો> ઠીક છે ફેરફારો સંગ્રહવા.
આ પણ વાંચો: ફિક્સ કોમ્પ્યુટર ફરીથી સમન્વયિત ન થયું કારણ કે કોઈ સમયનો ડેટા ઉપલબ્ધ ન હતો
પદ્ધતિ 7: વિન્ડોઝ અપડેટ સેવા પુનઃપ્રારંભ કરો
Sometimes, you could fix setup cannot continue due to a corrupted installation file error by manually restarting the Windows Update Service. Follow the below instructions to implement the same.
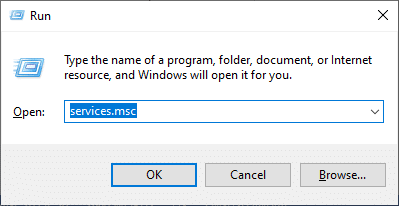
1. શરૂ કરો ચલાવો dialog box by hitting વિન્ડોઝ + આર કીઓ સાથે મળીને.
2. પ્રકાર services.msc અને ક્લિક કરો OK પ્રારંભ કરવો સેવાઓ વિન્ડો.
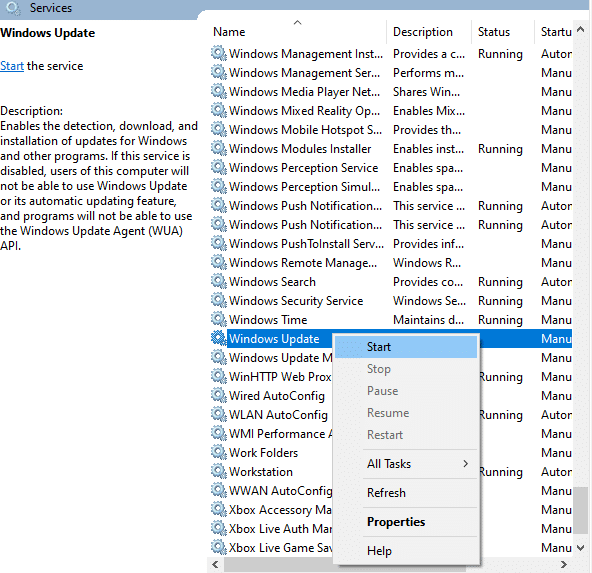
3. Scroll down the screen and જમણું બટન દબાવો on વિન્ડોઝ સુધારા.
નૉૅધ: If the current status is not ચાલી રહેલ, you can skip the below step.
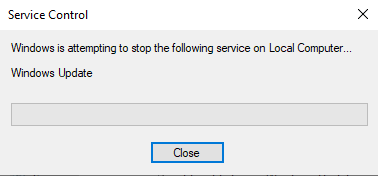
4. અહીં, પર ક્લિક કરો બંધ if the current status displays ચાલી રહેલ.
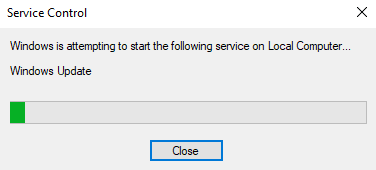
5. You will receive a prompt, વિન્ડોઝ સ્થાનિક કમ્પ્યુટર પર નીચેની સેવાને બંધ કરવાનો પ્રયાસ કરી રહ્યું છે... Wait for the prompt to be completed. It will take around 3 to 5 seconds.
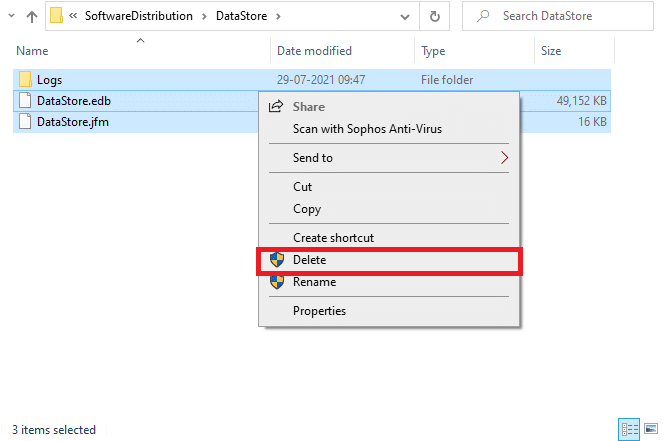
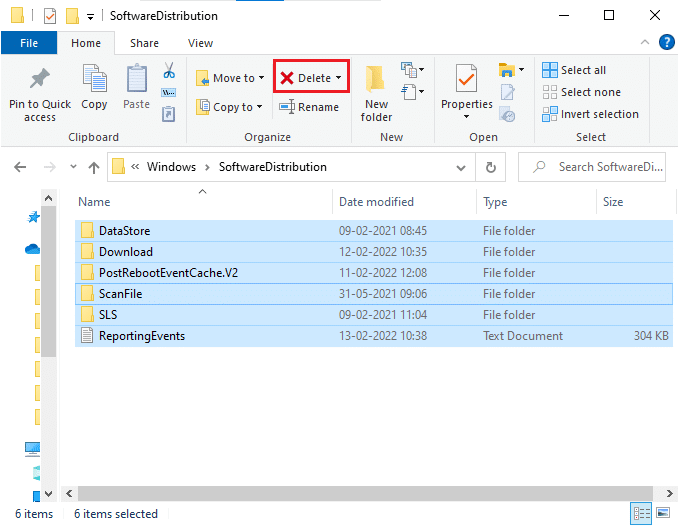
6. ખોલો ફાઇલ એક્સ્પ્લોરર ક્લિક કરીને વિન્ડોઝ + ઇ કીઓ together. Now, navigate to the following path.
C:WindowsSoftwareDistributionDataStore
7. Select all the files and folders by pressing Control+ A keys together and જમણું બટન દબાવો on the empty space.
8. પસંદ કરો કાઢી નાખો option to remove all the files and folders from the DataStore location.
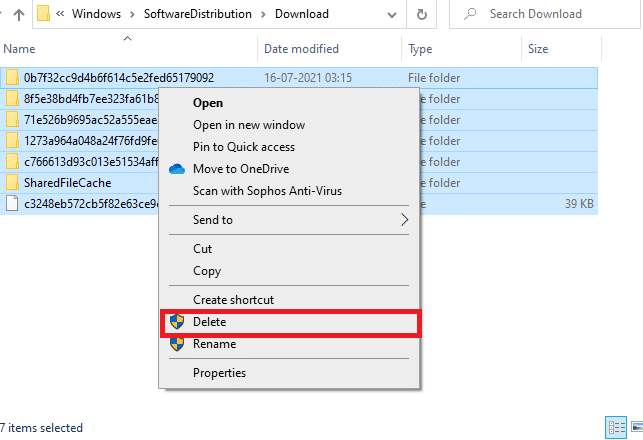
9. Now, navigate to the path, C:WindowsSoftwareDistributionDownload, અને કાઢી નાખો all the files in the Downloads location as mentioned in the previous step.
10. પર પાછા જાઓ સેવાઓ વિન્ડો અને જમણું બટન દબાવો on વિન્ડોઝ સુધારા.
11. આ પસંદ કરો શરૂઆત નીચેના ચિત્રમાં દર્શાવ્યા મુજબ વિકલ્પ.
12. You will receive a prompt, Windows સ્થાનિક કમ્પ્યુટર પર નીચેની સેવા શરૂ કરવાનો પ્રયાસ કરી રહ્યું છે... Wait for 3 to 5 seconds and close the Services window.
Method 8: Delete Software Distribution Files in Safe Mode
If the problem is not solved by manually deleting the components of the Software Distribution Folder or if you have faced any errors while removing the files, follow the below-mentioned steps. These instructions will boot your PC in recovery mode so you can delete it without any problems.
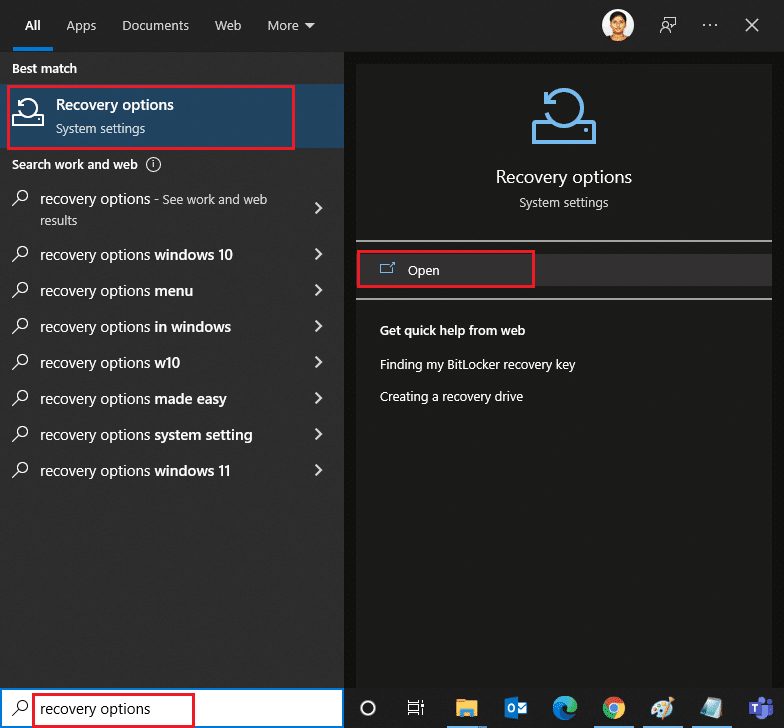
1. હિટ કરો વિન્ડોઝ કી અને પ્રકાર પુનoveryપ્રાપ્તિ વિકલ્પો as shown. Open the best results.
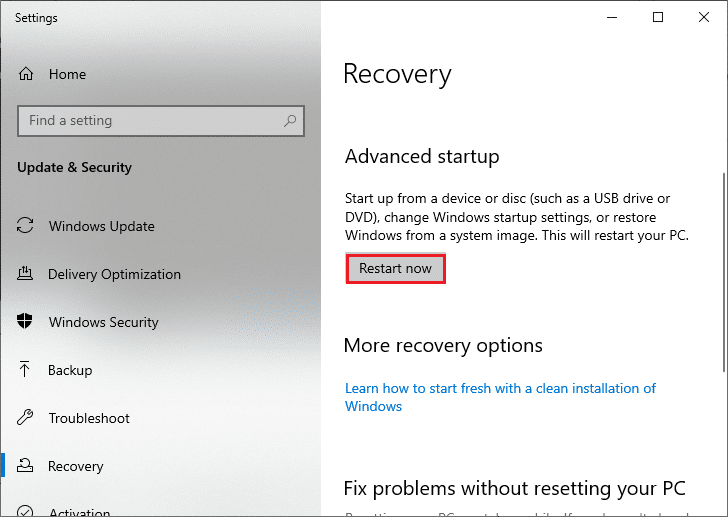
2. માં સેટિંગ્સ વિન્ડો, ક્લિક કરો ફરીથી શરૂ કરો વિકલ્પ હેઠળ ઉન્નત શરૂઆત બતાવ્યા પ્રમાણે.
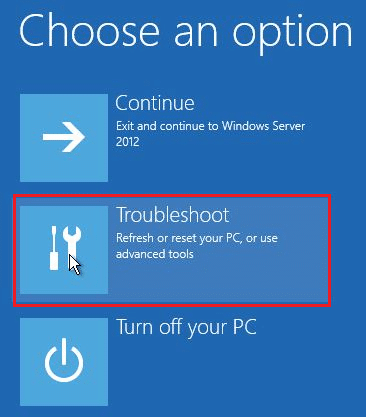
3. પર ક્લિક કરો મુશ્કેલીનિવારણ માં એક વિકલ્પ પસંદ કરો વિન્ડો.
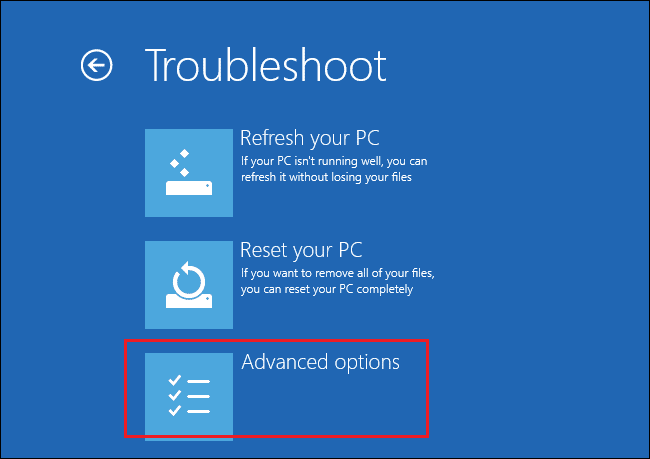
4. પર ક્લિક કરો અદ્યતન વિકલ્પો બતાવ્યા પ્રમાણે.
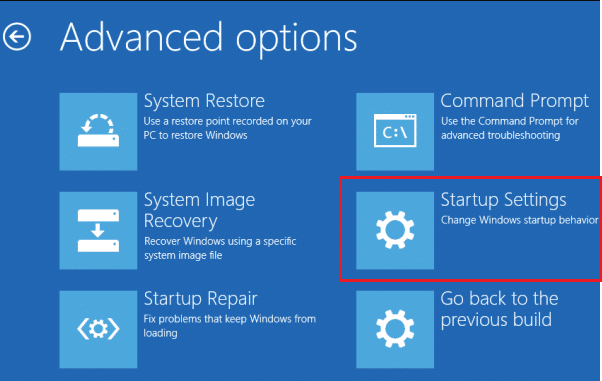
5. પર ક્લિક કરો સ્ટાર્ટઅપ સેટિંગ્સ તરીકે પ્રકાશિત.
6. માં સ્ટાર્ટઅપ સેટિંગ્સ વિન્ડો પર ક્લિક કરો પુનઃપ્રારંભ.
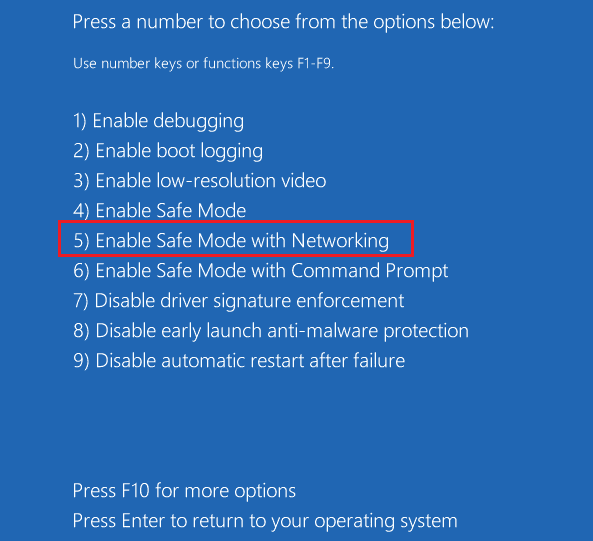
7. When your PC restarts, you will see the below screen. Here, hit the F5 key on your keyboard to નેટવર્કિંગ સાથે સલામત મોડને સક્ષમ કરો વિકલ્પ.
8. દબાવો અને પકડી રાખો વિન્ડોઝ + ઇ કીઓ એકસાથે ખોલવા માટે ફાઇલ એક્સ્પ્લોરર. Navigate to the following location.
સી: વિન્ડોઝ સૉફ્ટવેર વિતરણ
9. Select all the files in the Software Distribution folder and કાઢી નાખો તેમને.
10. પછી, તમારા પીસી ફરીથી શરૂ કરો and try updating the Windows Update.
આ પણ વાંચો: Windows 7 પર iaStorA.sys BSOD ભૂલને ઠીક કરવાની 10 રીતો
Method 9: Reset Update Components
To resolve all update-related issues, there is another effective troubleshooting method, resetting Windows Update components. It repairs BITS, Cryptographic, MSI Installer, Windows Update services, and updates folders like SoftwareDistribution and Catroot2. Here are some instructions to reset Windows Update components.
1. Follow steps 1 from 4A.
2. Type the command the following commands એક પછી એક and hit દાખલ.
નેટ સ્ટોપ વાઉઝર્વે
નેટ સ્ટોપ ક્રિપ્ટ એસવીસી
નેટ સ્ટોપ બીટ્સ
નેટ સ્ટોપ msiserver
ren C: WindowsSoftwareDistribution SoftwareDistribution.old
ren C:WindowsSystem32catroot2 Catroot2.old
ચોખ્ખી શરૂઆત વાઉઝર્વે
નેટ શરૂઆત ક્રિપ્ટ એસસીસી
નેટ શરૂઆત બિટ્સ
નેટ શરુઆતની મિસિસર
Wait for the commands to be executed and check if error 0x8007000d Windows 10 is fixed.
Method 10: Disable Antivirus (Temporarily)
Sometimes, an over-aggressive antivirus suite will interfere with the update process causing 0x8007000d Windows 10 update error 0xc1900204 or setup cannot continue due to a corrupted installation error. Hence, if you are using a third-party antivirus software, then disable it temporarily and check if you have fixed the issue. It is important that you enable it again after you have resolved your issue for protection against viruses.
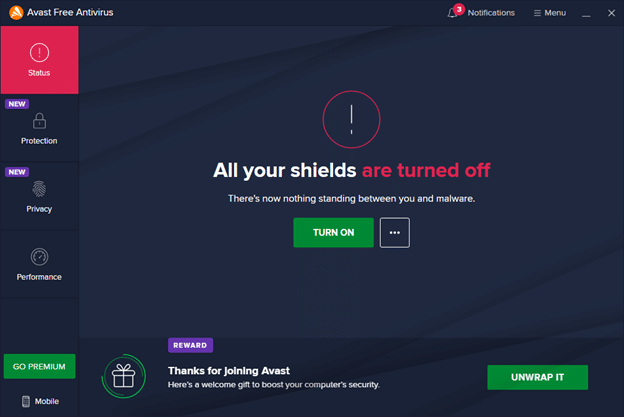
નૉૅધ: Different Antivirus programs will have different settings for this method. As an example we are using Avast Free Antivirus.
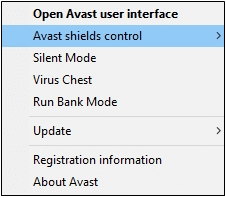
1. નેવિગેટ કરો એન્ટિવાયરસ icon in the Taskbar and જમણું બટન દબાવો તેના પર.
![]()
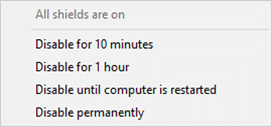
2. પસંદ કરો અવનસ્ટ ieldાલ નિયંત્રણ કરે છે option and you can temporarily disable Avast using the below options:
- 10 મિનિટ માટે અક્ષમ કરો
- 1 કલાક માટે અક્ષમ કરો
- કમ્પ્યુટર પુનઃપ્રારંભ થાય ત્યાં સુધી અક્ષમ કરો
- કાયમી ધોરણે અક્ષમ કરો
3. તમારી અનુકૂળતા અનુસાર વિકલ્પ પસંદ કરો અને સ્ક્રીન પર પ્રદર્શિત પ્રોમ્પ્ટની પુષ્ટિ કરો.
4. In the main window you will see the note All your shields are turned off denoting that you have disabled the antivirus. To activate it again, click on ચાલુ કરો.
પદ્ધતિ 11: પીસી રીસેટ કરો
If none of the above methods work for you, then this is the last resort. You can reset your PC to finally fix this error. Here is how to do it.
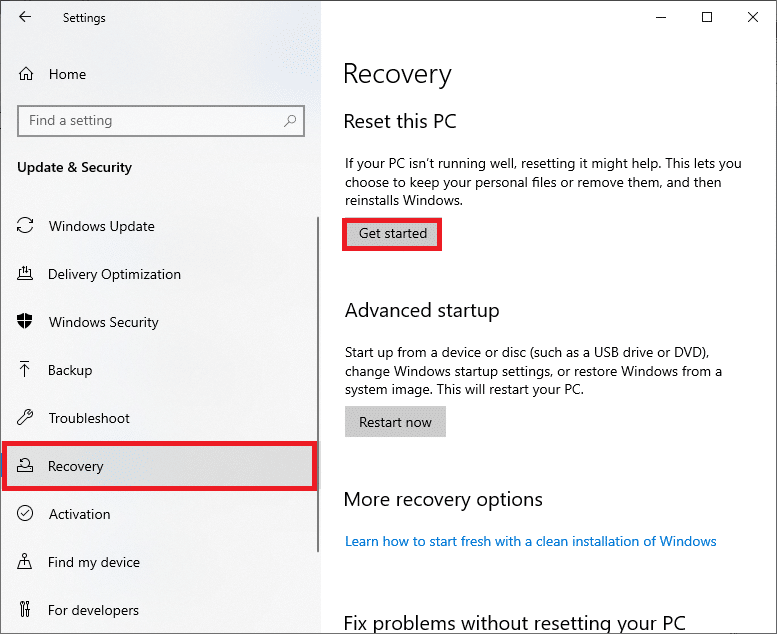
1. Navigate to Windows સેટિંગ્સ અને પસંદ કરો અપડેટ અને સુરક્ષા.
2. આ પસંદ કરો પુનઃપ્રાપ્તિ ડાબી તકતીમાંથી વિકલ્પ અને પર ક્લિક કરો પ્રારંભ કરો જમણા ફલકમાં.
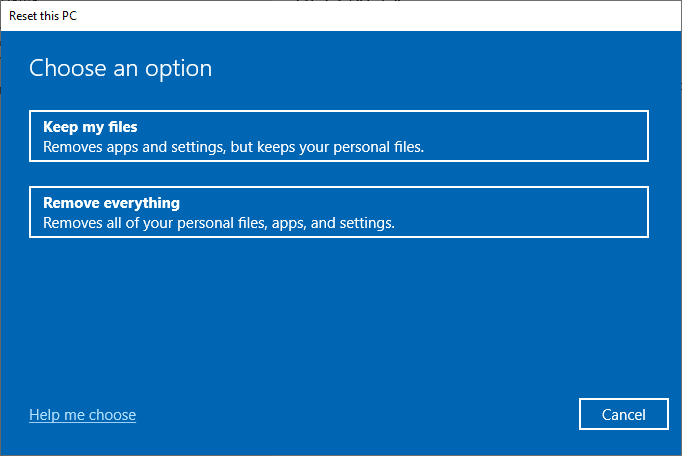
3. Now, choose an option from આ પીસી ફરીથી સેટ કરો વિન્ડો.
- મારી ફાઇલો રાખો option will remove apps and settings but will keep your personal files.
- બધું કા Removeી નાખો option will remove all your personal files, apps, and settings.
4. છેલ્લે, રીસેટ પ્રક્રિયા પૂર્ણ કરવા માટે ઓન-સ્ક્રીન સૂચનાઓને અનુસરો.
If you are unable to fix Windows update 0x8007000d error, here are a few alternatives to update your Windows 10 PC.
આ પણ વાંચો: વિન્ડોઝ 10 માં વિન સેટઅપ ફાઇલોને કેવી રીતે કાઢી નાખવી
Method 12: Use Windows 10 Update Assistant
You can try an alternative way of updating Windows 10 PC if you have any troubles with previous versions. Firstly, uninstall any possible recent updates and use Windows 10 Update Assistant as instructed below to fix 0x8007000d Windows 10 error.
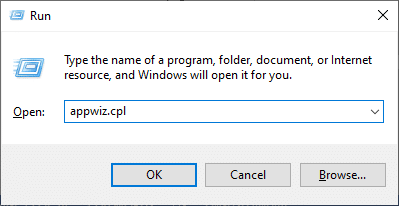
1. દબાવો અને પકડી રાખો વિન્ડોઝ + આર કીઓ એકસાથે ખોલવા માટે ચલાવો સંવાદ બોક્સ.
2. હવે, ટાઈપ કરો appwiz.cpl as shown and hit દાખલ કરો.
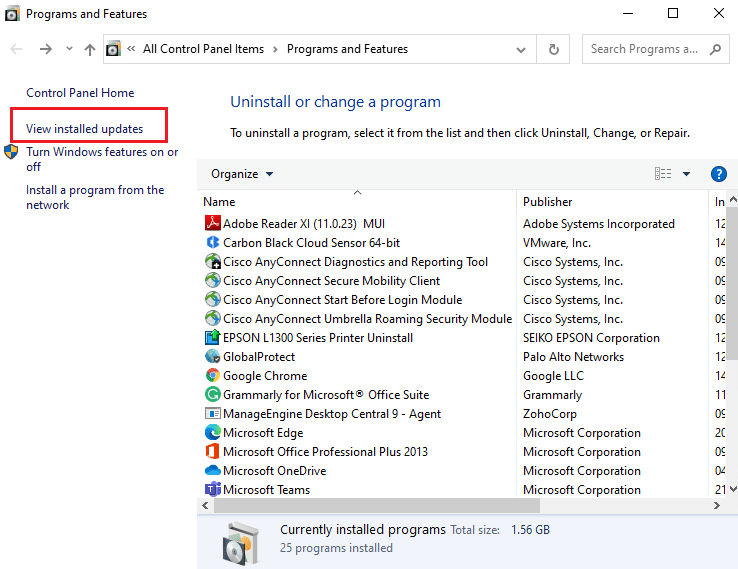
3. પર ક્લિક કરો ઇન્સ્ટોલ કરેલા અપડેટ્સ જુઓ in the left pane as shown here.
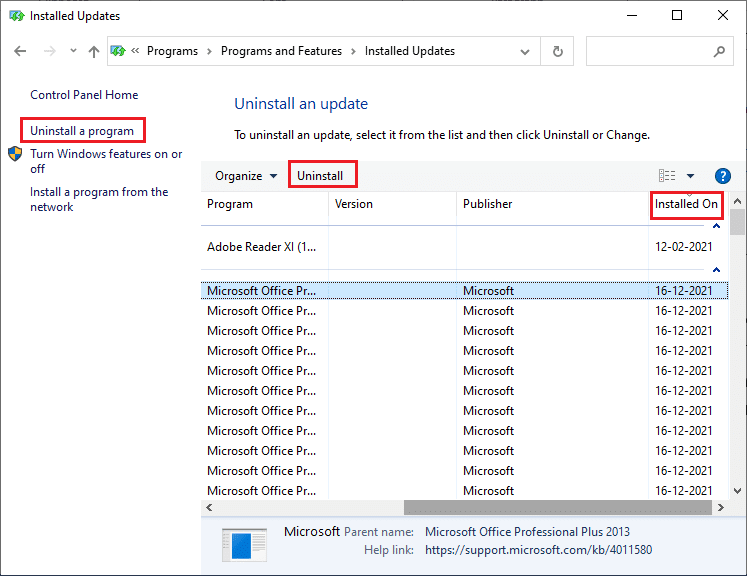
4. Now, select the most recent problematic update and click on અનઇન્સ્ટોલ કરો નીચે બતાવ્યા પ્રમાણે વિકલ્પ.
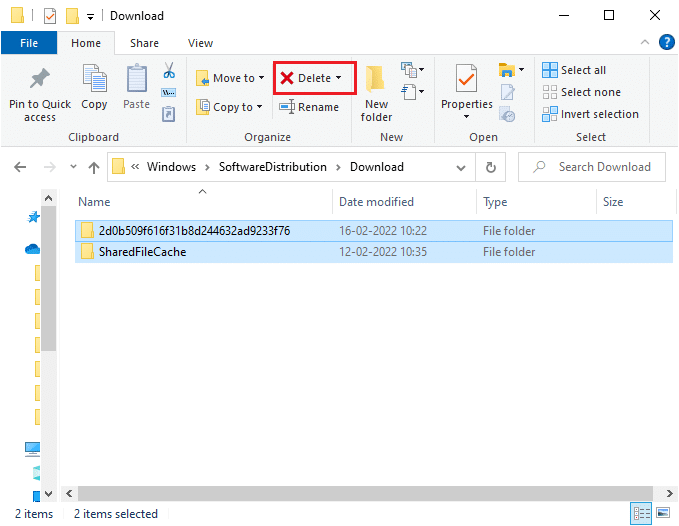
5. Confirm the prompt, if any. Now, press and hold વિન્ડોઝ + ઇ કીઓ એકસાથે ખોલવા માટે ફાઇલ એક્સ્પ્લોરર. Navigate to the following path.
C:/windows/softwaredistribution/download
6. Delete all the files and folders in the path. Select all the files and click on the કાઢી નાખો બતાવ્યા પ્રમાણે ચિહ્ન.
7. ની મુલાકાત લો Windows 10 Update download page. પર ક્લિક કરો હમણાં અપડેટ કરો બતાવ્યા પ્રમાણે વિકલ્પ.
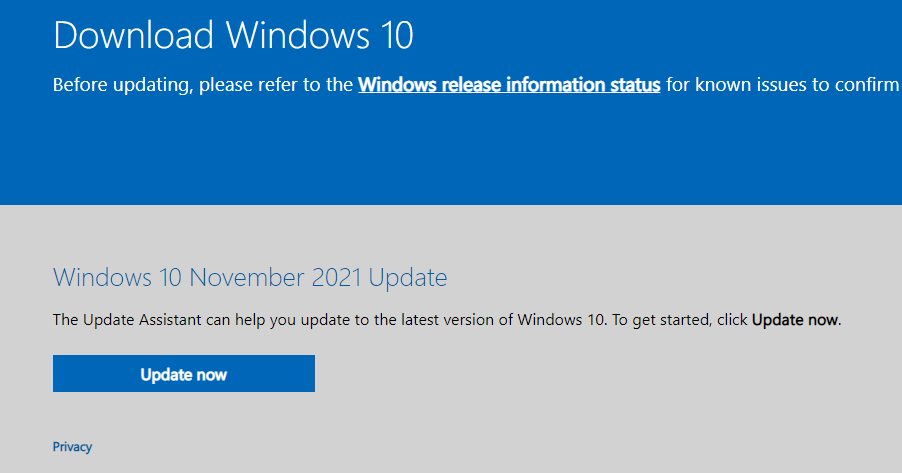
8. The update may slow down in between 60-85 % of the process. Wait until the update process is successful and તમારા પીસી ફરીથી શરૂ કરો.
9. દબાવો વિન્ડોઝ + આઇ કીઓ એકસાથે ખોલવા માટે સેટિંગ્સ તમારી સિસ્ટમમાં.
10. પસંદ કરો અપડેટ અને સુરક્ષા.
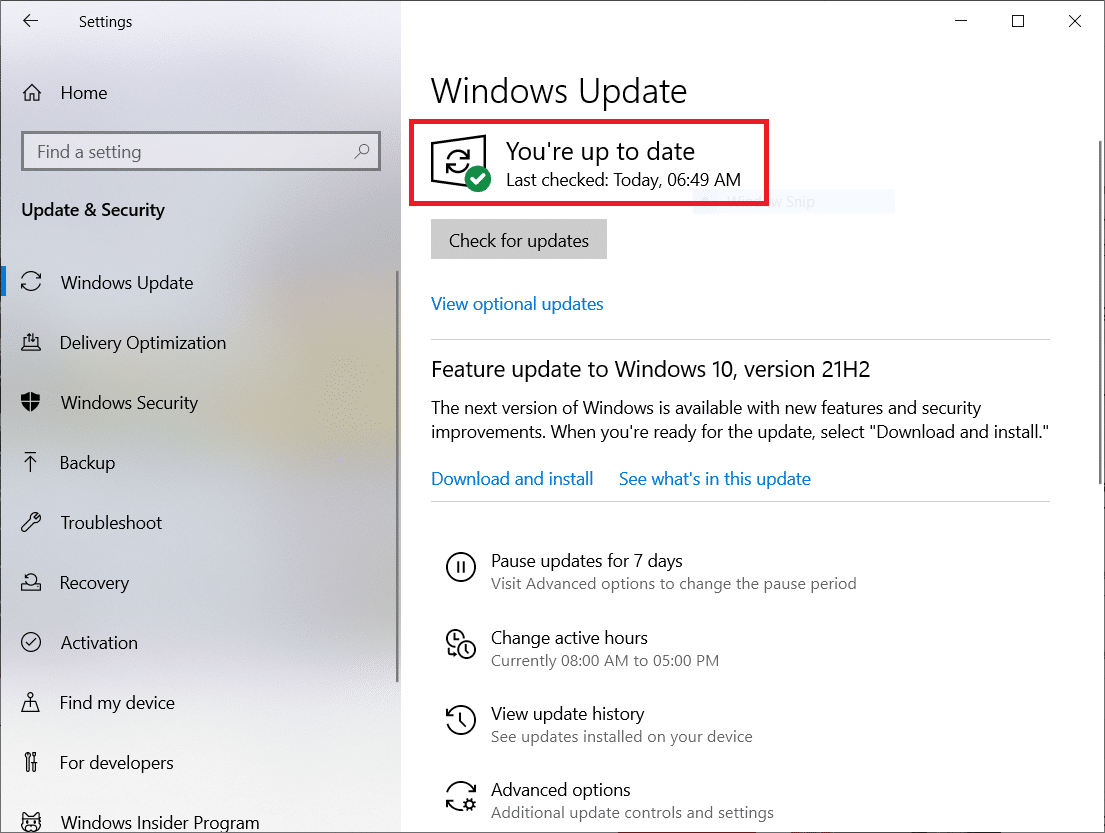
11. પસંદ કરો અપડેટ માટે ચકાસો from the right panel. Make sure you are prompted with તમે અપ ટુ ડેટ છો message as depicted.
નૉૅધ: જો તમે ઉપયોગ મિશ્ર રિયાલિટી software on your PC, please uninstall it. This software interferes with the Windows Update process and causes Windows update 0x8007000d error.
આ પણ વાંચો: ફિક્સ 0x80004002: વિન્ડોઝ 10 પર આવા કોઈ ઈન્ટરફેસ સપોર્ટેડ નથી
Method 13: Download the Updates Manually
If you have confirmed that there are no corrupt files, malicious programs in your PC and all essential services are running and still the error is not resolved then you can manually download the updates as instructed below. Before doing this, you have to identify the KB નંબર of your PC that is popping up with 0x8007000d Windows 10 error.
1. દબાવો વિન્ડોઝ + આઇ કીઓ એકસાથે ખોલવા માટે સેટિંગ્સ તમારી સિસ્ટમમાં.
2. હવે, પસંદ કરો અપડેટ અને સુરક્ષા.
3. પર ક્લિક કરો અપડેટ ઇતિહાસ જુઓ નીચે દર્શાવેલ વિકલ્પ.
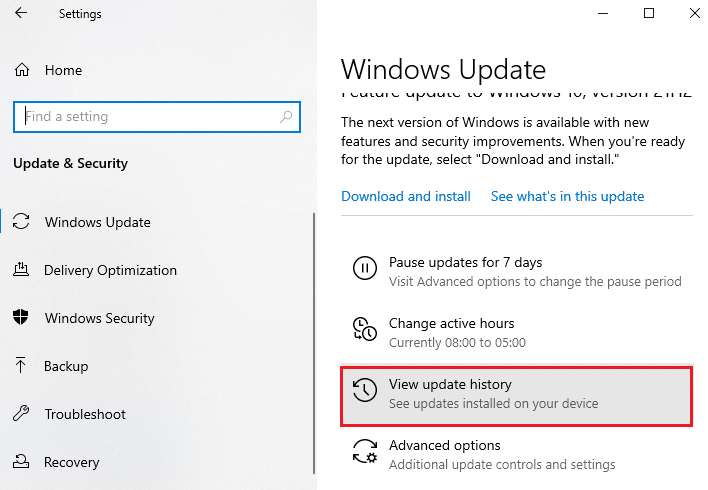
4. In the list, note down the KB નંબર of the update that has failed to install due to the error message.

5. ટાઇપ કરો KB નંબર માં માઈક્રોસોફ્ટ અપડેટ કેટલોગ શોધ બાર
6. Find the update that is compatible with your system and click on ઉમેરો to download and install the update manually.
આગ્રહણીય:
We hope that this guide was helpful and you have fixed Windows 10 update 0x8007000d error. Let us know which method worked the best for you. Also, if you have any queries/suggestions regarding this article, then feel free to drop them in the comments section.