Fix Windows Modules Installer Worker High CPU Usage
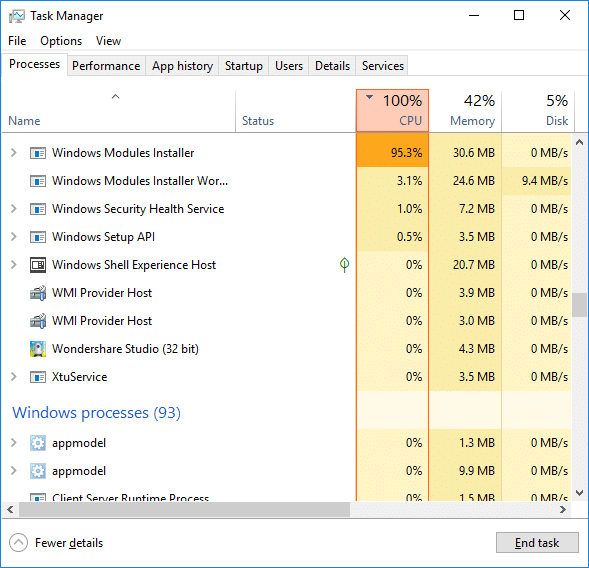
If you are facing the High CPU Usage by Windows Modules Installer Worker, then don’t worry as thousands of other users are also facing the similar problem and therefore, there are many working fixes which we will be discussing today in this article. To verify if you are facing this issue open Task Manager (Ctrl + Shift + Esc) and you will find that the Windows Modules Installer Worker is consuming High CPU or Disk Usage.

Pro Tip: You may leave your PC overnight or for a few hours to see the issue rectify itself once the Windows is finished downloading and installing updates.
What is Windows Modules Installer worker (WMIW)?
Windows Modules Installer worker (WMIW) is a service which takes cares of automatically installing Windows Update. According to its service description, WMIW is a system process that enables automatic installation, modification, and removal of Windows updates and optional components.
This process is responsible for finding new Windows Update automatically and installing them. As you might be aware that Windows 10 automatically install newer builds (i.e. 1803 etc.) via Windows Updates, so this process is responsible for installing these updates in the background.
Although this process is called Windows Modules Installer worker (WMIW) and you will see the same name in the Processes tab in the Task Manager, but if you switch to Details tab, then you will find the name of the file as TiWorker.exe.
Why Is Windows Modules Installer worker Using So Much CPU?
As Windows Modules Installer worker (TiWorker.exe) runs continuously in the background, sometimes it might utilize high CPU or disk usage when installing or uninstalling Windows Updates. But if its constantly using high CPU then the Windows Modules Installer worker may have become unresponsive while checking new updates. As a result, you may be experiencing lags, or your system might hang or freeze completely.
The first thing users do when they experience freezing, or lagging issues on their system is to restart their PC, but I assure you that this strategy won’t work in this case. This is because the issue will not resolve by itself until and unless you fix the underlying cause.
Fix Windows Modules Installer Worker High CPU Usage
Tabbatar da ƙirƙirar wurin mayarwa kawai idan wani abu ya ɓace.
Windows Modules Installer Worker (WMIW) is an important service, and it should not be disabled. WMIW or TiWorker.exe is not a virus or malware, and you cannot just delete this service from your PC. So without wasting any time let’s see How to Fix Windows Modules Installer Worker High CPU Usage tare da taimakon jagorar warware matsalar da aka jera a ƙasa.
Hanyar 1: Run Windows Update Matsala
1. Danna Windows Key + I don buɗewa Saituna saika danna Sabuntawa & Tsaro icon.
![]()
2. Daga menu na hannun hagu, zaɓi troubleshoot ƙarƙashin “Tashi da gudu” danna kan Windows Update.
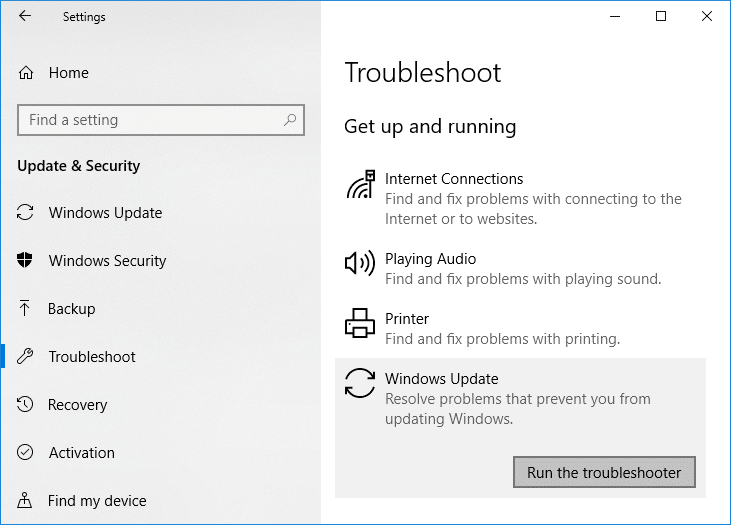
3. Yanzu danna kan “Gudun mai warware matsalar” under Windows Update.
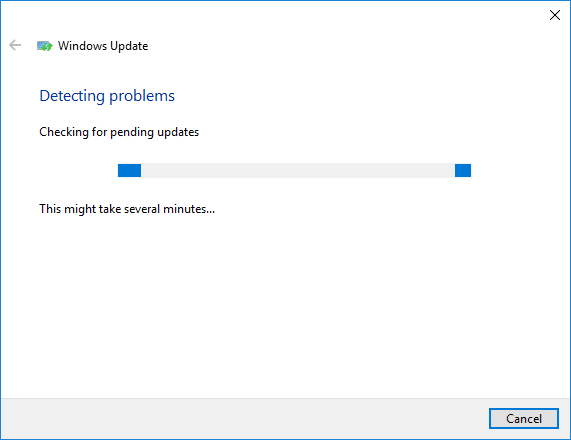
4. Let the troubleshooter run, and it will automatically fix any issues found with Windows Update taking forever.
Method 2: Manually Check for Windows Updates
1. Danna Windows Key + I sannan zaɓi Sabuntawa & Tsaro.
2. Daga gefen hagu, menu yana dannawa Windows Update.
3. Yanzu danna kan "Duba don sabuntawa” maballin don bincika kowane sabuntawa da ke akwai.

4. Idan wani sabuntawa yana jiran, to danna kan Zazzage & Shigar da sabuntawa.

5. Da zarar an sauke sabuntawar, sai a sanya su, kuma Windows ɗin ku za ta zama na zamani.
Method 3: Configure Windows Update to Manual
Tsanaki: This method will switch Windows Update from automatically installing the new updates to the manual. This means you have to manually check for Windows Update (weekly or monthly) to keep your PC secure. But follow this method, and you can again set the Updates to Automatic once the issue is resolved.
1. Danna Windows Key + R sannan ka rubuta ayyuka.msc kuma buga Shigar.

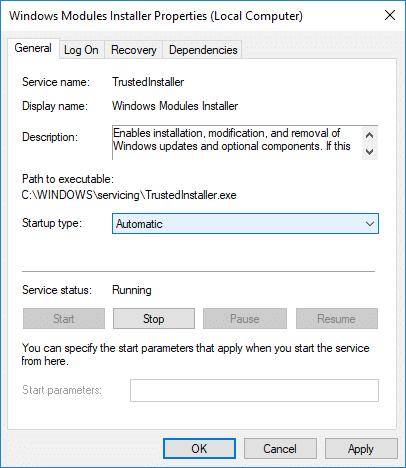
2. Scroll down and find Windows Modules Shigarwa service in the list.
3. Danna dama-dama Windows Modules Installer sabis kuma zaži Properties.
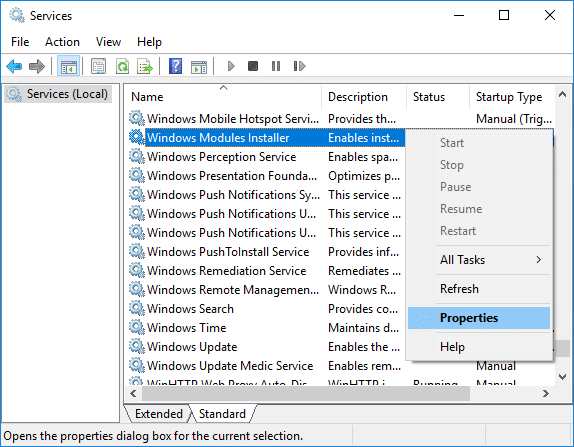
4. Yanzu danna kan Tsaya then from the Nau'in farawa drop-down select Manual.
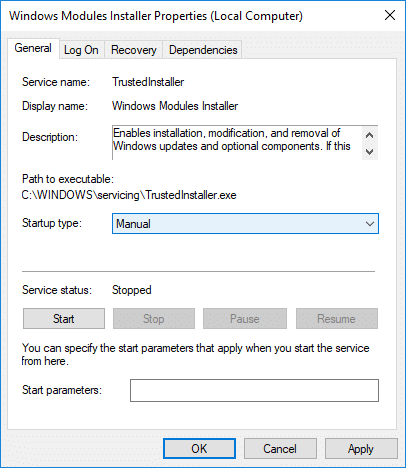
5. Danna Aiwatar, sannan kuma KO.
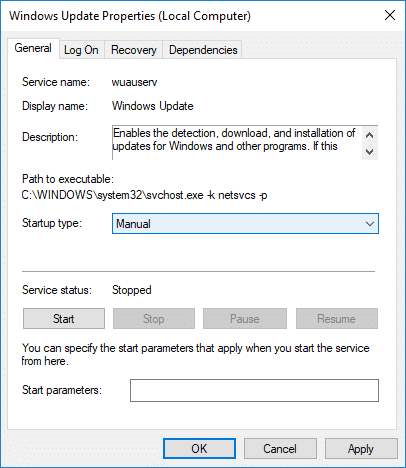
6. Similarly, follow the same step for the Windows Update service.
7. Sake yi PC ɗinka don adana canje-canje.
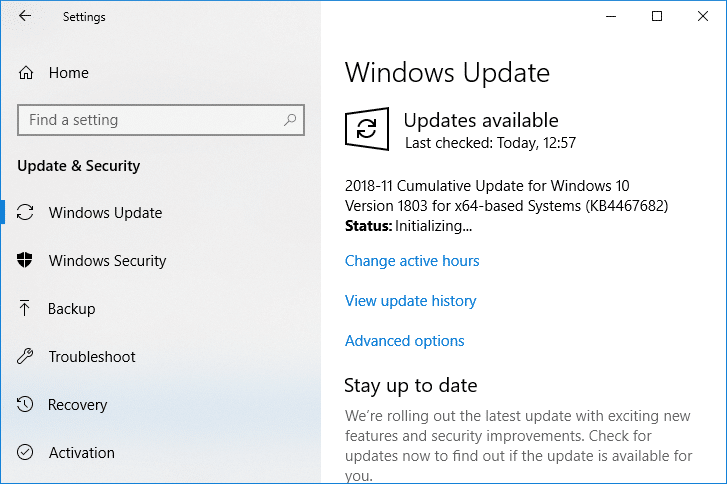
8. Sake duba Windows Updates Manually and install any pending updates.
9. Once is done, again go back to services.msc window and open the Windows Modules Installer & Windows Update Properties taga.
10. Saita Nau'in farawa to atomatik kuma danna Fara. Then click Apply followed by OK.
11. Sake yi PC ɗinka don adana canje-canje.
Hanyar 4: Gudanar da Matsalolin Kula da Tsarin
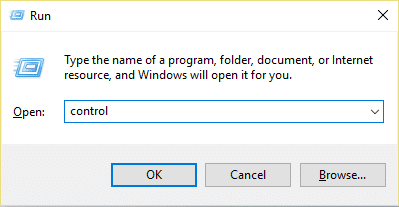
1. Danna Windows Key + R sai a buga control sannan ka danna Enter don budewa Control Panel.
2. Bincika Matsalar matsala kuma danna kan Shirya matsala.

3. Na gaba, danna kan duba duk a cikin hagu na hagu.
4. Danna kan “System Maintenance” don gudu System Maintenance Troubleshooter.

5. Mai matsala na iya iya Fix Windows Modules Installer Worker High CPU Usage, but if it didn’t, then you need to run System Performance Troubleshooter.
6. Buɗe Umurnin Umurni. Mai amfani zai iya yin wannan matakin ta neman 'cmd' sa'an nan kuma danna Shigar.

7. Rubuta wannan umarni cikin cmd kuma danna Shigar:
msdt.exe / id PerformanceDiagnostic
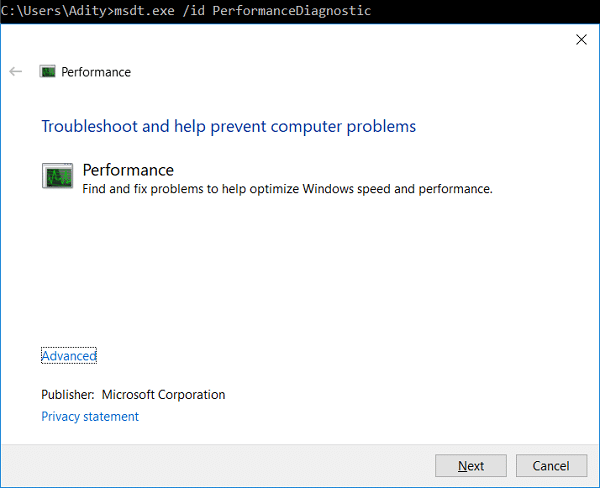
8. Follow the on-screen instruction to run the troubleshooter and fix any issues find the System.
9. Finally, exit the cmd and reboot your PC.
Method 5: Disable Automatic Maintenance
Sometimes Automatic Maintenance can conflict with the Windows Modules Installer Worker service, so try to disable Automatic Maintenance using this guide and see if this fixes your issue.
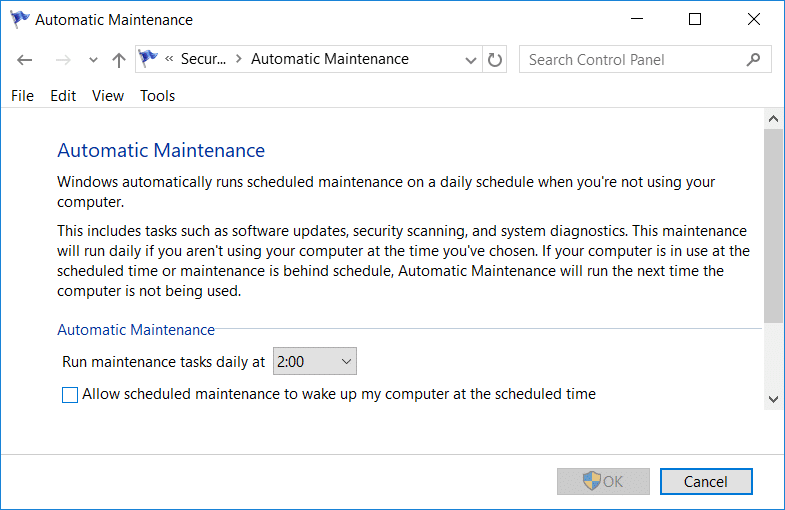
Although disabling Automatic Maintenance is not a good idea, but there might be some case where you need to actually disable it, for example, if your PC freezes during automatic maintenance or Windows Modules Installer Worker High CPU Usage issue then you should disable maintenance to troubleshoot the issue.
Method 6: Run System File Checker and DISM
1. Buɗe Umurnin Umurni. Mai amfani zai iya yin wannan matakin ta neman 'cmd' sa'an nan kuma danna Shigar.
2. Yanzu rubuta wadannan a cikin cmd kuma danna Shigar:
Sfc / scannow sfc / scannow /offbootdir=c: /offwindir=c:windows (Idan sama ya kasa to gwada wannan)

3. Jira na sama tsari don gama da zarar aikata, zata sake farawa da PC.
4. Sake bude cmd kuma buga wannan umarni kuma danna enter bayan kowannensu:
Dism / Kan layi / Hoto-Cleanup / CheckHealth Dism / Kan layi / Tsabtace-Hoto / ScanHealth Dism / Kan layi / Tsabtace-Hoto / Dawo daHealth

5. Bari umarnin DISM ya gudana kuma jira ya ƙare.
6. Idan umarnin da ke sama bai yi aiki ba, to gwada abubuwan da ke ƙasa:
Dism / Image: C: offline / Cleanup-Image /RestoreHealth / Source: c: testmountwindows Dism / Online / Clean-Image / RestoreHealth / Source: c: testmountwindows /LimitAccess
lura: Maye gurbin C:RepairSourceWindows tare da tushen gyaran ku (Windows Installation ko Disc farfadowa da na'ura).
7. Sake yi PC ɗinka don adana canje-canje kuma duba idan zaka iya Fix Windows Modules Installer Worker High CPU Usage.
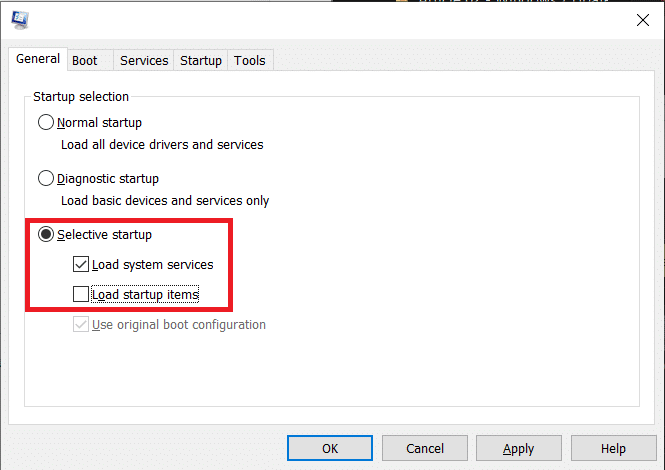
Hanyar 7: Yi Tsabtace Boot
Sometimes 3rd party software can conflict with Windows and can cause the issue. To Fix Windows Modules Installer Worker High CPU Usage issue, kuna buƙatar yin taya mai tsabta akan PC ɗin ku kuma bincika batun mataki-mataki.
Method 8: Set your WiFi as Metered Connection
lura: This will stop Windows Automatic Update, and you will need to manually check for Updates.
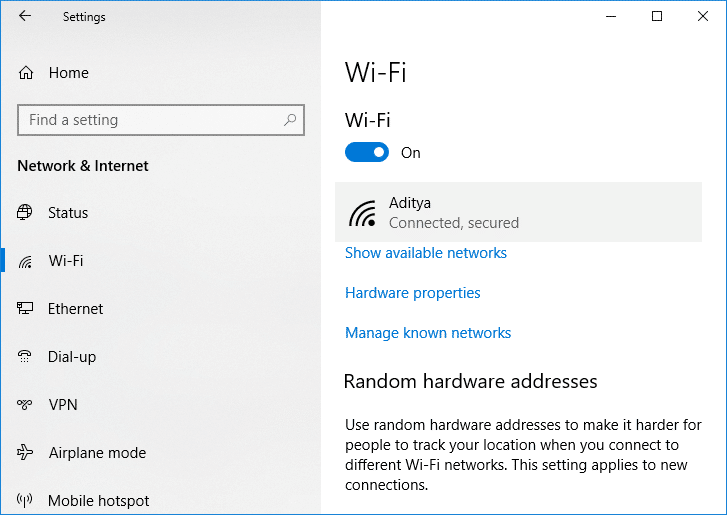
1. Danna Windows Key + I don buɗewa Saituna saika danna Hanyar sadarwa da yanar gizo.

2. Daga menu na hannun hagu, zaɓi Wi-Fi
3. Under Wi-Fi, click on your currently connected network (WiFi).
4. Scroll down to Metered connection and kunna kunnawa ƙarƙashin “Saiti a matsayin haɗin mafarki".
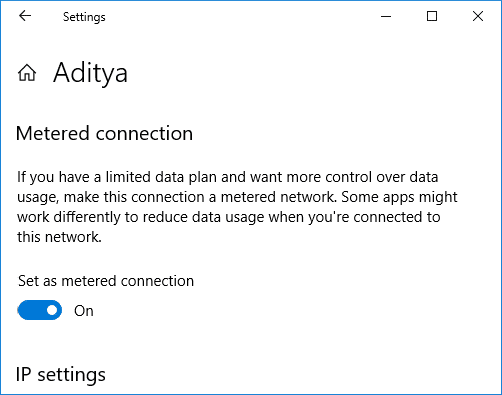
5. Close Settings and reboot your PC to save changes.
shawarar:
Shi ke nan, kun yi nasara Fix Windows Modules Installer Worker High CPU Usage amma idan har yanzu kuna da wata tambaya game da wannan koyawa to ku ji daɗin tambayar su a sashin sharhi.
