Yadda za a Shuka Screenshot akan Mac

In 2007, the screenshot option was introduced to the iPhone. For the old versions of iOS, one was required to press the volume up and power buttons simultaneously to take a screenshot. The first computer screenshots were created in 1980, and the first mac screenshots were taken on the first mac computer in 1984. Since then, taking screenshots has only simplified. With just the click of a few buttons and a few milliseconds, one can screenshot anything present on the screen. If you want to learn how to crop a screenshot on Mac, stay tuned till the end of this article. You will get to learn how to crop a Mac screenshot with the detailed steps and illustrations to your aid.
Yadda za a Shuka Screenshot akan Mac
You can crop any screenshot on Mac from the Preview app. Keep reading to find out the detailed steps later in this article with the illustrations to understand the procedure better.
Is There a Snip Tool on Mac?
A, there is a snipping tool on Mac. The flexibility and versatility of that snipping tool make it very user-friendly, even for beginners who have just started learning the features of their MacBook. It easily allows you to drag the crosshair and snip as per your wish. Just by pressing Shit + Command +4, you can drag and select the area of the screenshot, picture, or webpage you want to snip or crop.
What is Mac Screenshot Shortcut?
The mac screenshot shortcuts make it very convenient to take screenshots with the snap of a finger. There are basically three shortcuts domin guda:
- latsa shift+umarni+3 at the same time to take a screenshot of the whole screen.
- Tap kan shift+umarni+4 to take a screenshot of a small portion of the screen.
- Select Shift+Command+4+Space Bar simultaneously to take a screenshot of a window or menu.
Where Do Cropped Screenshots Go?
Screenshots are saved to your tebur as image files in the .png format. Those screenshots are saved as Screen Shot [date] at [time].png by default. Once they are edited and cropped, they can be saved anywhere. And like other files, be renamed as per your liking.
Can I Edit a Mac Screenshot?
A, you can edit a mac screenshot with great efficiency and very little time. You have to press shift+umarni+3 kai a screenshot. This screenshot will get saved to your desktop as Screen Shot [date] at [time].png, by default. You can open the file from there in Default Preview kuma danna Kayayyakin aiki, to edit the screenshot.
Har ila yau Karanta: How to Take an iPhone Screenshot Without Buttons
How to Crop a Screenshot on Mac? How to Crop a Mac Screenshot on Macbook Pro & Macbook Air?
Cropping a screenshot is simple and time-efficient, irrespective of your Macbook Pro or Macbook Air. The steps to take and edit a screenshot remain the same. Follow the steps below to crop a full screenshot with a specific key combination.
1. To take a screenshot, press the shift+umarni+3 at the same time from the keyboard.
Note: The screenshot will be saved on your tebur ta hanyar tsoho.
2. Once saved on your desktop, double click on the desired saved screenshot to open it in the Preview app.

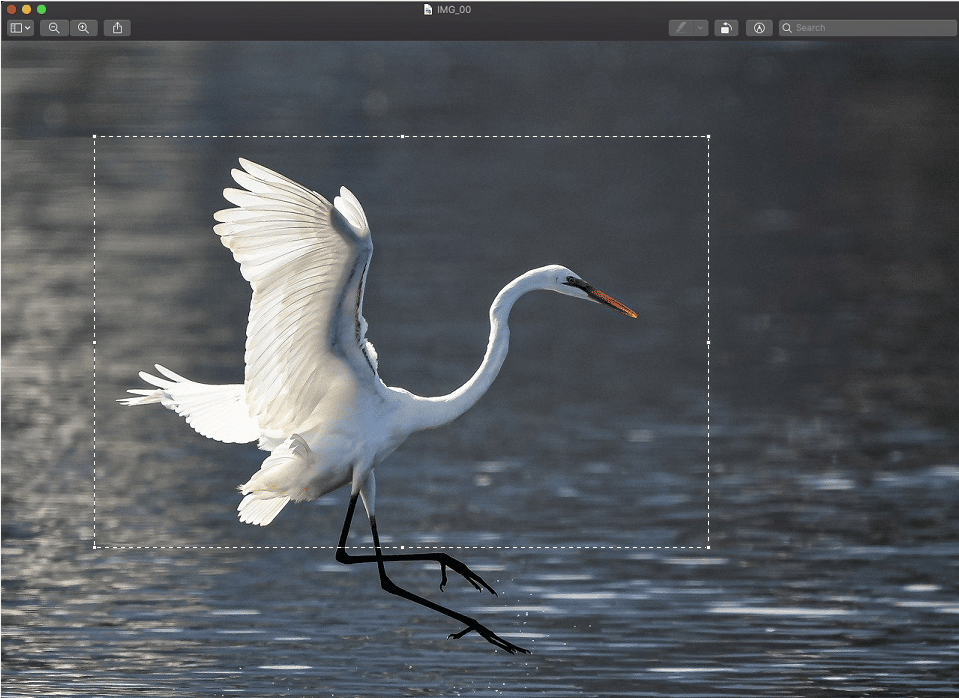
3. Now with the help of the Precision Pointer, select the yankin da ake so to crop the screenshot.
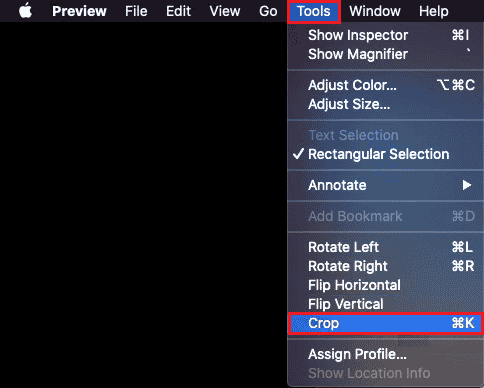
4. Danna kan Kayayyakin aiki, option from the top bar, as shown below.
5. From the drop-down menu, click on Furfure.
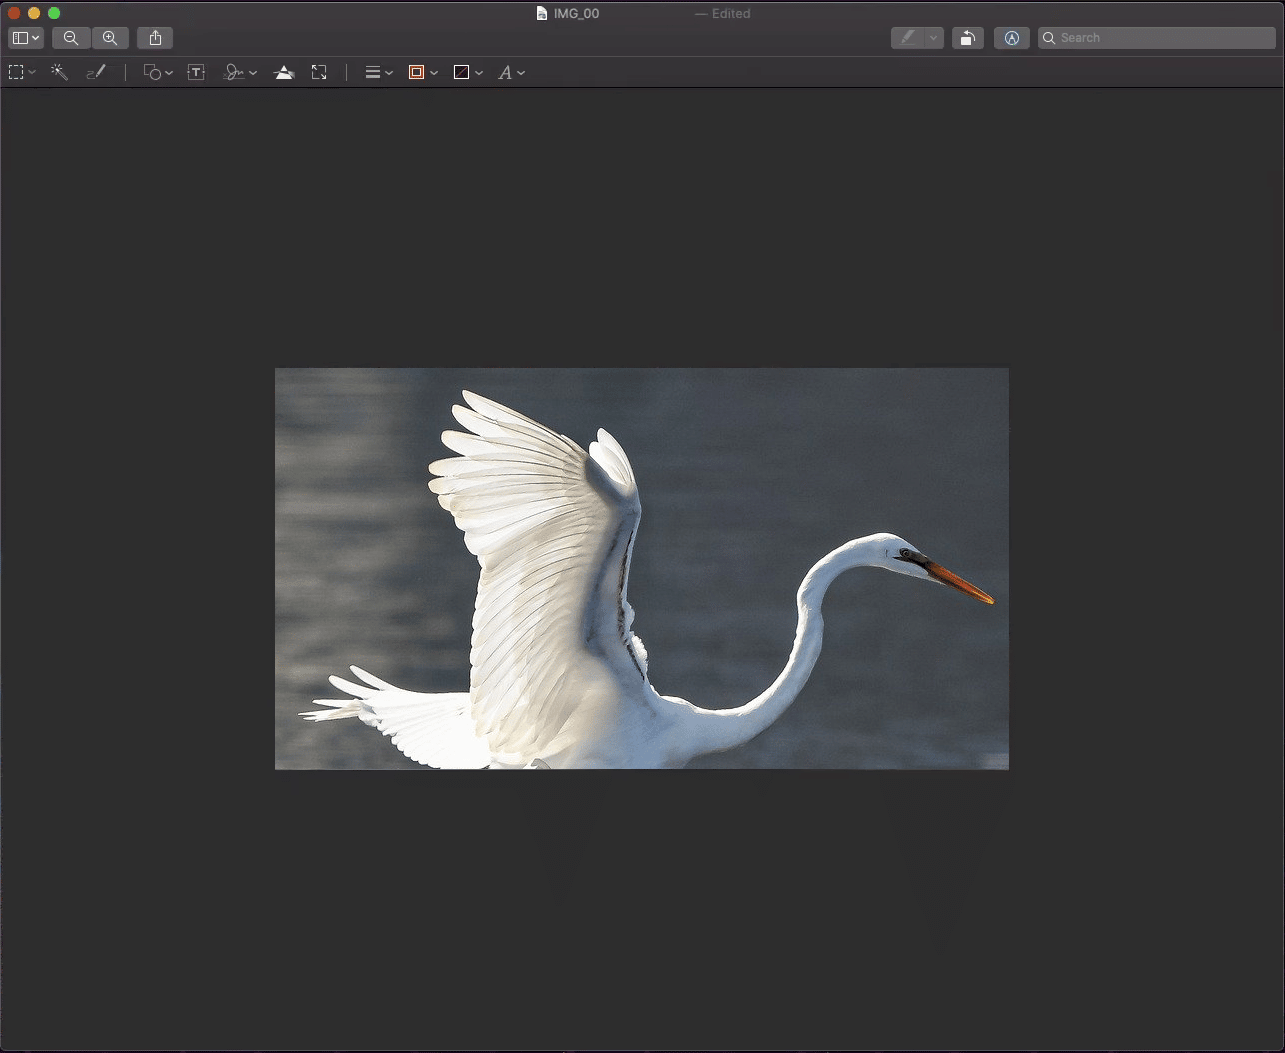
6. The screenshot will get cropped according to the selected area.
Har ila yau Karanta: How to Convert Image to Grayscale Paint
How Do I Crop a Screenshot on Mac After Saving It?
If you want to know how to crop a screenshot on Mac, follow our step-by-step guide underneath:
1. Latsa shift+umarni+3 simultaneously from the keyboard to take a screenshot.
Note: Zaka kuma iya amfani da shift+umarni+4 or Shift+Command+4+Space bar shortcuts to take different types of screenshots.
2. Danna sau biyu akan desired screenshot daga tebur.
3. A cikin Preview app, use the Precision Pointer to select the yankin da ake so of the screenshot image.
4. Danna kan Tools > Crop, kamar yadda aka nuna a ƙasa.
You will get the cropped screenshot saved on your Mac desktop.
Har ila yau Karanta: Ta yaya kuke Share Multiple iMessages a kan Mac
Why Can’t I Crop a Screenshot on Mac?
Below are some of the reasons why you can’t crop the screenshots on Mac:
How to Crop a Screenshot on iPhone?
Cropping a screenshot on the iPhone is child’s play. Follow the steps below to do that:
1. Latsa Power + Home button lokaci guda don ɗaukar hoton allo.
Note: Latsa Ƙara girma + Power buttons together to take a screenshot that doesn’t have the home button.
2. Matsa akan Preview of the screenshot immediately after taking it from the bottom left corner, as shown below.
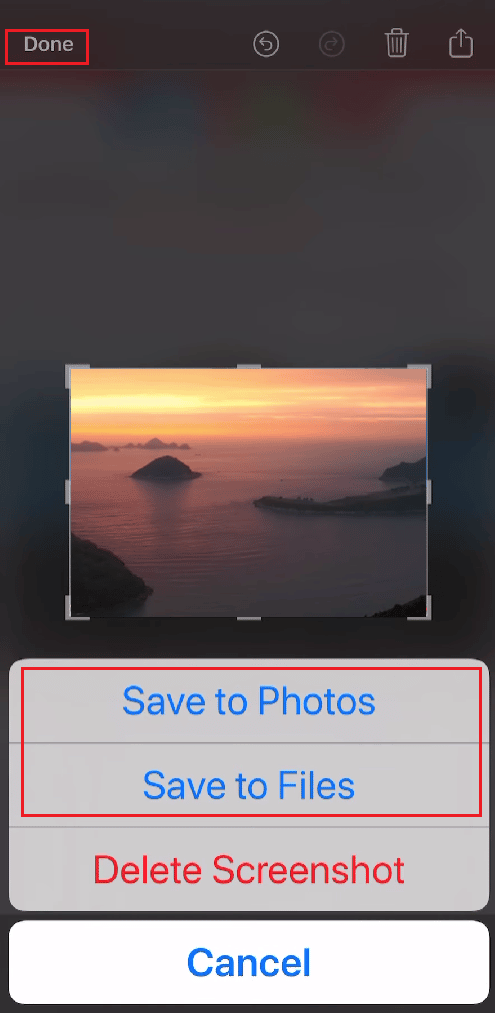
3. Select and adjust the yankin da ake so you want to crop from that screenshot. Then, tap on aikata.
4. Matsa Ajiye zuwa Hoto or Ajiye zuwa Fayiloli to save the cropped screenshot in the Gallery.
Nagari:
Muna fatan wannan jagorar ya taimaka kuma kun sami damar koya how to crop a screenshot on Mac. Jin kyauta don tuntuɓar mu tare da tambayoyinku da shawarwari ta sashin sharhin da ke ƙasa. Bari mu san abin da batun da kuke son koya game da shi a labarinmu na gaba.