- in makani by Keʻena Luna
Hoʻoponopono i ka MultiVersus ʻaʻole i hoʻomaka i Windows 10

MultiVersus is a famous online multiplayer fighting game that is rocking today’s gaming world. Yet, few users complain about the MultiVersus not launching issue when the game is launched on their Windows 10 PC. If you are in the same boat, the troubleshooting hacks discussed in this article will help you sail the problem.
How to Fix MultiVersus Not Launching in Windows 10
If you are vexed by MultiVersus won’t launch issue in your Windows 10 computer, here are a few possible reasons why you must analyze them carefully to sort out the problem.
- ʻAʻole hoʻokō ʻo PC i nā koi kumu o ka pāʻani.
- Ke hoʻopilikia nei kekahi papahana ʻē aʻe i ka pāʻani.
- Ke hoʻohana nei ʻoe i kahi mana hōʻoia ʻole o nā mea hoʻokele.
- Ua kuhi hewa ʻia nā hoʻonohonoho kiʻi o ka pāʻani.
- Loaʻa i nā polokalamu malware a me nā virus.
- ʻAʻole hōʻano hou ʻia ka .NET framework a me ka ʻōnaehana hana i kā lākou mana hou.
- ʻAʻole hōʻano hou ka mana DirectX.
- Overclocking.
- Any misconfigured or corrupt installation files of the game also cause the problem.
- ʻAʻole kūpono nā faila Microsoft C++ me ka pāʻani a me ka PC.
Eia kekahi mau ala hoʻoponopono pilikia e kōkua iā ʻoe e hoʻoponopono i ka pilikia i kūkākūkā ʻia.
Kaʻina 1: Nā ʻano hoʻoponopono kumu
E hahai i kēia mau ala hoʻoponopono pilikia e hoʻoponopono i ka pilikia i ʻōlelo ʻia.
1A. E nānā i nā Koina Pūnaewele
Pākuʻi Nui Palena iki System Nā Koi
- CPU: Intel Core i5-2300 a i ʻole AMD FX-8350
- hipa kāne: 4 GB
- PALAPALA VIDEO: Nvidia GeForce GTX 550 Ti a i ole AMD Radeon HD 5850 | Intel UHD 750
- NA PIXEL SHADERS: 5.0
- NA PALAPALA VERTEX: 5.0
- WAHI DISK UKU: 6 GB
- RAM VIDEO HOOLAA: 1024 MB
Pākuʻi Nui Manaʻoʻia nā Manaʻo
- CPU: Intel Core i5-3470 a i ʻole AMD Ryzen 3 1200
- hipa kāne: 8 GB
- PALAPALA VIDEO: Nvidia GeForce GTX 660 a i ʻole AMD Radeon R9 270
- NA PIXEL SHADERS: 5.0
- NA PALAPALA VERTEX: 5.0
- WAHI DISK UKU: 6 GB
- RAM VIDEO HOOLAA: 2048 MB
1B. Check your internet connection
Unstable internet connection leads to MultiVersus is not working issue, also if there are any obstacles between your router and your computer, they may interfere with the wireless signal and will cause intermittent connection problems.
Hiki iā ʻoe ke holo a ho'āʻo wikiwiki e ʻike i ka pae kiʻekiʻe loa o ka wikiwiki o ka pūnaewele e pono ai no ka pilina kūpono.
E hōʻoia i ka hoʻokō ʻana o kāu hāmeʻa i nā koina ma lalo nei.
- E ʻimi i ka ikaika hōʻailona o kāu pūnaewele a inā haʻahaʻa loa, e hoʻomaʻemaʻe i nā mea keakea a pau ma waena o ke ala.
- E hōʻalo i nā mea he nui i hoʻopili ʻia i ka pūnaewele like.
- E kūʻai mau i modem/router i hōʻoia ʻia e kāu Internet Service Provider (ISP) a ʻaʻohe o lākou hakakā.
- Mai hoʻohana kahiko, nahaha, a poino paha uwea. E hoʻololi i nā kaula inā pono.
- E hōʻoia i ka paʻa ʻana o nā uwea mai ka modem a i ke alalai a me ka modem a i ka paia.
Inā loaʻa kekahi pilikia pili pūnaewele, e nānā i kā mākou alakaʻi Pehea e hoʻoponopono ai i nā pilikia pili pūnaewele ma Windows 10 e hoʻoponopono i nā pilikia like.
1C. E hooki i ka Overclocking
- Kūkulu ʻia kēlā me kēia kamepiula kiʻekiʻe me ke koho o Overclocking e kōkua ana i ka hoʻopuka ʻana i ka wai hou aʻe ma mua o kāu mau kikoʻī i loaʻa iā ʻoe. ʻOi aku ka wikiwiki o ka holo ʻana i ke kāleka kiʻi a i ʻole ka mea hana ma mua o ka wikiwiki paʻamau e pili ana i ka overclocking.
- When this happens, your computer will reach the maximum temperature after a particular time. The computer detects this and adjusts the clock speed to the normal speed until it is cooled down. The clock speed is increased again after they cool down.
- This increases the performance of your computer and is a great help if you don’t have a powerful computer.
- Pono e hoʻomaopopo ʻia ʻaʻole kākoʻo nā pāʻani āpau i ka overclocking. Hoʻohana like ia me MultiVersus. No laila, pono ʻoe e hoʻāʻo e hoʻopau i nā overclocking āpau ma kāu kamepiula a hoʻāʻo e hoʻomaka i ka pāʻani. Inā hoʻomaka maikaʻi ia, ua paʻa ka pilikia.
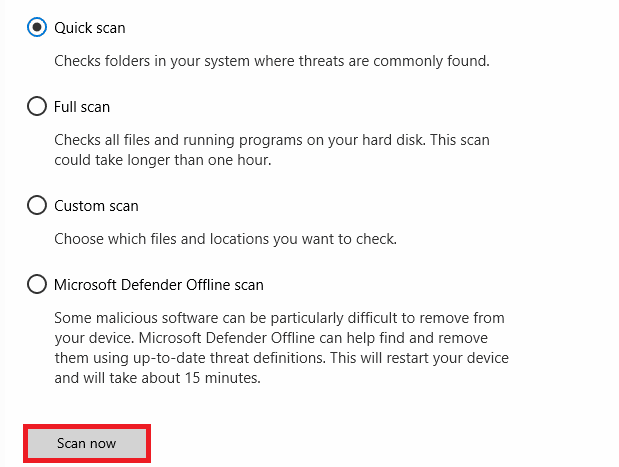
1D. Holo Malware Scan
ʻO ka loaʻa ʻana o kahi maʻi virus a i ʻole ka hoʻouka ʻana i ka malware e hopena i nā pilikia pāʻani ma kāu kamepiula. Inā he mea koʻikoʻi ka hoʻouka ʻana o ka maʻi, ʻaʻole hiki iā ʻoe ke hoʻohui i kekahi pāʻani pūnaewele e hoʻomau mau. No ka hoʻoholo ʻana i ka pilikia, pono ʻoe e wehe i ka maʻi a i ʻole nā malware mai kāu kamepiula Windows 10.
Paipai ʻia ʻoe e nānā i kāu kamepiula e like me ke kuhikuhi ʻana i kā mākou alakaʻi Pehea e holo ai au i kahi Virus Scan ma kaʻu kamepiula?
Eia kekahi, inā makemake ʻoe e wehe i ka malware mai kāu kamepiula, e nānā i kā mākou alakaʻi Pehea e wehe ai i ka Malware mai kāu PC ma Windows 10.
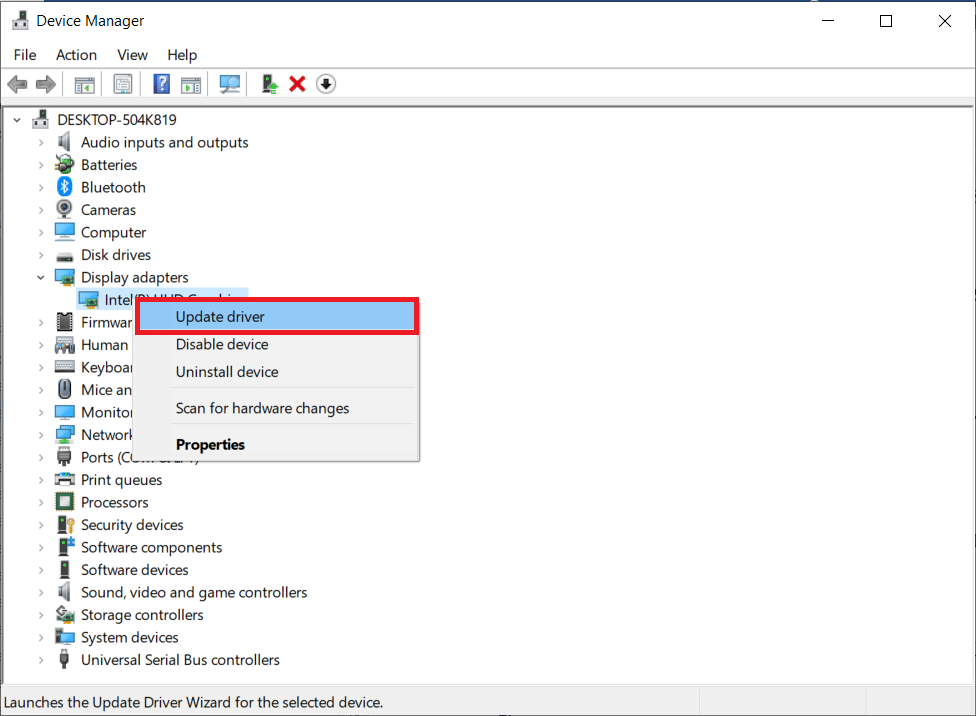
1E. Hoʻohou i nā mea hoʻokele GPU
Graphical drivers are responsible for heavy graphical images and video processing games. If you face any launching conflicts in the MultiVersus game, make sure you use an updated version of device drivers, as they serve as a link between the hardware and Operating System of your PC. Many users have suggested that updating drivers have fixed MultiVersus not working issue. Read and implement the steps instructed in our guide 4 Ways to Update Graphics Drivers in Windows 10 to do so.
E heluhelu pū nō hoʻi: Hoʻoponopono i nā mea hoʻokele i loaʻa iā Windows no kāu hāmeʻa akā ua loaʻa kahi hewa
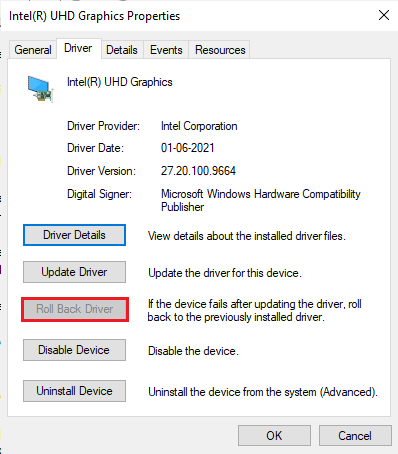
1F. Holoi hope GPU Keaukaha
Sometimes, the current version of GPU drivers may cause the discussed launching issue in MultiVersus, and in this case, you have to restore previous versions of installed drivers. This process is called rollback o na hookele a hiki iā ʻoe ke hoʻihoʻi i kāu mau mea hoʻokele kamepiula i ko lākou mokuʻāina ma mua ma ka hahai ʻana i kā mākou alakaʻi Pehea e Rollback Drivers on Windows 10.
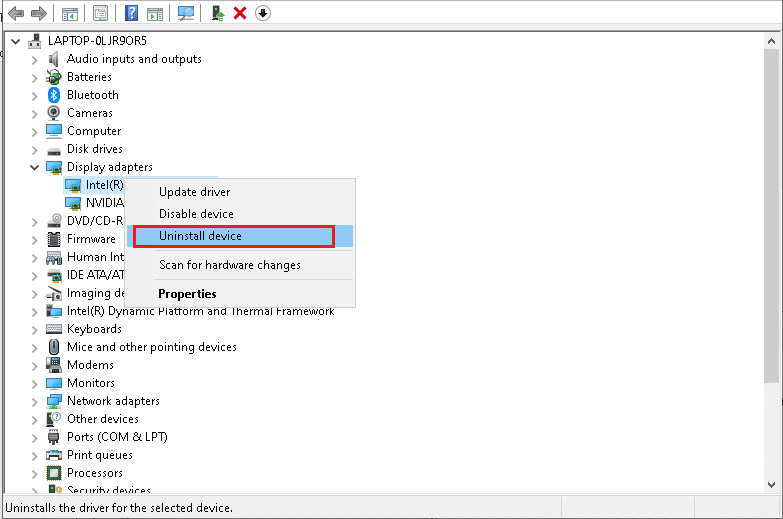
1G. E hoʻouka hou i ke Keaukaha GPU
If you still face MultiVersus not starting issue after updating your GPU drivers, then reinstall device drivers to fix any incompatibility issues. There are several ways to reinstall drivers on your computer. Yet, you can easily reinstall Graphical drivers as instructed in our guide How to Uninstall and Reinstall Drivers on Windows 10.
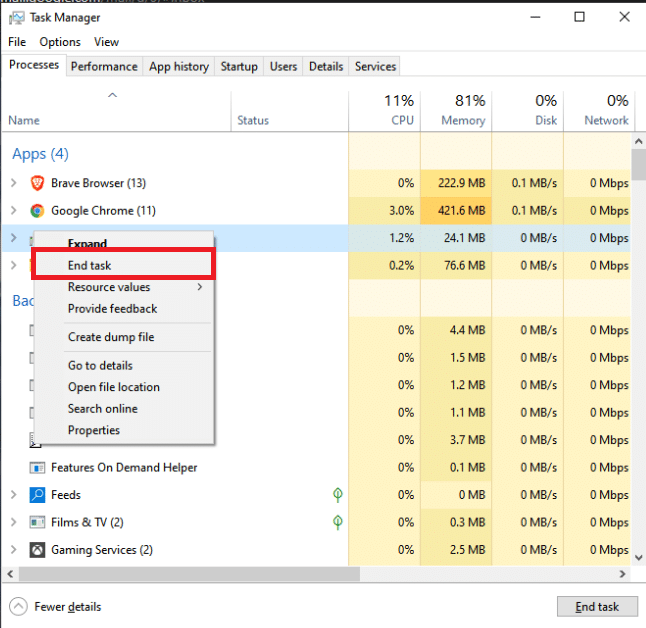
1H. End Background Processes
Several users have confirmed that MultiVersus not starting on PC can be resolved by closing all the background tasks running on your PC. To implement the task, follow our guide How to End Task in Windows 10, and proceed as instructed.
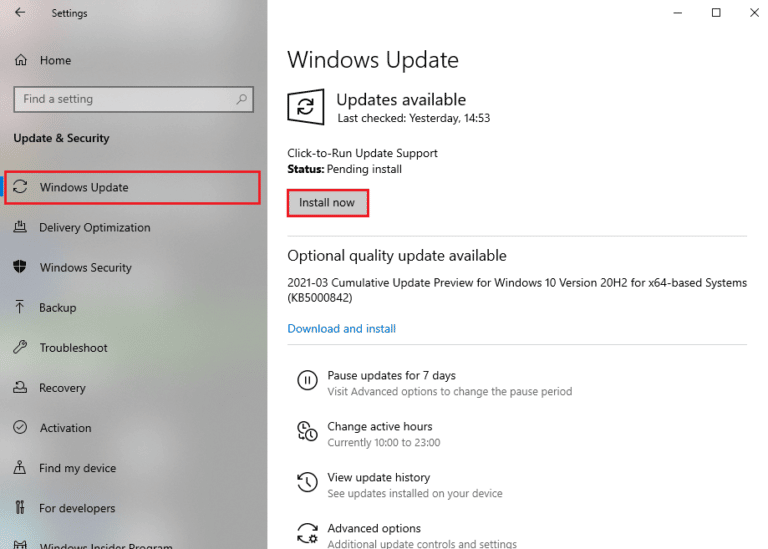
1I. Update Windows
You can also eradicate bugs in your computer and game by updating your Operating System. Always ensure if you have updated your Windows Operating System and if any updates are pending in action, use our guide How to Download and Install Windows 10 Latest Update
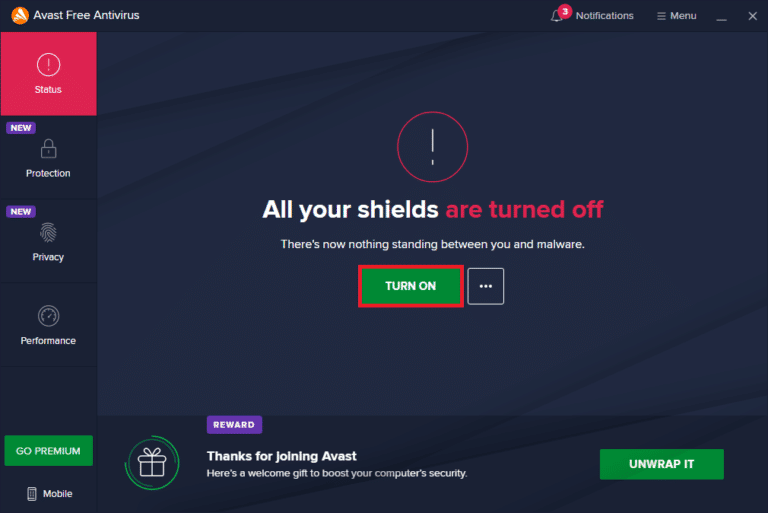
1J. Disable Antivirus Temporarily (If Applicable)
Some incompatible antivirus programs installed on your computer will cause MultiVersus launching problem. To avoid conflicts, you must ensure the security settings of your Windows 10 computer and check if they are stable or not. To find whether the antivirus suite is the reason for the discussed issue, disable it once and try connecting to a network.
E heluhelu i kā mākou alakaʻi pehea e hoʻopau ai i ka Antivirus no ka manawa lōʻihi Windows 10 a hahai i nā ʻōlelo kuhikuhi e hoʻopau i kāu polokalamu Antivirus no kekahi manawa ma kāu PC.
Inā loaʻa iā ʻoe kahi hoʻoponopono no kāu pilikia ma hope o ka hoʻopau ʻana i ka polokalamu antivirus ma kāu kamepiula, ʻōlelo ʻia ʻoe e wehe i ka polokalamu mai kāu PC.
Read our guide Force Uninstall Programs which won’t Uninstall in Windows 10 to uninstall your antivirus program on your computer.
E heluhelu pū nō hoʻi: Pehea e wehe ai i ka McAfee LiveSafe ma Windows 10
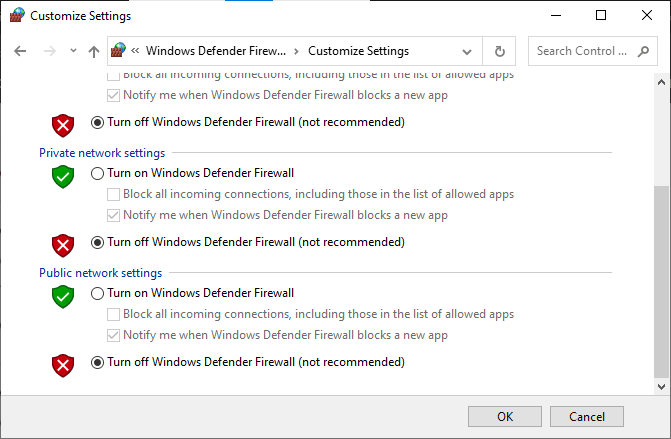
1K. Turn Off Windows Defender Firewall (Not Recommended)
Your computer will face MultiVersus is not working issue, due to an over-protective firewall suite in the Windows 10 PC. To resolve the problem, you can either add a new rule for your game, whitelist the game or as the last fix, disable the firewall temporarily.
Our guide on How to Disable Windows 10 Firewall will help you.
1L. Hoʻoponopono i nā faila Pūnaewele
If there are any missing or damaged files on your Windows 10 PC, you will face MultiVersus takes forever to launch issue. Yet, you are repairing these corrupt files by using inbuilt utilities namely, Pūnaewele Pūnaewele Pūnaewele a Ka hoʻolālāʻana i nā lawelawe kiʻi a me ka mālama.
E heluhelu i kā mākou alakaʻi pehea e hoʻoponopono ai i nā faila Pūnaewele ma Windows 10 a hahai i nā ʻanuʻu e like me ke kuhikuhi ʻana e hoʻoponopono i kāu mau faila hewa.
Kaʻina 2: Holo i ka pāʻani MultiVersus ma ke ʻano he Luna Hoʻokele
If MultiVersus does not have required administrative privileges, a few essential features of the game will be limited causing you MultiVersus not launching issue whenever you open the game or install any updates. Follow the below-mentioned instructions to run the game as an administrator.
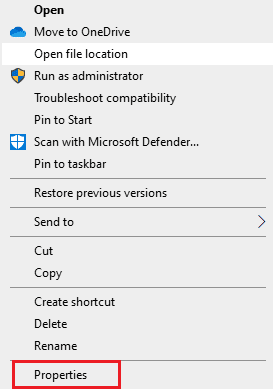
1. Kaomi ʻākau ma ka Pōkole MultiVersus ma ka Papakaukau.
'Ōlelo Aʻo: Hiki iā ʻoe ke hele i ka papa kuhikuhi hoʻokomo a kaomi pono ma luna.
2. A laila, koho i ka Nā Kuleana koho.
3. Ano, e nee i ka hoʻokaulike kaomi a kaomi E hoʻokele i kēia polokalamu ma ke alakaʻi.
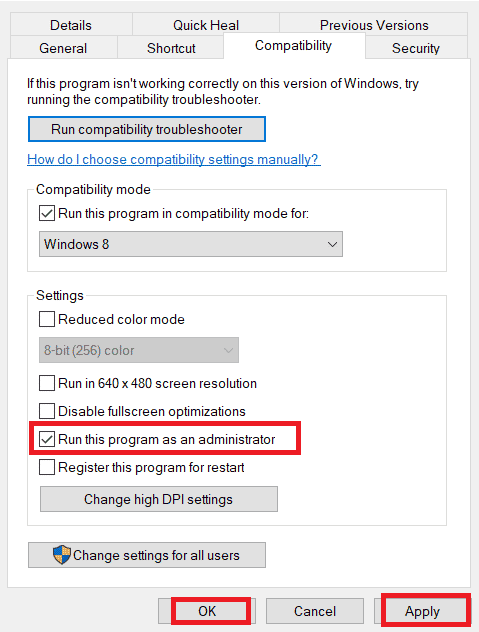
4. ʻO ka hope, kaomi ma luna Pili> OK e mālama i nā hoʻololi.
Check if you have fixed MultiVersus launching issues.
E heluhelu pū nō hoʻi: Hoʻoponopono i ka WoW e hoʻomaka i ka Windows 10
Ke Kaʻina Hana 3: Hoʻololi i ke Kaʻina Hana Paʻani
The preference of an application or process tells the computer the importance and if it should be given preference over the others while allocating the resources. The priority of every application is normal except the system processes, by default. MultiVersus might crash if it didn’t get enough resources.
1. Pomi i ka Nā kī Ctrl + Shift + Esc pu e wehe Taskbar.
2. Ano, e imi Kaʻina MultiVersus.
3. A laila hoʻololi i ka mea nui i Ke kūlana kiʻekiʻe a nānā inā hana kēia.
'Ōlelo Aʻo: E hoʻololi i ka mea nui me ka akahele nui e like me ka hoʻololi ʻana i ka mea nui o ke kaʻina hana me ka mālama ʻole i hiki ke lohi a paʻa ʻole paha kāu ʻōnaehana.
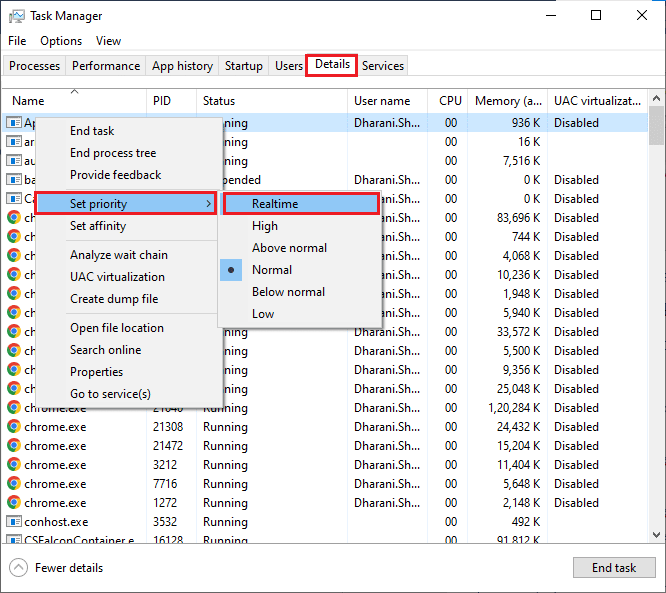
4. E pani i ka hana he manakia a reboot kou kamepiula.
Ka Papa Hana 4: Hoʻonohonoho i ka hana kiʻekiʻe
Hiki iā ʻoe ke hoʻonui i kāu pāʻani ke hoʻonohonoho i kāu hoʻonohonoho hoʻolālā mana mana kiʻekiʻe. Hoʻolālā ʻia kēia mau hoʻolālā mana e hoʻokele i nā hoʻonohonoho mana ma nā hoʻonohonoho paʻa. E hahai i nā ʻōlelo kuhikuhi ma lalo nei no ka hoʻohana ʻana i nā hoʻonohonoho hoʻolālā mana mana kiʻekiʻe i kāu ʻōnaehana.
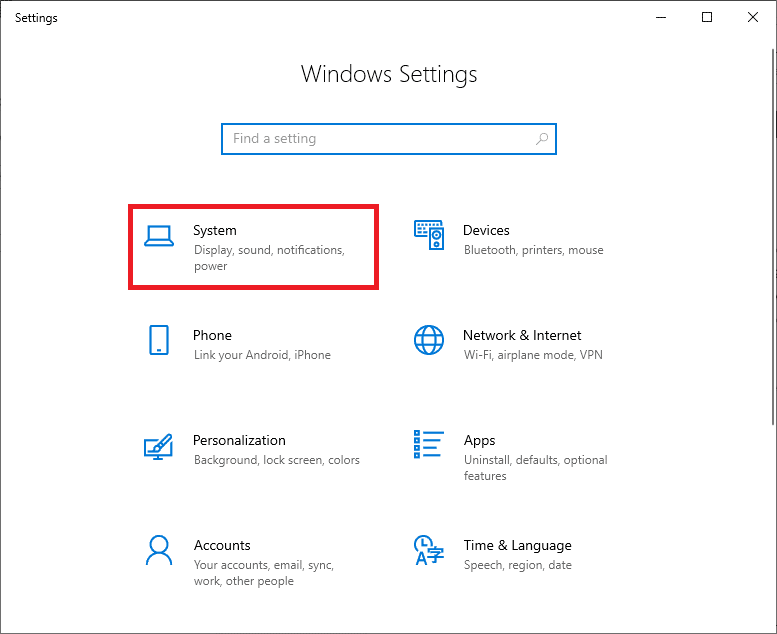
1. Pomi i ka Nā kī Windows + I i ka manawa like e wehe ai Nā hoʻonohonoho Windows.
2. Ano, e kaomi ma luna System wahi.
3. Ano, koho i ka Mana & hiamoe koho a kaomi ma ka Nā mana hana'ē aʻe malalo o Nā hoʻonohonoho e pili ana.
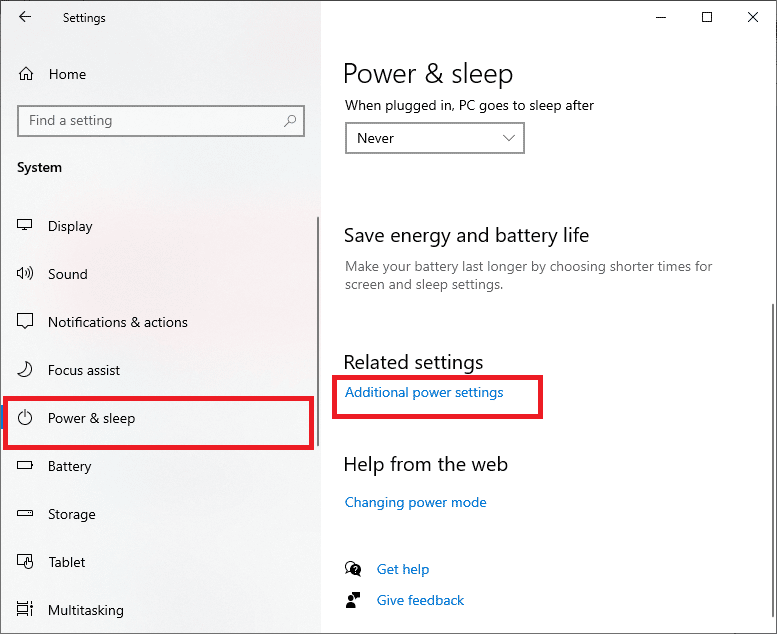
4. Ano, koho i ka Hana kiʻekiʻe koho ma lalo Nā papahana hou kiʻekiʻe e like me ka mea i hoikeia ma ke kii malalo iho.
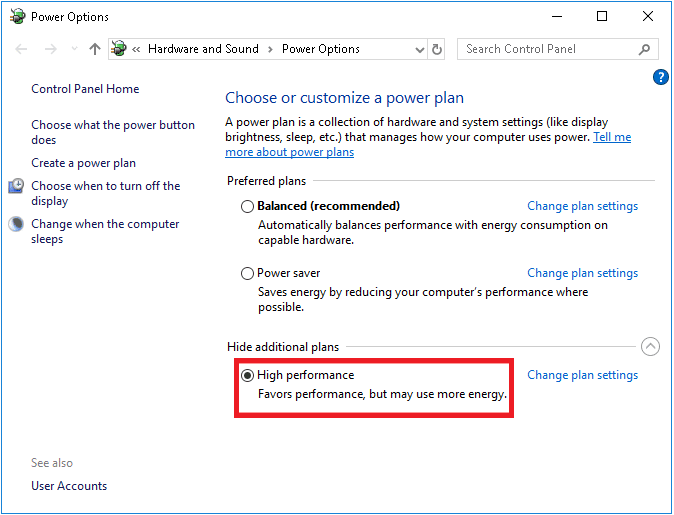
Now you have optimized your system, check if you have fixed MultiVersus won’t launch on startup issue.
E heluhelu pū nō hoʻi: Hoʻoponopono i ka hewa o nā faila i hoʻoiho ʻia ma Steam
Method 5: Update Steam App & MultiVersus Game
Inā hoʻohana ʻoe i kahi noi Steam kahiko, ʻaʻole hiki iā ʻoe ke komo i nā pāʻani me ka maʻalahi. No laila e hōʻoia mau ʻoe e hoʻohana i kahi mana hou o ka pāʻani Steam a me MultiVersus ma mua o ka hoʻomaka ʻana.
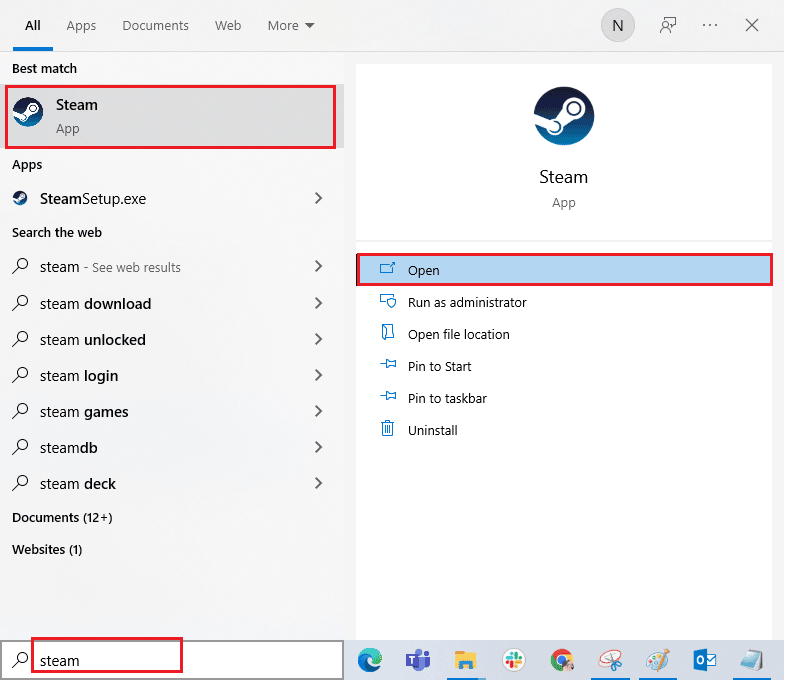
1. hit me Kāleka Windows a me keʻano mahu, a laila kaomi E wehe.
2. Ano, e kaomi ma luna mahu ma ka ʻaoʻao hema hema o ka pale i ukali ʻia e E nānā i nā mea hou o nā mea kūʻai aku Steam… e like me ka mea i kuhikuhi ʻia ma lalo nei.
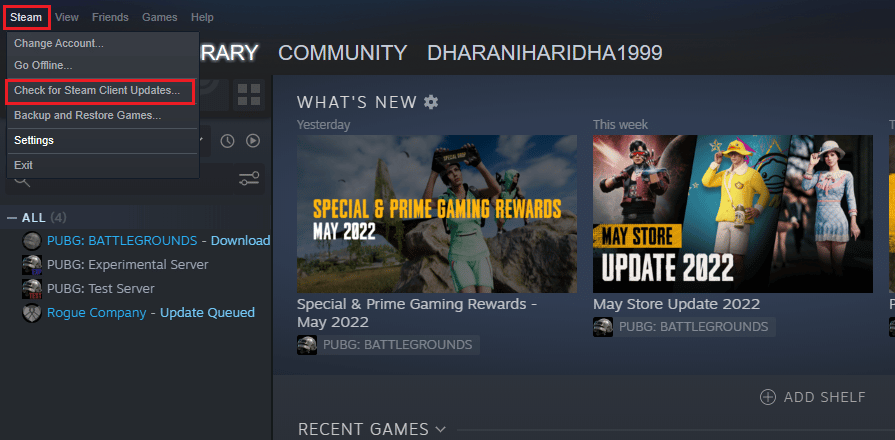
3. Inā loaʻa iā ʻoe nā mea hou e hoʻoiho ʻia, e hoʻokomo iā lākou a hōʻoia ʻo kāu mea kūʻai Steam he mea hou.
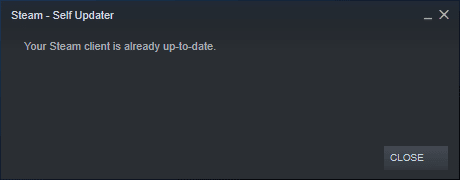
4. Ano, hoʻolana hou i ka mahu a e nānā inā ua hoʻoholo ʻia ka pilikia i kēia manawa.
Likewise, it is always essential that your game run at its latest version to avoid any conflicts. Until your game is updated, you cannot log in to MultiVersus servers successfully.
E hōʻano hou i kāu pāʻani, follow the below-mentioned steps.
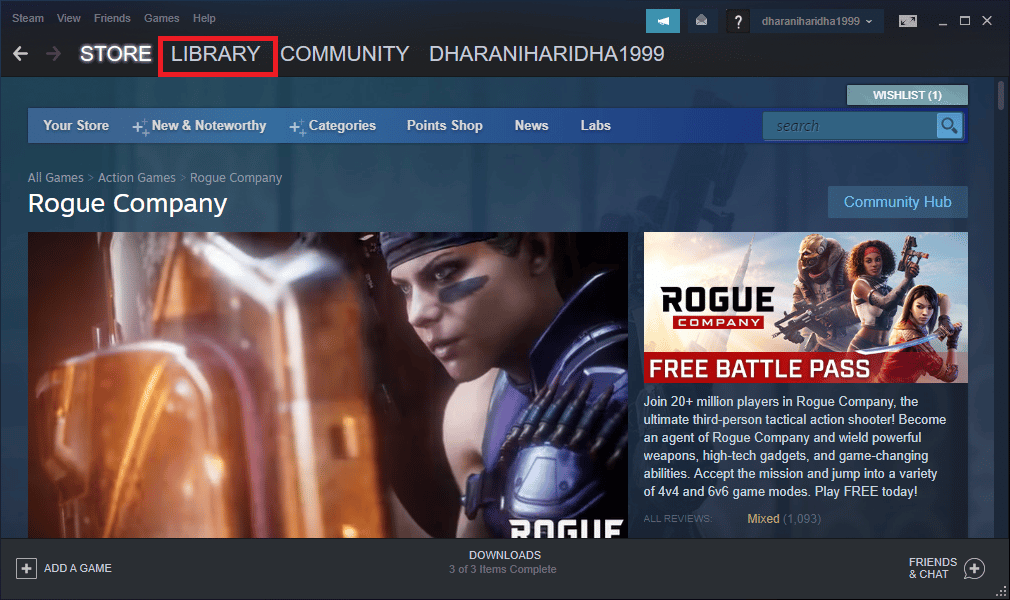
1. Hoʻollo mahu a hoʻokele iā LIBRARY.
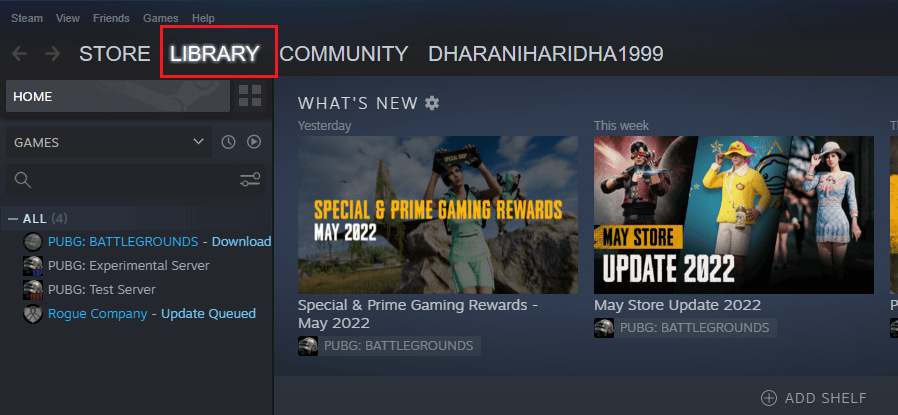
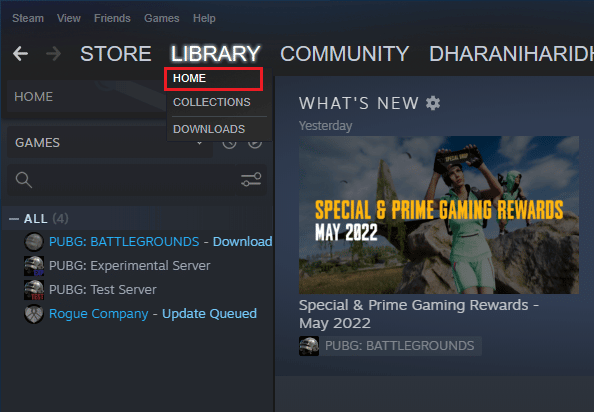
2. Ano, e kaomi ma luna HOME a e ʻimi iā MultiVersus.
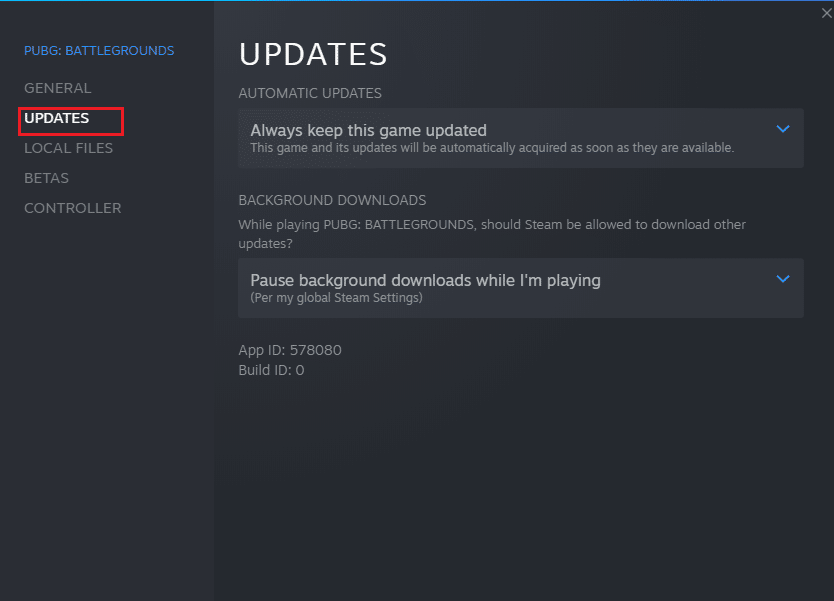
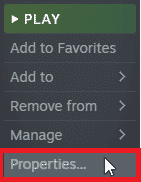
3. A laila, kaomi ʻākau ma ka pāʻani a koho i ka Nā waiwai… koho.

4. Ano, e hoololi i ka Kiʻi hou i nā ʻaoʻao a nānā inā aia kekahi mau mea hou i ka hana. Inā pēlā, e hahai i nā ʻōlelo kuhikuhi ma ka pale e hoʻoiho i nā mea hou.
After an update, check if MultiVersus not launching issue is fixed.
Ka Papa Hana 6: Hoʻopau i ka hoʻonui ʻana i ka nānā piha
Few users have suggested that disabling full-screen optimizations on PC has helped them fix MultiVersus is not launching issue. Follow as instructed.
1. E hoʻokele i ka mahu LIBRARY Ka 'ike no.
2. Now, right-click on the MultiVersus game and click on Nā waiwai…
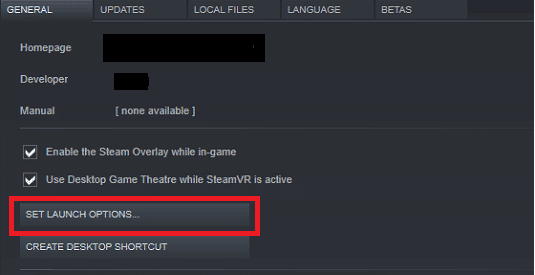
3. Ano, e hoololi i ka Nui kaomi a kaomi E KOHO ANA I NA KOHO… e like me ka mea i hoikeia.
4. I kēia manawa, e wehe ʻia kahi pukaaniani hou me kahi ʻōlelo aʻo mea hoʻohana kiʻekiʻe. No ka wehe ʻana i ka pāʻani ma ke ʻano puka makani, e kaomi i ka – puka makani ke koho.
5. I kēia manawa, mālama i nā hoʻololi ma ke kaomi ʻana OK a puka i waho mai ka puka makani Properties.
6. Ano, hoʻihoʻi ka pāʻani and ensure that it runs in windowed mode.
'Ōlelo Aʻo: You can also navigate to E KOHO ANA I NA KOHO… a paʻi hou i kēia mau ʻāpana ma kahi o ka palena hope.
– puka makani -w 1024
7. I kēia manawa, e mālama i nā hoʻololi ma ke kaomi ʻana OK.
Na kēia ʻāpana e hoʻonohonoho i ka pāʻani e hoʻomaka i ke ʻano puka makani.
E heluhelu pū nō hoʻi: Hoʻoponopono i ka Steam App Configuration ʻaʻole i loaʻa i loko Windows 10
Hanana 7: Hoʻopau i ka Overlay In-Game
The Steam Overlay is a piece of Steam that allows the users to access friends list, and web browser and allows in-game purchasing. It is a significant tool, yet it sometimes triggers MultiVersus not launching on startup issue. If you want to solve this problem, then turn off the Steam game overlay.
1. E wehe i mahu polokalamu a kaomi ma luna LIBRARY.
2. Ano, kaomi akau ma Pākuʻi Nui ae kaomi ma Nā waiwai…

3. Ano, e hoololi i ka Nui tab and uncheck the box containing E ho'ā i ka Steam Overlay i ka wā o ka pāʻani.
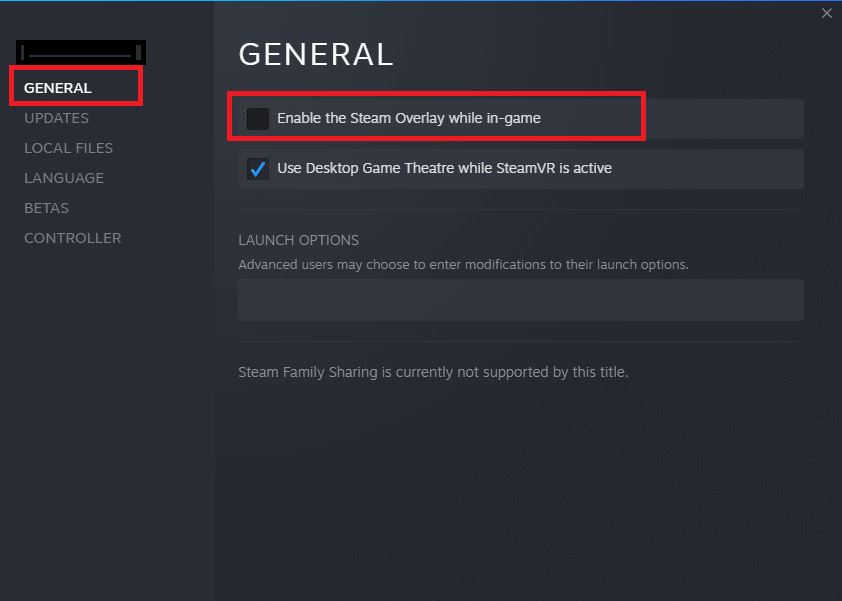
4. ʻO ka hope, hoʻomaka hou i ka pāʻani and check if the MultiVersus launching issue is solved.
Hanana 8: E hōʻoia i ka pono o nā faila pāʻani
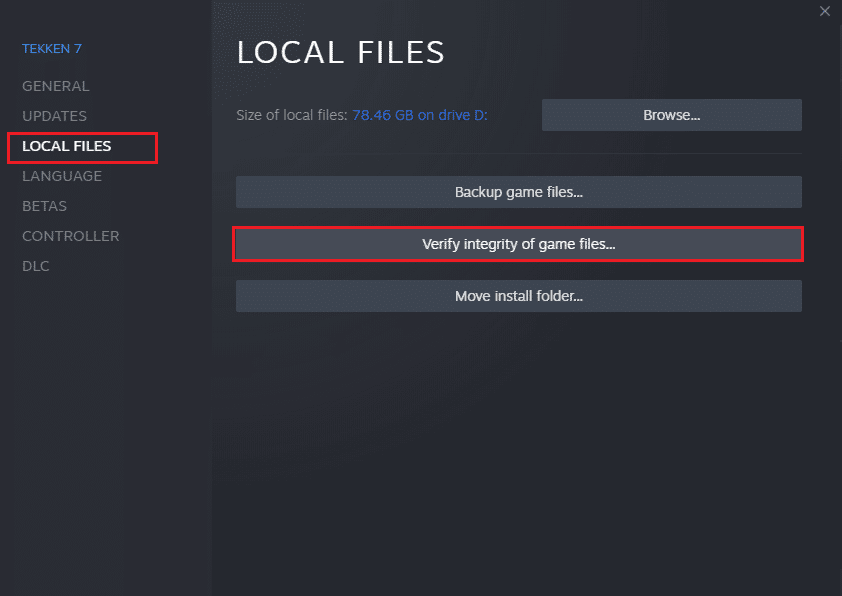
We have seen many cases in which the game files are either missing or corrupt or it had incomplete installations. Users could also experience MultiVersus not starting on PC issue if they are interrupted by the update process or if the game files are being moved. In this method, you will be opening Steam and using the built-in function for verifying the integrity of the game. It will be replaced if the application finds something. Read our guide on how to verify integrity of game files on Steam.
E heluhelu pū nō hoʻi: Fix Steam Client Bootstrapper Not Responding in Windows 10
Hana 9: Hoʻohou i ka .NET Framework
.NET framework in Windows 10 computer is essential for uninterrupted service of modern apps and games. Many games have an auto-update feature for the .NET framework, and thus it will be updated automatically whenever an update is available. In another case, if an update prompts in your PC, you can manually install the latest version of the .NET framework, as discussed below, to fix MultiVersus not launching issue.
1. Nānā no mea hou no ka mea .NET kahua paʻa mai ka pūnaewele Microsoft kūhelu.
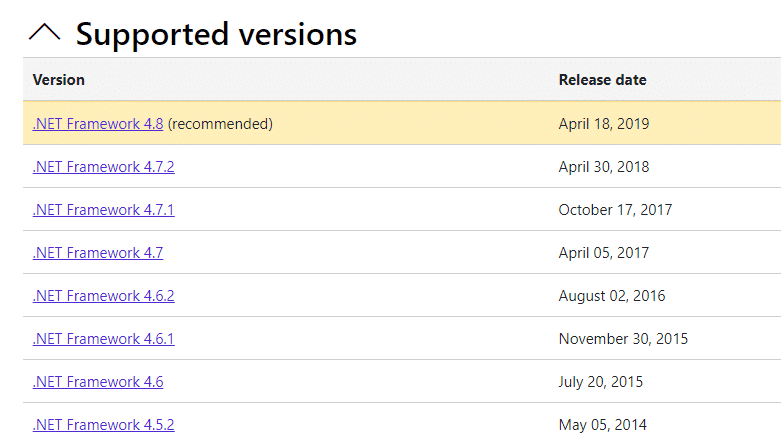
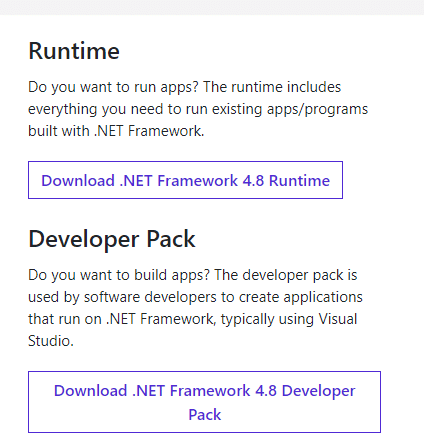
2. Ina he mau mea hou, e kaomi i ka mea pili/manaʻoʻia loulou a kaomi Hoʻoiho i ka .NET Framework 4.8 Runtime koho.
'Ōlelo Aʻo: Mai kaomi ma luna Hoʻoiho i ka .NET Framework 4.8 Developer Pack e like me ka mea i hoʻohana ʻia e nā mea hoʻomohala polokalamu.
3. E hele ʻO kaʻu mau hoʻoiho, double-click on the setup file to run the downloaded file and follow the kuhikuhi ma ka pale e hoʻokomo pono i ka .NET framework ma kāu PC Windows. Ke hana ʻia, e nānā inā ua hoʻoponopono ʻoe i ka pilikia i kūkākūkā ʻia a ʻaʻole paha.
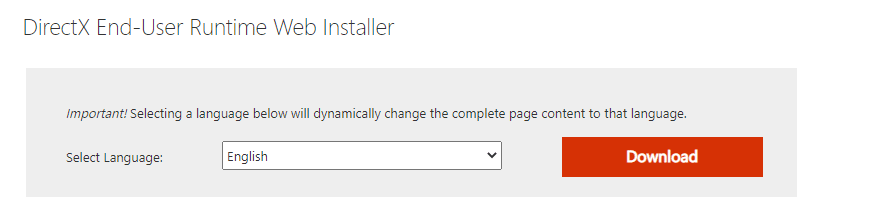
Hanana 10: Hoʻohou DirectX
To enjoy a seamless multimedia experience on MultiVersus, you have to make sure whether DirectX is installed, and it is updated to its latest version. DirectX helps you improve the visual media experience for graphical games and applications especially. It is worth updating DirectX needed for this game.
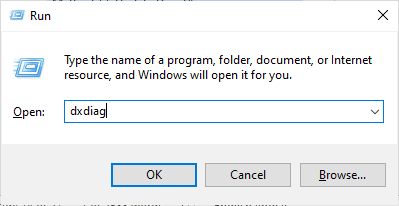
1. Pa i ka Nā kī Windows + R i ka manawa like e hoolana i ka holo ka dialog.
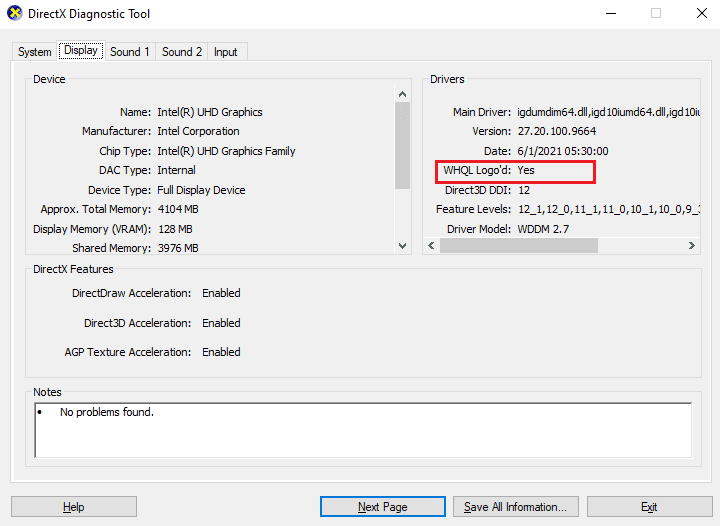
2. ʻAno dxdiag ae kaomi i E hoʻokomo i ke kī wehe Mea Hana Diagnostic DirectX.
3. E nānā i ka Palapala DirectX, if it contains DirectX 12 ʻaʻole paha.
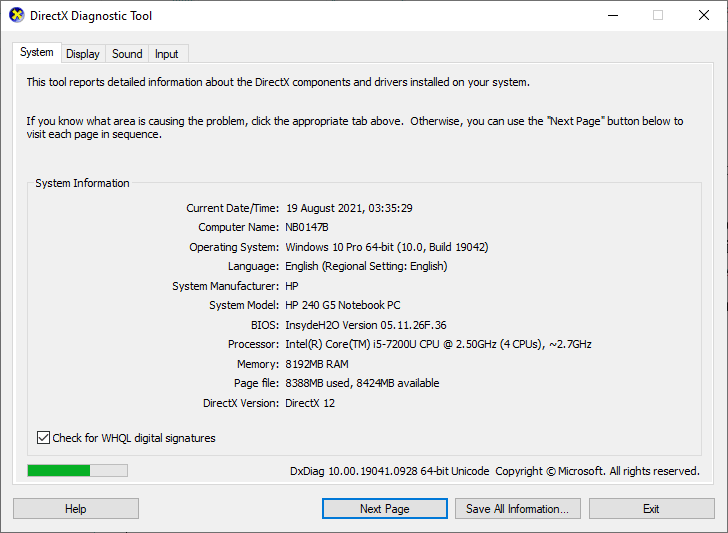
4. If you do not have DirectX 12 in your system, download and install it from the ʻO ka palapala hoʻoiho DirectX ma ka hahai ʻana i nā ʻōlelo kuhikuhi ma ka pale.
After installing DirectX, check if the issue occurs again.
'Ōlelo Aʻo: hōʻoia ' E nānā i nā pūlima kikohoʻe WHQL hoʻopaʻa ʻia ka pahu System tab a ma nā ʻaoʻao āpau, e nānā inā Logo WHQL e hoʻonoho ʻia i ʻAe.
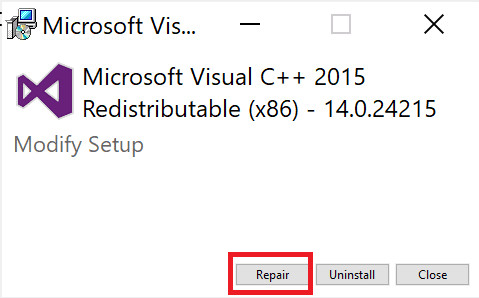
Ka Papa Hana 11: Hoʻoponopono i ka Microsoft Visual C++ Redistributable
Alternately, you can try to repair the Microsoft Visual C++ Redistributable packages to fix MultiVersus not launching issue as follows:
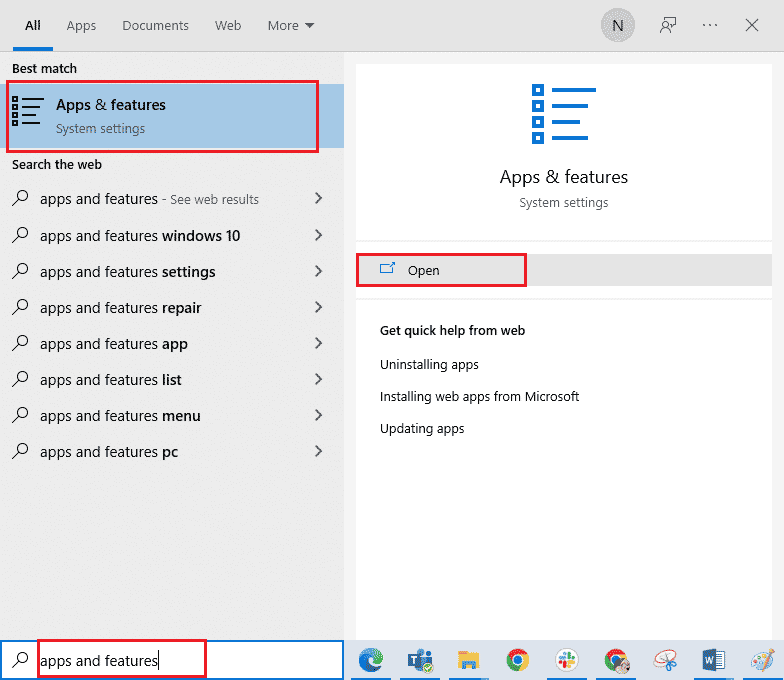
1. Pa i ka Kāleka Windows,ʻano Nā polokalamu & hiʻona, a laila kaomi Open.
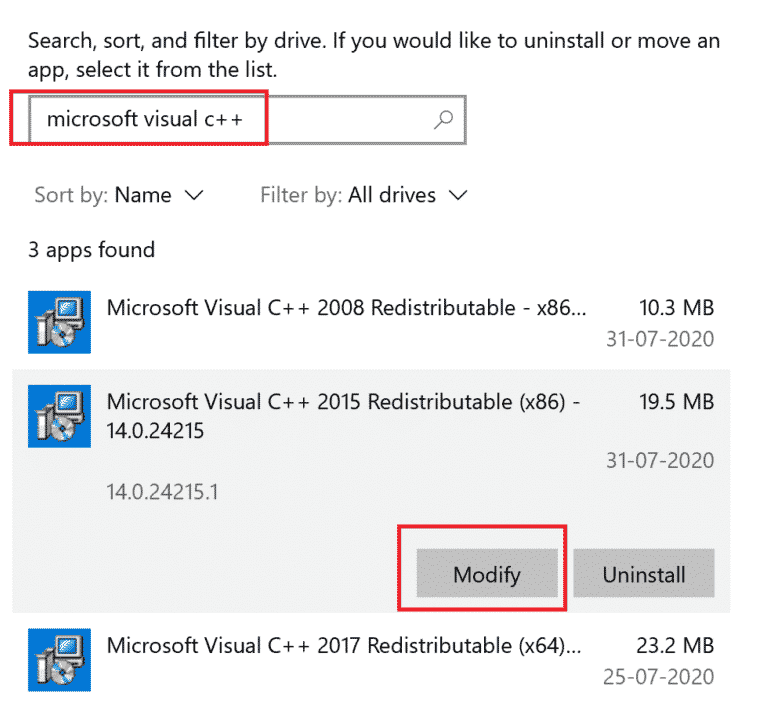
2. Huli no Hoʻolaha hou ʻia ʻo Microsoft Visual C ++ 'ōpili.
3. Then, select the package, and click on Hoʻololi koho.
4. A laila, kaomi ʻAe i ka Manaʻo Palapala Pūnaewele ka dialog.
5. In the pop-up window that appears, click on hana hou i. Kali no ke kaʻina hana e pau.
6. Repeat the above steps to modify all the Microsoft Visual C++ Redistributable packages.
7. ʻO ka hope, e hoʻomaka hou i ka PC.
E wehe i ka palapala noi hiki ʻole iā ʻoe ke wehe ma mua. Inā ʻaʻole i hana kēia, e hoʻāʻo e kau hou i ka C++ redistributable ma kahi.
E heluhelu pū nō hoʻi: Hoʻoponopono i ka hewa 2015x0 Microsoft Visual C++ 80240017 Redistributable Setup
Hanana 12: Hoʻouka hou iā Microsoft Visual C++ Redistributable
If the previous method of repairing the Microsoft C++ Visual Redistributable did not fix MultiVersus won’t launch issue, then you will have to reinstall the redistributable. Follow the given steps to uninstall & then install these again.
1. E wehe i Nā polokalamu & hiʻona hoʻonohonoho pūnaewele.
2. E koho i ka Hoʻolaha hou ʻia ʻo Microsoft Visual C ++ package, then click on Uninstall koho.
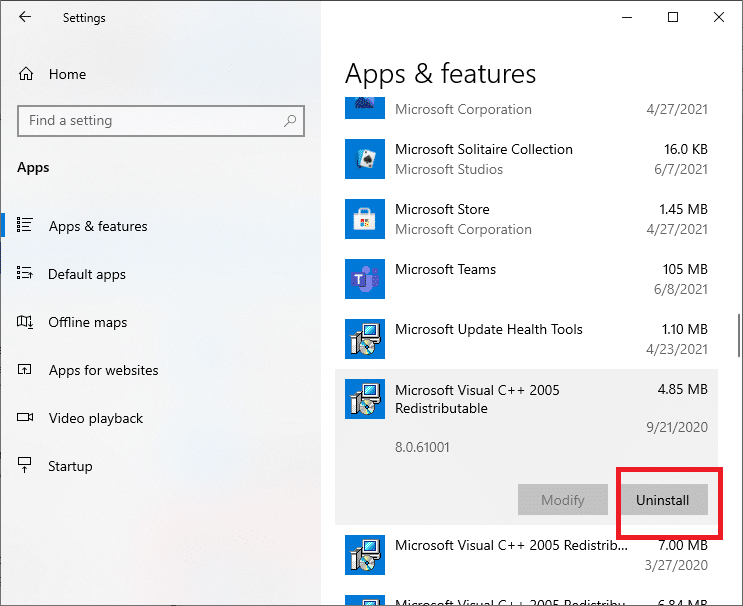
3. Kaomi ma Uninstall option again to confirm and remove the package.
'Ōlelo Aʻo: Make sure to uninstall all the Microsoft Visual C++ Redistributable packages.
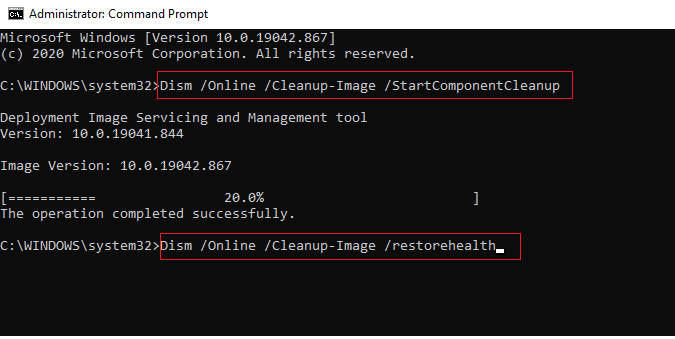
4. Pa i ka Kāleka Windows,ʻano ʻO ka hua'ōlelo kauoha, a laila kaomi E holo ma keʻano he mea hoʻoponopono.
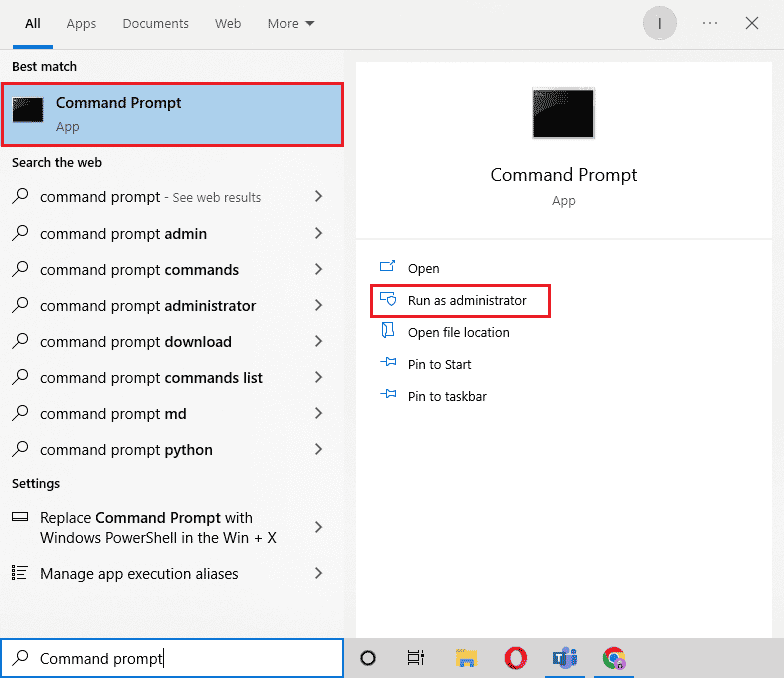
5. Kākau i kēia nā kauoha a ua pilikia komo kī ma hope o kēlā me kēia:
DISM /online /Cleanup-Image /StartComponentCleanup
DISM /online /Cleanup-Image /RestoreHealth
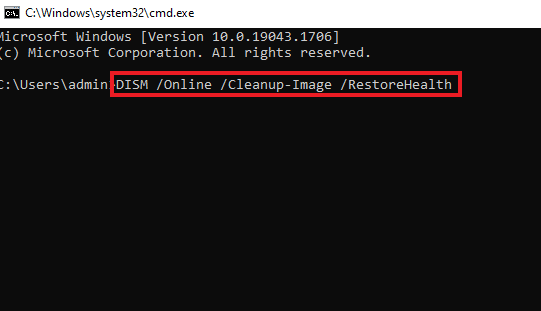
6. Ke pau ka hana, hoʻomaka hou i ka PC.
7. A laila, e kipa i ka Microsoft Visual C++ Redistributable webpage to download the latest C++ package as shown here.
8. Once downloaded, open the waihona i hoʻoiho ʻia by double-clicking on it in ʻO kaʻu mau hoʻoiho. hoʻouka the package by following the on-screen instructions.
9. Once the installation is complete, finally e hoʻomaka hou i ka PC.
haawiia:
Manaʻo mākou ua kōkua kēia alakaʻi a hiki iā ʻoe ke hoʻoponopono MultiVersus not launching issue on your Windows 10 PC. Let us know which method worked for you the best. Feel free to reach out to us with your queries and suggestions via the comments section below.